EPIC Notes is a powerful tool used by healthcare professionals to document patient information. In many cases, adding images to these notes can enhance the clarity and usefulness of the data. Whether you're inserting an image from a medical scan, a diagram, or a photo, images can provide essential visual context that supports the written content.
In this tutorial, we’ll walk you through how to easily insert images into EPIC Notes, ensuring that your notes are not only informative but also visually comprehensive.
Understanding the Importance of Visuals in EPIC Notes
Visuals can significantly improve the quality and effectiveness of EPIC Notes. Here’s why adding images is essential:
- Clarifies Complex Information: Images such as charts, scans, and diagrams can simplify difficult concepts, making them easier to understand for both healthcare professionals and patients.
- Enhances Communication: Visuals can bridge gaps in communication, especially in situations where words may fall short. For example, a patient’s X-ray image can provide critical context that text alone cannot convey.
- Improves Record-Keeping: Incorporating images in patient notes ensures a more complete and accurate record of care, making it easier to track progress over time.
- Supports Diagnosis and Treatment: Images can be used to document changes in a patient’s condition, which can aid in diagnosis and treatment planning.
In short, adding images into EPIC Notes makes them more comprehensive and helpful for everyone involved in patient care.
Also Read This: how to check ppi of image
Preparing Images for Insertion into EPIC Notes
Before you insert an image into EPIC Notes, it’s important to make sure the image is ready for use. Follow these steps to properly prepare your
- Ensure Image Quality: The image should be clear and high-resolution to ensure it is legible and useful in the medical context.
- Resize if Necessary: If the image is too large, it may slow down the system or cause difficulties when inserting. Resize the image to an appropriate size, typically under 2MB.
- Format the Image: EPIC Notes usually support common image formats such as JPG, PNG, and GIF. Be sure your image is in a supported format.
- Label the Image: Add a brief caption or description of the image before inserting it into your notes. This helps others understand what the image represents.
Once the image is prepared, you're ready to insert it into EPIC Notes and enhance your documentation. These simple steps can ensure that the images you use are clear, helpful, and fit seamlessly into your workflow.
Also Read This: Managing Your Portfolio Effectively by Removing Images from Alamy
Steps for Inserting Images into EPIC Notes
Inserting images into EPIC Notes is a straightforward process. Follow these simple steps to add visuals to your notes with ease:
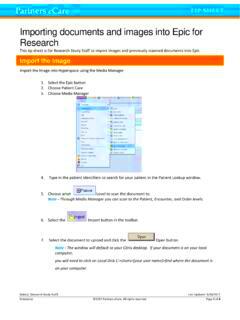
- Open the EPIC Notes Interface: Begin by opening the EPIC software and navigating to the specific patient note where you want to insert an image.
- Select the Insertion Point: Place the cursor in the section of the note where the image should appear. This could be within a body of text or at the end of the note.
- Click on the Image Icon: Look for the image or media icon within the toolbar. It’s typically represented by a small picture symbol.
- Upload the Image: Once you click the icon, a file dialog will open. Locate the image you want to insert from your computer or the hospital’s image library and select it.
- Adjust the Image Display: After uploading, you can adjust the image’s size, position, and alignment using the available options. Make sure it fits appropriately within the note.
- Save the Note: Once you're satisfied with the image placement, don’t forget to save your changes to ensure the image is stored with the patient’s note.
These steps should help you quickly insert any image, ensuring your notes are both informative and visually comprehensive.
Also Read This: Remove the ‘Open to Work’ Badge from LinkedIn with This Quick Guide
Editing and Adjusting Images in EPIC Notes
After inserting an image, you may need to make some adjustments. Here’s how you can edit and adjust images within EPIC Notes:
- Resize the Image: If the image appears too large or too small, you can resize it by clicking on the image and dragging the corners to adjust the dimensions.
- Reposition the Image: If the image isn’t positioned exactly where you want it, you can click and drag it to move it to a new spot within the note.
- Crop the Image: If only part of the image is relevant, you can crop it. Right-click the image and look for the crop option. Select the area you want to keep and discard the rest.
- Add a Caption: A caption can be added below the image to provide context or details. This can be done by clicking the image and entering text in the provided box below.
- Adjust Image Contrast and Brightness: In some cases, you may want to adjust the visibility of the image. EPIC may offer basic editing tools for contrast, brightness, and sharpness.
With these editing tools, you can ensure that images in your EPIC Notes look clear and are positioned perfectly for the best possible presentation.
Also Read This: how to make usb bootable with iso image
Common Challenges and How to Fix Them
While inserting and editing images in EPIC Notes is generally simple, you may run into a few common challenges. Here’s how to overcome them:
| Challenge | Solution |
|---|---|
| Image Not Appearing After Insertion | Check the image file format and ensure it’s supported. If necessary, try re-uploading the image or resizing it to reduce file size. |
| Image Quality Is Poor | Ensure that you are uploading a high-resolution image. Low-quality images can appear blurry when inserted. Try using a better-quality file. |
| Cannot Move or Resize the Image | Make sure you’re clicking directly on the image. Some versions of EPIC may require you to click on a specific area to activate the resizing tool. |
| Image Doesn't Fit Within the Note | Use the resize and reposition tools to adjust the image until it fits within the note’s layout without disrupting the text. |
By addressing these common issues, you can ensure that the process of inserting and editing images in EPIC Notes goes smoothly every time.
Also Read This: How to Start Your Own Getty Images Page for Contributor Success
Tips for Better Image Integration in EPIC Notes
Integrating images seamlessly into your EPIC Notes can enhance both the readability and usefulness of the document. Here are some tips to help you get the most out of the images you add:
- Use Clear and Relevant Images: Choose images that are clear and relevant to the note's content. For example, use a diagram to explain a procedure or a scan to support a diagnosis. Irrelevant or unclear images can confuse readers.
- Keep Image Sizes Manageable: Large images can slow down the system and make the note harder to load. Resize images before uploading to ensure they’re not unnecessarily large but still maintain clarity.
- Use Captions and Descriptions: Always add a caption or brief description to the image. This will help readers understand its significance and how it relates to the text. A well-placed caption enhances the value of the image.
- Optimize Image Placement: Make sure the image is positioned in a way that complements the flow of the note. Avoid cluttering the page. Position images next to the relevant text, and use proper alignment (left, center, or right) to keep things neat.
- Limit the Use of Multiple Images: While images are valuable, overusing them can clutter the note. Stick to key visuals that add real value to the documentation.
- Test the Formatting: After inserting and adjusting the image, preview the note to ensure that everything looks good on different devices. Formatting issues can be more apparent on smaller screens.
These tips will help ensure that your image integration in EPIC Notes is both effective and professional, enhancing your documentation without overwhelming it.
Also Read This: Word Wipeout: Deleting Files in Microsoft Word
Frequently Asked Questions
Here are some common questions about inserting images into EPIC Notes, along with their answers:
| Question | Answer |
|---|---|
| Can I insert any type of image into EPIC Notes? | EPIC supports common image formats like JPG, PNG, and GIF. Ensure your image is in one of these formats before uploading. |
| How do I resize an image after inserting it? | Click on the image, and you should see corner handles appear. Drag these handles to resize the image to your desired dimensions. |
| What should I do if the image quality is poor? | If the image quality is poor after uploading, try uploading a higher resolution version. Always ensure the image is clear and legible. |
| Can I move the image once it's inserted? | Yes, you can click and drag the image to reposition it within the note. Ensure that it aligns with the surrounding text for clarity. |
| Why isn't my image showing up in the note? | Check if the image was uploaded successfully and that it's in a supported format. If the problem persists, try re-uploading the image or restarting EPIC. |
If you have further questions, don't hesitate to reach out to your system administrator or consult EPIC's support documentation.
Conclusion and Final Thoughts
Inserting and managing images in EPIC Notes is a simple but powerful way to enhance your patient documentation. By following the steps outlined in this guide, you can ensure that your notes are more comprehensive and easier to understand. Remember to choose high-quality images, use them sparingly, and format them carefully for the best results.
With a little practice, integrating images into your EPIC Notes will become second nature, helping you create professional and visually informative documentation. If you encounter any challenges along the way, refer to the tips and troubleshooting advice in this guide, and you'll be able to overcome them quickly.
Ultimately, the goal is to make your notes more effective and supportive of patient care, and images play a vital role in achieving that goal. Happy documenting!
 admin
admin


