Glitter is the ultimate way to add sparkle and charm to your crafts, celebrations, and everyday life. While store-bought glitter can be fun, making it at home can be even better! Not only is homemade glitter often more eco-friendly, but it allows you to customize colors and textures to suit your creative needs. In this post, we’ll explore the simple methods you can use to create your very own glitter and share why this DIY project might just become a staple in your crafting toolkit.
Why Make Glitter at Home?
There are a multitude of reasons why crafting your own glitter at home is a fabulous idea. Let’s dive into some of the most enticing benefits:
- Customization: One of the biggest perks of making glitter at home is the ability to customize it. Want a specific shade of blue? No problem! Mix colors until you achieve that perfect hue. You can also integrate different materials to create varied textures and effects.
- Eco-Friendly: Many commercial glitters are made from plastic particles, which contribute to environmental pollution. By creating your own glitter from natural ingredients such as salt or sugar, you can enjoy the sparkle without feeling guilty about harming the planet.
- Cost-Effective: Purchasing glitter from a craft store can add up quickly, especially if you need multiple colors. By making your own, you can save money and use items that may already be in your pantry!
- Safe for Kids: If you’re crafting with little ones, homemade glitter can be a safer alternative. Instead of the toxic dyes often found in commercial products, you can use food coloring or natural pigments, ensuring your kids can glitter safely!
- Creativity Boost: Engaging in DIY projects like making glitter can inspire your creativity. It can be a fun, hands-on activity that gets everyone involved, whether you’re making it for a party, special occasion, or just for fun.
- Unique Effects: By experimenting with various substances, such as sugar, salt, or even crushed flower petals, you can create glitter that catches the light in different ways. This can give your crafts a truly unique twist!
In addition to these reasons, making your own glitter can be a delightful and fulfilling experience. It’s not just about the end product; the process itself can be exciting. So gather your ingredients and let your imagination run wild. The results will not only dazzle but also bring you a sense of pride in your creative abilities!
Also Read This: Creating Elegant French Nails on Dailymotion
3. Materials Needed for DIY Glitter
If you're ready to dive into the world of DIY glitter, you'll need a few supplies to get started. Fortunately, most of these items can be found around your home or easily purchased at a local craft store. Here’s a handy list of what you’ll need:
- Salt or Sugar: These are the most common bases for glitter. Both create a sparkling effect, so you can choose based on your preference.
- Food Coloring: This will help you transform your plain salt or sugar into beautiful colorful glitter. Get creative with your color choices!
- Baking Sheet: A flat surface for drying your glitter after you’ve colored it.
- Parchment Paper: This isn’t necessary, but it’s great for keeping the mess to a minimum. You can place it on the baking sheet before spreading the glitter.
- Baking Oven: A low-temperature oven will help set the color of your glitter.
- Sealable Containers: Once your glitter is made, you’ll want a safe place to store it. Jars or little bags work perfectly!
With these materials, you’ll be ready to unleash your creativity and make glitter that shines bright. Whether you’re planning to use it for arts and crafts, decorations, or even homemade gifts, you’ll find that DIY glitter is not just fun to make—it’s surprisingly easy!
Also Read This: How to Curl Short Hair with a Straightener: Easy Methods on Dailymotion
4. Step-by-Step Guide to Making Glitter
Now that you have all your materials laid out, let’s get into the fun part: making your custom glitter! Follow these simple steps, and you’ll be sparkling in no time:
- Prepare Your Surface: Preheat your oven to 350°F (about 175°C). Line your baking sheet with parchment paper to make clean-up easier later on.
- Mix Your Base: In a bowl, combine your salt or sugar with a few drops of food coloring. It’s best to start with a small amount of dye and gradually add more until you reach your desired hue!
- Spread It Out: Once you have the perfect color, spread your mixture evenly on the baking sheet. The thinner the layer, the better it will dry, so try not to clump it together.
- Bake It: Place the baking sheet in the oven for about 10 minutes. Keep an eye on it to ensure it doesn’t burn! Removing it when it starts to look slightly dry will yield the best results.
- Cool Down: Remove the glitter from the oven and allow it to cool completely on the baking sheet. This is important because it helps the color set. Plus, the cooling process will make your glitter even more sparkly!
- Store Your Glitter: Once cooled, carefully transfer your glitter into sealable containers. You can categorize them by color if you're feeling organized. Your DIY projects are about to shine!
And there you have it—a simple and fun method for creating your own glitter at home! Whether you’re using it for arts and crafts, decorating party invitations, or even sprucing up gifts, your homemade glitter will add a personal touch that store-bought glitter simply can’t match. Why not share your glitter creations with friends and invite them to join in on the fun?
Also Read This: How to Increase Nail Growth Overnight with Home Remedies
5. Different Variations of Homemade Glitter
Now that you’ve mastered the basics of making glitter at home, let’s explore some fun variations to elevate your DIY glitter game! Each variation brings a unique twist and can suit different projects or occasions. Here are a few creative ideas to try:
- Salt Glitter: By mixing fine salt with food coloring, you can create sparkling salt glitter. Just blend equal parts of salt and your chosen color, spread it on a baking sheet, and bake it at a low temperature (around 200°F) for about 10 minutes. Let it cool, and you’ll have beautiful colored salt that glitters!
- Sugar Glitter: Want a more edible option? Sugar glitter is perfect for holiday cookies and cake decorations! Combine granulated sugar with gel food coloring, and follow the same baking process as the salt glitter. You’ll end up with a sweet and sparkly topping!
- Herbal Glitter: For a more natural and eco-friendly twist, consider using dried herbs or flowers. Find some edible petals (like rose or lavender) and grind them into a fine powder using a spice grinder. You can mix these with a bit of sugar or salt for added texture.
- Paper Glitter: Save scrap paper by turning it into shiny flakes! Choose colored or metallic cardstock, cut it into tiny pieces, and then use a food processor to grind it into finer bits. This homemade paper glitter is perfect for craft projects, offering a sustainable option!
- Glitter with Essential Oils: For those looking to add a scent to the sparkle, mix a few drops of essential oil with your regular glitter mix! This variation works splendidly with a blend of sugar or salt, giving not just the visual appeal but an aromatic experience as well.
Exploring these variations not only spices up your crafting but can also save money. Instead of buying expensive specialty glitter, you can create unique blends suited to your project!
Also Read This: How to Use Viber on Mobile: Stay Connected with Friends and Family
6. Creative Uses for Your DIY Glitter
Now that you have a stash of fabulous homemade glitter, it’s time to get creative with ways to use it! Here’s a list of fun and inventive ideas to incorporate your DIY sparkle into various projects:
- Craft Projects: Use your glitter in scrapbooking, card-making, or other paper crafts. It adds a delightful touch to any project. Sprinkle it on glue designs for an eye-catching finish!
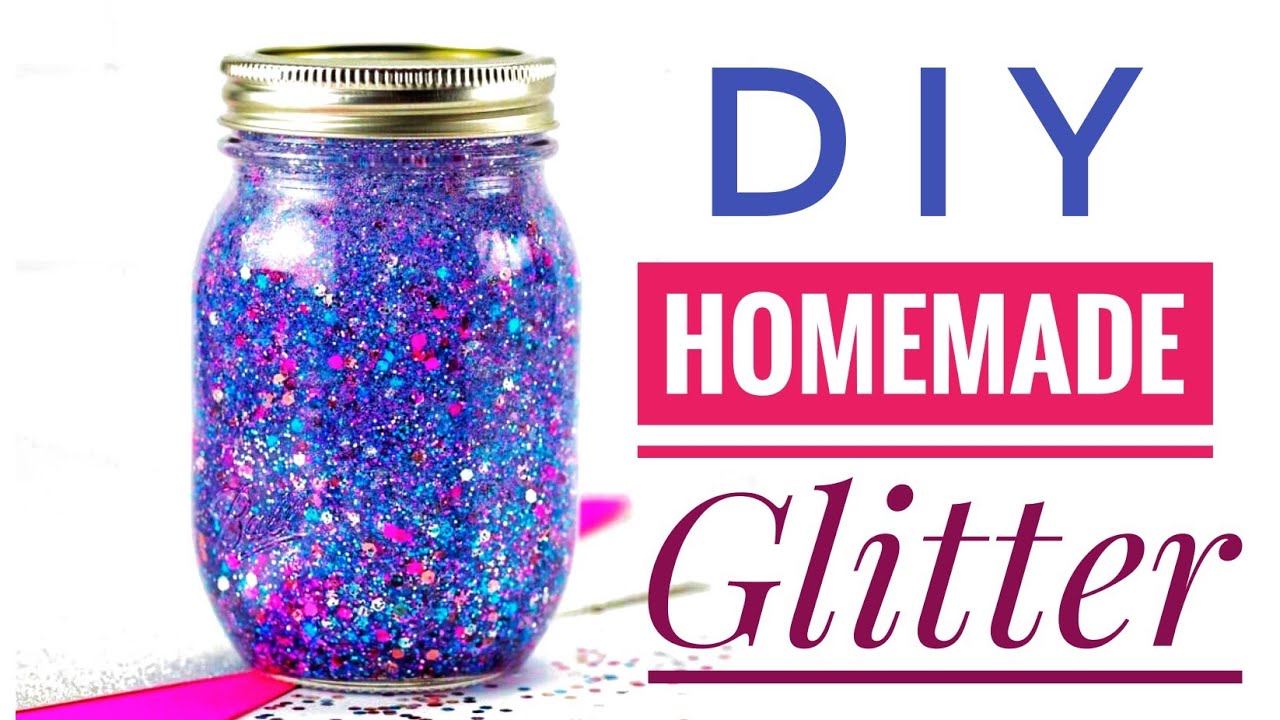
- Holiday Decorations: From Christmas ornaments to Halloween decorations, there’s no shortage of festive possibilities. Coat pine cones, pumpkins, or mason jars with a bit of glue and sprinkle your glitter for seasonal décor that outshines the rest!
- Fashion Accessories: Want to bedazzle your wardrobe? Use your glitter to personalize clothes, shoes, or bags. Just mix it with a suitable adhesive, apply it, and watch your fashion statement glitter away!
- Gift Wrapping: Amp up your gift-giving game! Add homemade glitter to wrapping paper or cards to make your gifts sparkle. It’ll certainly impress your friends and family.
- Beauty Products: Looking to add some shimmer to your cosmetic collections? Mix a bit of glitter with clear nail polish or lotion for a fun, customized beauty product!
As you can see, your DIY glitter can shine in many ways! Get adventurous and let your creativity run wild. The only limit is your imagination!
Also Read This: Understanding the Rise of Unskippable YouTube Ads
7. Tips for Storing Your Homemade Glitter
Once you've gone through the fun process of making your own glitter, the next step is figuring out how to store it effectively. Proper storage will help maintain its sparkle and keep it ready for your next creative project. Here are some tips to ensure your homemade glitter stays fabulous:
- Choose the Right Container: Airtight containers are your best bet for keeping moisture out. Look for small jars, spice containers, or even recycled plastic containers. Make sure they have a secure lid!
- Label Everything: It’s easy to forget what you put in each jar, especially if you made several colors. Get a label maker or simply use masking tape and a permanent marker to note the color and any special details (like the material).
- Keep It Cool and Dry: Find a storage spot away from direct sunlight and humid areas. A cool, dry cupboard or craft drawer will help preserve the color and texture of your glitter.
- Use Desiccants: If you live in a humid climate, consider adding a silica gel packet to your storage containers to absorb any excess moisture. Just be sure to keep it out of reach of kids and pets!
- Separate Colors: If you’ve made multiple colors, store each one in its own container. This prevents them from mixing together and creating a muddy color.
By following these simple storage tips, you can keep your homemade glitter in great shape for all your crafting endeavors. After all, you wouldn’t want all that hard work to go to waste!
8. Conclusion and Final Thoughts on Glitter Making
Creating your own glitter at home is not just a fun, crafty project; it’s also a fantastic way to express your creativity and personalize your supplies. Here are a few final thoughts to keep in mind as you dive deeper into your glitter-making adventures:
- Experiment and Play: Don’t be afraid to try different materials and colors. Whether it’s sugar, salt, or even crushed flowers, experimenting can lead to unique results that store-bought glitter just can’t compete with!
- Eco-Friendly Options: Homemade glitter can be a great alternative to plastic-based glitter. By using natural materials, you’re doing your part to help the environment, especially if you choose biodegradable options.
- Sparking Joy: Remember, crafting should be enjoyable! Take your time during the glitter-making process, and let it be a relaxing experience. Turn on some music, grab a friend, or even involve the kids for a fun family activity.
- Incorporate Into Projects: Once you’ve made your glitter, consider the many ways to use it! From greeting cards to party decorations, or even as a finishing touch on DIY gifts, the possibilities are endless.
So, roll up your sleeves and get that sparkle flowing! With a little creativity and effort, you can make beautiful, homemade glitter that adds a personal touch to your crafts. Happy crafting!
 admin
admin


