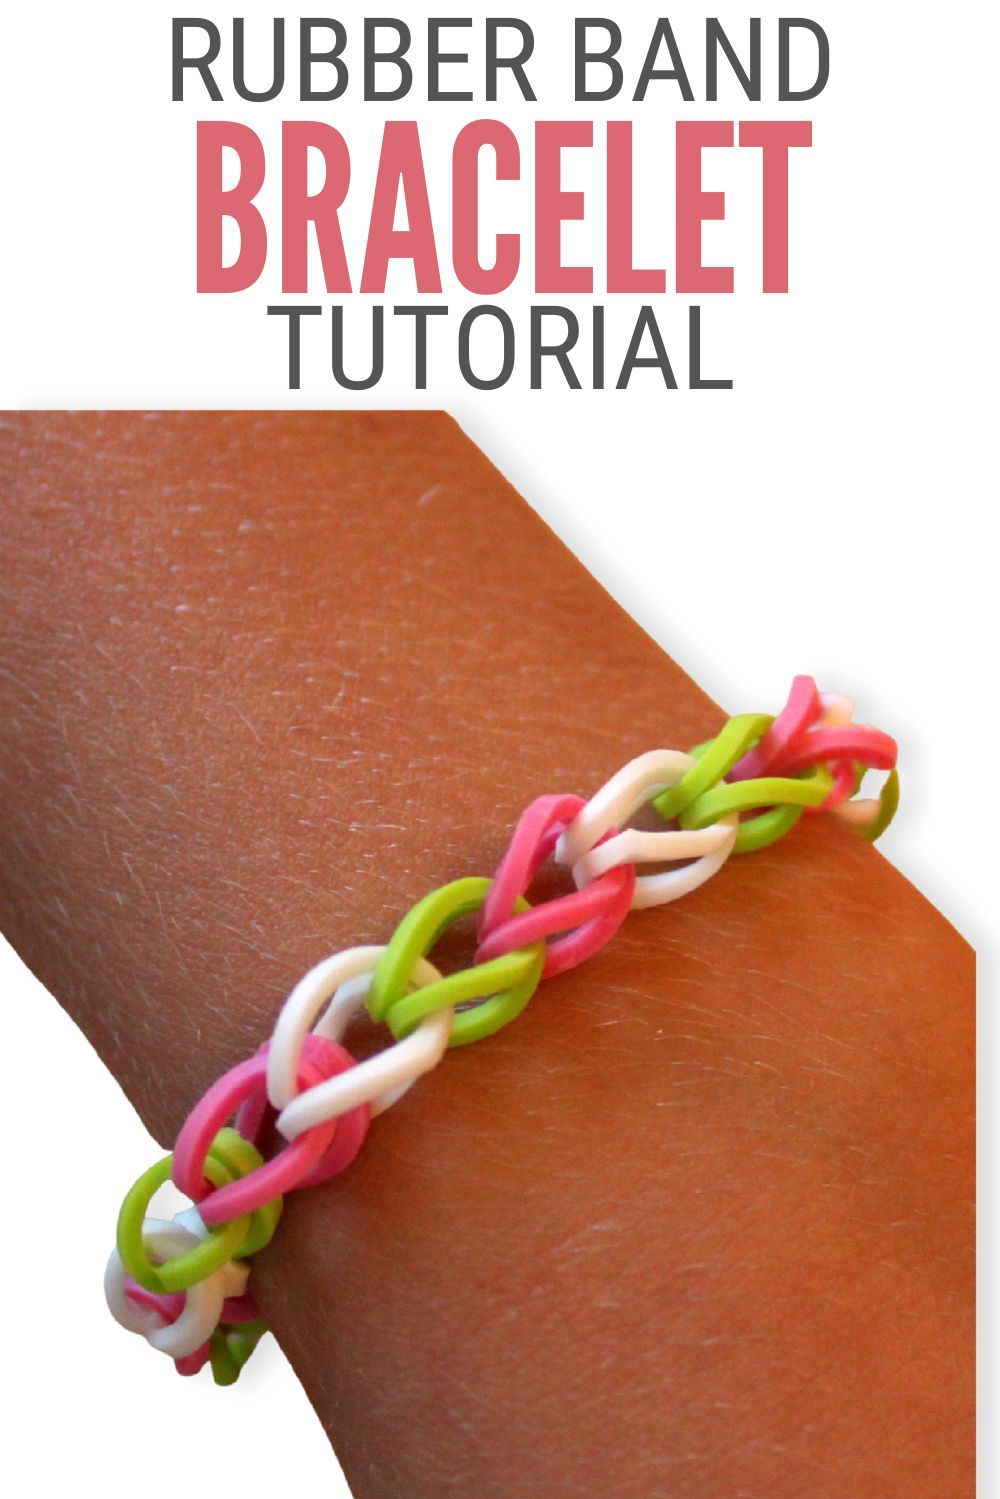
Welcome to the colorful world of rubber band bracelets! These fun accessories have taken creativity to a whole new level, allowing people of all ages to express themselves through vibrant designs and patterns. Whether you're looking to make a unique gift or just want to spend some time crafting, this simple tutorial will guide you step by step. Let's get those fingers moving and create something beautiful together!
Materials Needed for Your Bracelet
Before we jump into the crafting, let's gather all the materials you'll need to make the perfect rubber band bracelet. Don't worry; most of these items are easy to find and might already be in your home!
- Rubber bands: Choose a variety of colors to add some pizzazz to your bracelet. The standard size works great, but you can also find mini bands for more intricate designs.
- Bracelet loom or crochet hook: If you have a loom, fantastic! If not, a simple crochet hook can do the trick. The loom helps keep bands in place, making the process smoother.
- Clip or S-clips: These small fasteners will hold your bracelet together and prevent it from coming apart.
- Scissors: You’ll need these to snip any excess bands or to cut your bracelet to the desired length.
- Optional items: Beads and charms can add a personal touch to your bracelet. If you want to get fancy, include some decorative elements!
Once you've gathered everything, you’re ready to start creating your masterpiece. The next steps will guide you through the process, making it enjoyable and easy for everyone—whether you're a beginner or an experienced crafter. So, gather those materials, and let’s get started on your rubber band bracelet journey!
Also Read This: How to Download Dailymotion Videos Without Any Software
3. Step-by-Step Instructions for Making Your Bracelet
Now that you’re all set up with your materials, let’s jump into the fun part: making your rubber band bracelet! Follow these simple steps, and you’ll be sporting a stylish new accessory in no time.
- Prepare Your Workspace: Find a clean, flat surface where you can work comfortably. It’s essential to have enough space to lay out your tools and materials without cluttering your area.
- Choose Your Colors: Select the colors of rubber bands you want to use. You can go for a monochromatic look with various shades of one color, or mix and match different colors for a fun, vibrant design.
- Start with the Base: Place your first rubber band on your loom or fingers in a figure-eight (8) shape. This will be the first band of your bracelet. If you’re using a loom, place the band on the pegs following the loom pattern.
- Add More Bands: Continue adding rubber bands in the same figure-eight configuration. If you’re using your fingers, simply stretch the rubber bands around your fingers and continue adding them as you go.
- Weave the Bands: Once you have several bands in place, it’s time to start weaving. Use your crochet hook or your fingers to pull the bottom band over the top band. If you’re using a loom, follow the guide closely to ensure you’re following the right path.
- Repeat the Process: Keep adding and weaving the bands until your bracelet reaches your desired length. It’s a rhythm you’ll get into, and before you know it, you’ll see your bracelet taking shape!
- Finishing Up: When the bracelet is long enough, carefully remove it from the loom or your fingers. Be gentle to avoid breaking any bands. Then, secure the ends using a clip or a small piece of rubber band to ensure it doesn’t unravel.
- Create a Clasp: If you want to be able to take your bracelet on and off easily, you can create a clasp. Use a small rubber band to connect the ends or use a specific clasp designed for rubber band bracelets.
- Admire Your Work: Lastly, take a step back and admire your beautiful creation! Feel free to experiment with different designs, patterns, and colors as you gain confidence in your skills.
Also Read This: How to Apply Loose Powder Foundation for a Matte Look on Dailymotion
4. Tips and Tricks for Beginner Bracelet Makers
As a beginner, it’s completely normal to encounter a few bumps along the way. Fortunately, we’ve gathered some tips and tricks that will help make your bracelet-making journey smoother and more enjoyable.
- Practice Patience: Like any craft, making rubber band bracelets takes practice. Don’t rush through the steps; take your time and enjoy the process.
- Watch Tutorials: There are countless videos and tutorials available online that can demonstrate various techniques visually. Sometimes seeing someone else do it can make things click.
- Start Simple: Begin with basic designs, like single-band bracelets or simple fishtail patterns. As you get comfortable, you can gradually challenge yourself with more complex creations.
- Work in Good Lighting: Good lighting can make a world of difference when it comes to working with small materials. It helps you see your bands clearly and reduces the chances of mistakes.
- Maintain Your Tools: Ensure your loom or hook is clean and free from rubber band residue. A clean workspace means fewer complications.
- Join a Community: Engaging with others who share your interest can enhance your learning experience. Look for local crafting groups or online forums where you can share your creations and get advice from more experienced bracelet makers.
- Have Fun! Remember, rubber band bracelet making is about self-expression and creativity. Allow yourself to experiment with patterns, colors, and styles!
Now that you’re armed with these tips, it’s time to roll up your sleeves and get started on your bracelet-making adventure! Enjoy the journey and happy crafting!
Also Read This: Step by Step Guide to Creating Beautiful Wool Flowers with Dailymotion
5. Different Designs and Patterns for Rubber Band Bracelets
When it comes to creating rubber band bracelets, the possibilities are virtually endless! Whether you're a beginner or a seasoned pro, trying out different designs and patterns can be a lot of fun. Let’s dive into some popular styles that you can experiment with:
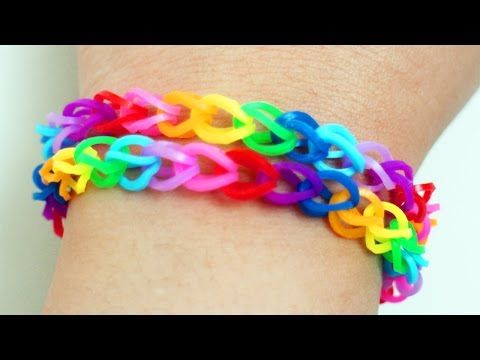
- Single Chain: This is the simplest design and perfect for beginners. It involves looping the bands together in a single chain format, making it a great first project.
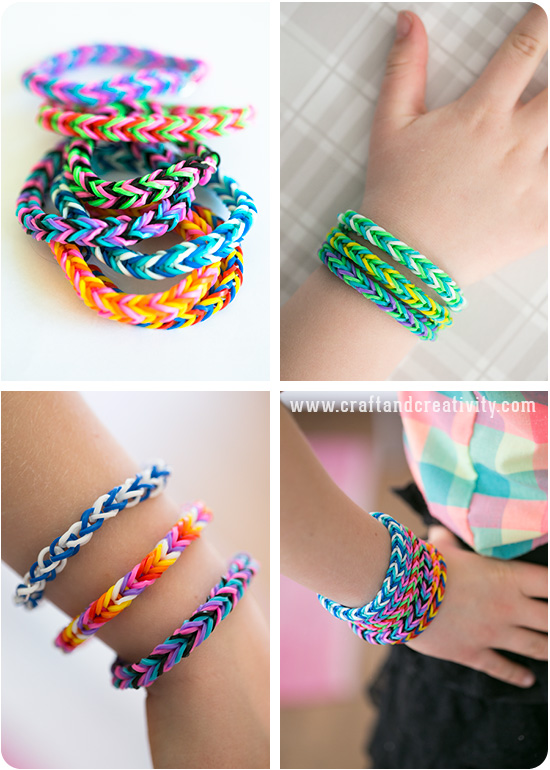
- Fishtail: The fishtail design is a step up from the single chain and has a unique, braided appearance. To achieve this look, you’ll need to use two strands of rubber bands and work them in a specific pattern.
- Dutch Lace: This design adds a touch of elegance to your creations. By alternating different colors and weaving them in a specific way, you can create a beautiful lace effect that looks intricate yet is easy to achieve.
- Infinity: The infinity design showcases a figure-eight appearance, making it not only stylish but also a symbol of everlasting friendship. This pattern requires some practice, but the end result is worth it!
- Starburst: For those who love a bit of flair, the starburst bracelet is a stunning choice. It combines various colors of rubber bands to create a vibrant, star-like pattern that stands out.
Don’t hesitate to mix and match colors and even incorporate charms or beads to personalize your bracelets further. The beauty of rubber band bracelets lies in your creativity, so let your imagination run wild! You can find countless tutorials online that can help guide you through crafting these stunning patterns.
Also Read This: Is Dailymotion Free to Watch or Is There a Cost Involved
6. Common Mistakes to Avoid When Making Rubber Band Bracelets
While making rubber band bracelets is a fun and enjoyable hobby, there are a few common mistakes that beginners often encounter. Avoiding these pitfalls can save you time and frustration, ensuring that your crafting experience is as smooth as possible. Here are some tips to keep in mind!
- Overstretching Bands: One of the most common mistakes is overstretching the rubber bands. This can cause them to break or lose their elasticity. When working with your bands, be gentle and avoid pulling too tightly.
- Skipping Steps: It might be tempting to rush through a tutorial, but skipping steps can lead to a chaotic design. Take your time and follow the instructions closely to achieve the best results.
- Not Using the Right Tools: Make sure to use proper tools, such as a loom or hook, if required for your chosen design. Trying to create intricate patterns without the right equipment can be incredibly challenging.
- Ignoring Color Coordination: While spontaneous color choices can lead to unique designs, ignoring color coordination might result in a bracelet that looks mismatched. Try laying out your colors before you start to see how they work together.
- Neglecting to Secure Endings: After finishing your bracelet, be sure to secure the ends properly. This prevents your creation from unraveling. A common method is to use a clip or slip knot to hold everything in place.
By keeping these common mistakes in mind, you'll enhance your crafting skills and enjoy the process even more. Remember, practice makes perfect, so don’t be discouraged if your first few designs don’t turn out exactly as you imagined. Happy crafting!
Also Read This: How to Create a New Skype Account Quick Setup Instructions Featured on Dailymotion
7. Caring for Your Rubber Band Bracelets
Once you’ve put in the time and effort to create a beautiful rubber band bracelet, the last thing you want is for it to get ruined too quickly. Fortunately, caring for your rubber band creations is pretty straightforward. Here are some helpful tips to keep your bracelets looking fresh and vibrant:
- Avoid Excessive Stretching: Rubber bands tend to lose their elasticity over time. To prolong the life of your bracelets, avoid pulling them too tight or stretching them extensively. When wearing or removing them, do so gently.
- Keep Away from Water: While it might be tempting to show off your cool bracelet during a pool party, water can weaken rubber bands. If your bracelet does get wet, dry it off gently and avoid submerging it.
- Store Properly: When you're not wearing your rubber band bracelets, store them in a cool, dry place away from direct sunlight. A small box or a pouch can help keep them from getting tangled and maintain their shape.
- Clean When Necessary: If your bracelet starts to collect dirt or grime, you can gently clean it. A damp cloth with a little soap can work wonders. Just make sure to dry it thoroughly afterward!
- Inspect for Wear: Regularly check your bracelets for signs of wear and tear. If you find a band wearing thin or breaking, consider repairing it or replacing it before it falls apart completely.
By following these simple care tips, you can extend the life of your rubber band bracelets and continue to enjoy them for many crafting seasons to come. Plus, caring for your bracelet sets a great example of how to appreciate the things we make!
8. Conclusion and Final Thoughts
Creating rubber band bracelets can be an incredibly rewarding and fun experience! Whether you’re making them for yourself, gifting them to friends, or even selling them, these vibrant accessories have a way of bringing a little joy to anyone who wears them. As we wrap up this tutorial, here are a few final thoughts to consider:
- Let Creativity Flow: Don’t be afraid to think outside the box! Experiment with different colors, patterns, and styles. The best part about crafting is that you can always try something new!
- Share with Others: Crafting can be a social activity. Share your techniques and tips with friends or family members. You might inspire someone else to pick up this fun hobby!
- Join Online Communities: There are numerous online communities dedicated to crafting with rubber bands. Joining these groups can provide you with more ideas, tutorials, and support, plus a chance to showcase your creations!
- Have Fun! Remember that crafting is all about having fun. If you make a mistake or a bracelet doesn’t turn out as planned, embrace it! Sometimes the ‘oops’ moments lead to the most unique creations.
So grab your rubber bands and your creativity, and start weaving! Whether you create a simple single-band bracelet or a complex masterpiece, each piece tells a story. Happy crafting, and may your rubber band bracelets always bring you joy and a splash of color!
 admin
admin


