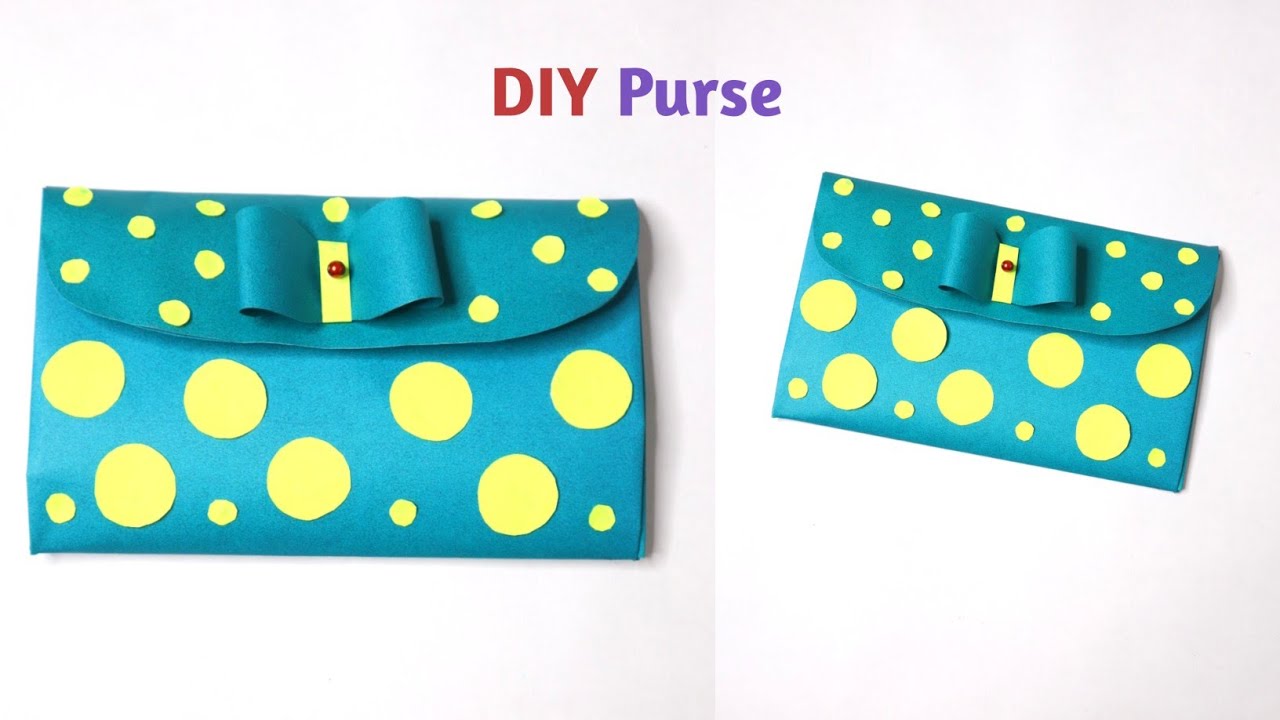
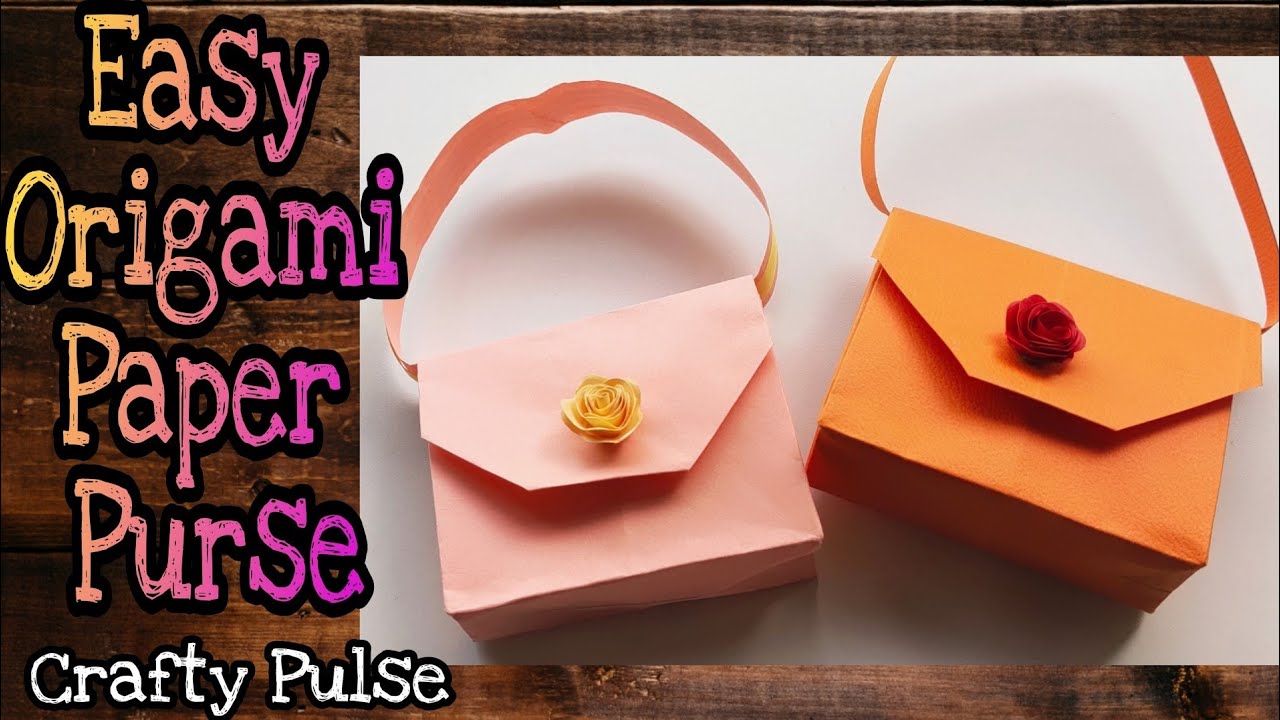
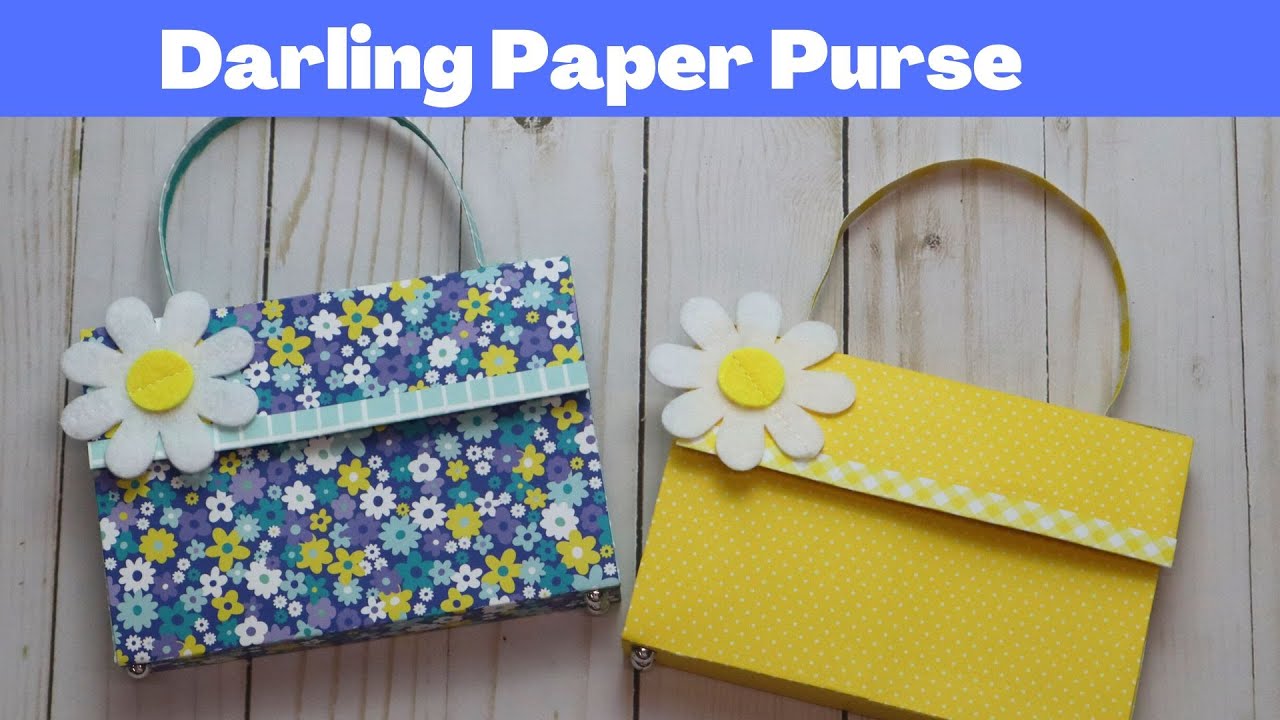
Have you ever wanted a stylish yet simple accessory that you can make right at home? Paper purses are not only fun to create, but they also add a personal touch to your style! Whether you’re looking to gift something unique or just want to unleash your creativity, this DIY project is perfect for you. Easy to customize and quick to make, paper purses can brighten up your outfit or serve as charming decor. Let’s dive into the world of paper purses and discover how you can craft your own!
Materials Needed for Your Paper Purse
Before we get started on our paper purse project, let’s gather all the materials you’ll need. Don’t worry; most of these items are common household supplies or easy to find in craft stores. Here’s a handy list:
- Colored Paper: You can use scrapbooking paper, construction paper, or even old magazines for a unique look.
- Scissors: A good pair of scissors is essential for cutting your paper into the right shapes.
- Glue or Tape: Use craft glue or double-sided tape to assemble your purse.
- Ruler: This will help you measure your paper accurately for even cuts.
- Pencil: Perfect for marking measurements before cutting.
- Embellishments (optional): Consider using stickers, washi tape, or buttons to decorate your purse.
Now that you know what you need, let’s talk about some tips for choosing your paper:
- Texture: Experiment with different textures! A glossy magazine page can give your purse a chic look, while textured scrapbook paper can add depth.
- Patterns: Don’t shy away from bold prints. Floral, geometric, or even polka dots can make your purse pop!
- Color Coordination: Think about the outfits you want to pair your purse with. Choose colors that complement your wardrobe.
Once you have all your materials ready, you’ll be set to create a beautiful and functional paper purse. Next, we’ll go through the step-by-step instructions to craft your very own stylish accessory. Get excited; it’s going to be a fun project!
Also Read This: Effective Methods to Download YouTube Videos on Android with Dailymotion Alternatives
3. Step-by-Step Instructions to Create Your Paper Purse
Ready to dive into the fun world of DIY? Making a paper purse is not just easy, but it’s also a fantastic way to express your creativity! Let’s break it down into simple steps.
- Gather Your Materials: Before we start, collect the following items:
- Colored or patterned paper (scrapbook paper works great)
- Scissors
- Glue stick or double-sided tape
- Pencil
- Ruler
- Decorative elements (stickers, sequins, etc.)
And voila! You’ve created your very own paper purse. It’s perfect for holding small treasures or as a playful accessory for your next outing!
Also Read This: How to Watch Have You Got It Yet on Dailymotion
4. Creative Ideas for Personalizing Your Paper Purse
Now that you have your paper purse crafted, let’s talk about ways to make it truly yours! Personalization is what makes your DIY project stand out. Here are some fun ideas:
- Color Schemes: Choose colors that reflect your personality. Soft pastels for a gentle look or vibrant colors for a bold statement!
- Stickers and Stamps: Use a variety of stickers or stamps that resonate with your interests—flowers, animals, or even motivational quotes!
- Photo Collage: Print small photos of your favorite memories and glue them onto the purse for a nostalgic touch. It’ll be a great conversation starter!
- Custom Patterns: Use markers to create your own patterns. Doodles, stripes, or polka dots can add a delightful flair.
- Functional Additions: Consider adding pockets inside your purse for better organization. Just cut smaller pieces of paper, fold, and glue them inside.
Remember, the sky's the limit when it comes to personalization! Each purse can reflect a different mood or event, making them perfect gifts for friends or family. So grab your materials, let your imagination flow, and enjoy the process of making your paper purse a true reflection of you!
Also Read This: Ultimate Guide to Photo Editing with Adobe Photoshop 7.0 on Dailymotion
5. Tips and Tricks for a Perfect Finish
Creating your own paper purse can be a fun and rewarding experience, but a flawless finish takes a bit of practice. Here are some tips and tricks to ensure your purse turns out beautifully:
- Choose Quality Paper: If you want your purse to look professional, start with high-quality paper. Craft paper or cardstock in vibrant colors or fun patterns can elevate your design.
- Use a Bone Folder: For crisp folds and clean edges, a bone folder is your best friend. This handy tool ensures your creases are sharp, giving your purse a polished appearance.
- Be Mindful of Glue Placement: When attaching pieces, apply glue sparingly and only to the areas that need it. Too much glue can lead to unsightly messes. A fine-tipped glue applicator can help with precision.
- Embellish with Style: Don’t hesitate to add embellishments like stickers, washi tape, or even rhinestones to make your purse unique. Just remember less is often more; choose a few standout pieces rather than overwhelming your design.
- Take Your Time: Rushing through the assembly can lead to mistakes. Take your time, especially when measuring and cutting, to ensure everything aligns perfectly.
Lastly, don't forget to make your purse functional! Consider adding a small pocket inside for storing cards or cash. A well-finished purse not only looks great but also serves its purpose.
6. Where to Find More DIY Tutorials
If you enjoyed making your paper purse and are eager to try out more DIY projects, there are countless resources available online. Here are some great places to explore:
- YouTube: This platform is a treasure trove of DIY tutorials. Channels like Crafty Panda or 5-Minute Crafts offer a variety of paper crafts that are easy to follow.
- Pinterest: A visual platform perfect for discovering creative ideas, you can search for “DIY paper crafts” to find endless inspiration and step-by-step guides.
- Blogs: Websites like Craftaholics Anonymous and Lovely Indeed feature detailed tutorials with photos, tips, and even downloadable templates for various projects.
- Instagram: Follow hashtag trends like #PaperCrafts or #DIYProjects for quick ideas and inspiration from fellow crafters. You might stumble upon unique techniques or styles!
- Books: For those who prefer a more traditional approach, consider picking up a craft book from your local library or bookstore. Look for titles focused on paper crafts for a deeper dive into techniques and projects.
With these resources at your fingertips, you'll have no shortage of ideas to explore. Happy crafting!
 admin
admin


