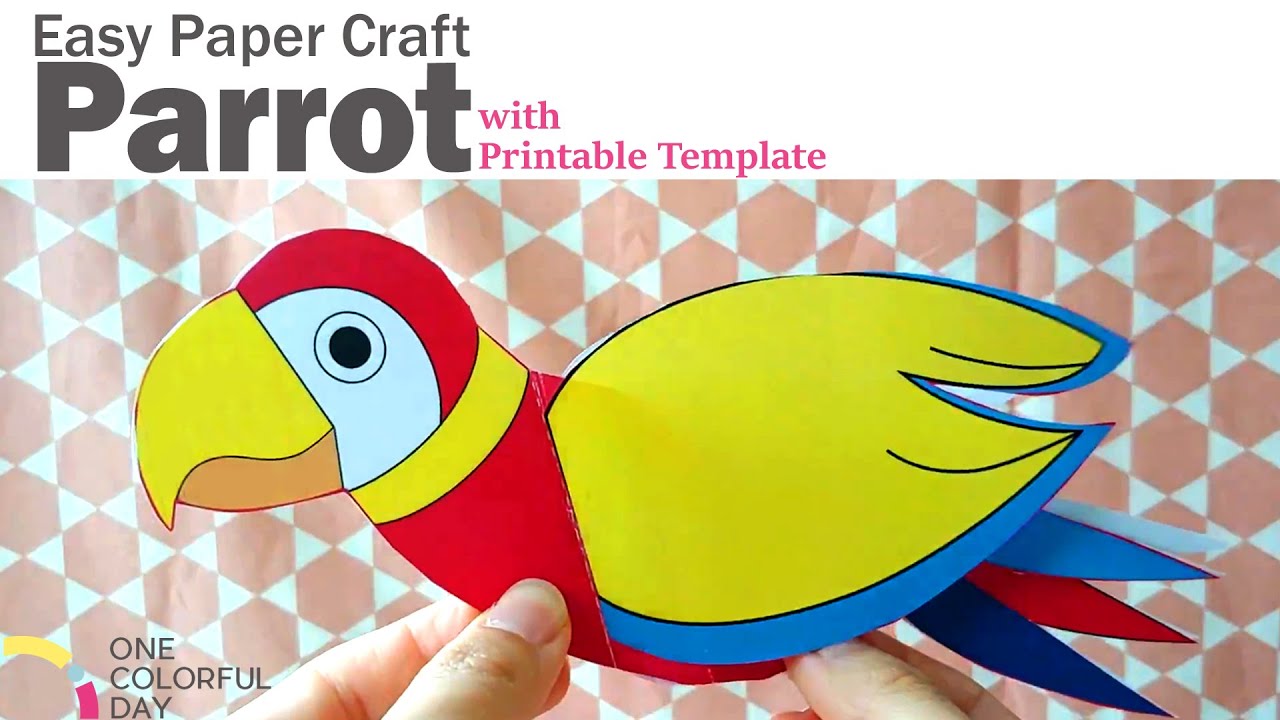
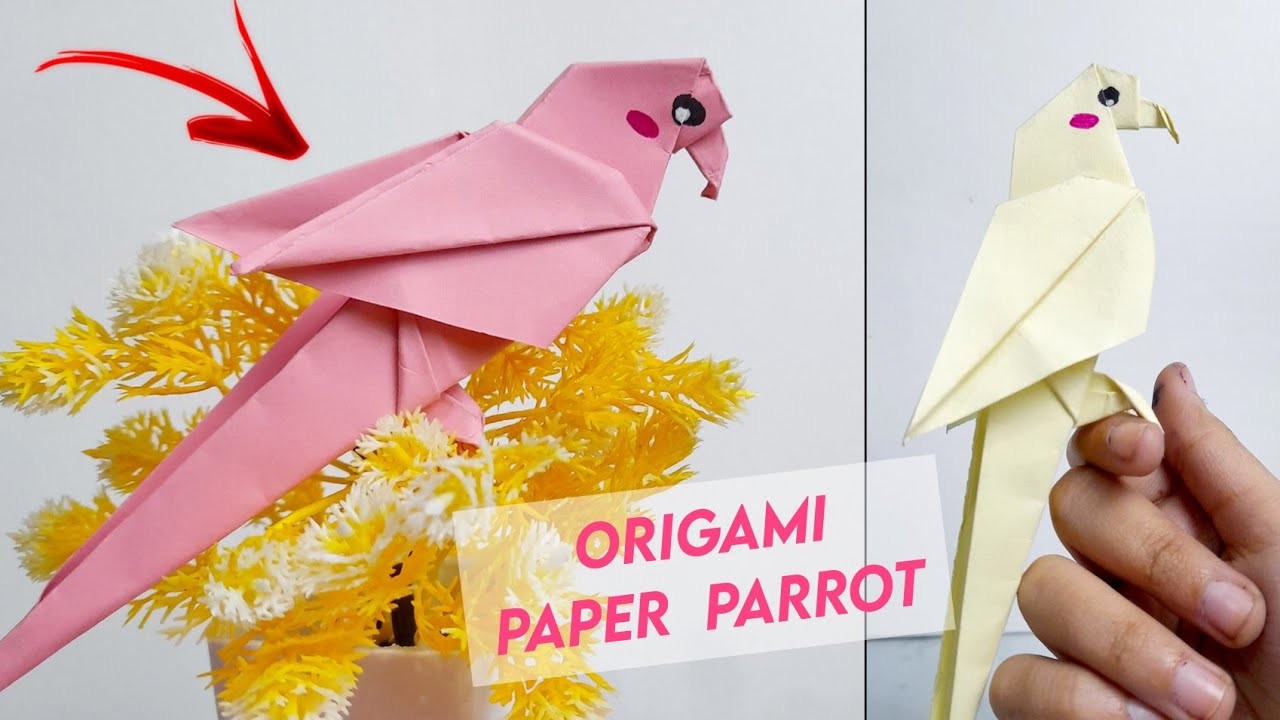
Welcome to the colorful world of paper crafting! If you’ve ever wanted to unleash your creativity without the mess of paints or the hassle of other materials, then paper crafting might just be your next favorite hobby. It's not only a great way to express your artistic side but also a fantastic opportunity to relax and unwind. Today, we’re diving into a fun project that will bring a splash of vibrant colors into your home: crafting a paper parrot! Grab your materials and let’s get started!
Materials Needed for Your Paper Parrot
Before you start folding and cutting, let’s gather all the essential materials you’ll need for this delightful paper parrot. Don’t worry; most of these items can be found around your home. Here’s a simple list for your shopping or scavenging needs:
- Colored Paper: You’ll need various colors to bring your parrot to life. Think bright yellows, blues, greens, and a vibrant red for the beak!
- Craft Scissors: A good pair of scissors is essential for cutting out your shapes.
- Glue or Double-Sided Tape: This will hold your parrot together securely.
- Pencil: For sketching out your shapes before cutting.
- Ruler: Helps in measuring, especially for making straight lines.
- Googly Eyes (Optional): These can really give personality to your parrot!
- Crafting Knife (Optional): Useful if you want to make more intricate cuts.
Once you have your materials assembled, make sure you set up a comfortable workspace. A clean, flat surface is ideal where you can easily arrange your papers and tools. You might also want to have some additional materials on hand:
| Additional Materials | Purpose |
|---|---|
| Markers | Add details and designs to your parrot’s feathers. |
| Strips of Paper | Can be used for creating texture or additional decorations. |
| Wire or Pipe Cleaners | To make a stand or add flexibility to your parrot’s wings. |
Now that you’re equipped with all the necessary materials, you’re ready to embark on your paper crafting journey. Take a moment to admire your supplies and prepare for a fun and rewarding experience. In the next section, we’ll guide you through the step-by-step process of bringing your paper parrot to life with easy-to-follow video instructions!
Also Read This: Setting Up a Hotmail ID Quick Steps on Dailymotion
3. Step 1: Preparing Your Paper
Alright, let’s dive into the fun part—preparing your paper! This is the foundation of your paper parrot project. Getting your materials ready sets the stage for a smooth crafting experience. Here’s what you’ll need:
- Colorful Origami Paper: Think bright greens, yellows, reds, and blues!
- Scissors: You’ll need a good pair of scissors for clean cuts.
- Glue Stick or Liquid Glue: For putting your parrot together.
- Pencil: To sketch your shapes before cutting.
- Ruler: Helpful for getting those straight lines, especially for the wings and tail!
- Craft Mat or Thick Cardboard: To protect your work surface.
Now that you’ve got your supplies on hand, let’s get down to preparation:
- Choose Your Colors: Decide on the colors you want for your parrot. A classic choice is a mix of green and blue for the body, combined with a splash of yellow or red for the beak and tail feathers.
- Measure and Cut Your Paper: Using your ruler, measure out squares or rectangles depending on the parrot parts you’re making. A good starting size for the body could be around 6x6 inches.
- Make a Sketch: Before cutting, it’s always wise to sketch the shapes on the paper lightly with a pencil. Outline the body, wings, tail, and head of the parrot. Don’t worry about being perfect—this is paper crafting, and a little whimsical touch adds character!
Once you complete these steps, your paper is prepped and ready to go. Remember, the more vibrant and colorful your pieces, the more lively your parrot will be!
Also Read This: Using Dailymotion on Roku TV – A Comprehensive Guide
4. Step 2: Cutting Out the Shapes
Now that you have your paper ready, it’s time for the exciting part—cutting out the shapes for your paper parrot! Grab your scissors and let’s get to work.
Make sure your workspace is clear and that you have good lighting. This will help ensure that you cut precisely and avoid any mishaps. Follow these steps to cut out each part of your parrot:
- Cutting the Body: Start with your main parrot body shape. If you sketched it out, simply follow along the lines. Aim for smooth, flowing cuts to give your parrot a natural look!
- Creating the Wings: Next, for the wings, you want to create two pieces that mimic the shape of a wing. Think of a teardrop or an elongated leaf shape. You can make these as big or small as you like—just ensure they are symmetrical!
- Making the Tail: For the tail feathers, cut out a long strip with jagged edges at the bottom to form feathery tips. The tail can be a mix of different colors if you want to add even more flair.
- Crafting the Head and Beak: For the head, create a rounded shape at the top of the body piece. The beak should be a simple triangle—just make sure it’s small enough to fit nicely on your parrot’s face!
- Add Details: Optional but fun! You can cut out small circles for eyes and even add some decorative patterns to the wings or body for extra character. Let your imagination run wild!
Once all your pieces are cut out, spend a moment arranging them to see how everything looks together. This will give you a visual of your paper parrot before you start gluing things down. You’re halfway there, and your parrot is really starting to take shape!
Also Read This: How to Download a Video from Dailymotion on PC: A Simple Guide
5. Step 3: Assembling the Parrot
Now that you have all your pieces cut out, it's time for the fun part—assembling your paper parrot! This step brings your creation to life and allows you to express your artistic flair. Don’t worry if you’re not sure where to start; I’ll walk you through it!
Here’s a simple list of what you’ll need for this step:
- Cut-out pieces from Step 2
- Glue (white glue or a glue stick works best)
- Scissors (for any touch-ups)
- A clean workspace
Ready? Let’s get started!
1. Start with the Body: Take your largest piece, which is typically the body of the parrot. Apply a thin line of glue around the edges to avoid any messy spills. Carefully place it on your workspace, ensuring it’s oriented correctly.
2. Attach the Wings: Next, grab the wings you cut out. If your wings are separated into two parts, make sure they are symmetrical when you attach them to the body. Use glue on one side and press gently against the body, holding for a few seconds to ensure they stick. Repeat with the other wing.
3. Secure the Tail: The tail gives the parrot its personality! Position the tail at the back of the body. You might want to apply glue to both the body and the tail piece to make sure it stays in place. Give it a little wiggle to make sure it’s secure.
4. Head Placement: Finally, it’s time to attach the head. Place it firmly at the top of the body. Depending on your design, you can angle it slightly or have it facing forwards. Again, glue it well and hold it for a moment.
Assembling the parrot is about patience and a bit of finesse. Don’t worry if some pieces don’t align perfectly; that’s part of the charm of handmade crafts!
Once everything is glued and secure, let your parrot sit for a while to ensure that all the pieces adhere properly. You can now proceed to the next step, where we’ll add some vibrant details to make your parrot pop!
Also Read This: How to Make a Facebook ID Using Yahoo on Dailymotion
6. Step 4: Adding Details and Color
Now that your parrot is assembled, it’s time to make it truly stand out with colors and details. This is where you can get as creative as you want, turning your paper parrot into a colorful masterpiece!
Here’s what you’ll need for this step:
- Colored markers, crayons, or paint
- Decorative paper (optional)
- Stickers (optional)
- Glitter (if you’re feeling adventurous!)
Let’s dive into the fun!
1. Color the Body: Choose bright, tropical colors for your parrot. A classic combination is bright green for the body with pops of yellow, red, or blue on the wings. Use markers or colored pencils to fill in each section, and don’t be shy about mixing colors to create shading effects!
2. Detail the Face: The eyes can really bring your parrot to life! You can draw large, expressive eyes using black and white markers for that cartoonish effect. If you have googly eyes lying around, grab them—they can add a fun twist!
3. Add Patterns: Want your parrot to have stripes or polka dots? Use different colors to create patterns on the wings or body. You can also cut decorative paper into shapes or strips to glue onto your parrot for a 3D effect.
4. Finishing Touches: If you want to be extra, consider adding glitter to the wings or around the eyes for a sparkling effect. Stickers can also work wonders—maybe a flower or two around your parrot to give it a great look!
This step is all about personalization. Your parrot should reflect your unique style and creativity, so don’t hesitate to experiment! Once you’re satisfied with the details and colors, allow any paint or glue to dry thoroughly. Then, your paper parrot is ready for display!
And there you have it—a completed paper parrot! With these steps, you not only have a fun craft but also a piece of art that showcases your creativity. Now, you might want to showcase your new creation or even make a few more for family and friends! Happy crafting!
Also Read This: How to Change Shirt Color in Photoshop
7. Step 5: Creating a Display for Your Parrot
Now that you've crafted your beautiful paper parrot, it’s time to give it a stunning home! A well-designed display can really highlight your creation and make it shine. You can get creative here, and I’ll share some simple ideas to help your parrot stand out.
First, let’s think about the display base. Here are a few options:
- Wooden Blocks: A sturdy wooden block can serve as a natural base. You can paint it to complement your parrot’s colors or leave it bare for a rustic look.
- Cardboard Base: Cut a piece of cardboard into a rectangle and cover it with colored paper or tissue that matches your parrot.
- Flower Pot: An upside-down flower pot creates a whimsical stand. You can even add some faux foliage to enhance the tropical vibe.
Once you’ve settled on a base, it's time to secure your parrot. You can use glue or tape, but for a more professional look, consider using a wooden dowel. Here’s how you can do it:
- Take a small wooden dowel and insert one end into the bottom of your parrot. You may need to make a small hole carefully to fit it snugly.
- Then, attach the other end of the dowel to the base you’ve chosen. If you're using cardboard, just poke a hole in it first, and then slide the dowel in.
- Make sure everything is balanced. You may need to adjust the length of the dowel or reposition your parrot to ensure it stands upright without tipping over.
Finally, think about the overall aesthetic of your display. You could arrange it with a small backdrop, like a painted scene or some additional paper crafts—perhaps some flowers or butterflies—to create a lively environment for your paper parrot.
To give you a better idea of this process, don’t forget to check out the video instructions that accompany this guide. Visuals can make a world of difference!
Also Read This: How to Do Layered Haircut at Home on Dailymotion: Simple Steps for Gorgeous Layers
8. Optional: Variations and Creative Ideas
Now that you've gotten to know the basics of crafting a paper parrot and creating an attractive display, let’s dive into some fun variations and creative ideas! This part is all about letting your imagination soar as high as your parrot!
Here are some exciting twists to make your paper parrot truly one-of-a-kind:
- Colorful Themes: Instead of the traditional colors, why not create a fantasy version of your parrot? Think rainbow gradients or neon designs for a pop art effect!
- Textured Creations: Use materials like fabric, foil, or textured paper to give your parrot some unique flair. Incorporate materials that can add dimension and interest.
- Incorporate Movement: Add some small weights or use paper folding techniques to make your parrot's wings flap! This adds an interactive element to your craft.
- DIY Accessories: Why not accessorize your parrot? Create tiny sunglasses, a hat, or even a miniature skateboard for it to perch on. The wackier, the better!
If you're feeling adventurous, consider creating a whole flock of paper parrots in different sizes and styles. You could then arrange them in a mobile or create a vibrant paper jungle to showcase your work.
Lastly, share your creations! Whether you take photos for social media, join an arts and crafts community, or just show them off to your friends and family, showcasing your work is a wonderful way to connect and inspire others. Who knows what fantastic ideas might come from your creativity?
Remember, crafting should be fun, and there are no limits to your imagination! Enjoy the process, and let your paper parrot take flight!
Conclusion and Resources
In conclusion, crafting a paper parrot is a delightful and creative project that can be enjoyed by people of all ages. Not only does it enhance your artistic skills, but it also allows you to explore your imagination. Whether you are making these colorful birds for educational purposes, decorations, or simply for fun, following the steps outlined in this guide will help you achieve fantastic results.
To further assist you in your crafting journey, here are some valuable resources:
- Video Instructions: For a visual guide, check out our step-by-step video tutorial which demonstrates the entire process in detail.
- Printable Templates: Download free templates for your paper parrot creations from this link.
- Crafting Community: Join our online community at CraftingHub where you can find tips, share your creations, and connect with other crafters.
Don’t forget to share your paper parrot creations on social media using the hashtag #PaperParrotCraft. Happy crafting!
 admin
admin


