Welcome to our guide on automatically tracing images in Photoshop! If you've ever wished to convert a raster image into a smooth vector graphic effortlessly, you're in the right place. Whether you're a beginner or a seasoned designer, understanding how to use Photoshop's powerful tracing features can elevate your projects. Let’s dive into the basics of image tracing and how it can transform your artwork.
Understanding Image Tracing in Photoshop
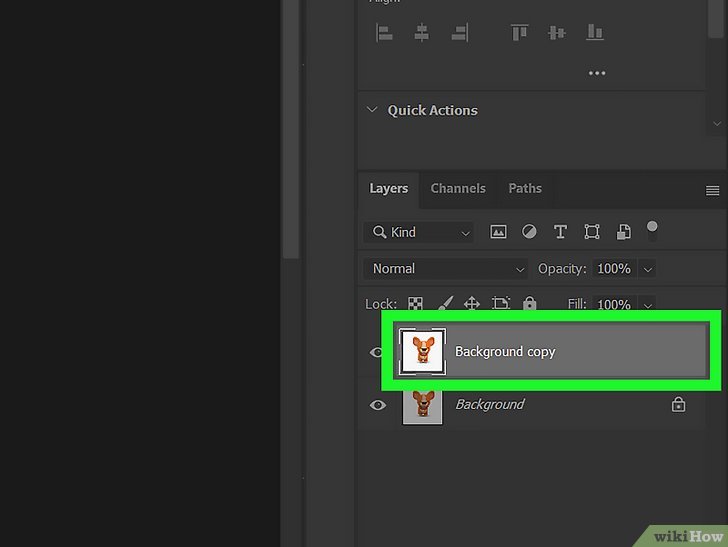
Image tracing in Photoshop is the process of converting pixel-based images (raster images) into vector graphics, which can be scaled without losing quality. This is essential for graphic designers, illustrators, and anyone who needs crisp, clean images for print or digital use. Here’s a breakdown of what you need to know:
- Raster vs. Vector: Raster images are made up of pixels and can become blurry when scaled. In contrast, vector images are constructed using paths defined by mathematical expressions, making them infinitely scalable.
- Why Trace Images? Tracing allows for easier edits, resizing, and the ability to manipulate individual elements in the design. This is particularly useful for logos, illustrations, and any graphic needing scalability.
- Photoshop vs. Illustrator: While Illustrator is often the go-to for vector work, Photoshop has its own powerful tools for image tracing. Photoshop’s auto-tracing features can help streamline your workflow, especially if you’re already familiar with its interface.
To get started with image tracing, you'll want to familiarize yourself with tools like the Image Trace function or the Pen Tool. These tools help you create paths that replicate the shapes and lines of your original image. Understanding these key concepts will set the foundation for effective tracing in your projects!
Also Read This: How Do You Annotate an Image for Detailed Explanations and Notes
3. Preparing Your Image for Tracing
Before diving into the tracing process in Photoshop, it’s crucial to prepare your image properly. The quality of your tracing largely depends on the clarity and detail of the original image. Here’s how to set the stage:
- Select a High-Quality Image: Choose an image with clear outlines and distinct colors. Images with good contrast between the subject and background work best.
- Crop and Resize: Use the Crop Tool to focus on the part of the image you want to trace. Resize the image if necessary to ensure it fits well within your workspace.
- Adjust Brightness and Contrast: Go to Image > Adjustments > Brightness/Contrast. Increase the contrast to make the edges more defined, which will help in the tracing process.
- Convert to Grayscale: Sometimes, switching to grayscale can enhance edge visibility. You can do this by navigating to Image > Adjustments > Black & White.
- Duplicate the Layer: It's always wise to work on a duplicate. Right-click on the layer and select Duplicate Layer. This way, you’ll have the original image untouched for reference.
By following these steps, you'll ensure that the image is in the best possible shape for tracing. Remember, a well-prepared image sets the foundation for a successful tracing experience!
Also Read This: how to insert image in blender
4. Using the Quick Action Tool for Automatic Tracing
Now that your image is prepped and ready, let's explore the Quick Action Tool in Photoshop, which simplifies the tracing process. This feature allows you to convert your image into a vector-like format with just a few clicks. Here’s how to get started:
- Open Your Image: Load your prepared image into Photoshop.
- Access the Quick Actions: Go to the right panel and find the Properties panel. If it’s not visible, you can enable it by going to Window > Properties.
- Locate the Quick Action: In the Properties panel, look for the Quick Actions section. You’ll see options like Remove Background or Apply Image Effects.
- Select “Convert to Vector”: This is the magic button! Click on Convert to Vector. Photoshop will analyze your image and automatically create paths based on the edges and colors.
- Adjust the Result: Depending on the complexity of your image, you may need to tweak the results. Use the Direct Selection Tool to refine paths and points as needed.
And there you have it! With the Quick Action Tool, you can transform your images into stunning vector-like tracings effortlessly. It’s a game changer for anyone looking to speed up their workflow!
Also Read This: How to Add a Picture to Your YouTube Video
Adjusting Tracing Settings for Best Results
Once you’ve selected your image and initiated the tracing process in Photoshop, the next step is to tweak the tracing settings to achieve the best results. This is crucial as it helps you refine the traced image to match your vision. Here are some key settings you might want to adjust:
- Threshold: This setting determines how much of the image is considered when tracing. A lower threshold captures more details, while a higher threshold simplifies the shapes.
- Smoothing: This feature reduces the jagged edges in your traced image. Adjusting the smoothing amount can help achieve a cleaner finish without losing essential details.
- Paths: Control the complexity of your traced image by adjusting the number of paths. Fewer paths simplify the image, while more paths retain intricate details.
- Noise Reduction: This option helps remove unwanted artifacts from the tracing process. Increasing noise reduction can lead to a more polished look.
As you play around with these settings, make sure to preview your changes in real-time. This allows you to see how each adjustment affects your image instantly. Don’t hesitate to experiment; sometimes, finding the perfect balance requires a bit of trial and error. Remember, the goal is to create an image that feels right for your project!
Also Read This: How to Check Scheduled Posts on LinkedIn
Finalizing and Saving Your Traced Image
After you’ve adjusted your tracing settings and are satisfied with the results, it’s time to finalize and save your traced image. This step is essential to ensure your hard work doesn’t go to waste and that you can easily access your image later. Here’s how to do it:
- Check Your Layers: Before saving, make sure all your layers are in order. You might want to group them for easier management.
- Remove Unwanted Elements: Use the eraser tool or layer masks to get rid of any leftover artifacts or elements that you don’t want in your final image.
- Flatten the Image: If you’re satisfied with the layers and don’t need to edit them further, flatten your image to reduce file size. This merges all layers into one.
- Save Your Work: Under the “File” menu, select “Save As.” Choose a format that suits your needs—PNG for transparency, JPEG for a smaller file size, or PSD to maintain layers for future editing.
By following these steps, you’ll ensure that your traced image is ready for use in any project—be it digital art, graphic design, or even printing. Don’t forget to give your file a memorable name to make it easy to find later!
Also Read This: 123RF vs Adobe Stock: Comparing Two Prominent Stock Image Providers
How to Automatically Trace an Image in Photoshop
Tracing images in Photoshop can be a powerful technique for artists and designers. It allows for the conversion of raster images into vector-like illustrations, which are easier to edit and scale without losing quality. In this guide, we will explore the steps to automatically trace an image using Photoshop’s built-in features.
Follow these steps to automatically trace an image:
-
Open Your Image:
Start by launching Photoshop and opening the image you want to trace. Go to File > Open and select your image file.
-
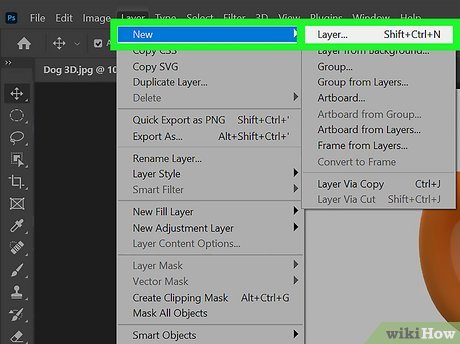
Convert to Smart Object:
Right-click on the image layer in the Layers panel and select Convert to Smart Object. This allows you to apply filters non-destructively.
-
Apply the Threshold Filter:
Go to Image > Adjustments > Threshold. Adjust the threshold level until you achieve a satisfying outline for your image.
-
Use the Image Trace Option:
Go to Filter > Convert for Smart Filters, then select Filter > Stylize > Find Edges. This will create a basic outline of your image.
-
Refine Your Trace:
Utilize the Brush Tool or Pencil Tool to refine edges or add details manually.
-
Save Your Work:
Once satisfied with your tracing, save your work by going to File > Save As and choosing your desired file format.
With these steps, you can effectively trace an image automatically in Photoshop, combining the power of filters and smart objects to enhance your creative workflow. Experiment with different images and settings to discover the best techniques for your artistic style.
Conclusion
Automatic tracing in Photoshop simplifies the illustration process, offering artists a quick way to create vector-like images while retaining control over the final look, making it an invaluable skill for any designer.
 admin
admin


