Layer management is a crucial part of creating polished presentations in Google Slides. Whether you're working on a simple design or a more complex one with multiple images and elements, understanding how to manage the layers can make your slide look more organized and professional. By arranging elements in layers, you control which objects appear in front or behind others. This makes it easier to work with overlapping items and ensures your visuals appear exactly how you want them.
In Google Slides, each object, whether it's an image, text box, shape, or chart, is placed on its own layer. Understanding how to adjust these layers helps you avoid clutter and ensures your content is easy to read and visually appealing. With the right layer management skills, you can create a clear, engaging presentation that delivers your message effectively.
Why Moving Images Forward is Important in Google Slides

When designing slides, you may find that certain images or objects are hidden behind other elements. This can create a confusing or cluttered look. Moving an image forward helps ensure it stands out and is seen by your audience. It’s particularly useful when you have multiple elements on a slide and need to highlight certain visuals for clarity or emphasis.
There are several reasons why you might want to move an image forward in Google Slides:
- Visibility: Ensures that important images are not hidden behind other objects.
- Emphasis: Helps draw attention to specific images, such as a product photo or chart, making it a focal point.
- Layer organization: A well-organized slide has images in a logical order, preventing visual chaos.
Proper image placement can improve the overall look and feel of your presentation, making it more engaging for your audience.
How to Move an Image Forward in Google Slides Step by Step

Moving an image forward in Google Slides is a simple task that can dramatically improve the layout of your presentation. Here’s how to do it:
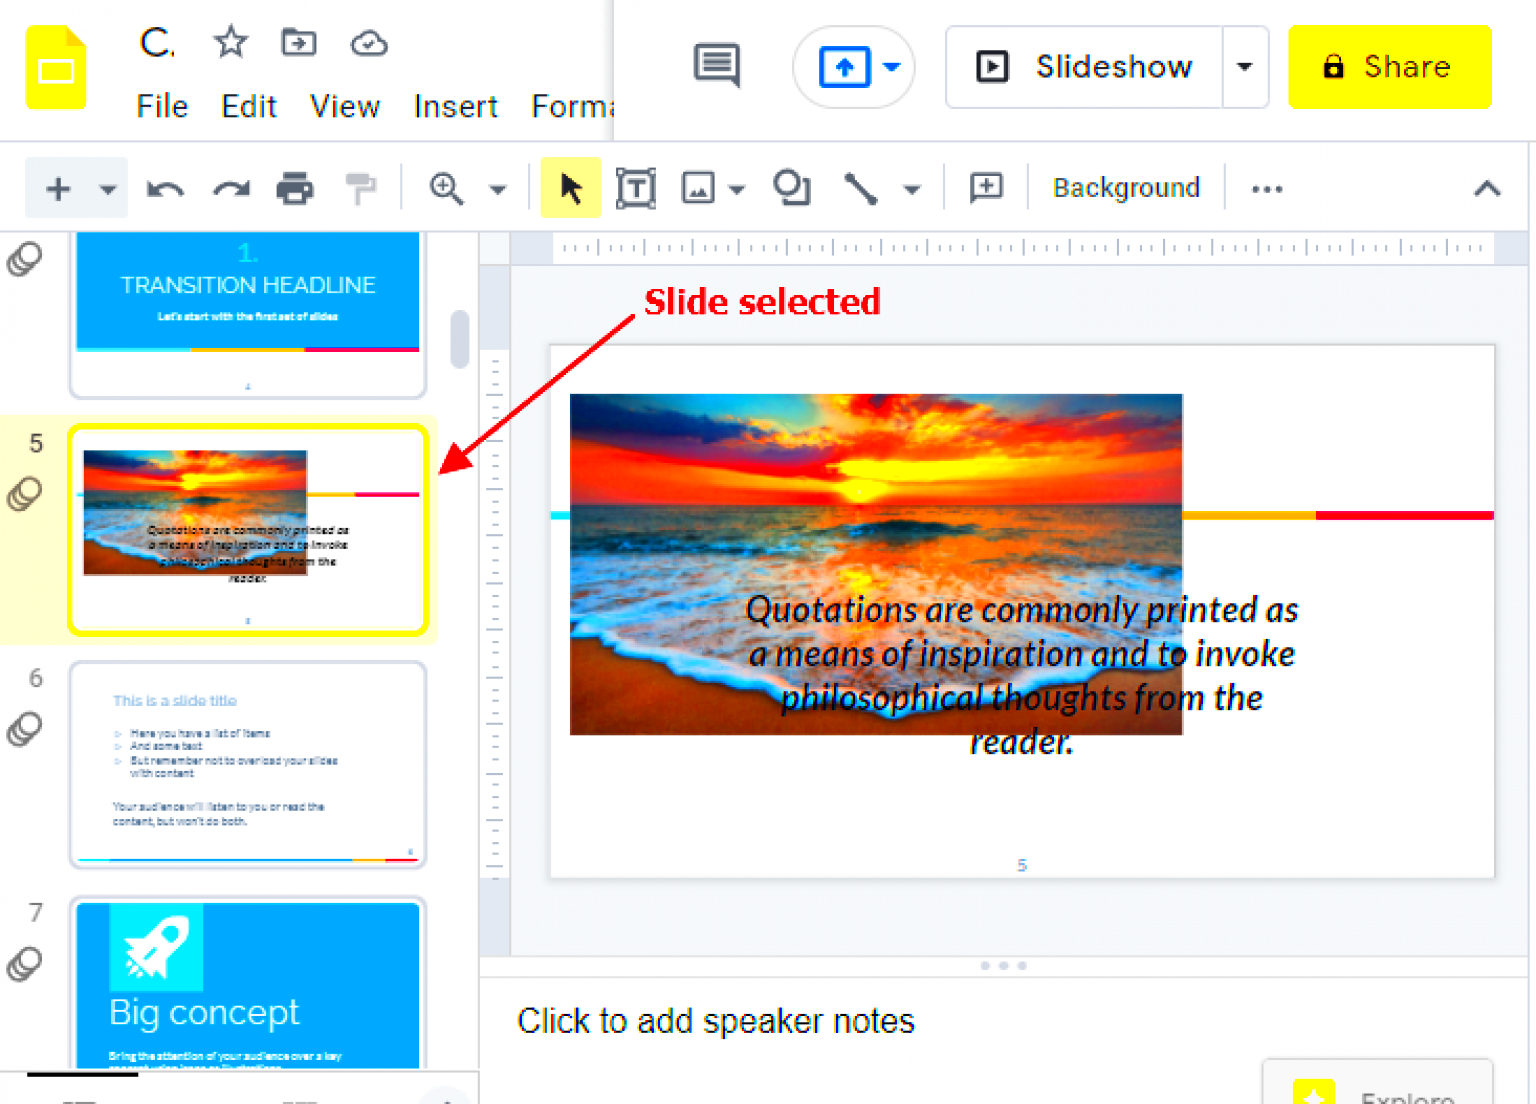
- Select the Image: Click on the image you want to move forward.
- Right-click on the Image: After selecting the image, right-click to open the context menu.
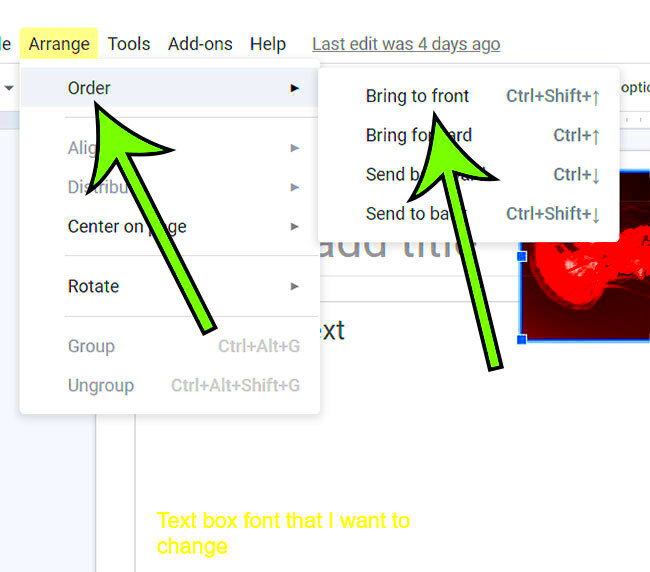
- Choose “Order”: In the menu, hover over the “Order” option to reveal more options.
- Select “Bring to Front” or “Bring Forward”: You’ll have two options:
- Bring to Front: Moves the image to the very top layer, in front of all other objects.
- Bring Forward: Moves the image one layer up, just in front of the object directly behind it.
- Done: Once you’ve made your selection, the image will move forward as per your choice.
This simple process allows you to adjust the layering of images and ensures that your content appears just the way you want it on the slide. Keep in mind that you can also move other elements like shapes and text boxes forward using the same steps.
Using Keyboard Shortcuts to Move Images Forward
If you want to streamline your workflow in Google Slides, using keyboard shortcuts is a great way to move images forward quickly. Instead of right-clicking and navigating through the menus, shortcuts can save you time and make the process more efficient. Once you get used to them, you’ll find that keyboard shortcuts are a real game-changer when it comes to managing your slides.
Here are the keyboard shortcuts you can use to move images forward:
- Bring to Front: Press Ctrl + Shift + ↑ (Windows) or Cmd + Shift + ↑ (Mac) to move the selected image to the very top layer.
- Bring Forward: Press Ctrl + ↑ (Windows) or Cmd + ↑ (Mac) to move the selected image one layer up, in front of the object directly behind it.
These shortcuts are especially helpful when you need to adjust layers multiple times during the design process. Instead of clicking around, you can focus more on your creative work and less on navigating through menus. You can also use these shortcuts for text boxes, shapes, and other objects, not just images. Give them a try and see how much faster you can manage your slide layers!
Understanding Layer Order in Google Slides
In Google Slides, each object is placed on its own layer. The layer order determines which objects appear on top of or behind others. Having a good understanding of how the layer order works can help you create well-organized slides, avoid unwanted overlaps, and make sure your visuals are displayed exactly as you intend.
Each slide in Google Slides operates like a stack of cards. The topmost card is the object that appears at the front of the slide. Understanding this order is important when you're designing a slide with multiple elements. Here are some key points to consider:
- Top Layer: The object at the top of the stack will be the one visible at the front. You can move an image or text box to the top by using the "Bring to Front" option.
- Bottom Layer: The object at the bottom of the stack will be hidden behind all others. Use "Send to Back" to move it behind other elements.
- Layer Hierarchy: You can adjust the order of elements by moving them forward or backward one layer at a time, allowing you to control exactly where each object sits in relation to the others.
By understanding layer order, you can avoid situations where important images or text are hidden behind other elements. Managing layers properly helps your slides look neat, professional, and visually appealing.
Organizing Multiple Images for Better Design
When you're working with multiple images on a single slide, it’s important to organize them effectively for a clean and balanced design. A cluttered slide with overlapping or poorly arranged images can distract from your message and make your presentation look unprofessional. Here are some tips to help you organize your images in a way that improves both the visual appeal and clarity of your design:
- Use Grid or Guides: Google Slides has gridlines and guidelines that can help you align images neatly. To enable them, go to the “View” menu and select "Show" then "Guides." You can use these lines to keep your images evenly spaced and aligned.
- Group Related Images: If you have multiple images that go together, consider grouping them. This makes it easier to move and adjust them as a single unit. Simply select all the images you want to group, right-click, and select “Group.”
- Spacing and Alignment: Ensure there’s enough space between your images so that each one stands out. Use the alignment options in the toolbar to make sure the images are aligned either horizontally or vertically for a more organized look.
- Layer Images for Depth: You can create depth by layering images on top of each other. For example, place a large background image behind smaller ones or create a sense of depth by placing images in front of shapes or text.
- Consistency: Use similar image sizes and styles to maintain a consistent look across your slides. This helps keep your design cohesive and professional.
By organizing your images properly, you can create slides that are visually pleasing and easier for your audience to understand. Keep your design simple and clean, and focus on the key images that support your message.
Tips for Managing Image Layers in Google Slides
Managing image layers effectively is key to creating a well-organized and visually appealing Google Slides presentation. Whether you're working with one image or several, understanding how to control the layers can prevent clutter and make your slides look more polished. Here are some tips to help you manage image layers with ease:
- Start with a Clear Design: Before you add any images, think about how you want the elements to be arranged on the slide. This will help you plan the layer order and avoid unnecessary adjustments later.
- Use Layering for Emphasis: To draw attention to a particular image or element, move it to the front by using the "Bring to Front" option. This is especially helpful for key visuals like product photos or main concepts.
- Keep Layers Organized: If your slide contains multiple images, try to keep them in an organized order. For example, use one layer for background images and another for foreground elements. This can help avoid confusion when making edits.
- Group Related Elements: When you have several images that need to be adjusted together, group them. This allows you to move and resize them as one, saving time and keeping the layout consistent.
- Use Alignment Tools: Google Slides offers alignment tools to help you arrange images neatly. These tools can automatically align images to the left, center, or right, and help you space them evenly across your slide.
By following these tips, you can create a more organized and professional presentation that effectively communicates your message without the distractions of poorly managed layers.
Common Issues When Moving Images Forward and How to Fix Them
While moving images forward in Google Slides is straightforward, you may encounter a few issues along the way. Here are some common problems users face and how to resolve them:
- Images Not Moving as Expected: Sometimes, an image may not move forward even after selecting “Bring Forward” or “Bring to Front.” This can happen if the object is locked in place. To fix this, ensure the object isn’t locked by checking the object properties or try ungrouping any grouped items.
- Image Gets Hidden Behind Other Objects: If you move an image forward and it still seems to be hidden, it could be behind a text box or shape that’s not visible. Try bringing both the image and the object forward to see if the problem resolves.
- Images Overlap and Look Cluttered: Layered images can sometimes overlap, making the slide look cluttered. To fix this, use the alignment and distribution tools to evenly space out the images. You can also adjust the transparency of certain images to make them less distracting.
- Unintended Changes to Other Objects: Moving one image forward may inadvertently move other objects along with it, especially if they are grouped. If this happens, ungroup the elements before adjusting their positions. This ensures that only the desired image is affected.
- Inconsistent Layer Order: If your slide contains several images, the layer order may become inconsistent. To fix this, manually adjust the order of the images by using the “Order” menu. You can bring objects to the front or send them to the back to maintain a clear hierarchy.
By addressing these common issues, you can make the process of moving images forward much smoother and more efficient. A little patience and understanding of the layering system will go a long way in creating well-organized slides.
FAQ
1. How do I move an image forward in Google Slides?
To move an image forward, right-click on the image, select “Order,” and choose either “Bring Forward” to move it one layer up or “Bring to Front” to move it to the topmost layer. You can also use keyboard shortcuts for faster action.
2. Can I use keyboard shortcuts to move images in Google Slides?
Yes! You can use the following keyboard shortcuts:
- Press Ctrl + ↑ (Windows) or Cmd + ↑ (Mac) to move an image one layer up.
- Press Ctrl + Shift + ↑ (Windows) or Cmd + Shift + ↑ (Mac) to bring the image to the front.
3. Why do some images not move forward in Google Slides?
If an image isn't moving as expected, it may be locked or grouped with other elements. Ensure that the image isn't part of a group and that it’s not locked. Try ungrouping the elements and then adjust the layers again.
4. How can I manage multiple images at once?
If you need to adjust multiple images together, consider grouping them. Select all the images, right-click, and choose “Group.” This will allow you to move, resize, and layer them as one unit.
5. What should I do if my images overlap and look cluttered?
If your images are overlapping, use the alignment and distribution tools to space them evenly. You can also adjust the transparency of some images or resize them to avoid crowding the slide.
Conclusion
Managing image layers effectively in Google Slides can significantly enhance the quality and visual appeal of your presentations. By understanding how to move images forward and using proper layer order, you can ensure that your slides are both organized and engaging. Whether you're working with a single image or multiple elements, the key is to plan your design carefully, use the available tools for alignment and grouping, and make adjustments as needed. With these tips and techniques, you can create slides that clearly communicate your message, while also keeping your audience focused on the most important visuals.

 admin
admin


