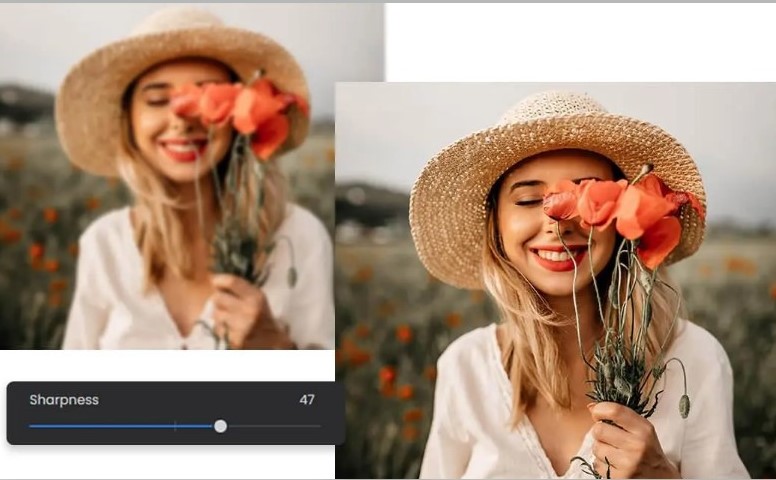
Have you ever stumbled upon a fantastic video on YouTube, only to find it marred by annoying blurriness? It can be incredibly frustrating, especially when you're eager to absorb the content. Luckily, you’re not alone in this dilemma! In this post, we’ll explore the nature of video blur and delve into some smart techniques and tools available to clear up that visual mess. So, let’s untangle the mystery of blurry videos and get back to enjoying high-quality content!
Understanding Video Blur

Video blur can often feel like the bane of a viewer's existence. But what causes it, and is there a way to fix it? Let's break it down:
- Motion Blur: This type occurs when there is rapid movement within a scene, and the camera fails to capture that motion crisply. Think of an athlete running or a car speeding by—these fast actions can result in smudged visuals.
- Focus Blur: Ever found yourself trying to capture a beautiful landscape only for it to appear out of focus? Similarly, videos can appear blurry when the camera doesn’t focus correctly on the subject, leaving the viewer straining to see what’s happening.
- Compression Blur: This is often the result of compressing the video file too much, reducing the razor-sharp quality into something hazy. YouTube employs various compression algorithms during uploads, which, while helpful for streaming, can sometimes dull the picture.
- Low Quality Source: If a video is uploaded in a low resolution, there just isn’t enough detail for viewers to see clearly. This can be especially troubling for older videos or those shot with less advanced recording equipment.
Understanding these types of blur is crucial for pinpointing the issue at hand. Knowing whether it’s motion, focus, compression, or resolution-related will help you choose the right tools and techniques to resolve the blurriness and enhance your YouTube viewing experience!
Also Read This: How to Record PC Gameplay for YouTube and Grow Your Gaming Channel
Common Causes of Blurring in Videos

When it comes to blurriness in videos, it can be frustrating to watch, especially if it's your own content. Understanding what causes that blurry mess can help you stay clear of these issues in the future. Here are some common culprits:
- Poor Lighting Conditions: Lack of sufficient light can cause cameras to struggle to focus, leading to a blurry outcome. Using the right lighting can make a significant difference.
- Camera Shake: If you're filming while moving or even standing in place, slight camera movement can lead to blurriness. Using a tripod or stabilizer can help prevent this.
- Low-Resolution Settings: Sometimes, your video settings may not be optimal. Filming in low resolution can make the video appear fuzzy when viewed at a larger size.
- Out-of-Focus Shots: A classic mistake! If the camera lens is not properly focused on the subject, the result will be a soft, blurry image.
- Compression Artifacts: When videos are compressed for uploading to platforms like YouTube, they can lose quality. This often results in visible blurring, especially on detailed backgrounds.
By recognizing these common causes, you can minimize the chances of blurring in your future videos. Just a little bit of forethought can save you a lot of time and effort during editing!
Also Read This: Becoming a Contributor on Alamy: A Guide to Selling Your Images
Techniques to Unblur Videos

Have you ever filmed a fantastic moment only to discover it turned out blurry? Don't worry! There are some effective techniques and tools you can use to unblur those videos. Let’s dive into some of the best options available:
- Video Editing Software: Programs like Adobe Premiere Pro and Final Cut Pro have features that allow you to sharpen your video. They use advanced algorithms to enhance clarity.
- AI-Powered Tools: Tools like Topaz Video Enhance AI leverage artificial intelligence to improve video quality remarkably. They can make a dramatic difference in the final output.
- Adjusting Sharpness Settings: Most editing software includes a sharpness adjustment feature. By subtly increasing the sharpness levels, you can often clarify outlines and details in your video.
- Motion Stabilization: If camera shake contributed to blurriness, using motion stabilization features in software can help. This can smooth out jerky movements, making the video appear clearer.
In addition to these tools, remember that practicing your filming techniques is essential. The better your original footage is, the less you’ll have to rely on these unblurring techniques. Happy editing!
Also Read This: Choosing Between Royalty-Free and Rights-Managed Images on Imago Images
5. Tools and Software for Unblurring Videos
When it comes to unblurring a YouTube video, selecting the right tools and software can make a significant difference. You want options that not only enhance the quality but are also user-friendly. Here are some excellent tools you might consider:
- Adobe Premiere Pro: This professional-grade video editing tool offers advanced features like sharpening and Gaussian blur adjustment. While it has a learning curve, the results can be astounding.
- Final Cut Pro: Exclusively for Apple users, Final Cut Pro is known for its intuitive interface and powerful editing capabilities. Use its sharpening filters to enhance blurred areas effectively.
- iMovie: If you’re looking for something more straightforward, iMovie can be a great start. Its basic tools can help with minor adjustments, especially if you're a beginner.
- HitFilm Express: This free software offers many features similar to paid programs. Its sharpening tools can help improve slightly blurred videos without overwhelming users.
- DaVinci Resolve: An excellent choice for those who need color correction along with sharpening tools. Plus, it's free for the basic version, which includes quite a few professional features.
Choosing the right software will depend on your specific needs, skill level, and budget. Each tool comes with its own set of strengths, so consider what you're looking to achieve when you make your choice.
Also Read This: Imago Images and Its Impact on Sports Photography
6. Step-by-Step Guide to Using Video Editing Software
Unblurring a video might sound daunting, but with a bit of guidance, it can be relatively straightforward. Let’s break it down into easy steps using a common video editing tool, Adobe Premiere Pro.
- Import Your Video: Start by launching Adobe Premiere Pro and importing the blurred video by selecting File > Import.
- Create a Sequence: Once the video is imported, drag it to the timeline to create a new sequence.
- Access the Effects Panel: Open the Effects panel from the side menu and search for the Sharpen effect. Drag this effect onto your video clip in the timeline.
- Adjust the Sharpen Effect: Click on the video clip and navigate to the Effect Controls panel. You’ll see the Sharpen effect listed here. Adjust the Amount slider incrementally until you see the desired clarity.
- Use Gaussian Blur (if needed): If parts of the video are still a bit blurry, you can also utilize the Gaussian Blur effect to refine it further. Just make sure you're adjusting the settings carefully!
- Export Your Video: Once you’re satisfied with the results, export your video. Go to File > Export and choose your desired format.
And there you have it! With these straightforward steps, you can start transforming your blurred footage into clearer visuals. Don't be afraid to experiment with different settings—every video is unique!
Also Read This: How to Set Up a Behance Account and Configure Your Portfolio
7. Best Practices for Capturing Clear Videos
Creating clear and high-quality videos is crucial for engaging your audience. Here are some best practices you can follow to ensure your videos come out sharp and vibrant:
- Choose the Right Resolution: Always shoot in the highest resolution your camera allows. For maximum clarity, aim for at least 1080p or even 4K if possible.
- Good Lighting is Key: Natural light is your best friend! Try to shoot during the day or in well-lit environments. Avoid harsh shadows and make sure the light source isn’t directly behind you.
- Stabilize Your Camera: Use a tripod or a gimbal to keep your footage steady. Shaky videos can distract viewers and reduce clarity.
- Use Quality Equipment: Invest in a good camera and microphone. Your video quality will improve significantly if you use professional tools.
- Control Your Settings: Familiarize yourself with your camera’s settings. Adjusting the ISO, shutter speed, and aperture can help you capture better images in various lighting conditions.
- Keep Your Lens Clean: It may sound simple, but regularly cleaning your lens can remove dust and smudges that lead to blurry videos.
- Edit Wisely: Use video editing software to enhance your footage. You can sharpen images and correct colors, but don’t overdo it!
By applying these best practices, you'll set the stage for producing videos that are not only clear but also visually appealing.
8. Conclusion
In conclusion, unblurring a YouTube video can be a challenging task, but it’s certainly achievable with the right techniques and tools. Remember, prevention is often the best cure! Focus on capturing clear videos from the start to avoid the hassle of post-production fixes.
Utilizing software for unblurring, like video sharpening tools and advanced editing software, can provide a solution to unclear footage. However, always strive to implement camera settings and shooting techniques that optimize your video quality upfront.
Here’s a quick recap of what we’ve covered:
- Best practices for clear video capture.
- Various software options for unblurring videos.
- Techniques to enhance video clarity in post-production.
With the right knowledge and resources, you can create stunning visual content that captures your audience’s attention and conveys your message effectively. So, gear up, start recording, and make those blurry videos a thing of the past!
 admin
admin


