Canva is a popular graphic design tool that allows you to create stunning visuals, whether you're designing for social media, presentations, or marketing materials. One of the most common tasks in design is adjusting the size of an image, but sometimes, you may need to stretch an image to fit a particular space without losing its quality. In this post, we’ll guide you through the process of stretching an
Why Stretch an Image Without Cropping?

Stretching an image without cropping can be a useful technique in various design situations. When you want to fit an image into a specific frame or dimension, but cropping would remove important parts of the
- Maintain the Full Image: Stretching preserves the entire image, so nothing gets cut off, even if the original aspect ratio doesn't match your frame.
- Fit to a Custom Size: Sometimes, you need to adjust an image to fit a specific space without losing key elements, and stretching helps achieve that.
- Consistent Design Aesthetic: Stretching can help maintain uniformity in your design, especially when working with multiple images of varying sizes.
- Quick Fix: Stretching is a faster solution compared to re-editing or finding a new image that fits the frame perfectly.
Although stretching may alter the image’s proportions, it’s often the best option when you don’t want to sacrifice important parts of the image or leave empty space in your design.
Also Read This: Using Alamy Images on YouTube: Guidelines for Incorporating Copyrighted Content
Steps to Stretch an Image in Canva

Now that you understand why stretching an image can be useful, let’s go over the simple steps to stretch an image in Canva:
- Upload Your Image: Start by uploading the image you want to stretch to Canva. Click the "Uploads" tab on the left, select "Upload Media," and choose your image from your device.
- Insert the Image into Your Design: Once uploaded, drag the image onto your canvas. This will place it in your design area.
- Select the Image: Click on the image to select it. When the image is selected, you’ll see resizing handles (small circles) around the edges.
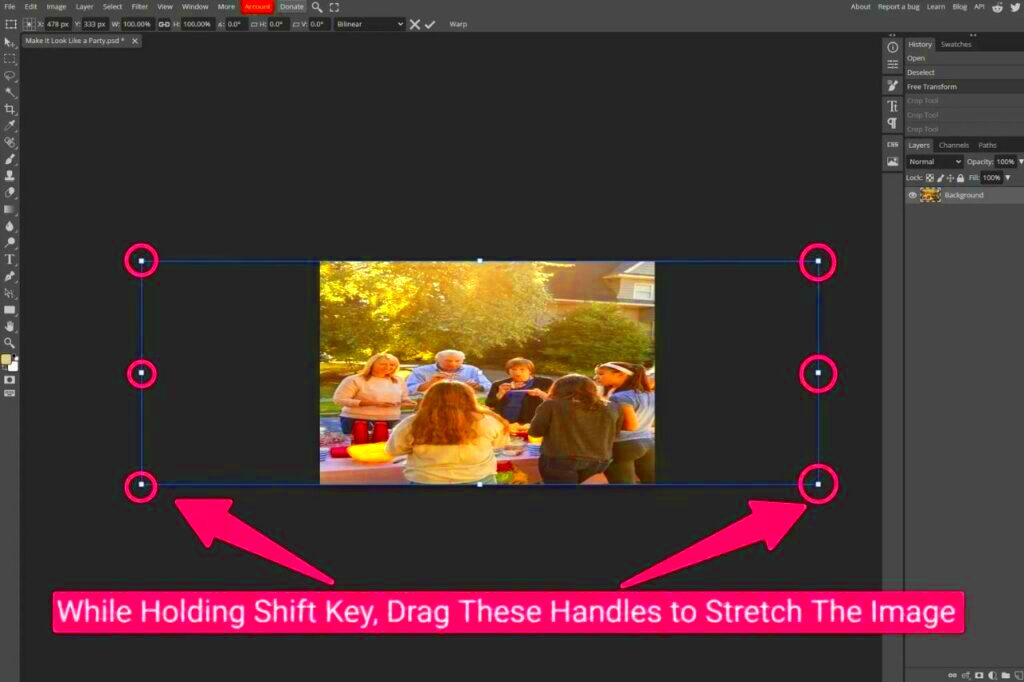
- Stretch the Image: To stretch the image, simply click and drag one of the corner handles. If you want to stretch the image vertically or horizontally, drag the top or side handle. Hold down the Shift key to maintain proportional scaling if needed.
- Adjust the Image Placement: After stretching, reposition the image on your canvas to ensure it fits perfectly within your design’s frame.
- Preview and Adjust: Take a moment to preview the stretched image. If needed, make final tweaks to ensure everything looks good.
And that’s it! With just a few clicks, you’ve successfully stretched an image in Canva without cropping it.
Also Read This: The Symbolism Behind the Sound in A Rumble in the Jungle
Using the Resize Tool to Stretch an Image
The Resize Tool in Canva is a powerful feature that allows you to change the dimensions of an image or design quickly. When you need to stretch an image to fit a specific space, the Resize Tool can help you do this while keeping the design consistent. Let’s break down how to use it effectively:
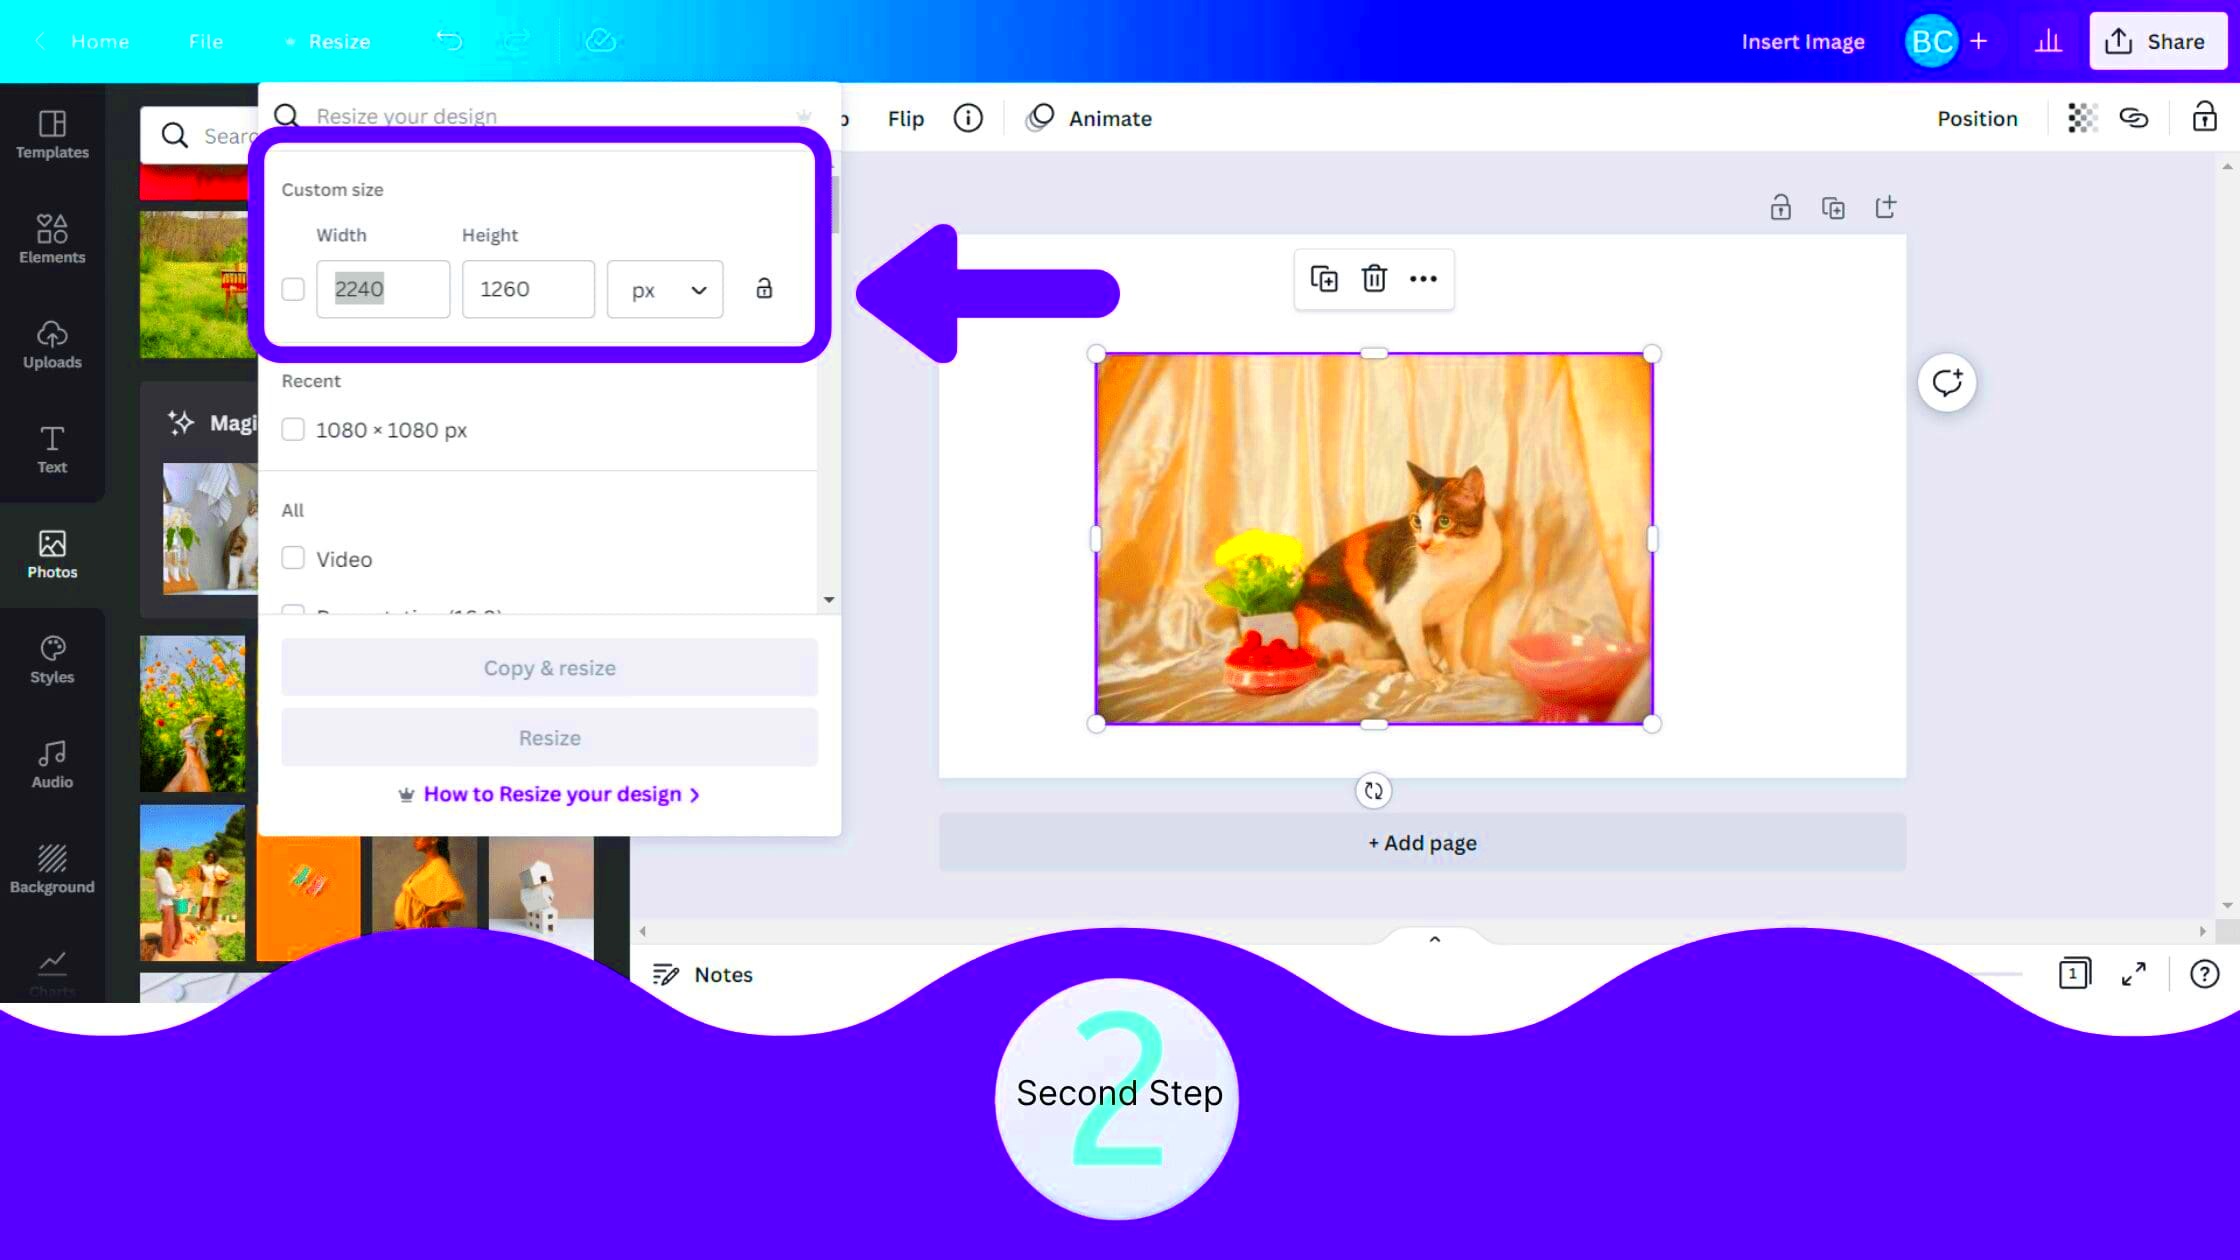
- Access the Resize Tool: If you're using a Canva Pro account, you’ll have access to the Resize Tool. Simply click on the "Resize" button located at the top of the editor.
- Choose Your Dimensions: Enter the width and height values you want for your image. You can either set custom dimensions or choose from preset options like "Instagram Post" or "Facebook Cover." This is helpful if you want the image stretched to a specific size for a platform.
- Enable Aspect Ratio Lock (if necessary): If you need the image stretched uniformly, ensure that the "Lock aspect ratio" option is disabled. This will let you stretch the image both vertically and horizontally without maintaining its original proportions.
- Click Resize: After adjusting the width and height, click the "Resize" button. Your image will automatically adjust to the new dimensions, stretching it accordingly.
Using the Resize Tool is one of the easiest and most straightforward ways to stretch an image. However, be mindful of how much you stretch the image, as extreme changes can cause pixelation or blurriness.
Also Read This: How to Remove the Alamy Watermark with Photoshop: A Step-by-Step Tutorial
Adjusting the Image Proportions Without Distortion
When stretching an image, it’s essential to maintain its proportions to avoid distortion. Distortion occurs when the image stretches in one direction too much, making it look unnatural. Fortunately, Canva offers a few tricks to help you adjust image proportions without causing this issue:
- Hold the Shift Key: When resizing the image using the corner handles, hold the Shift key on your keyboard. This keeps the aspect ratio locked, preventing the image from becoming squished or stretched unevenly.
- Use the Resize Tool Smartly: If you want the image to stretch to fill a frame but keep its proportions intact, make sure to adjust both dimensions carefully. Instead of stretching the image too much, resize it proportionally first, then adjust the design elements around it.
- Test the Stretch: Once you stretch the image, take a step back and review the results. If the image looks distorted, undo the action and try a more subtle stretch.
- Use Canva’s Grids or Frames: Canva also provides grids and frames that help you place and resize images without distorting them. These elements automatically crop and adjust images proportionally within the designated space.
By following these tips, you can stretch images in Canva without distorting their original shape, ensuring your designs maintain a professional, polished appearance.
Also Read This: Swiftly Download Vimeo Subtitles With Ease Using Our Expert Guide
Common Mistakes to Avoid While Stretching Images
Stretching images might seem like a simple task, but it’s easy to make mistakes that can affect the overall quality of your design. Here are some common mistakes to watch out for and how to avoid them:
- Over-Stretching the Image: Stretching an image too much can lead to pixelation, making it blurry and low-quality. Avoid stretching the image beyond its resolution limit. If the image becomes blurry, consider using a higher-quality version of the image or adjusting your design to accommodate the original size.
- Ignoring Aspect Ratio: Failing to maintain the correct aspect ratio while stretching can distort the image, making it look unnatural. Always hold the Shift key when resizing to keep the proportions intact unless you want to intentionally stretch the image in one direction.
- Not Checking Image Quality After Stretching: After stretching, always preview your image to ensure it still looks sharp. Canva’s resizing tools may not always preserve image quality when stretched too far, so checking the final result is crucial.
- Stretching Without Considering the Design: Sometimes, stretching an image can disrupt the balance of your overall design. Always consider how the stretched image fits within the layout of your entire design. It’s important to make sure that the image doesn’t overpower other elements or create awkward spaces.
- Forgetting to Adjust the Background: When you stretch an image to fill a space, the background may shift, affecting the overall composition. Be sure to adjust the background or use a new one if the stretch alters the balance of your design.
By avoiding these common mistakes, you can stretch images in Canva effectively, ensuring your designs look professional and polished every time.
Also Read This: Understanding the Costs of Running a YouTube Channel
Canva Features That Help in Image Stretching
Canva offers several powerful features to help you stretch images without sacrificing quality. These tools are designed to make the stretching process easier and ensure that your images still fit perfectly within your design. Here’s a look at some of the most useful Canva features for image stretching:
- Resize Tool (Pro Feature): The Resize Tool allows you to quickly adjust the size of your image to fit specific dimensions. It’s perfect for stretching your image to match the proportions of a frame or canvas without needing to crop anything out. You can either enter custom width and height values or use preset sizes for popular platforms like Instagram and Facebook.
- Guidelines and Grids: Canva’s grids and guidelines help you position and stretch your image proportionally. They ensure that images fit neatly within the available space while maintaining the integrity of the design. Using grids can prevent stretching that leads to distortion, making your design more visually appealing.
- Frames: Canva’s frames can be used to contain images while still allowing flexibility in resizing. When you drag an image into a frame, it automatically adjusts to the frame’s shape. This ensures the image fits neatly without becoming distorted, and you can stretch it in a controlled way.
- Lock Aspect Ratio: When resizing an image, holding the Shift key locks the aspect ratio, preventing the image from becoming too stretched or squished. This feature is useful if you want to stretch the image while maintaining its natural proportions.
- Transparent Background Option: If you're using a background or placing your image over other elements, Canva allows you to stretch the image without affecting the background. This is especially helpful for creating designs where the background remains intact while the image is stretched.
With these features, Canva makes it easier to stretch images without losing their quality or distorting the overall design. The right tools can help you create professional-looking graphics that fit perfectly within any layout.
Also Read This: Find Out What Content You Can Sell on Shutterstock
FAQ
Here are some common questions about stretching images in Canva, along with helpful answers:
- Can I stretch an image in Canva without losing quality? Yes, Canva allows you to resize and stretch images. However, it's important to avoid stretching an image too far, as doing so can cause pixelation and blurriness. Always try to use high-quality images for best results.
- How do I prevent an image from distorting when I stretch it? To maintain the proportions of your image while stretching, hold down the Shift key while resizing. This locks the aspect ratio, ensuring that the image doesn’t become stretched in one direction.
- Can I stretch an image to fit a specific frame? Yes, you can stretch an image to fit a custom-sized frame in Canva. Simply drag the image into the frame, and it will adjust to fill the space without distortion.
- What is the best way to resize an image without cropping it? The best way to resize an image without cropping is to use Canva’s Resize Tool or drag the corner handles to stretch the image proportionally. You can also use grids to guide you and ensure the image fits perfectly.
- Can I stretch an image for free in Canva? While Canva offers a free version with basic features, the Resize Tool is available only for Pro users. If you're using the free version, you can still stretch images manually using the drag handles but without the automated resizing options.
Conclusion
Stretching an image in Canva can be a useful technique when you need to fit an image into a specific design space. With tools like the Resize Tool, grids, and frames, Canva makes it easy to stretch your images while preserving their quality and proportions. By following the right steps and avoiding common mistakes, you can stretch your images without compromising their clarity or aesthetic appeal.
Remember, stretching is not always the best solution for every image, so it’s important to consider the overall design. If done correctly, stretching images in Canva can enhance your projects and make them look polished and professional.
Whether you’re designing for social media, creating presentations, or working on other creative projects, Canva’s features give you the flexibility to stretch images in the way that best fits your vision. Happy designing!

 admin
admin


