If you've ever wanted to share your creativity, moments, or passions with the world, YouTube provides an excellent platform. Uploading videos to YouTube using your iPhone is a breeze, thanks to the user-friendly interface of the mobile app. In this guide, we'll walk you through the steps needed to upload your videos smoothly. Whether it's a travel vlog, a cooking tutorial, or just a fun moment caught on camera, you'll have your content live on
Prerequisites for Uploading Videos

Before diving into the upload process, it’s essential to ensure that you’re well-prepared. Here’s a handy checklist of prerequisites to make your upload experience seamless:
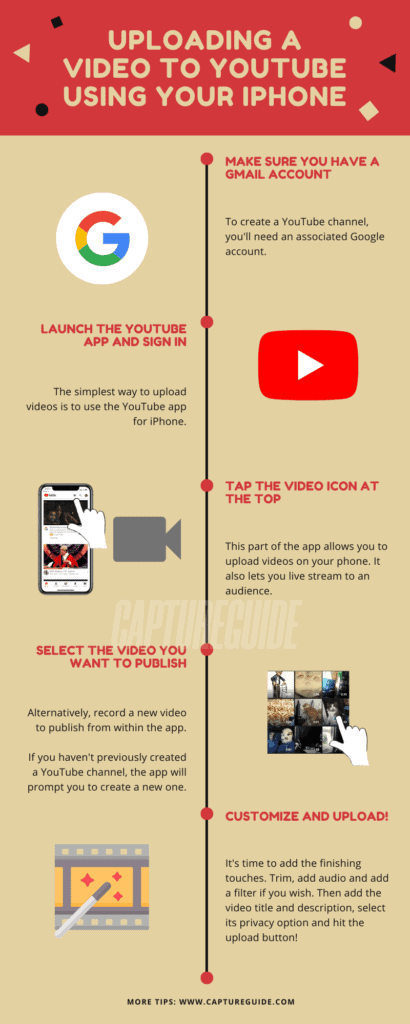
- iPhone with YouTube App: Make sure you have a compatible iPhone model with the YouTube app installed. You can download it from the App Store if you haven't done so already.
- Google Account: You'll need a Google account to upload videos on YouTube. If you don’t have one, you can create it easily on the Google website.
- Video Content: Have the video you want to upload ready. Make sure it's saved in your Photos or Files app. Be aware of the video format; typically, MP4 is a safe choice.
- Stable Internet Connection: A stable Wi-Fi or mobile data connection ensures that your upload doesn’t get interrupted. Remember that larger files will require more time!
- Video Length and Size Limit: Keep in mind that YouTube has upload limits: videos can be up to 15 minutes long for new accounts. If you’ve verified your account, you can upload videos longer than this.
- Video Quality: Consider the quality of your video. The better the quality, the more engaging it’ll be for viewers. You can edit your video using various apps to enhance its appeal!
Once you've ticked off these prerequisites, you’re ready to dive into the exciting world of uploading your videos to YouTube directly from your iPhone!
Also Read This: Pre-Wedding Photoshoot: A Complete Guide for Beginner Photographers
3. Step-by-Step Guide to Upload Videos

Uploading videos to YouTube using your iPhone is a breeze! Just follow these simple steps to get your content live and ready for viewers:
- Open the YouTube App: Start by launching the YouTube app on your iPhone. If you haven’t installed it yet, head over to the App Store, and download it.
- Sign In: Tap on the profile icon at the top right corner and sign in with your Google account. If you don’t have an account, you’ll need to create one to upload videos.
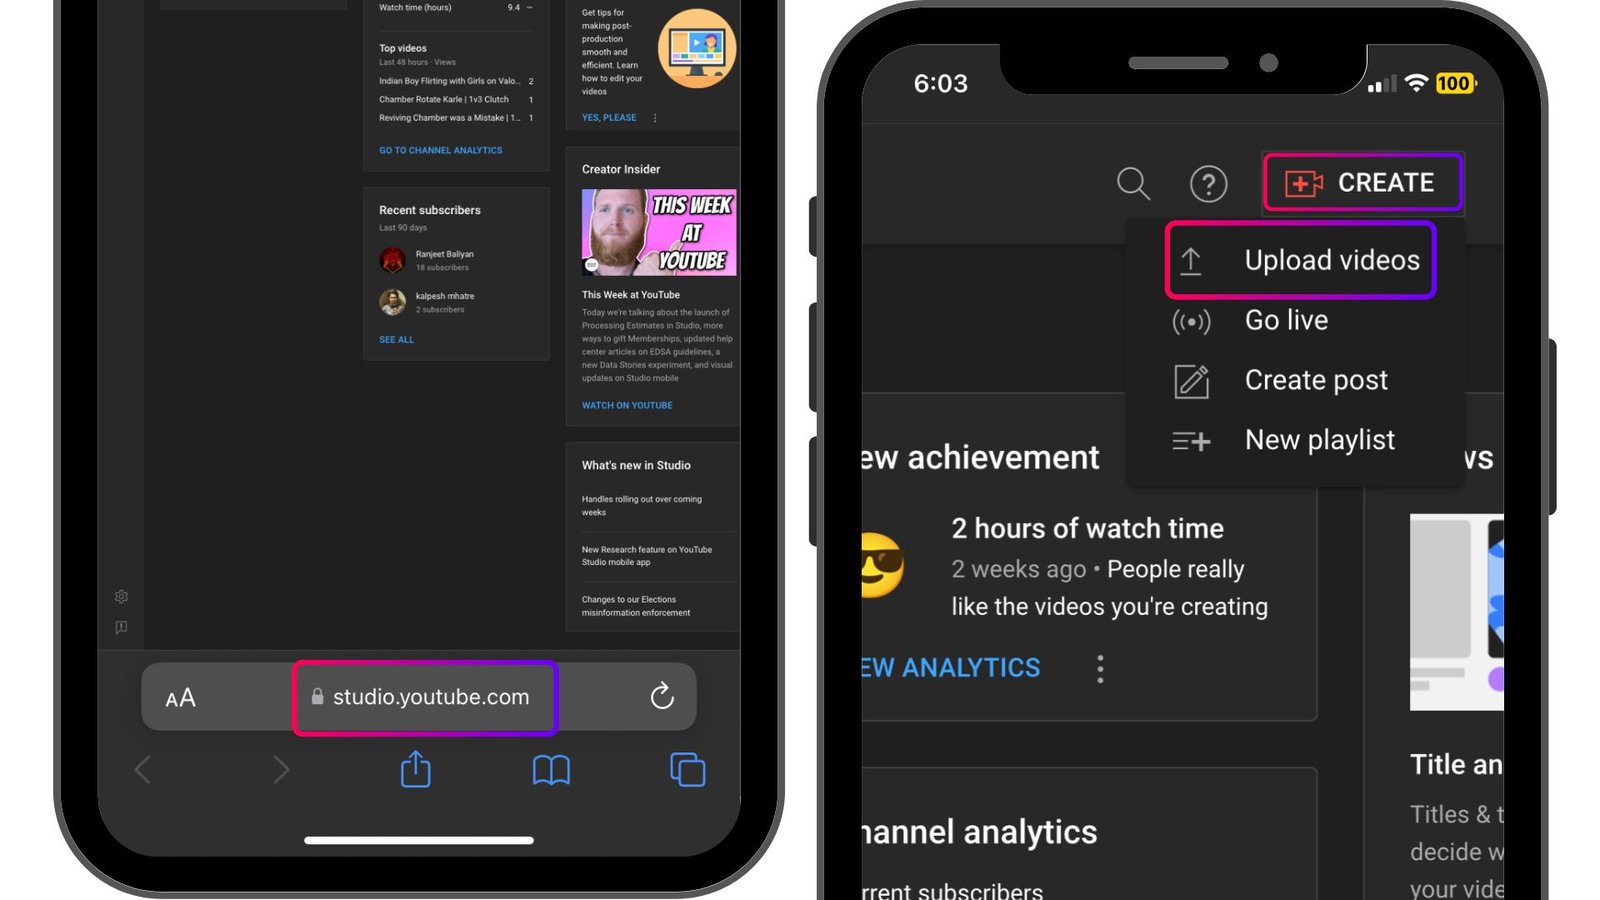
- Tap the Plus Icon: Look for the plus (+) icon, typically located in the bottom center of the screen. This is your gateway to uploading!
- Select “Upload a Video”: After tapping the plus icon, choose “Upload a video.” This will lead you to your camera roll.
- Choose Your Video: Browse through your videos, and select the one you want to upload. Tap on it to begin the upload process.
- Details & Settings: Now it’s time to fill in the necessary details like title, description, and tags. Make this section engaging; a catchy title can draw viewers in!
- Select Thumbnail: You can either choose a still from your video or upload a custom thumbnail. Thumbnails are critical for attracting viewers!
- Set Privacy Settings: Decide whether you want your video to be public, unlisted (only people with the link can view it), or private.
- Upload: Finally, hit the “Upload” button, and your video will begin processing. Congratulations, you’re now a YouTuber!
Also Read This: How to Share a YouTube Video on Your Instagram Story
4. Editing Your Video Before Upload

Before you hit that upload button, it’s crucial to ensure that your video is polished and perfect. Editing can significantly enhance the quality and viewer engagement. Here are some effective ways to edit your video on your iPhone:
- Use iMovie: iMovie is a fantastic free app available on iOS. It provides tools to trim clips, add transitions, insert music, and even add text overlays.
- Adjust Video Quality: Make sure your video is in the best quality possible. Check for clarity and lighting, and consider enhancing colors to make it more vibrant.
- Cut Unnecessary Parts: Attention spans are short! Snip out any boring or irrelevant sections to keep your audience engaged.
- Add Music: Consider enhancing the atmosphere by adding a fitting soundtrack. iMovie allows you to add royalty-free music tracks.
- Include Captions: Captions make your video accessible to a wider audience, including the hearing impaired. They can also help with SEO!
- Check for Compatibility: Ensure your final edit is in a YouTube-friendly format (.MP4 is highly recommended) to avoid any upload issues.
Taking the time to edit your video can make a world of difference in how it’s received by your viewers. Happy editing!
Also Read This: Effective Strategies to Monetize Your Dailymotion Videos and Generate Income
Choosing the Right Settings for Your Video
Alright, so you've got your video ready, and now it’s time to choose the right settings before you hit that upload button on YouTube. This step can make a big difference in how your video is received by viewers. Let’s dive into some of the key settings you need to consider:
- Resolution: Make sure to select a higher resolution like 1080p or even 4K if your video is shot in that quality. Higher resolutions look better and attract more viewers.
- Aspect Ratio: YouTube supports multiple aspect ratios, but 16:9 is the standard for most videos. You want your video to fill the screen nicely and look professional.
- Title: Use a catchy and descriptive title. It should tell viewers what they can expect while also incorporating keywords for better visibility in search results.
- Description: Your video description is crucial. Provide enough detail about the content of the video, and don't forget to include relevant tags and links!
- Thumbnail: A custom thumbnail can drastically increase click-through rates. Choose a vibrant image that reflects your content and compels viewers to click.
- Privacy Settings: Decide if you want your video to be public, private, or unlisted. Public makes it available to everyone, while private means only you can see it.
Taking the time to dial in these settings might seem tedious, but it can really help your video stand out and get noticed. Plus, it sets the stage for success right from the get-go!
Also Read This: How to Find the Resolution of an Image on Mac Devices
Sharing Your Video After Upload
You've uploaded your video! Yay! But wait, it's not time to kick back just yet. You want to make sure everyone gets to see your masterpiece. Sharing your video effectively is essential, so let’s break down how to do it:
- Social Media: Share your video across various platforms like Facebook, Twitter, and Instagram. Create a short teaser or a snippet to intrigue your followers—there's no harm in generating some buzz!
- Email Newsletters: If you have a mailing list, send out an email to your subscribers. Include a compelling subject line and a brief description to encourage them to watch.
- Online Communities: Join relevant forums or groups where your target audience hangs out. Engage with them genuinely and share your video when it makes sense!
- Your YouTube Channel: Don’t forget to cross-promote! Create playlists that include your newly uploaded video, or mention the new video in your previous uploads.
- Collaborations: If you have friends or colleagues with YouTube channels, consider collaborating. Tag them in your video and ask them to share it on their platform too!
Remember, sharing isn't just about promoting your content; it’s about connecting with your audience. The more you engage, the more likely your video will gain traction. So get out there and start sharing!
Also Read This: What is the Ideal Size for a YouTube Thumbnail
7. Common Issues and Troubleshooting
When uploading a video to YouTube via your iPhone, you might encounter a few bumps along the way. The good news is that most issues are pretty straightforward to fix! Here are some common problems and how to handle them:
- Slow Internet Connection: If your upload is taking forever, check your Wi-Fi or mobile data. A weak connection can really slow things down. Consider moving closer to your router or switching to a different network.
- File Format Issues: Make sure your video file is in a supported format like MP4, MOV, or AVI. If not, you might need to convert it using an app before uploading.
- Error Messages: If you see an error message during the upload, take a screenshot of it. This can help you search for specific fixes online. Restarting the YouTube app often works wonders for resolving minor glitches.
- Storage Space Limitations: Your iPhone may not have enough storage space to handle a large video file. Check your storage and delete any unused apps or photos to free up space.
- App Updates: Always keep your YouTube app updated. Sometimes, an old version may not function properly with new features or changes in YouTube's backend.
If you've tried all these tips and are still facing problems, consider restarting your iPhone. Sometimes, a simple reset can clear up any lingering issues! Always ensure you're using the latest version of iOS for the best performance.
8. Conclusion
Uploading videos to YouTube from your iPhone can be a fun and rewarding experience! Whether you're sharing vlogs, tutorials, or just capturing moments, the process is relatively simple. Just follow the steps outlined in this guide, and you’ll be well on your way to sharing your content with the world.
Don’t forget to pay attention to:
- The quality of your video and audio.
- The title, description, and tags for better discoverability.
- Your thumbnails – they play a significant role in attracting viewers!
Finally, remember that practice makes perfect. As you upload more videos, you'll get the hang of it. Embrace the learning curve and don’t hesitate to experiment with different formats and styles.
So, what are you waiting for? Grab your iPhone, start recording, and let your voice be heard on YouTube!
 admin
admin


