GIMP, or GNU Image Manipulation Program, is a powerful and free tool for editing images. It offers a wide range of features that can help you enhance your photos, create artwork, or modify graphics. One common task you might need to do is rotate images. This can be useful for correcting the orientation of a photo or creating interesting compositions. In this guide, we’ll walk you through the process of rotating
Steps to Open an Image in GIMP

Opening an image in GIMP is straightforward. Here’s how you can do it:
- Launch GIMP on your computer.
- Click on File in the top left corner of the screen.
- Select Open from the dropdown menu.
- Navigate to the folder where your image is stored.
- Select the image file you want to edit and click Open.
Once your image is open, you can see it in the main GIMP workspace, ready for editing.
Also Read This: How to Create an Eye-Catching Carousel Post on LinkedIn
How to Rotate Images Using the Menu
Rotating images in GIMP using the menu options is quick and easy. Follow these steps:
- With your image open, go to the Image menu at the top.
- Hover over Transform to see the rotation options.
- You can choose from several options, such as:
- Rotate 90° clockwise
- Rotate 90° counter-clockwise
- Rotate 180°
After rotating, you may want to adjust the canvas size to fit your new image dimensions. This ensures your image displays correctly without any blank spaces.
Also Read This: Finding and Managing Your Scheduled Posts on LinkedIn
Using the Rotate Tool for Image Adjustment
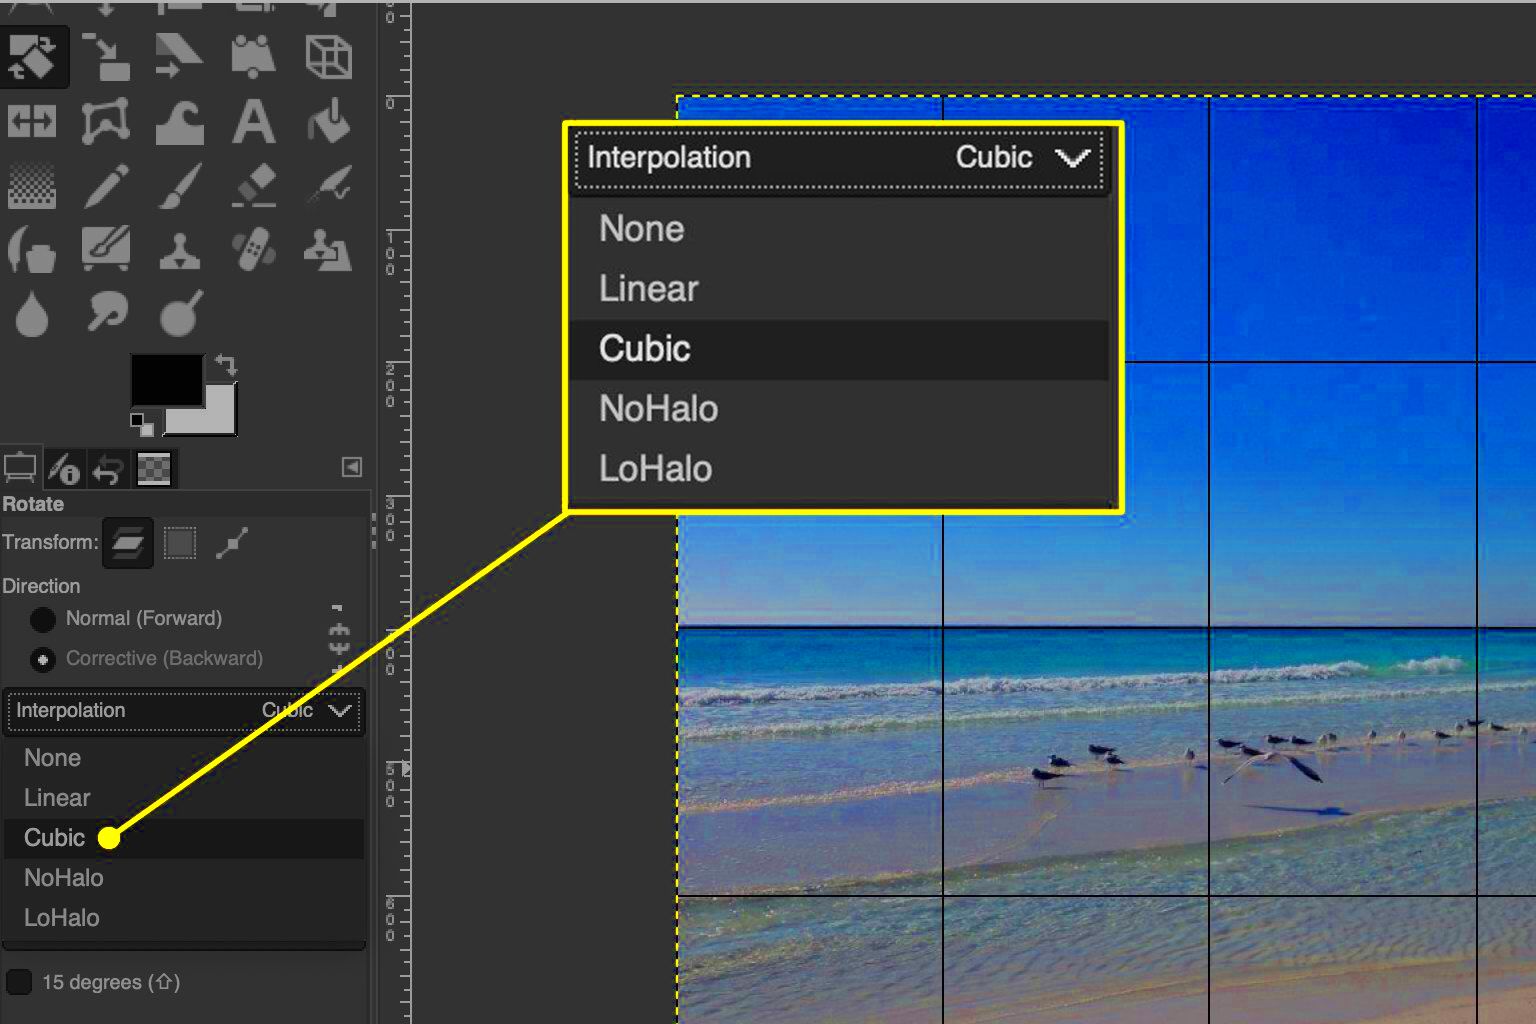
GIMP's Rotate Tool is perfect for more precise adjustments when rotating your images. This tool gives you the flexibility to rotate your image by any angle you choose, allowing for creative edits and fine-tuning. Here’s how to use it:
- First, make sure your image is open in GIMP.
- In the toolbox on the left, select the Rotate Tool, which looks like a circular arrow.
- Click on the image where you want to start rotating. A pop-up window will appear, giving you options for rotation.
In this window, you can:
- Adjust the angle: Enter the degree of rotation you want. Positive values rotate clockwise, while negative values rotate counter-clockwise.
- Choose the rotation center: You can set the point around which the image rotates, ensuring your focus stays where you want it.
- Preview the changes: Check the box for Preview to see how the rotation looks before applying it.
Once you’re happy with the rotation, click Rotate, and your image will be adjusted accordingly. This tool is especially useful for artistic edits or when you want to align elements within your composition.
Also Read This: How to Properly Credit Storyblocks When Using Their Content in Your Work
Saving Your Rotated Image
After you’ve rotated your image to perfection, it’s essential to save your work. GIMP allows you to save your image in various formats, which can be helpful depending on your needs. Here’s how to save your rotated image:
- Go to the File menu in the top left corner.
- Select Export As to choose a format. Common options include:
- JPEG: Great for photographs, balancing quality and file size.
- PNG: Ideal for images that need transparency.
- GIF: Good for simple graphics with fewer colors.
Your image is now saved in the format you chose. Remember to keep a copy in GIMP's native format (.XCF) if you want to make further edits later.
Also Read This: Making Changes to Your YouTube Video After Upload
Common Issues When Rotating Images
While rotating images in GIMP is generally straightforward, you might encounter a few common issues. Here are some problems to watch out for and tips to resolve them:
- Image Quality Loss: Rotating too many times can degrade image quality. Always save a copy before making significant changes.
- Unwanted Blank Areas: After rotating, the canvas size might not match your image. To fix this, go to Image > Crop to Content to remove blank spaces.
- Alignment Issues: If elements of your image become misaligned after rotation, use the Move Tool to reposition them.
- Not Able to Rotate: If the Rotate Tool seems unresponsive, check if the layer is locked. Unlock it by clicking the lock icon in the Layers panel.
By being aware of these potential issues, you can troubleshoot effectively and ensure your image rotation experience is smooth and enjoyable.
Also Read This: How to Upload a Project on Behance and Share Your Latest Work with the Community
Tips for Effective Image Rotation
When it comes to rotating images in GIMP, a few tips can help you get the best results. Whether you're making small adjustments or significant edits, these tricks will enhance your workflow:
- Use Guides: Before rotating, consider using guides to help align your image perfectly. You can create guides by dragging from the rulers on the sides of the workspace. This helps maintain balance and symmetry.
- Experiment with Different Angles: Don’t be afraid to try various rotation angles. Sometimes a slight tilt can make your image more dynamic and visually appealing.
- Preview Changes: Always use the preview function in the Rotate Tool. This lets you see how your image will look before finalizing any changes, preventing any surprises later on.
- Adjust Canvas Size: After rotation, check the canvas size. If your image doesn’t fit perfectly, go to Image > Crop to Content to eliminate any unnecessary space.
- Save Different Versions: Save your rotated images in various formats and keep a copy of the original file. This way, you can always revert to the original if needed.
Implementing these tips will ensure you make the most of your editing experience and achieve professional-looking results.
Also Read This: Recording YouTube Videos with Audacity Software
Frequently Asked Questions
As you dive into rotating images in GIMP, you might have some questions. Here are answers to a few common queries:
- Can I rotate multiple images at once? No, GIMP does not support batch rotation directly. You’ll need to rotate each image individually.
- What if I rotate my image too much? If you rotate your image too far, you can always undo your action by pressing Ctrl + Z to revert to the previous state.
- How can I rotate text in an image? To rotate text, first convert the text layer to a raster image by right-clicking it in the Layers panel, then use the Rotate Tool as you would with an image.
- Is there a way to reset the rotation? Yes, if you want to return to the original orientation, just undo the rotation or manually rotate it back to 0 degrees.
These answers should help clear up some confusion as you work with image rotation in GIMP.
Conclusion
Rotating images in GIMP is a simple yet effective way to enhance your graphics. Whether you're correcting an image's orientation or getting creative with angles, GIMP provides the tools you need. By following the steps outlined in this guide and keeping in mind the tips and common issues discussed, you'll be well-equipped to rotate images with confidence.
Remember to save your work frequently and experiment with different techniques to find what works best for you. With practice, you'll become adept at using GIMP for all your image editing needs. Enjoy your creative journey with GIMP, and let your imagination guide you!

 admin
admin


