Initially, it may seem like resizing images for sublimation is a tough assignment but with a clear step by step guide you can always do that easily. Here is the appropriate way to resize your images:
- Select Your Image: Choose the image you want to resize. Ensure it’s of high quality to start with.
- Open Your Software: Launch your preferred image editing software, such as Adobe Photoshop or GIMP.
- Check Image Dimensions: Look at the current size of your image. You can find this in the image properties or dimensions settings.
- Set New Dimensions: Decide on the new dimensions for your image. A common practice is to set the width and height according to the size of the item you are sublimating.
- Maintain Aspect Ratio: When resizing, make sure to keep the aspect ratio locked. This prevents the image from stretching or squishing.
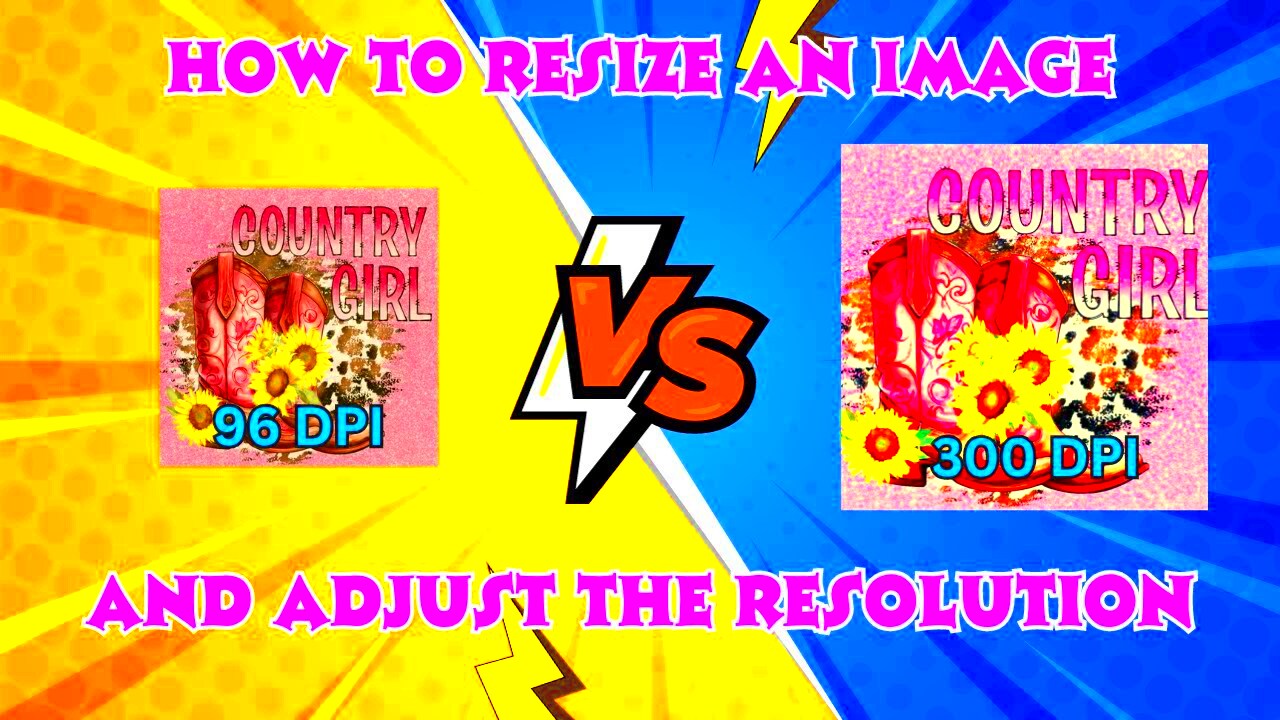
- Adjust Resolution: Set the resolution to at least 300 DPI (dots per inch) for high-quality prints. This will ensure that your image looks crisp and clear.
- Preview the Changes: Before finalizing, use the preview function to see how your image looks at the new size.
- Save the Image: Save your resized image in a suitable format (like PNG or JPEG) for sublimation.
It is very effective to follow these actions in order to resize sublimation images, making sure that your designs will have a beautiful appearance.
Common Mistakes to Avoid When Resizing
Sometimes, even the most skilled image designers fail to create an appropriate size for sublimation. There are a few mistakes they generally commit; thus, avoid them:
- Ignoring Resolution: Not checking the resolution can lead to poor-quality prints. Always ensure your image is at least 300 DPI.
- Stretching Images: Resizing without maintaining the aspect ratio can distort your design, making it look unprofessional.
- Choosing the Wrong Format: Saving images in formats that don’t support transparency (like JPEG) can affect the final print quality.
- Neglecting Backgrounds: If your image has a background that needs to be sublimated, make sure it is also resized and positioned correctly.
- Overlooking File Size: A very large file can slow down your software and may cause issues during printing. Optimize your file size without sacrificing quality.
Tips for Maintaining Image Quality
It is essential to maintain image quality when resizing sublimation images. Some useful tips for ensuring that your designs remain clear and full of life include:
- Start with High-Quality Images: Always begin with the highest resolution images you can find. This sets a solid foundation for resizing.
- Use Vector Graphics: Whenever possible, use vector images instead of raster images. Vectors can be resized without losing quality.
- Avoid Excessive Resizing: Frequent resizing can degrade image quality. Try to keep resizing to a minimum and aim for your desired dimensions from the start.
- Sharpen After Resizing: Apply sharpening filters after resizing to enhance the details in your image.
- Check Color Profiles: Ensure that your color settings are consistent across all devices and software to avoid unexpected color changes.
Following these pointers will enable you to achieve superior quality of your sublimation images which in turn leads to magnificent end products.
How to Test Your Resized Images
Prior to printing out your images, they need to be tested after resizing. This is essential since it ensures that everything appears alright and also avoids making expensive errors. The procedure of conducting tests on the resized images is easy and comprises of the following steps:
- Print a Test Sample: Always start by printing a small test sample of your resized image. This allows you to check the overall quality without wasting materials.
- Check Colors: Compare the printed colors to what you see on your screen. Color discrepancies can occur due to different color profiles.
- Inspect Details: Look closely at the details in your design. Ensure there are no blurriness or pixelation, especially in text and intricate patterns.
- Evaluate Fit: If your image is meant to fit on a specific product, place the printed test sample on the product to see how well it fits.
- Seek Feedback: If possible, ask someone else to review the test print. A fresh pair of eyes can catch issues you might overlook.
Can spare from using money and materials eventually by checking your resized images since they would help you in that way. It guarantees that what you expect to achieve is in the product that you ultimately get from that process, thus assuring good quality outcomes.
FAQs about Resizing Sublimation Images
Concerning adjusting the size of sublimation images, some inquiries often pester an individual. The following are commonly asked inquiries which can aid towards clearing doubts:
- What is the ideal resolution for sublimation images? It’s best to use images that are at least 300 DPI to ensure high quality.
- Can I resize images in any software? Yes, but using professional editing software can provide better control over the resizing process.
- What happens if I resize an image too much? Over-resizing can lead to pixelation, making the image appear blurry and unprofessional.
- Should I use raster or vector images for sublimation? Vector images are ideal for resizing because they can be scaled without losing quality.
- How do I know if my image is high enough quality? Check the resolution and dimensions. If your image is pixelated or blurry at 100%, it’s not high enough quality for sublimation.
Here are a few frequently asked questions regarding resizing sublimation images. Having knowledge of these aspects will assist in making proper decisions as you prepare your designs.
Conclusion on Properly Resizing Sublimation Images
correctly scouting images for sublimation is very important in any printing procedure, By using proper methods, It helps ensure your designs are cool and indeed mounted on the products you have selected. Always use good quality images, mind the size and resolution, always pre-test your prints before making them final.Furthermore, your sublimation experience can greatly be improved by knowing some common mistakes and taking care of image quality. In terms of results, it makes a significant difference to take time to resize images some times when you are doing it whether you are doing it professionally or as a hobby.The onus is on you, then, to make sure that your pictures are full of life, sharp and stay true to your vision. Therefore, apply these concepts in practice and you will be able to produce beautiful sublimation articles!

 admin
admin