Recording audio from YouTube can be a handy skill, whether you're looking to save a podcast, a music track, or a mesmerizing lecture for later listening. If you’re a Mac user, you’re in luck! There are several straightforward methods to capture that sweet audio straight from your favorite videos. In this guide, we’ll walk you through the options available, and best of all, you’ll be set in no time. Let’s dive in!
Understanding the Legal Implications
Before you jump into recording audio from YouTube videos, it’s essential to understand the legal backdrop. Copyright law is a significant concern and can affect how and when you use content from platforms like YouTube. Here are some key points to consider:
- Copyright Ownership: Most content on YouTube is protected under copyright law. This means that the creators hold the rights to their work, including the audio. Recording and using their content without permission can lead to legal issues.
- Personal Use vs. Distribution: Many people might think, "What’s the harm if I’m just using it for personal listening?" Well, it’s often a gray area. While personal use may not result in immediate consequences, sharing or distributing that audio without permission is typically a no-go.
- Fair Use Doctrine: Under certain circumstances, using portions of copyrighted material may be permissible under the Fair Use provision. This generally applies to commentary, criticism, news reporting, or educational purposes. However, it’s complex, and relying on this can be risky.
To stay on the safe side, it’s advisable to look for content with a Creative Commons license or similar permissions that explicitly allow for reuse. Always respect the copyright from the creators, as they invest time and effort into their content. So, before hitting that record button, think about the implications to keep yourself free from trouble!
Also Read This: Becoming an Adobe Stock Contributor: A Guide to Selling Your Images
3. Tools You Will Need

To get started with recording audio from YouTube on your Mac, you'll need a few essential tools. These tools will ensure that your recording is clear and efficient. Here’s a handy list of everything you might need:
- Screen Recording Software: This is the key tool for capturing audio. There are several options available, including:
- QuickTime Player (Free and built-in)
- Audacity (Free and open-source)
- OBS Studio (Free and versatile)
- Audio Interface (Optional): If you want to enhance the quality of your recording, consider investing in an audio interface. It can help in capturing audio from multiple sources.
- Headphones: Using headphones while recording can help you monitor the audio quality in real time. Just ensure that they're not leaking sound back into your recording.
- Good Internet Connection: When you're streaming from YouTube, a stable and high-speed internet connection is crucial to avoid buffering issues.
Also, make sure that your Mac's operating system is up-to-date. This can prevent any compatibility issues with the software you're using.
Also Read This: Top-Selling Photos on iStock and How to Contribute
4. Step-by-Step Guide to Recording Audio
Now that you've gathered your tools, it’s time to dive into the step-by-step process of recording audio from YouTube on your Mac. Don't worry; it's easier than you might think!
- Open Your YouTube Video: Start by launching your web browser and navigating to the YouTube video from which you want to record audio.
- Choose Your Recording Software: Depending on your preference, select the screen recording software you installed (for instance, QuickTime Player).
- Set Up Your Software:
- For QuickTime Player: Open it, go to "File," and select "New Audio Recording." Adjust the settings to ensure you're capturing system audio if available.
- For Audacity: Open Audacity, and set the audio host to "Core Audio." Select your microphone, then set to record.
- Start Recording: Hit the "Record" button after you’ve set everything up. Then, quickly switch to your YouTube video and hit "Play" to capture the audio.
- Stop Recording: Once you’ve captured the desired audio section, return to your recording software and hit "Stop." Make sure to save your file appropriately.
And voilà! You’ve successfully recorded audio from YouTube. Just a few simple steps and you're all set to enjoy your audio recordings anytime, anywhere!
Also Read This: How to Adjust the Publish Date in Behance Managing Your Project Timeline
5. Editing and Saving Your Recorded Audio
Once you’ve successfully recorded your audio from YouTube, the next step is to edit and save it. This is where you can enhance the quality of your recording, remove unwanted parts, or add effects. Let’s dive into some of the best practices for editing your audio.
First things first, you’ll want to import your recorded audio into an audio editing software. Some popular options for Mac users include:
- GarageBand: A user-friendly tool perfect for beginners.
- Audacity: Free and open-source software that is great for more advanced editing.
- Logic Pro X: A professional-grade software if you’re looking for sophisticated features.
Once you’ve selected your software, follow these steps to edit your audio:
- Import your audio file: Open the software and drag your recorded audio file into the workspace.
- Trim unnecessary sections: Use the cutting tool to remove any awkward pauses or mistakes.
- Add effects: Enhance your audio by adjusting the volume, adding background music, or using filters.
- Listen back: Always play through your audio to ensure it sounds just right!
Finally, save your masterpiece! Choose a format suitable for your needs, such as MP3 or WAV. To save, go to File > Export and select your preferred format. Remember to choose a location on your Mac that’s easy to remember.
Also Read This: Mastering Gameplay Video Recording on YouTube TV
6. Troubleshooting Common Issues
Recording audio from YouTube isn’t always a walk in the park. Occasionally, you might run into a few hiccups along the way. But don’t worry! Here are some common issues and easy solutions to keep you on track.
Here’s a quick list of possible problems:
- No sound during recording: This could be due to incorrect audio settings. Make sure your input source is set to the correct recording device.
- Audio quality is poor: If your audio sounds muffled or distorted, try adjusting the gain levels in your recording software.
- Recording stops unexpectedly: Ensure you have enough disk space on your Mac as limited storage could halt the recording process.
- Recording not saving properly: Remember to check for the correct export settings or file type; if in doubt, export as MP3 for universal compatibility.
If you encounter any errors, consider restarting your audio application or your Mac. Often, a simple reboot can fix a plethora of issues. Lastly, don’t hesitate to check online forums or the help section of your software for additional support. Happy recording!
How to Record Audio from YouTube on a Mac
If you're looking to capture audio from YouTube videos on your Mac, you've come to the right place. Recording audio can be useful for various reasons, whether it's for creating a personal music library, extracting sound effects, or taking notes from educational videos. Here, we’ll explore some effective methods to record audio from YouTube on a Mac.
Methods to Record Audio from YouTube
There are several methods you can use to record audio effectively:
- Using QuickTime Player
- Open QuickTime Player from your Applications folder.
- Go to File > New Audio Recording.
- Select the internal microphone or an external microphone for higher quality.
- Play the YouTube video and click the red record button.
- Stop recording when finished and save the file.
- Using Audacity
- Download and install Audacity, a free audio recording software.
- Choose the audio source (e.g. "Soundflower" or "Aggregate Device").
- Click the red record button and play the YouTube video.
- Save the audio file after stopping the recording.
- Using Online Services
- Visit sites like Online Audio Converter or YTMP3.
- Insert the YouTube video link and select the desired audio format.
- Download the converted audio file directly to your Mac.
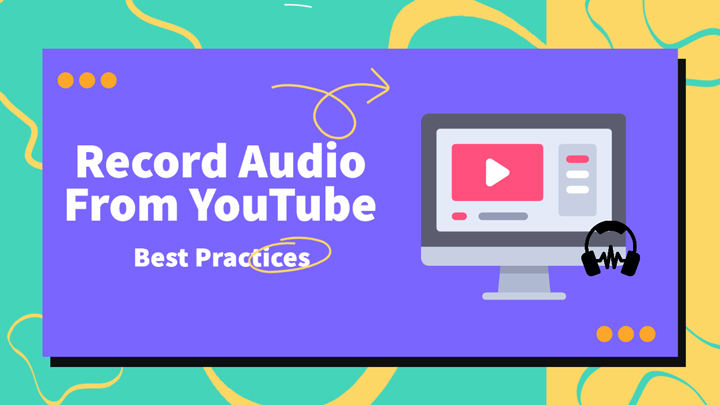
Best Practices
Always ensure that you have permission to record audio from YouTube and respect copyright laws. Use high-quality microphones and recording settings for the best sound quality. Additionally, editing tools within Audacity or GarageBand can be useful for enhancing your recorded audio.
Conclusion
Recording audio from YouTube on a Mac can be easily accomplished through various methods such as QuickTime Player, Audacity, or online services. By following the steps outlined and adhering to best practices, you can achieve high-quality audio recordings for personal use while respecting copyright regulations.
 admin
admin


