Blackboard discussion boards serve as a vital tool for online learning and collaboration. They allow students and instructors to engage in meaningful conversations, share insights, and build a sense of community. In these virtual spaces, participants can post messages, respond to others, and facilitate discussions that enhance learning.
When you join a discussion board, you’ll notice various threads where people share their thoughts on specific topics. Each thread can be initiated by anyone, fostering a collaborative environment. Additionally, Blackboard provides features such as notifications, allowing you to keep track of new posts and replies. This interactivity can help you deepen your understanding of the subject matter.
Importance of Images in Discussions

Images can significantly enhance discussions in Blackboard. Here are a few reasons why:
- Visual Engagement: Images capture attention and make posts more visually appealing.
- Clarification: Sometimes, a picture is worth a thousand words. Images can clarify complex concepts or ideas.
- Emotional Connection: Relevant images can evoke emotions and foster deeper connections among participants.
- Enhancing Communication: Images can serve as additional context, making it easier to convey ideas.
Using images in your posts can lead to more interactive and lively discussions, encouraging others to participate actively.
Also Read This: Using iStock Photos Legally on Facebook
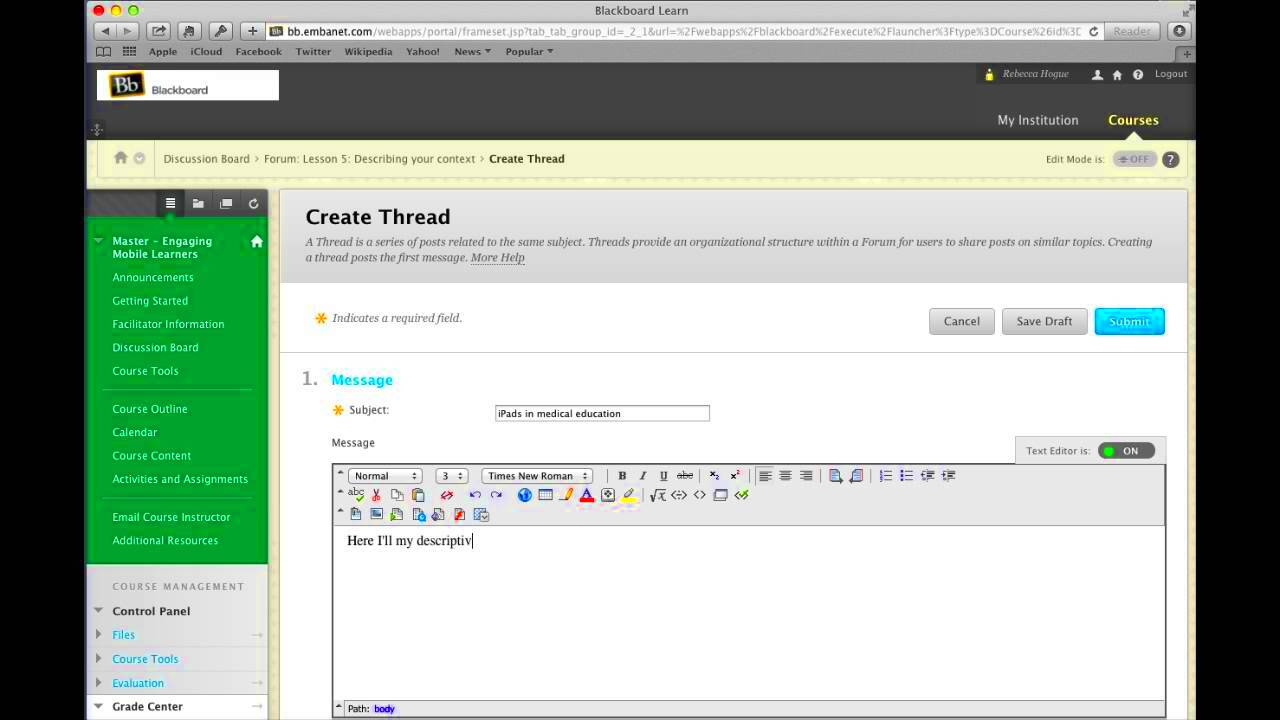
Steps to Insert an Image in Blackboard
Inserting an image into your Blackboard discussion post is straightforward. Here’s a simple step-by-step guide to help you out:
- Log into Blackboard: Start by logging into your Blackboard account and navigating to the course where the discussion board is located.
- Open the Discussion Board: Click on the discussion board link to access the relevant thread.
- Create a New Post: Select the option to create a new post or reply to an existing one.
- Locate the Image Tool: In the text editor, look for the image icon, which typically resembles a small picture or landscape.
- Upload or Insert an Image: Click the image icon and choose to upload an image from your device or insert an image URL from the web.
- Add Alt Text: It's good practice to include alternative text (alt text) that describes the image for accessibility reasons.
- Preview and Post: Preview your post to ensure everything looks good, then hit submit to share it with your classmates.
Following these steps will help you enrich your posts and contribute to a more engaging discussion.
Also Read This: Sharing YouTube Content on Instagram Easily
Using the Blackboard Image Tool
The Blackboard Image Tool is a handy feature that allows you to easily insert images into your discussion posts, assignments, or other content areas. This tool makes the process of adding visuals straightforward, helping you to enhance your communication and make your posts more engaging.
Here’s how to effectively use the Blackboard Image Tool:
- Locate the Tool: When you’re in the text editor, look for the image icon. It usually looks like a small mountain or landscape.
- Click the Icon: Once you find it, click on the image icon to open the image upload options.
- Select Image Options: You can either upload an image from your device or add an image link from the web. Choose the option that works best for you.
- Insert the Image: If uploading, browse your files to select an image. If using a link, paste the URL of the image you want to include.
- Adjust Settings: After inserting the image, you can often adjust settings like alignment and size. Make sure it fits well within your post.
Using the Blackboard Image Tool is a great way to improve your posts and make your contributions stand out in discussions!
Also Read This: Digitizing an Image: Easy Techniques
Uploading Images from Your Device
Uploading images from your device to Blackboard is quick and easy. This feature lets you share personal visuals, graphs, or screenshots directly from your computer. Here’s how to do it:
- Open Your Discussion: Navigate to the discussion board where you want to post.
- Create a New Post or Reply: Click on the option to create a new post or reply to an existing one.
- Use the Image Tool: Click on the image icon in the text editor.
- Select Upload Option: Choose the option to upload an image from your device.
- Find Your Image: A file dialog will open. Browse your files and select the image you want to upload.
- Add Alt Text: Provide a brief description of the image in the alt text field for accessibility.
- Insert and Preview: Insert the image and preview your post to ensure it looks right before submitting.
By following these steps, you can easily upload images that enhance your posts and make them more visually appealing.
Also Read This: Cropping Images in Procreate
Adding Images from the Web
Adding images from the web to your Blackboard posts is a great way to include relevant visuals without having to download anything. This method allows you to link to existing online content, making it efficient and effective. Here’s how you can do it:
- Find an Image Online: Use a search engine to find an image that fits your discussion topic. Make sure the image is appropriate and that you have permission to use it.
- Copy the Image URL: Right-click on the image and select “Copy image address” or “Copy link address” to get the URL.
- Go to Blackboard: Open your discussion board and create a new post or reply.
- Click the Image Icon: In the text editor, click on the image icon to open the image options.
- Insert Image URL: Paste the copied image URL into the designated field.
- Add Alt Text: Provide a description of the image in the alt text field for accessibility.
- Preview and Submit: Preview your post to see how the image looks, then hit submit.
This method not only saves time but also allows you to incorporate a wide variety of visuals to enrich your discussions.
Also Read This: A Look at Small Tech Companies Making a Huge Impact in the USA
Tips for Effective Image Use
Using images in your Blackboard posts can enhance your communication, but it's essential to use them effectively. Here are some practical tips to help you make the most of your images:
- Choose Relevant Images: Ensure that your images are related to the topic of your discussion. A relevant image can strengthen your argument and provide clarity.
- Keep It Simple: Avoid overly complex images. Simple visuals are often easier to understand and more effective in conveying your message.
- Use High-Quality Images: Always opt for high-resolution images. Blurry or pixelated images can distract from your content and may leave a negative impression.
- Optimize Image Size: Make sure your images are not too large to avoid slow loading times. Consider resizing images to fit the discussion format.
- Consider Accessibility: Always add alt text to your images. This helps visually impaired users understand your content and is a good practice for inclusivity.
- Avoid Overuse: While images are helpful, using too many can overwhelm your audience. Select a few impactful images to enhance your post.
By following these tips, you can create engaging and effective posts that encourage interaction and discussion among your classmates.
Also Read This: Learn to Make a Traditional Patang Kite with Dailymotion Tutorials
Frequently Asked Questions
As you navigate using images in Blackboard, you might have some questions. Here are some common queries and their answers:
- Can I use any image I find online?
- Not all images online are free to use. Make sure to use images that are labeled for reuse or that you have permission to use.
- How do I resize an image in Blackboard?
- You can often adjust the size of an image after inserting it by clicking on the image and dragging the corners. Always preview your post to see how it looks.
- What format should my images be in?
- Common image formats like JPEG, PNG, and GIF are generally supported. Check Blackboard's guidelines if you're unsure.
- Why is alt text important?
- Alt text is essential for accessibility. It allows visually impaired users to understand the content of the image through screen readers.
- Can I edit my post after submitting?
- Yes, you can usually edit your post after submission if you need to make changes or corrections.
Conclusion
Incorporating images into your Blackboard discussions can significantly enhance the learning experience for you and your classmates. By using the Blackboard Image Tool, uploading images from your device, or linking to images online, you can make your posts more engaging and informative. Remember to use images thoughtfully and follow best practices to ensure clarity and accessibility.
With the right approach, images can become a powerful element of your discussions, fostering a richer and more interactive online learning environment. So go ahead, start using images in your Blackboard posts, and watch the conversations come to life!
 admin
admin


