Editing photo captions on Behance is a crucial skill for any creative looking to showcase their work effectively. Whether you want to add context to your images, correct a typo, or simply enhance the narrative surrounding your projects, understanding how to navigate the platform is key. In this guide, we'll walk you through the process step-by-step to ensure your captions truly reflect your artistic vision.
Step 1: Access Your Behance Profile
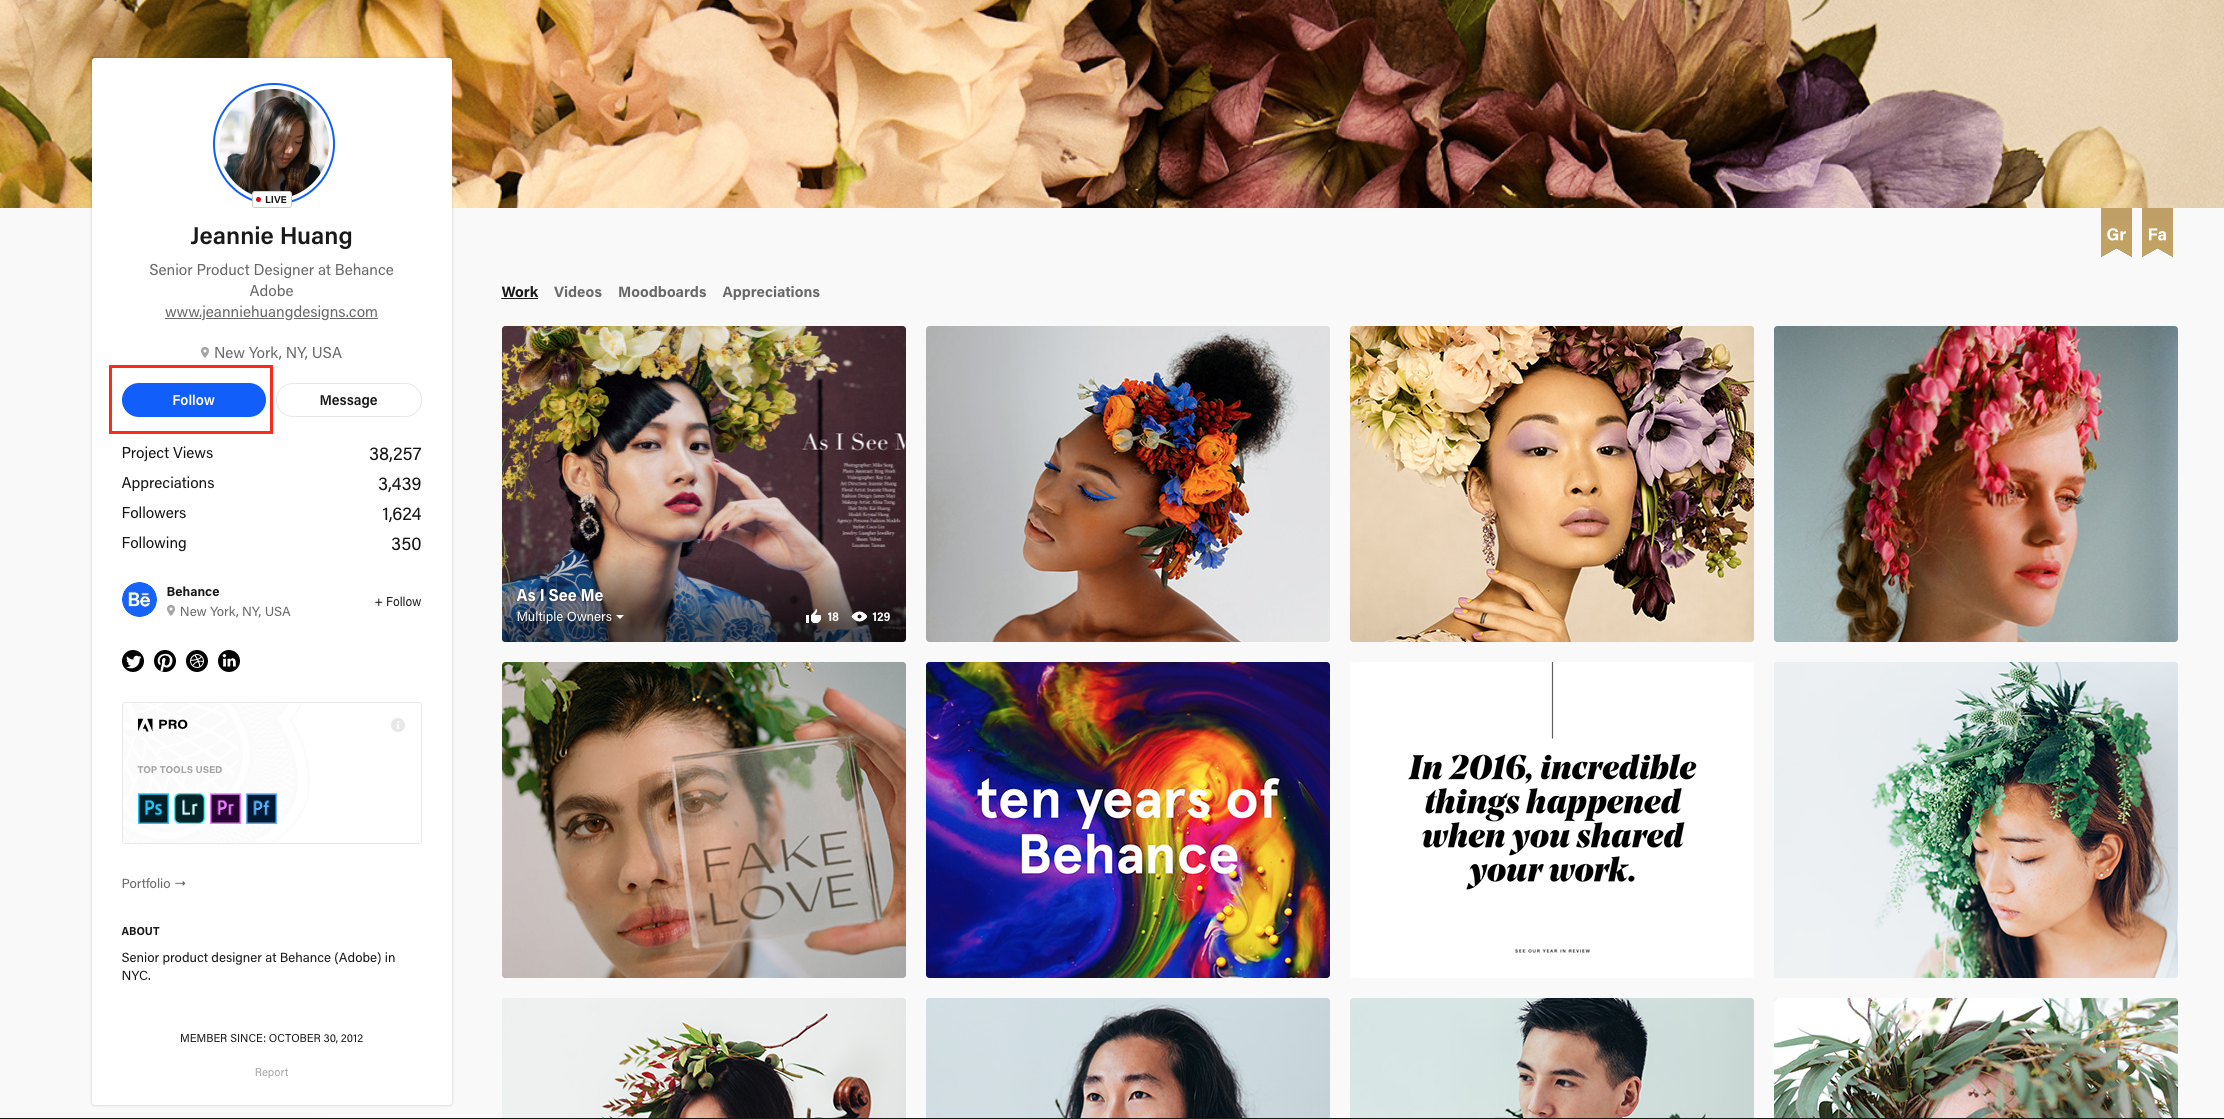
The first step in editing your photo captions on Behance is to access your profile. Follow these simple steps to get started:
- Log In to Your Behance Account: Begin by visiting the Behance website and logging in with your credentials. If you don’t have an account yet, you’ll need to create one.
- Navigate to Your Profile: Once logged in, locate your profile picture at the top right corner of the page. Click on it to reveal a dropdown menu, and select “Profile.” This will take you to your main profile page.
- Access Your Projects: On your profile page, you’ll see a list of your projects displayed in a grid format. Click on the project that contains the photo caption you wish to edit.
- Edit Project: Within the project view, look for the “Edit” button, usually found near the project title or on the project toolbar. Clicking this will open the project editor interface.
Congratulations! You’ve now accessed the area where you can edit your captions. The next steps will guide you through making those changes seamlessly.
Also Read This: How to Build a Portfolio on Behance for Success
Step 2: Navigate to Your Project
Now that you’re logged into your Behance account, it’s time to find the project you want to edit. This step is all about navigation, and it’s easier than you might think! Here’s how you can do it:
- Visit Your Profile: Click on your profile icon in the top right corner of the screen. This will take you to your Behance profile.
- Access Your Projects: Once you’re on your profile, scroll down to see all of your projects. They’re displayed in a neat grid format, making it easy to find what you’re looking for.
- Use the Search Bar: If you have many projects and can’t find the one you’re after, utilize the search bar. Just type in the project name or keywords related to it.
As you browse through your creations, remember that each project is a representation of your artistic journey. So, take a moment to appreciate your past work before diving into the edits!
Also Read This: Upgrade Your Behance Account to Showcase Your Best Work Like a Pro
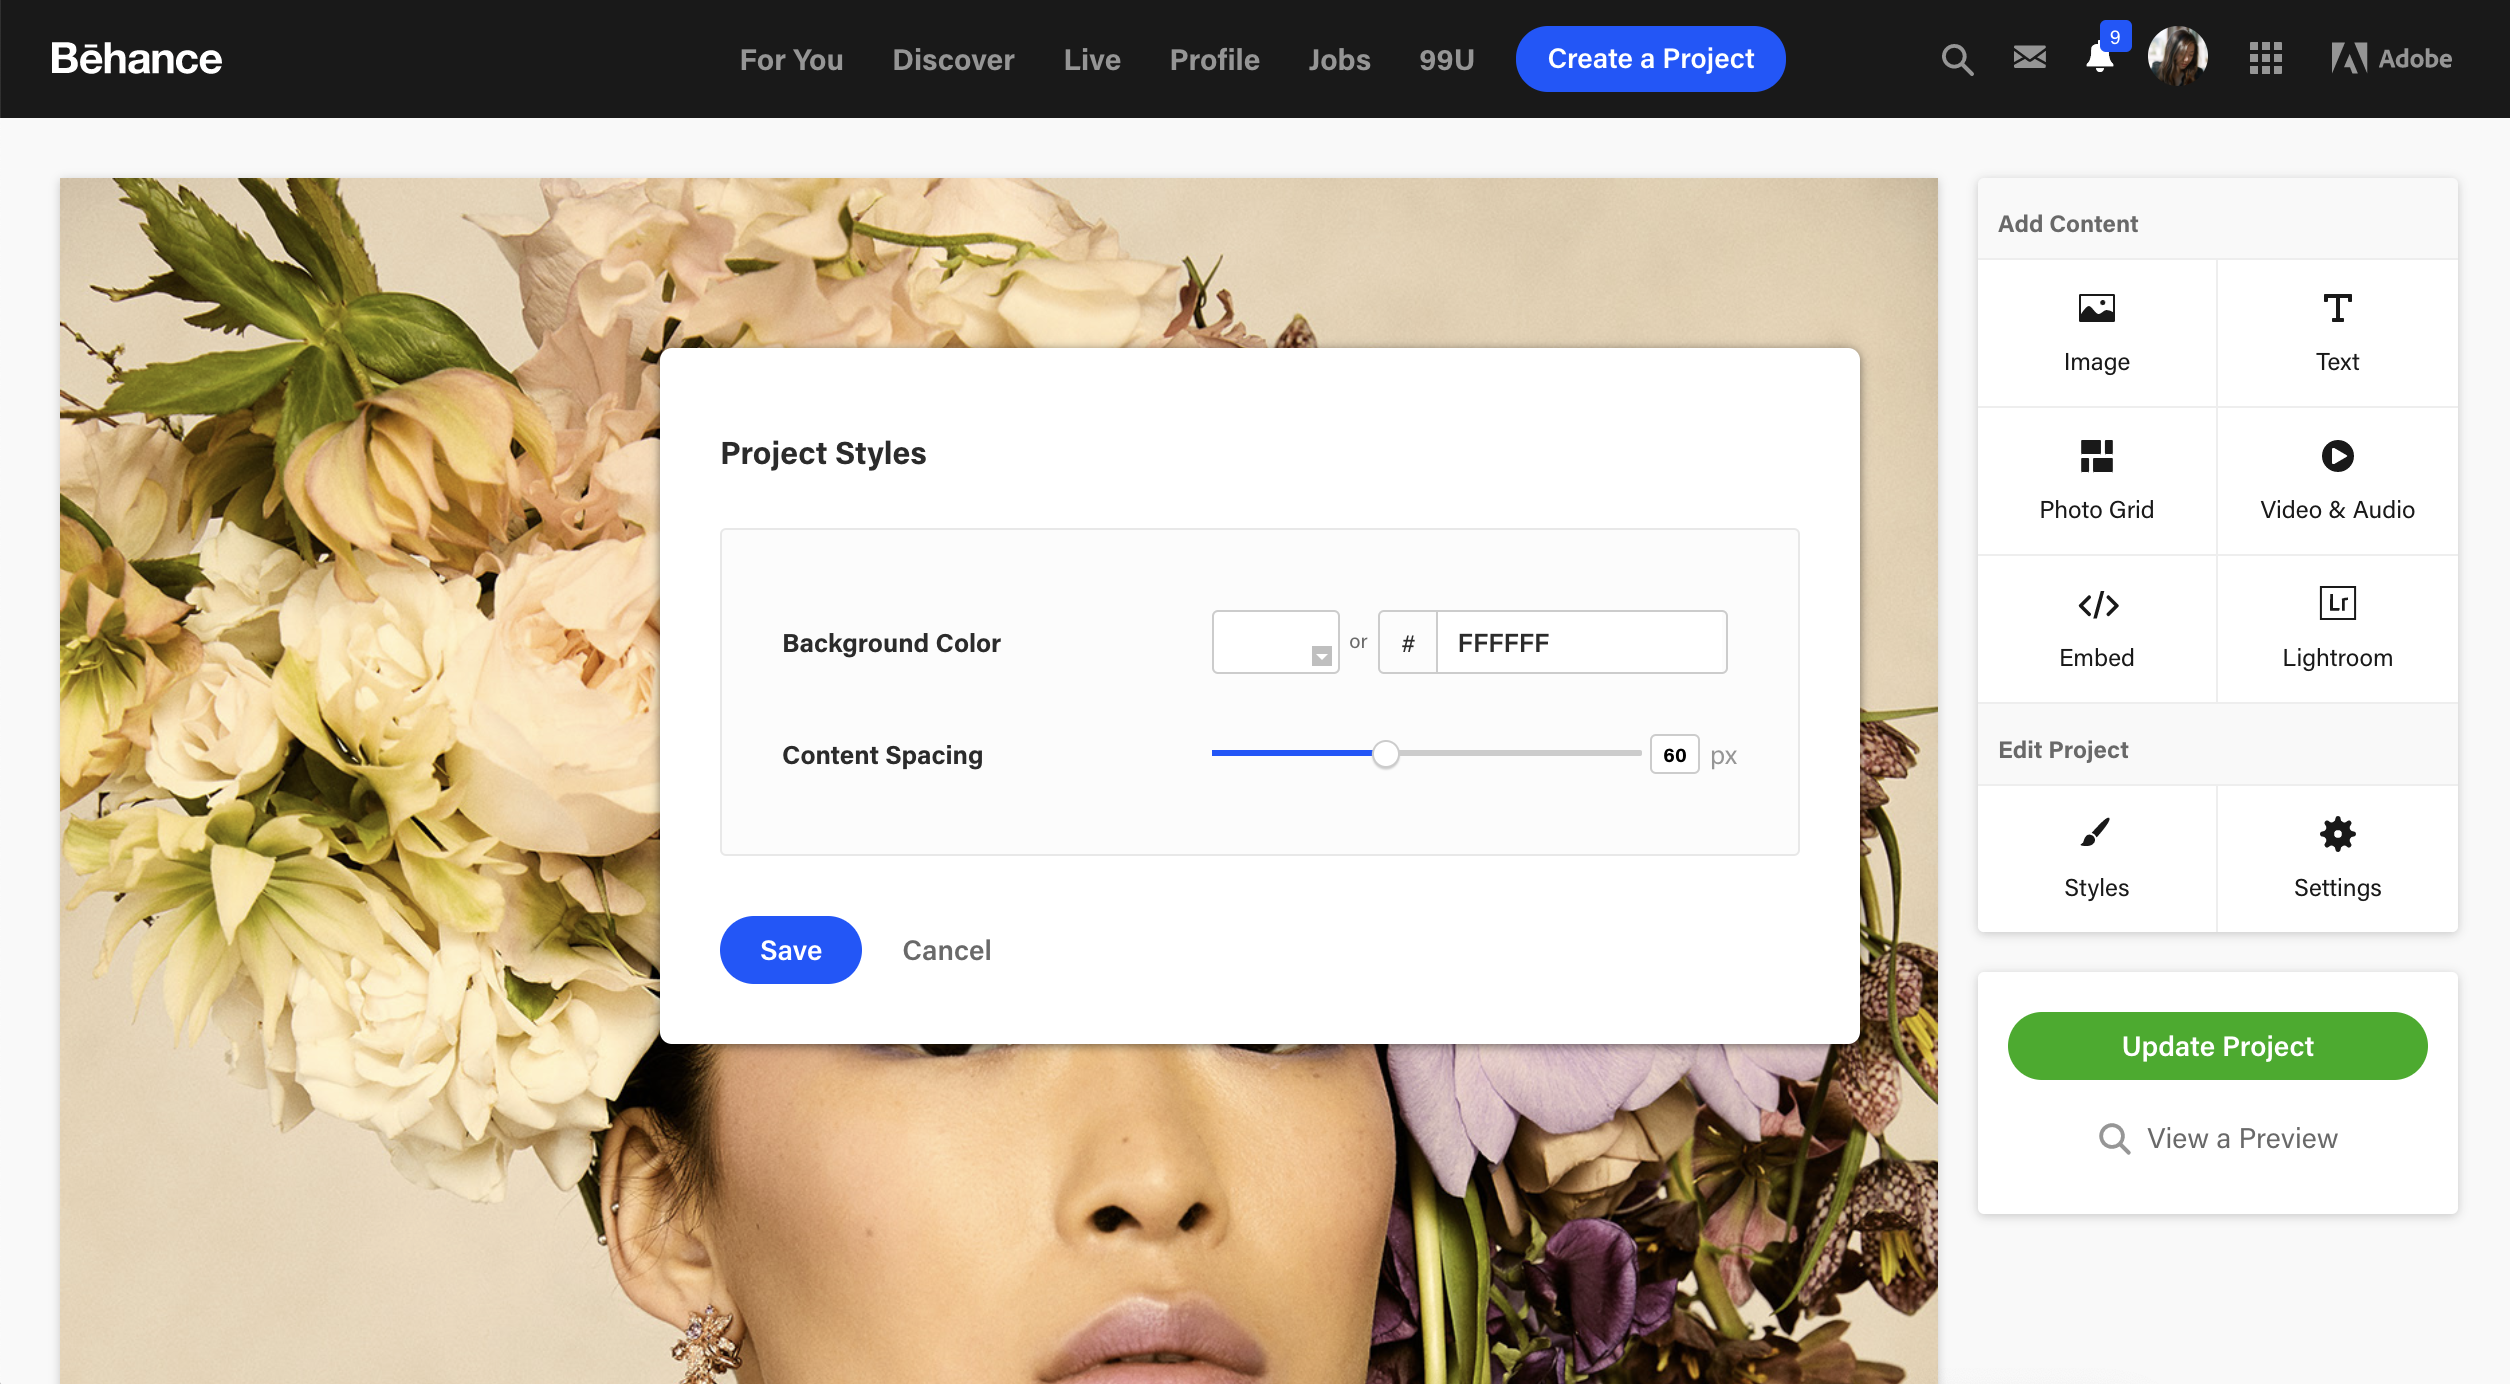
Step 3: Enter Edit Mode
Once you’ve located the project you want to edit, it’s time to enter edit mode. This is where the magic happens, and you can fine-tune those captions to perfection! Follow these simple steps:
- Click on the Project: Select the project thumbnail by clicking on it. This will open the project view where you can see all your images and existing captions.
- Find the Edit Button: Look for the “Edit” button, usually located at the top right corner of the project view. It often looks like a pencil or a similar icon. Click it to enter edit mode.
- Edit Captions: Now you’re in edit mode! You’ll see fields where you can modify the captions. Simply click on the text you want to change, type in your new caption, and make it shine!
Remember, this is your opportunity to add personality and context to your visuals, so don’t hold back! Once you’re satisfied with your edits, just hit save, and voilà! Your captions are updated.
Also Read This: How Behance Generates Revenue Through Its Business Model
Step 4: Modify Your Photo Captions
Once you're in the editing mode, it's time to give your photo captions a makeover! This step is where you can truly express your creativity and ensure that your images resonate with your audience. Here’s how to modify your captions effectively:
- Choose Your Tone: Decide on the tone that matches your project. Whether it’s professional, casual, or whimsical, your tone should reflect your brand.
- Be Descriptive: Provide context for your images. Instead of just naming a photo, describe what’s happening or what inspired it. For instance, “A serene sunrise over the mountains, capturing the first light of day” gives more depth than just “Sunrise.”
- Use Keywords: Incorporate relevant keywords that may help viewers understand your work better or even enhance searchability. Think about what someone might search for when looking for similar artwork.
- Break Up Text: If your caption is long, consider breaking it into smaller paragraphs or using bullet points. This makes it easier to read and digest.
- Add Emojis: If appropriate, sprinkle in a few emojis to add personality and make the text visually appealing!
Remember, the goal is to engage your audience while providing clarity about your work. A well-crafted caption can elevate the viewer's experience and complement your visual storytelling.
Also Read This: How to Write a Project Description for Behance that Captures Attention
Step 5: Save Your Changes
After you’ve meticulously crafted your photo captions, the next step is to save those changes. It may seem straightforward, but it’s crucial to ensure that all your hard work doesn’t go to waste. Here’s how to properly save your changes:
- Look for the Save Button: Once you’re satisfied with your captions, locate the “Save” button, usually found at the top or bottom of the editing interface.
- Confirmation Prompt: After clicking save, watch for any confirmation prompts. Behance often provides a message confirming that your changes have been successfully saved.
- Preview Your Changes: Before you exit the editing mode, take a moment to preview your project. This allows you to see how the captions look with your images and make any final adjustments if necessary.
- Check Your Edit History: If you’re uncertain about any changes, Behance allows you to view your edit history. This can be helpful if you want to revert to a previous version.
Finally, don’t forget to share your updated project with your network! Letting others know about your changes can increase engagement and feedback on your revised captions.
How to Edit Photo Captions on Behance
Editing photo captions on Behance is crucial for showcasing your work effectively. Captions provide context, enhance viewer engagement, and can contribute to your project's overall narrative. Here’s a detailed guide to help you edit captions seamlessly.
Follow these steps to edit your photo captions on Behance:
- Log into Your Account: Start by logging into your Behance account.
- Navigate to Your Project: Go to your profile and select the project you want to edit.
- Edit Mode: Click on the 'Edit' button, usually located at the top right corner of your project page.
- Choose the Photo: Click on the photo for which you want to edit the caption. A panel will appear.
- Update the Caption: In the panel, you will find the caption field. Edit the text as needed. Here are some tips for effective captions:
- Be Concise: Keep it brief and to the point.
- Use Keywords: Incorporate relevant keywords for better discoverability.
- Add Context: Explain the story behind the image or the techniques used.
- Maintain Tone: Ensure the tone matches your overall project style.
After making your changes, click the 'Save' button to apply your edits. Additionally, preview how your captions look within your project to ensure they enhance the visual storytelling.
In conclusion, regularly updating photo captions on Behance not only improves the presentation of your work but also engages your audience more effectively, facilitating a better understanding of your creative process.
 admin
admin