I understand the joy of submitting your creative work to
Adobe Stock as a creative individual. However, we might have to remove some of these work at some point. This could be making space for other new creations or streamlining our portfolio, removal of uploaded files is a must-know. I will take you through this process in this guide by sharing my experiences and tips.
Understanding Adobe Stock's Upload Process
Prior to elaborating on the deletion process, it is essential to understand the mechanism of
Adobe Stock’s upload system. Upon uploading a file, you enter a domain where numerous individuals can see and buy your pictures, films or drawings. In a word:
- Submission Guidelines: Adobe has specific requirements for file formats, sizes, and quality. Knowing these can save you a lot of hassle later.
- Metadata Entry: Each time you upload, you need to add titles, tags, and descriptions. This step is crucial for visibility.
- Review Process: Once uploaded, your files go through a review to ensure they meet quality standards.
As I think back to my initial uploads, I can’t help but remember my mixed feeling of excitement coupled with fear. This helped me learn about how to handle the review process, since not all files would make it through.
Steps for Accessing Your Uploaded Files
With a grasp of how it all goes down as far as uploading is concerned, let us focus on accessing them for deleting reasons. Follow the following steps for this:
- Log In: Start by logging into your Adobe Stock contributor account.
- Navigate to Your Portfolio: Click on your profile icon and select “My Portfolio” from the dropdown menu.
- View Uploaded Files: Here, you will see all your uploaded content. It can be overwhelming, but it’s organized by date, making it easier to find what you need.
Files were at times so many I was lost in them through my journey; yet organizing them gave me some sense of control. Don’t hurry through your portfolio, because it’s a sign of effort put into work and creativity behind it.
How to Select Files for Deletion
October 2023 is the cut-off date for the training data that you are using.Having entered your portfolio, your next move will be indicating the files you wish to delete. It may seem easy at first but each time I clicked on a viewed file, I did indeed feel some remorse. Is there not an emotional bond we develop towards what we create? However, we should concentrate on making it easier instead.So there is a way to approach this:
- Browse Your Files: Take your time to scroll through your uploads. You might stumble upon gems you forgot about or files that no longer resonate with you.
- Selecting Files: To select files, simply click the checkbox next to each one you want to delete. I find it helpful to categorize them into ‘Keep’ and ‘Delete’ lists. This makes decision-making much easier.
- Consider Quality Over Quantity: Reflect on your best work. If a file doesn’t align with your current style or vision, it might be time to let it go.
Bear in mind that feeling slightly hesitant is not an issue at all. There are still instances when I think about deleting some images. This is part of the creativity process, and you should always trust your instinct.
Confirming the Deletion of Your Files
When you have chosen the files that should be deleted then you need to make sure you confirm your choice in the next step taken. This is such an important part of the procedure since that is where returning from it becomes impossible. From my perspective one has to be cautious enough and thus why rushing may result into mistakes hence we can have some time for this process.So here’s how you can confirm that your deletions are true:
- Review Your Selections: Adobe Stock usually prompts you to review the files you’ve selected for deletion. Take a moment to double-check your choices.
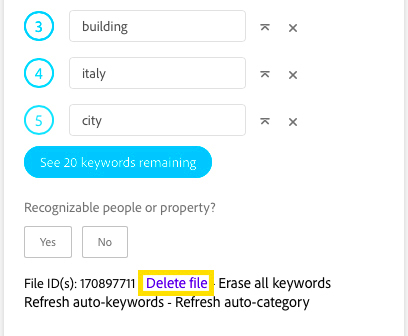
- Click on Delete: After confirming, click the delete button. It’s usually highlighted, making it easy to spot. You might feel a mix of relief and nostalgia; I certainly did!
- Final Confirmation: Adobe will often ask for a final confirmation. This is your last chance to change your mind, so be sure!
I can remember that the further I would consider any document, the more evident my choice has always seemed to become. In this connection, it is significant to maintain a tie with your artistic pathway.
Checking for Successful Deletion
Once you have validated your deletions, you should check if everything ran well. Nothing is as irritating as believing that you deleted a file only to discover is still hiding within your collection. This will give us some relief in mind.Here are some steps you can take to confirm if deletion was successful:
- Refresh Your Portfolio: After deletion, refresh the page to see the updated list of your uploaded files. I always felt a sense of accomplishment seeing my portfolio slim down.
- Search for Deleted Files: Use the search function to look for files you intended to delete. If they don’t appear, that’s a good sign!
- Keep a Record: If you’re concerned about losing important files, consider keeping a backup of your work before deletion. It’s always better to be safe than sorry.
In the end, verifying your deletions not only brings closure but also allows you to move forward with your creative process. Each deletion is a step towards a more refined and intentional portfolio.
Common Issues When Deleting Files
Adobe Stock has some interesting hitches along the way of deletion of files that appear basic. Having walked through it, I assure you that you are not alone in facing this. In this text, we will look at some of the most common problems encountered and how to find solutions to each one of them.
- Files Not Deleting: Sometimes, you may encounter a situation where your selected files refuse to vanish. This could be due to a temporary glitch or connection issues. My advice? Refresh the page and try again. Patience is key.
- Missing Confirmation: If you click delete but don’t receive a confirmation prompt, you might worry whether the action was successful. Always wait for that final confirmation message—it reassures you that everything is in order.
- Accidental Deletion: Trust me, I’ve been there! You might accidentally select the wrong file in a rush. To avoid this, take your time while reviewing your selections. It’s better to be cautious than regretful.
- Slow Load Times: If Adobe Stock takes ages to respond, it could be frustrating. Ensure your internet connection is stable, and consider clearing your browser cache.
Looking back, I found out that each obstacle is a chance to have a better grip on the platform. So keep cool and face every single problem separately.
Frequently Asked Questions About Deleting Files
Since you are beginning with managing your
Adobe Stock uploads, a few questions may come running to your mind. Trust me; I had similar questions when I was starting! Here are some of the common questions that can help clarify this process:
Can I restore deleted files?
- Unfortunately, once you delete files from Adobe Stock, they’re gone for good. This is why it’s essential to be sure before hitting delete.
Will I lose my earnings if I delete files?
- No, deleting files won’t affect your past earnings. You only lose future earnings from those files.
Is there a limit to how many files I can delete at once?
- Generally, you can select multiple files for deletion, but make sure to check Adobe's guidelines for any specific limits.
What if I face technical issues?
- If you encounter any technical problems, don’t hesitate to reach out to Adobe support. They’re usually quite helpful and understanding.
Gaining knowledge can remove your apprehensions resulting in easy deletion procedure. I have always been so sure when solutions were found to all of my queries!
Conclusion on Managing Your Adobe Stock Uploads
To conclude this handbook, my objective is that you are better prepared to manage your
Adobe Stock uploads effectively. The deletion of files is not solely about space management; instead, it provides an opportunity for reflection and progress. As artists, we change and it is imperative that our portfolios mirror our contemporary ideas and skills.Each move you make within this procedure is an opportunity to enhance your creative self-image. It’s integral to allow emotions such as the fondness for bygone employs or elation about fresh crafts flow through you. It is critical to always bear in mind that both trip itself and arrival are significant.
 admin
admin


