Changing image colors on a Mac can be a fun and creative way to enhance your photos or design projects. Whether you're adjusting the hues to create a specific mood or correcting color imbalances, the process is relatively easy. Mac computers offer several built-in tools and third-party software options that make altering image colors simple and effective. This post will guide you through the reasons why you might want to adjust your images, the tools available, and step-by-step instructions on how to make those changes on your Mac.
Why You Might Want to Change Image Color on Mac

There are many reasons why you might need to change the color of an image on a Mac. Here are a few common scenarios:
- Enhance Image Appeal: Adjusting colors can make a photo or graphic look more vibrant or visually appealing.
- Correct Color Imbalances: Sometimes images don't capture colors accurately due to lighting or camera settings. Changing the colors can help make the photo look more natural.
- Create a Mood or Theme: Artists and designers often adjust the colors of images to convey a specific feeling or theme, such as a warm, cozy vibe or a cold, moody atmosphere.
- Prepare for Print: When preparing images for print, adjusting the colors ensures the printout matches what you see on the screen.
- Design Projects: If you're working on a project, like a presentation or website, altering the colors to match your brand's theme is crucial.
Also Read This: Importing Adobe Stock Photos into Photoshop
Tools You Can Use to Change Image Color on Mac

Mac computers offer a range of tools for changing image colors. Some are built into the macOS, while others are available as third-party software. Below are the most popular options:
- Preview: This default app on Mac allows you to make simple color adjustments, like tweaking exposure, brightness, and contrast.
- Photoshop: Adobe Photoshop offers professional-level tools for adjusting colors in more advanced ways, like using the color balance tool or applying selective color changes.
- Affinity Photo: A great alternative to Photoshop, Affinity Photo is affordable and comes with powerful color editing features.
- GIMP: Free and open-source software, GIMP is another great option for color changes, offering many advanced tools for image editing.
- Pixelmator Pro: This is an easy-to-use app that provides powerful color editing features for users who need both simplicity and functionality.
- Online Tools: Websites like Canva and Pixlr also offer color editing options, perfect for quick changes if you don't want to download software.
Each tool has its own set of features, so the best option depends on your needs and experience level. If you're just looking to make quick adjustments, Preview or an online tool might be enough. For more detailed work, Photoshop or Affinity Photo would be the better choice.
Also Read This: How to Sell Feet Pics on Foap: A Step-by-Step Guide
Step-by-Step Guide to Changing Image Color on Mac Using Preview

Changing image color on a Mac is simple when using the built-in Preview app. This free tool offers basic yet effective options for adjusting the color balance, brightness, and contrast of your images. Whether you want to make subtle tweaks or noticeable changes, Preview can help. Here's how to do it:
- Open the Image: First, double-click on your image to open it in Preview. If Preview isn't the default viewer, right-click the file and select "Open With" followed by "Preview."
- Access the Markup Toolbar: Once the image is open, click on the "Show Markup Toolbar" button (a small pencil icon) at the top of the window.
- Adjust the Color: Click on the "Adjust Color" button in the markup toolbar. This opens a new panel where you can fine-tune various color settings.
- Use the Sliders: In the "Adjust Color" panel, you'll find sliders for adjusting parameters like exposure, contrast, saturation, and temperature. Play around with these settings to get the desired effect.
- Preview Your Changes: As you move the sliders, Preview automatically updates the image so you can see the changes in real-time. Fine-tune the settings until you're satisfied with the color adjustments.
- Save the Image: Once you're happy with the changes, simply click "File" and then "Save" to keep your edited image, or choose "Save As" if you want to create a new copy.
This method is quick and ideal for basic color adjustments. However, if you need more control or advanced features, other software options may be better suited.
Also Read This: How to Overlay Images in Microsoft Word for Creative Layouts
How to Use Photoshop to Change Image Color on Mac
Photoshop is one of the most powerful tools for image editing, offering advanced options for color adjustments. While it has a learning curve, its flexibility makes it perfect for professional-level color manipulation. Here’s a step-by-step guide on how to change image color using Photoshop on a Mac:
- Open the Image in Photoshop: Launch Photoshop and open the image you want to edit by going to "File" > "Open" and selecting the file.
- Use the Color Balance Tool: Go to "Image" in the top menu, select "Adjustments," and then choose "Color Balance." Here, you can adjust the overall color tones by moving sliders for shadows, midtones, and highlights.
- Apply Hue/Saturation: For more fine-tuned color shifts, go to "Image" > "Adjustments" > "Hue/Saturation." The Hue slider lets you shift all colors in the image, while the Saturation slider controls the intensity of the colors.
- Experiment with Selective Color: If you want to change specific colors in the image, go to "Image" > "Adjustments" > "Selective Color." This lets you isolate certain colors and adjust them individually without affecting the rest of the image.
- Use Adjustment Layers for Flexibility: Instead of directly changing the image, you can add an adjustment layer. Go to the Layers panel, click the "Create new fill or adjustment layer" icon, and choose "Hue/Saturation" or "Color Balance." This way, you can edit your image non-destructively and adjust the layer settings later.
- Preview and Save: As you make adjustments, Photoshop updates the image in real-time. Once you’re happy with the results, save the file by clicking "File" > "Save As" to preserve your edits.
Photoshop’s color tools allow for deep customization, making it a perfect choice if you're aiming for precision or need to correct colors with high accuracy.
Also Read This: Steps to Remove Color from an Image for a Clean Look
Adjusting Image Color in Other Editing Software on Mac
If you're not using Preview or Photoshop, there are plenty of other editing programs available for Mac that can help with changing image colors. These alternatives often offer unique features and may be more suitable depending on your needs or budget. Here are some great options:
- Affinity Photo: A powerful alternative to Photoshop, Affinity Photo offers robust tools for color correction. Use its "HSL" (Hue, Saturation, Lightness) panel to make adjustments, or work with the "Selective Color" feature to isolate and tweak specific colors.
- Pixelmator Pro: This app combines a user-friendly interface with advanced color editing options. You can use the "Color Adjust" tool to manipulate brightness, contrast, exposure, and saturation, or apply filters for creative effects.
- GIMP: A free, open-source software that rivals Photoshop, GIMP offers various color-editing tools, including "Hue-Saturation," "Color Balance," and "Levels." GIMP also supports layers, so you can make non-destructive changes to your images.
- Canva: For simpler edits, Canva is an easy-to-use online tool that includes color adjustment sliders for photos. While it’s not as powerful as other software, it’s great for quick edits and design work.
- Fotor: This free online tool allows for basic color adjustments, including brightness, contrast, and saturation. It’s a good choice for quick fixes when you're on the go or don’t want to download heavy software.
These programs are excellent alternatives depending on what you're looking for in an editing tool. While they may not offer the same depth as Photoshop, they can certainly handle many color-editing tasks, especially for everyday use.
Also Read This: How Many Wallet-Sized Photos Fit on an 8×10 Print?
Tips for Perfecting Your Image Color Adjustments on Mac
When it comes to changing image colors on your Mac, small adjustments can make a big difference. To ensure that your color adjustments look professional, here are some helpful tips:
- Start with the Basics: Before diving into advanced color adjustments, always begin with basic tweaks like brightness, contrast, and exposure. These simple changes can often make a significant impact without needing to adjust the color balance itself.
- Use the Histogram: If your software offers a histogram, use it to guide your adjustments. This visual tool shows the distribution of light and dark areas in your image and helps you avoid overexposure or underexposure when adjusting colors.
- Work Non-Destructively: Whenever possible, use adjustment layers or duplicate your image layer. This allows you to experiment with colors without permanently changing the original file.
- Make Subtle Changes: When adjusting color settings like saturation or hue, less is often more. Making drastic color changes can result in unnatural-looking images, so start small and gradually increase the effect until you achieve the desired result.
- Monitor Calibration: Make sure your monitor is calibrated to ensure you're seeing accurate colors. If your screen is off, your adjustments may not look the same when viewed on other devices or printed out.
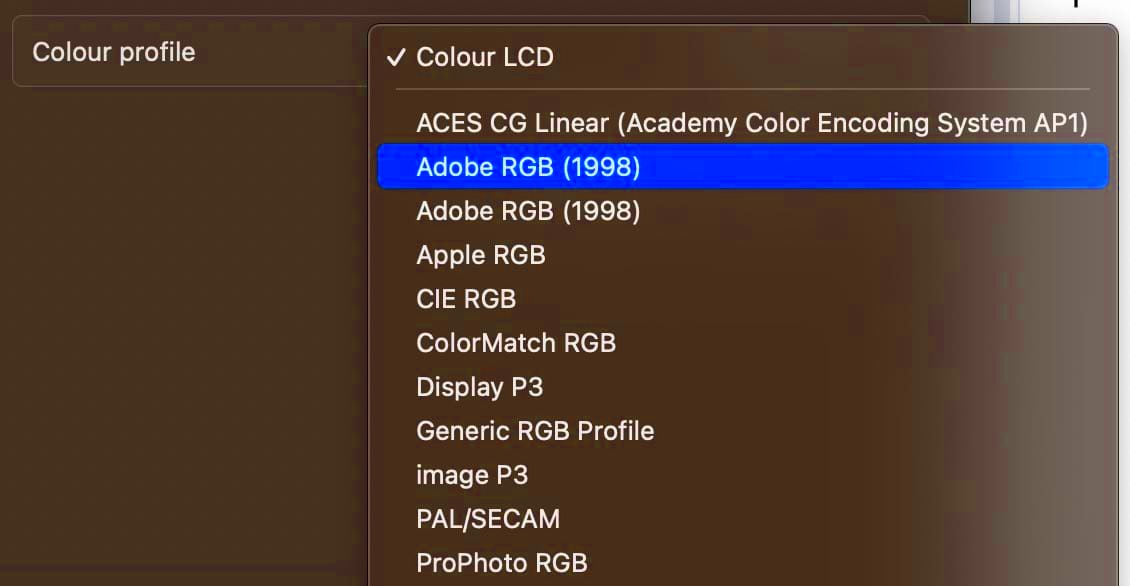
- Use Color Profiles: If you're preparing images for print, use color profiles to match the image's color settings with your printer’s capabilities. This helps ensure the colors you see on-screen match the printed version.
With these tips, you'll be able to perfect your image color adjustments and ensure your edits look as good as possible, whether you're working on a personal project or a professional design.
Also Read This: Can You Add Your Product to an iStock Image?
Common Issues When Changing Image Color on Mac and How to Fix Them
When adjusting image colors on your Mac, you might run into some common issues. Don't worry – most of these are easy to fix! Here are some problems you may encounter and how to resolve them:
- Problem: The Colors Look Too Bold or Artificial
This can happen if you've overdone adjustments to saturation or contrast. To fix this, try resetting the settings and adjusting in small increments. Focus on subtle color changes to keep the image looking natural.
- Problem: The Image Appears Too Dark or Too Bright
If your image looks washed out or too dark, it might be a result of poor exposure settings. To fix this, adjust the exposure and brightness sliders. Start with small changes and keep the histogram in view to avoid clipping (loss of detail in dark or bright areas).
- Problem: Colors Aren’t Matching Across Different Devices
Colors can look different depending on the display device. This is known as color inconsistency. Ensure your Mac's monitor is properly calibrated. You can use built-in calibration tools in macOS by going to "System Preferences" > "Displays" > "Color" to select the correct color profile for your monitor.
- Problem: The Image Doesn’t Look Good After Printing
Printing issues often occur because of a mismatch between screen and print colors (RGB vs. CMYK). Use color profiles in Photoshop or other advanced software to match your image’s color settings to your printer’s color capabilities. You might also want to do a test print before finalizing the color adjustments.
- Problem: Not Getting the Right Hue
If you're adjusting hues but not getting the result you want, check your image's current color balance. Sometimes a small tweak to the balance of red, green, or blue can help you achieve the perfect hue.
These common issues are easy to fix with a bit of patience and attention to detail. With practice, you'll be able to make adjustments that enhance your images without running into problems.
Also Read This: How to Check the Dimensions of an Image for Accurate Sizing
FAQ
Here are some frequently asked questions about changing image colors on a Mac. If you’re unsure about something, these answers might help clear up any confusion:
- Can I change the color of an image without using third-party software?
Yes! macOS offers basic tools like Preview, where you can adjust brightness, contrast, and saturation. For more advanced editing, you can use apps like Photos or iPhoto. - What’s the best software for changing image colors on a Mac?
The best software depends on your needs. For basic color edits, Preview or Photos works well. For professional editing, Adobe Photoshop or Affinity Photo offers advanced tools for precise adjustments. - Can I adjust the color of an image in a specific area?
Yes! Many editing tools, like Photoshop and GIMP, allow you to select specific parts of an image and adjust the color only in those areas. This is called "masking" and is great for detailed edits. - Why do my color adjustments look different on other devices?
This could be due to monitor calibration or color profile settings. Ensure that your monitor is calibrated correctly and use standard color profiles for consistency across different devices. - How do I know if my color adjustments are too extreme?
If your image looks unnatural or too vibrant, you might have gone too far with the adjustments. Always preview your changes and aim for subtle enhancements. You can also check the image on different devices to ensure it looks good across all screens.
If you have more questions, feel free to explore more guides or contact support for personalized help with your image adjustments!
Conclusion
Changing the color of your images on a Mac can be a fun and rewarding experience, whether you’re adjusting photos for personal use or enhancing your design work. By using tools like Preview, Photoshop, or other editing software, you can make your images stand out with customized color adjustments. Remember, subtlety is key when adjusting color—small changes often have a more significant impact than dramatic shifts. Take your time, experiment with different tools, and use the tips shared in this post to perfect your images. With the right tools and techniques, you’ll have no trouble creating the perfect look for any image on your Mac!


