Creating an image outline in Canva can be a simple yet effective way to enhance your design. Whether you're working on a logo, poster, social media graphic, or any other project, adding an outline around your image can make it stand out. The process is easy to follow and doesn't require advanced design skills. In this guide, we'll walk you through the steps of adding an outline to an
Why You Should Create an Image Outline in Canva

There are several reasons why adding an image outline can improve the overall look of your design. Here are some of the key benefits:
- Improves visibility: A well-defined outline can help an image stand out against a busy background or cluttered design.
- Enhances aesthetics: Outlines can add a professional and polished look to your image, making it more visually appealing.
- Focuses attention: By adding a bold or subtle outline, you can direct the viewer's eye to specific parts of your design.
- Versatility: Outlines can be customized in terms of thickness, color, and style, offering a wide range of creative possibilities.
- Consistency: Using outlines in a consistent manner across your designs can create a cohesive and branded look.
Whether you're designing for personal use or business, adding an image outline is an easy way to improve your graphics and make them stand out in any design setting.
Also Read This: How to Download Getty Images for Free: Exploring Legal Ways
How to Start with Canva’s Image Editing Tools

Canva offers a range of powerful image editing tools that make it easy for anyone to get started with design. Here’s how to begin:
- Create a Canva account: If you haven’t already, sign up for a free Canva account to access all the editing tools.
- Select your template or blank canvas: Choose a template that suits your project, or start with a blank canvas for a more custom design.
- Upload your image: Upload the image you want to add an outline to by clicking on the "Uploads" tab and selecting the file from your computer.
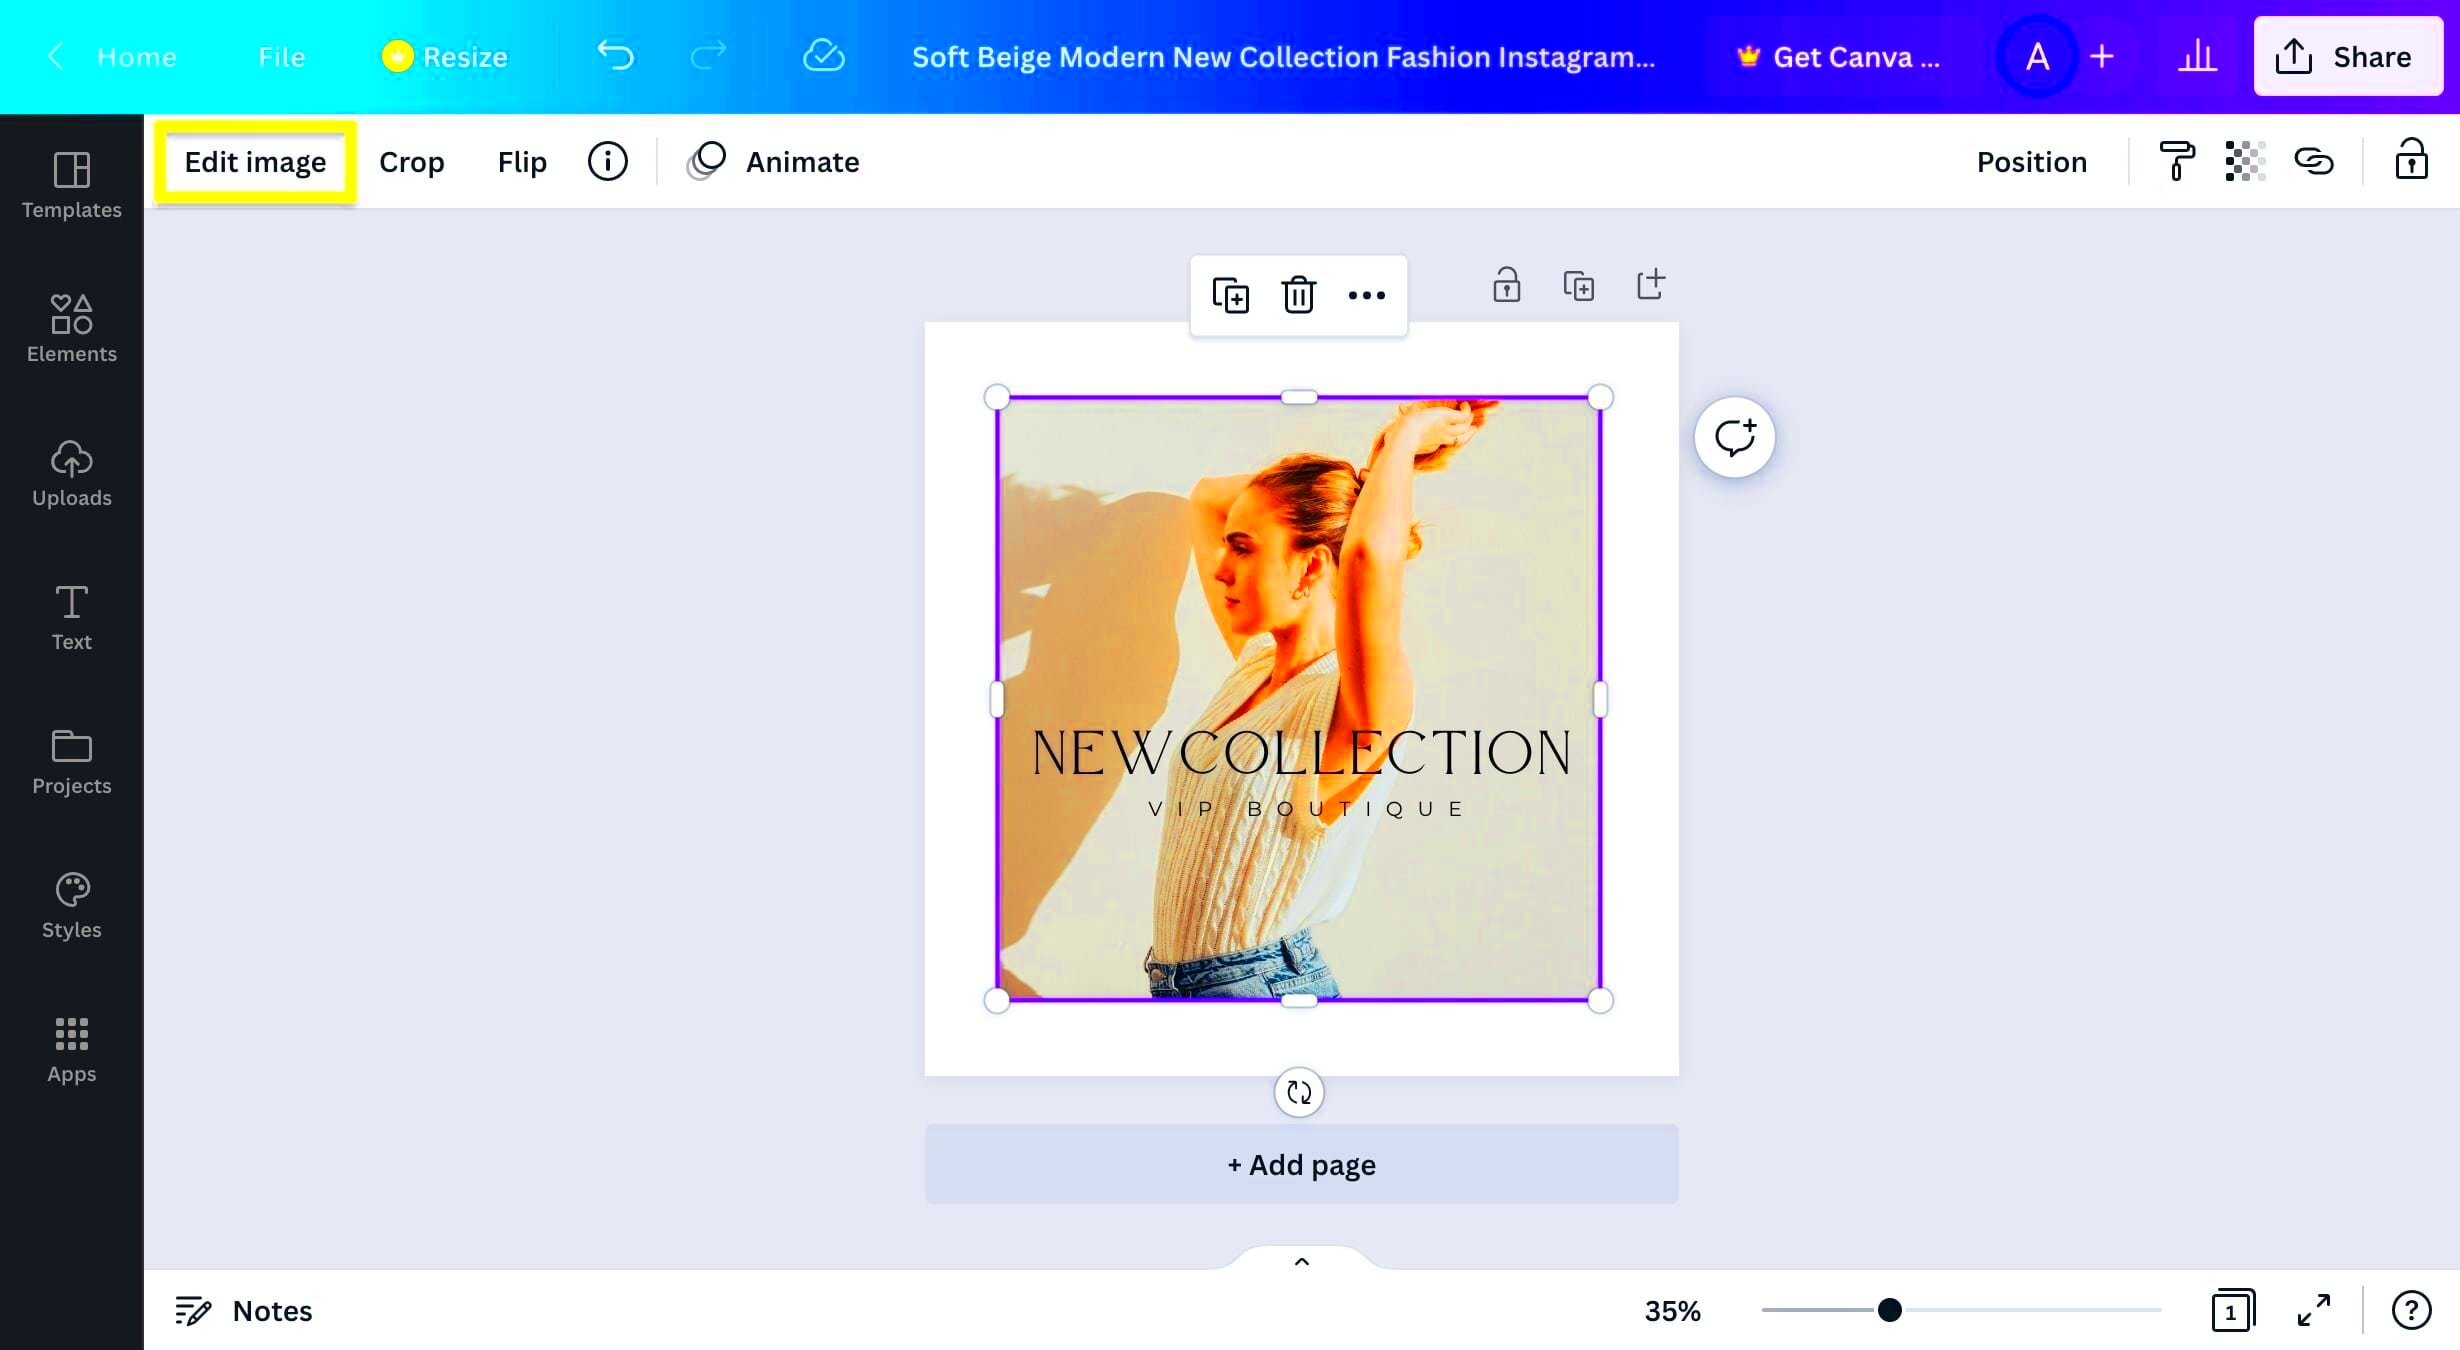
- Use the "Edit Image" option: Once your image is uploaded, click on it to bring up the editing options.
- Explore the editing tools: Canva provides tools for cropping, adjusting brightness, contrast, and saturation, as well as filters and effects. These can help you fine-tune the image before adding the outline.
Once you’re familiar with these basics, you're ready to dive deeper into Canva’s more advanced features to create stunning designs with custom outlines. With a bit of practice, you can unlock all of Canva’s potential and transform your images into polished works of art.
Also Read This: How to Upscale MidJourney Images for Print
Steps to Add an Outline to an Image in Canva

Adding an outline to an image in Canva is a quick and easy process. Follow these simple steps to make your image pop and stand out in your design:
- Step 1: Upload your image - Start by uploading the image you want to add an outline to. Click the "Uploads" tab in Canva, select your image from your device, and drag it onto your canvas.
- Step 2: Click on the image - Once the image is on your design, click on it to open the editing options.
- Step 3: Choose the "Effects" option - In the top toolbar, click on "Effects" to access various editing tools.
- Step 4: Select "Shadows" and "Glow" - To add an outline, select the "Glow" effect under the "Shadows" section. This will automatically apply a soft outline around your image.
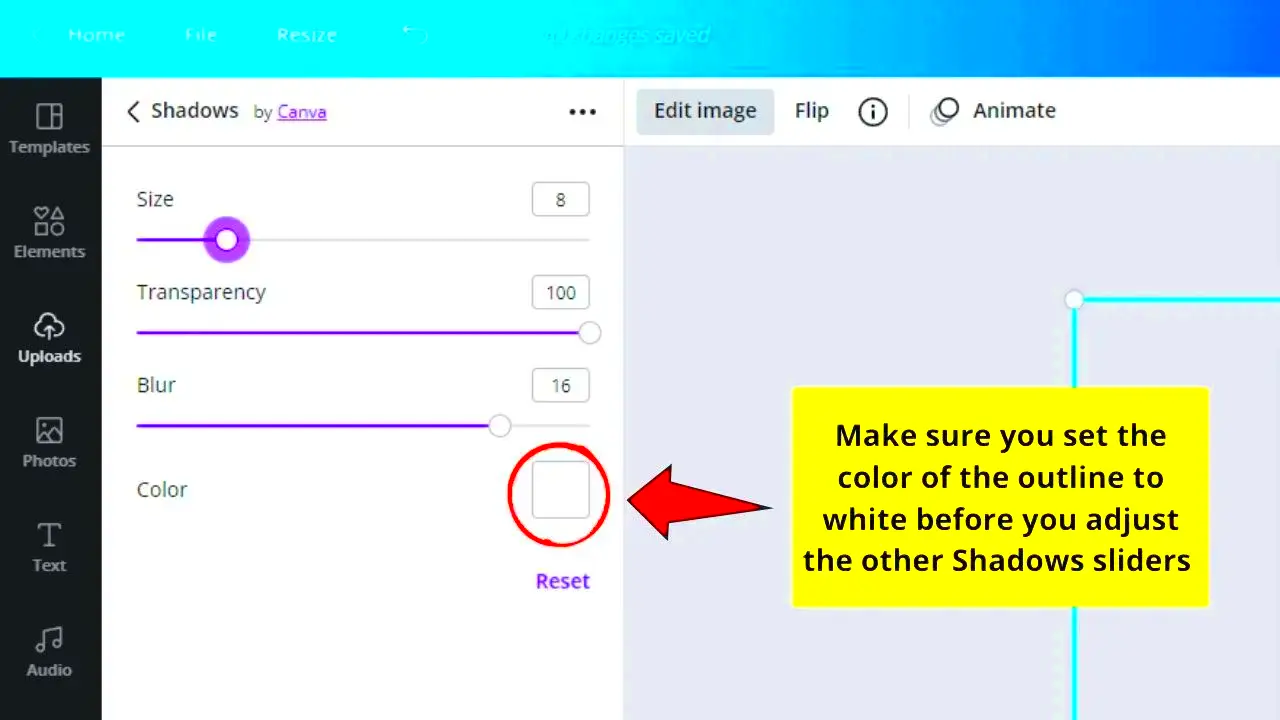
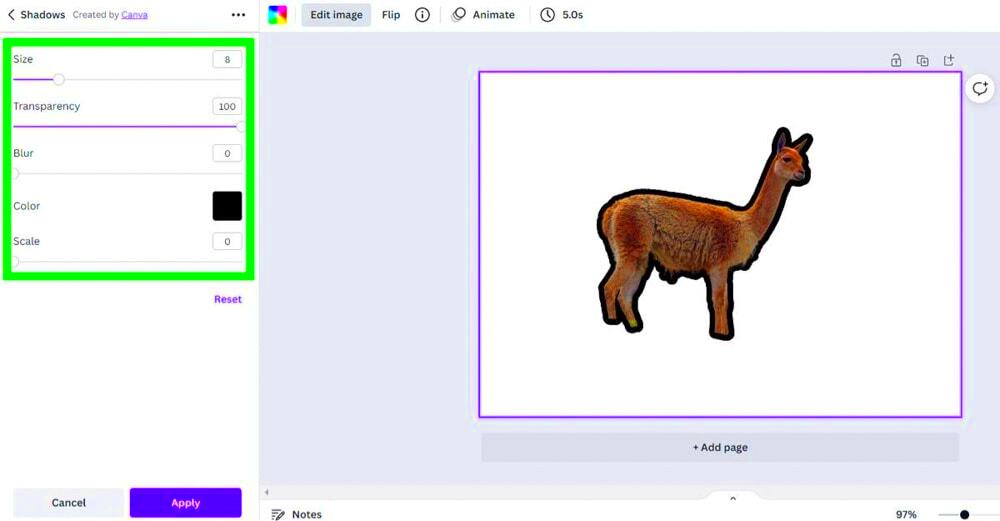
- Step 5: Customize your outline - Adjust the outline by playing with the settings. You can control the size, blur, and color of the outline to match your design.
Once you're happy with how the outline looks, you can move on to other design elements like text or background to complete your project. It’s that easy to enhance any image with a simple outline in Canva!
Also Read This: How to Work as a Photographer for Getty Images: Tips for Aspiring Contributors
Adjusting the Thickness and Color of the Outline
Customizing the thickness and color of your image outline in Canva is an essential step to ensure that it fits perfectly with your overall design. Here’s how you can adjust these settings:
- Thickness: To make your outline thicker or thinner, simply use the “Size” slider in the "Glow" effect settings. Increasing the size will make the outline bold and noticeable, while decreasing it gives a more subtle effect.
- Color: Change the color of your outline by clicking on the color box next to the "Glow" effect. You can choose a color from Canva's color palette or enter a custom hex code for a specific shade.
- Blur: Adjust the blur effect to create a smooth or sharp outline. Less blur gives a defined edge, while more blur softens the outline and can create a glowing effect.
- Outline Style: You can experiment with the outline's style by using different effects like "Neon" or "Outer Glow" for a more dramatic appearance.
Fine-tuning these settings ensures your image outline looks just the way you want, whether you need it bold, soft, vibrant, or subtle. Experimenting with these options gives you complete control over the final design.
Also Read This: Stretching Images in Canva Without Cropping
Using Advanced Features for Custom Image Outlines
Canva offers some advanced features that let you take your image outlines to the next level. These tools can help you create more customized, professional designs. Here's how you can use them:
- Layering Effects: Canva allows you to stack multiple effects on your image, including shadows, glows, and outlines. By layering different effects, you can create a more intricate and dynamic look for your image outline.
- Gradient Outlines: Want a gradient outline? While Canva doesn’t directly support gradient outlines, you can simulate this by creating a custom shape (like a circle or rectangle) behind your image and applying a gradient effect to it. This shape will act as your outline with a gradient transition of color.
- Using Custom Shapes: If the "Glow" effect doesn't give you the look you want, consider using custom shapes around your image. You can find various shapes in the “Elements” tab, resize them to fit your image, and then adjust the color and transparency to create a unique outline.
- Transparency Effects: By adjusting the transparency of the outline, you can make it more subtle, allowing the image itself to shine through while still having a defined border.
By using these advanced features, you can create more creative and unique outlines that complement your design vision. Whether it's for a professional logo, a marketing piece, or a social media graphic, Canva's advanced editing tools let you customize the smallest details for a polished result.
Also Read This: How to Download Files and Projects from Behance
Common Mistakes to Avoid When Adding Outlines to Images
Adding an outline to your image can elevate your design, but it's easy to make a few missteps along the way. Avoid these common mistakes to ensure your image outline looks polished and professional:
- Using an outline that’s too thick: While a bold outline can be striking, too thick of an outline can overwhelm the image and take attention away from the main design. Try to keep the thickness proportionate to the size of the image.
- Choosing the wrong color: If your outline color clashes with the image or background, it can ruin the overall effect. Opt for a color that contrasts well without clashing with the other elements in your design.
- Overusing the outline effect: Adding outlines to every image in your design can make it feel repetitive and cluttered. Use outlines sparingly, and only on key elements that need emphasis.
- Neglecting the background: If the background is too busy or distracting, the outline may not stand out. Make sure the background complements the outline and doesn’t overshadow the image itself.
- Not testing different styles: Canva offers several outline and shadow effects—experiment with different ones to see which works best for your design. Don’t just settle for the default glow effect without considering others.
By keeping these points in mind, you can avoid common design mistakes and create a clean, cohesive look with your image outlines.
Also Read This: How to Submit Photos to Getty Images: A Complete Guide for Beginners
Tips for Making the Most of Image Outlines in Your Designs
Image outlines can add flair and structure to your designs when used effectively. Here are some tips to help you make the most of this feature in Canva:
- Use contrasting colors: For an outline to truly pop, choose a color that contrasts well with the image and background. For example, a white outline can make darker images stand out, while a black outline works well on lighter backgrounds.
- Adjust transparency: If the outline is too bold, reduce the transparency to make it more subtle. This can create a soft yet noticeable border without overpowering the image.
- Experiment with different effects: Don’t settle for the basic outline. Canva offers a variety of effects such as neon, glow, and shadow that can give your outline a unique touch and elevate your design.
- Combine outlines with other design elements: Enhance your outline by pairing it with shapes, text, or other decorative elements. This can help frame your image and tie everything together in a harmonious way.
- Consider the context: Think about where your design will be used (social media, print, website) and how the outline will appear across different platforms. For example, outlines may look more dramatic on a website header but need to be subtler on social media posts.
By following these tips, you’ll be able to maximize the impact of your image outlines and create visually striking designs that capture attention.
Also Read This: The Best TikTok Trends of 2023: How to Jump on the Bandwagon
FAQ
Here are some frequently asked questions about adding image outlines in Canva:
- How do I add an outline to an image in Canva? To add an outline, click on the image, select "Effects" from the top toolbar, and choose "Glow" under the "Shadows" section. Adjust the outline’s size, color, and blur to your preference.
- Can I make the outline color match my brand? Yes! You can easily select a custom color by clicking on the color box next to the "Glow" effect. You can enter a hex code for your brand’s specific color.
- Can I use different outlines for multiple images in the same design? Absolutely! Each image can have a unique outline style, color, and thickness, giving you flexibility in your design.
- Why is my outline not showing up clearly? If your outline is not visible, try adjusting the thickness or changing the color for better contrast. You may also want to experiment with the blur setting or reduce transparency.
- Can I add multiple outlines to the same image? While Canva doesn’t support adding multiple outlines directly, you can layer shapes behind your image to create a more complex outline effect.
If you have more questions or run into any issues, Canva’s support page is a great resource for troubleshooting and learning more about image editing tools.
Conclusion
Adding image outlines in Canva is a simple yet powerful design technique that can make a significant impact on the overall aesthetic of your project. By following the steps outlined in this guide, you can easily create visually appealing images that stand out. Remember to experiment with different thicknesses, colors, and effects to find the perfect style that fits your design vision. Whether you're designing for social media, marketing, or personal projects, using image outlines strategically can help enhance your visuals and create a more polished, professional look. With a bit of practice, you'll be able to master this feature and incorporate it into your creative projects effortlessly.

 admin
admin


