Creating boot images in System Center Configuration Manager (SCCM) is an essential part of managing and deploying operating systems across a network. These boot images allow you to start a system in a minimal operating environment, enabling you to install or repair an OS remotely. They are key for scenarios like OS deployment, system maintenance, and disaster recovery. In this post, we will walk you through why boot images are important, the prerequisites for creating them, and the steps involved in the process.
Why Boot Images Are Important in SCCM
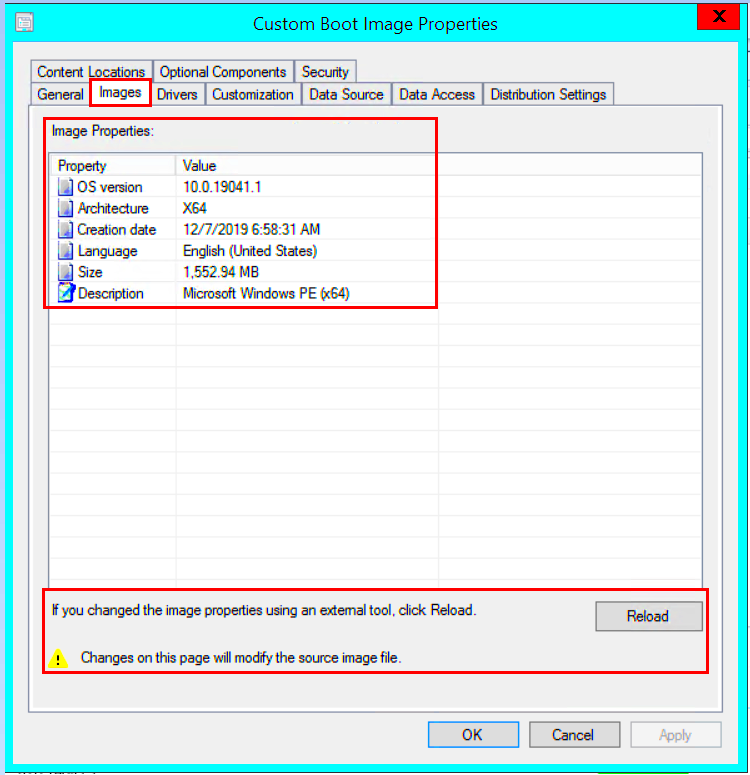
Boot images in SCCM play a crucial role in network-based OS deployment. Without a boot image, you cannot initiate the deployment process, especially for new or re-imaged devices. Here's why boot images are so important:
- Network Booting: They enable systems to boot over the network (PXE boot) without requiring an OS to be installed on the machine.
- OS Deployment: Boot images allow for the installation of operating systems on remote devices, simplifying large-scale deployments.
- Hardware Independence: They help create a consistent deployment environment, regardless of the hardware model.
- Diagnostic and Recovery: Boot images can be used to run diagnostics or repair OS installations in case of system failures.
- Customization: Boot images can be customized with drivers and additional tools to support a variety of hardware.
Overall, they streamline the deployment process and reduce the risk of errors during OS installation.
Also Read This: How to Sign Up for Getty Images to Submit Photos: A Complete Guide for New Contributors
Prerequisites for Creating Boot Images
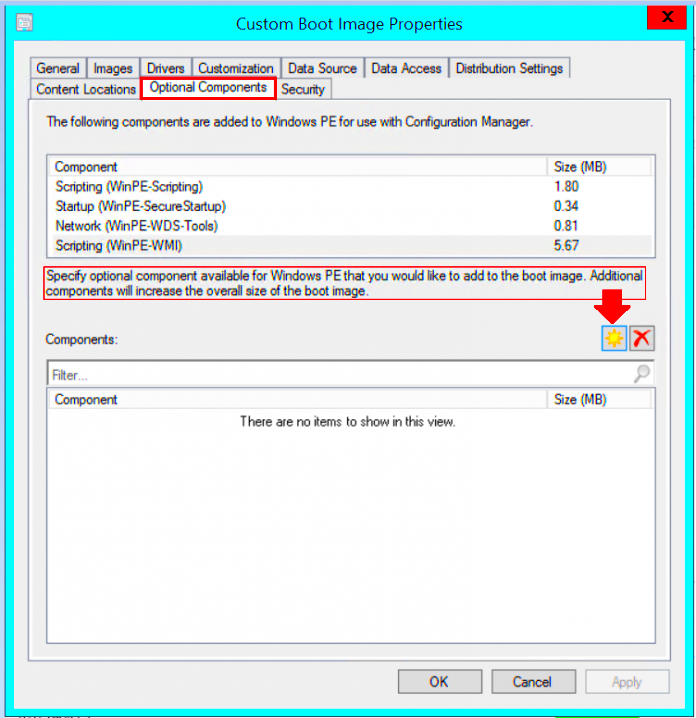
Before you start creating boot images in SCCM, there are a few prerequisites that you should be aware of. These include both software and hardware requirements that ensure a smooth process. Here's what you need:
- SCCM Installed and Configured: You need an active SCCM environment that is properly configured to manage devices and deployments.
- Operating System Installation Files: You'll need the installation files for the operating systems you plan to deploy.
- Network Access: Since boot images are typically used for network-based deployments, ensure that your network infrastructure supports PXE booting.
- Windows Assessment and Deployment Kit (ADK): The ADK provides necessary tools and drivers for creating boot images. Make sure it’s installed on your SCCM server.
- Drivers for Hardware: For successful deployments, you may need specific hardware drivers in your boot image, particularly if you are deploying to different types of devices.
Once you have all the prerequisites in place, you'll be ready to create and deploy boot images using SCCM.
Also Read This: How Much Money Does Getty Images Make: A Look at Getty’s Revenue and Business Model
Steps to Create Boot Images in SCCM
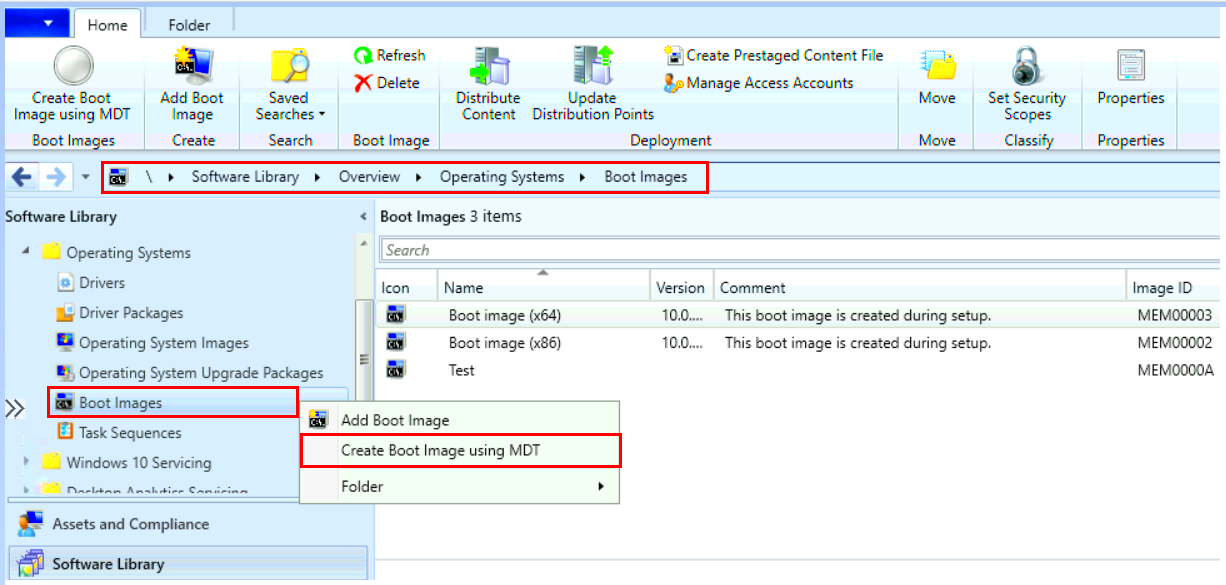
Creating boot images in SCCM is a straightforward process, but it requires careful attention to detail. Follow these steps to create boot images that are ready for deployment:
- Launch SCCM Console: Start by opening the SCCM console and navigating to the Software Library workspace.
- Access Boot Images: Go to Operating Systems and click on Boot Images under the Operating System Deployment section.
- Create Boot Image: In the Boot Images pane, click on Create Boot Image from the ribbon at the top. This opens the Create Boot Image Wizard.
- Specify Source Files: Select the appropriate source files for the boot image. Typically, these are taken from the Windows ADK or the Windows installation files.
- Choose Architecture: You’ll be asked to select whether you want a 32-bit or 64-bit boot image. Choose based on your deployment needs.
- Define the Destination: Choose the destination folder in SCCM where the boot image will be saved. This can be your distribution points or the main server.
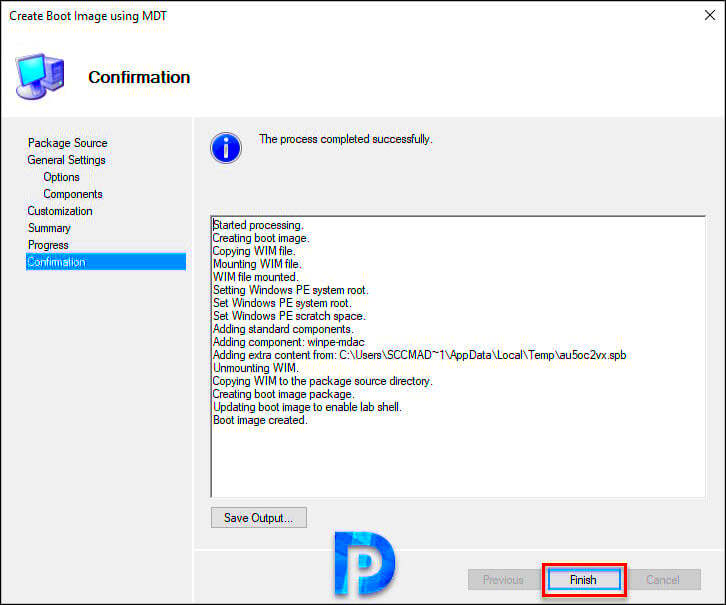
- Review and Confirm: Review all your selections and click Next to create the boot image. The process may take a few minutes.
- Distribute Boot Image: Once the boot image is created, distribute it to your distribution points to make it available for deployment.
After completing these steps, the boot image will be ready for use in OS deployment or troubleshooting tasks.
Also Read This: Legally Using Getty Images in Your Projects
Customizing Boot Images for Specific Environments
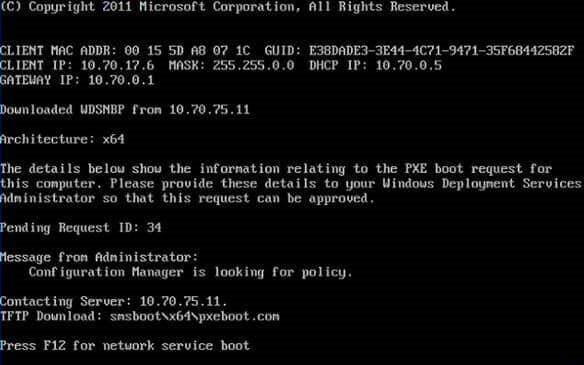
Sometimes, the default boot images created by SCCM may not fully meet the requirements of your environment. Customizing boot images allows you to add specific drivers, tools, or scripts tailored to your hardware and deployment needs. Here’s how you can do it:
- Adding Drivers: One of the most common customizations is adding drivers for specific hardware. Open the boot image properties and navigate to the Drivers tab. Here, you can add drivers for network adapters, storage controllers, or any other device that requires a driver during the boot process.
- Including Scripts: You can add custom scripts to your boot image for tasks like disk partitioning, network mapping, or even installing software packages during the deployment phase.
- Using Custom Backgrounds: If you want to brand your boot images or make them more user-friendly, you can customize the background. This can be done by modifying the boot image’s WIM file using tools like DISM.
- Enabling BitLocker: If you use BitLocker encryption, you can enable it in your boot images, allowing for encrypted OS deployment.
- Adding Diagnostic Tools: You can also add additional diagnostic or repair tools to the boot image, allowing IT staff to troubleshoot problems during deployment or system recovery.
By customizing boot images, you can ensure they are fully optimized for your specific needs, whether that’s for hardware compatibility, security, or user experience.
Also Read This: How Much Is a Getty Images Stock Photo: Understanding Getty's Pricing for Stock Photography
Deploying Boot Images Using SCCM
Once your boot image is created and customized, the next step is deploying it to the target machines. Deploying boot images with SCCM allows you to initiate OS installations and maintenance tasks across your network. Here’s how to deploy your boot images:
- Distribute Boot Image: If you haven’t already, distribute the boot image to your distribution points. Go to the Boot Images section in SCCM, select your boot image, and choose Distribute Content to send it to the appropriate distribution points.
- Initiate PXE Boot: To deploy a boot image, the target machine needs to be configured to boot from the network. Ensure that PXE boot is enabled in the BIOS/UEFI of the devices. Once that’s done, the machines will automatically request the boot image during startup.
- Configure Task Sequences: SCCM uses task sequences to automate the OS deployment process. Create or select a task sequence that includes your boot image and specify what should happen once the machine is booted (e.g., installing the OS, running scripts, etc.).
- Deploy Task Sequence: Deploy the task sequence to a collection of devices. You can target specific devices, user groups, or entire subnets, depending on your needs.
- Monitor Deployment: Once the deployment begins, monitor the status from the SCCM console. You can track the progress, check for errors, and ensure the deployment runs smoothly.
- Post-Deployment Actions: After the boot image is deployed and the OS installation completes, SCCM can automatically apply additional configurations, install software, or join machines to a domain as part of the task sequence.
Deploying boot images using SCCM is an efficient way to automate large-scale deployments. By following these steps, you can ensure that your OS deployment process is both reliable and scalable, saving time and reducing manual effort.
Also Read This: What Is iStock Signature Plus and How It Compares to Other Collections
Common Issues and Troubleshooting Tips
While creating and deploying boot images in SCCM is usually smooth, there can be some common issues that may cause delays or failures. Knowing what to look for and how to troubleshoot can save you time. Let’s go over a few common problems and their solutions:
- PXE Boot Failure: One of the most common issues is PXE boot failure. If a system isn’t able to boot from the network, check that the device’s BIOS/UEFI is configured correctly to boot from the network. Also, ensure that the DHCP server and PXE services on the SCCM server are functioning properly.
- Boot Image Not Available: If the boot image doesn’t appear during the network boot, ensure that it has been distributed to the correct distribution points and is available for the devices in question.
- Missing Drivers: If the boot image doesn’t load properly due to missing drivers (e.g., network or storage controllers), you can add the necessary drivers to the boot image through the SCCM console. It’s important to test boot images on various hardware to make sure they have all the needed drivers.
- Corrupt Boot Image: If a boot image is corrupted, it can fail during the deployment process. Recreate the boot image from scratch using the SCCM console and ensure that the source files are intact.
- Network Connectivity Issues: If the device cannot connect to the network during deployment, ensure the network drivers are included in the boot image. Additionally, check that the distribution points are accessible and the network infrastructure is stable.
By understanding these common issues and following the troubleshooting tips, you can ensure a smoother deployment process with fewer disruptions.
Also Read This: How to Obtain Getty Images for Your Event Without Cost
Frequently Asked Questions
Here are some frequently asked questions related to boot images in SCCM:
- What is the difference between a boot image and an OS image?
A boot image is a minimal operating system used to initiate an OS deployment. It contains the necessary tools and drivers to boot up a machine over the network. An OS image, on the other hand, is a complete operating system package that is installed after the boot image is loaded. - Can I customize a boot image?
Yes, boot images can be customized by adding drivers, tools, scripts, or even custom backgrounds. This allows you to tailor the boot environment to your specific needs, such as supporting different hardware or adding extra functionality like disk partitioning. - How do I add drivers to a boot image?
To add drivers to a boot image, go to the Boot Images section in SCCM, select the boot image, and then click on the Drivers tab. From here, you can import and apply the required drivers for your hardware. - Can I use a boot image for tasks other than OS deployment?
Yes, boot images can be used for system diagnostics, repairs, or even recovery tasks. They provide a minimal environment that allows you to troubleshoot or restore systems before deploying a full OS. - Why is my boot image not appearing in the deployment wizard?
This could happen if the boot image hasn't been distributed to the right distribution points or if it's not associated with the task sequence. Ensure the boot image is properly distributed and that the task sequence references the correct boot image.
If you have additional questions or need further clarification, don't hesitate to consult the SCCM documentation or reach out to your IT support team.
Conclusion
Creating and deploying boot images in SCCM is an essential process for managing operating system deployments, troubleshooting, and system recovery. By understanding the purpose of boot images, following the correct steps for creation, and addressing common issues along the way, you can ensure a smooth and efficient deployment process. Customizing your boot images for specific environments and hardware further enhances their effectiveness. And with the right troubleshooting tips and FAQ answers, you’ll be equipped to handle any challenges that arise.
By mastering boot image creation and deployment in SCCM, you'll streamline your IT operations, reduce downtime, and ensure that your OS deployment tasks run efficiently. With the right preparation and knowledge, boot images will become an indispensable part of your IT toolkit.
 admin
admin


