Blurring an image in PowerPoint can be a useful technique to enhance your presentation. Whether you're trying to draw attention to a specific part of the slide or create a subtle background effect, blurring can help you achieve the right visual impact. PowerPoint offers built-in tools to help you blur an image quickly without needing any external software. In this guide, we’ll walk you through the steps to blur images, discuss when and why you should use it, and explore some advanced tips for achieving the best results.
Why You Might Want to Blur an Image in PowerPoint

Blurring an image in PowerPoint serves several purposes. Here are a few reasons why you might consider using this effect:
- Focus on Text or Other Elements: If your slide has a detailed image that distracts from important text or other elements, blurring the image can help shift the viewer’s focus to the key content.
- Creating a Soft Background: When an image is used as a background, blurring it can make the text or other content stand out more clearly without overwhelming the viewer.
- Protecting Privacy: Sometimes, images may contain sensitive information that you don’t want to be fully visible. Blurring part of the image can help protect privacy.
- Adding an Artistic Effect: Blurring can be used creatively to give your slide a more modern or professional look, especially when applied subtly.
Also Read This: DIY Barbie Dresses with Fun Crafting Tips
Steps to Blur an Image Using PowerPoint's Built-In Tools
PowerPoint makes it easy to blur an image using its built-in formatting tools. Follow these steps to get started:
- Insert Your Image: First, insert the image you want to blur by going to the "Insert" tab and clicking "Pictures." Select your image from your device and place it on the slide.
- Select the Image: Click on the image to select it. You'll see the "Picture Format" tab appear on the ribbon at the top.
- Open Picture Effects: In the "Picture Format" tab, click on "Picture Effects," which is located under the "Artistic Effects" menu.
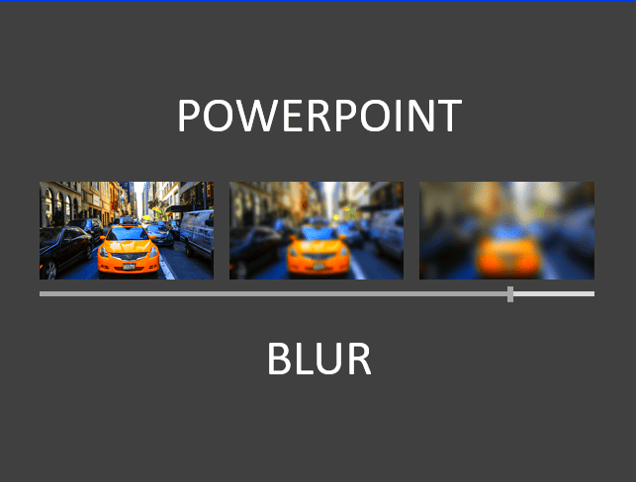
- Choose the Blur Effect: Scroll through the list of artistic effects and select the "Blur" option. You'll see the image change as the blur effect is applied.
- Adjust the Blur Intensity: To control the amount of blur, use the "Transparency" slider or adjust the blur intensity by choosing from different preset levels in the artistic effects menu. You can experiment to get the desired look.
- Finalize Your Image: Once you're satisfied with the blur effect, click outside the image to deselect it. Your blurred image is now ready for use in your presentation.
With just a few simple steps, you can blur an image in PowerPoint and create a more focused, professional-looking presentation.
Also Read This: Mastering Foundation Application for a Flawless Face
Using the Format Picture Tool to Blur an Image
If you want more control over the blur effect, you can use the "Format Picture" tool in PowerPoint. This tool gives you access to detailed settings that allow you to fine-tune the blur, making it easier to achieve exactly what you need. Here’s how you can use it:
- Select Your Image: Click on the image you want to blur to select it.
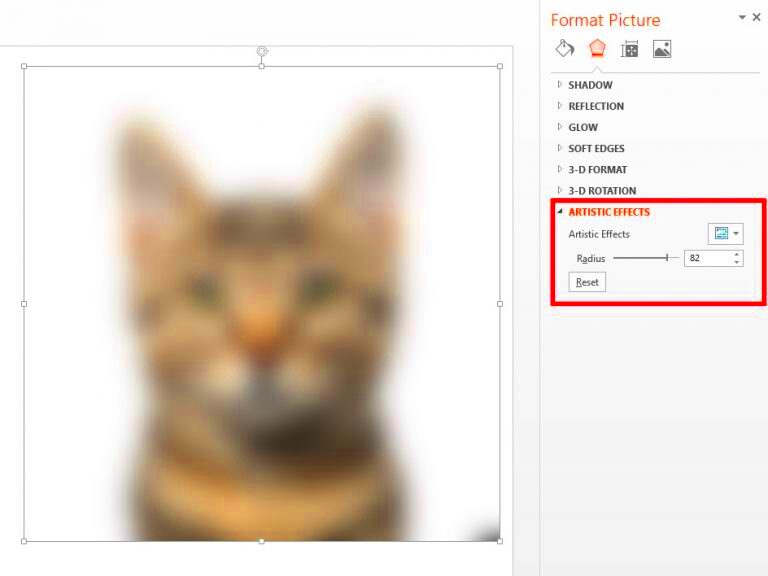
- Open the Format Picture Pane: Right-click on the image and select "Format Picture" from the menu. This will open a sidebar on the right side of the screen.
- Choose the Picture Effects Section: In the Format Picture pane, click on the "Picture" icon. Then, go to the "Effects" section, where you’ll find different options for adjusting your image.
- Apply the Blur: Under the "Artistic Effects" tab, select "Blur" from the list of available effects. This will instantly apply a blur to the image.
- Adjust the Blur Intensity: To customize the blur, use the slider to adjust the intensity. You can increase or decrease the amount of blur to make the effect stronger or lighter.
Using the "Format Picture" tool is a great way to ensure that the blur effect fits perfectly with your presentation’s needs. Whether you're blurring the background or highlighting certain elements, this method offers a higher level of customization compared to the standard options.
Also Read This: How to Send Auto-Delete Pictures on Telegram
Adjusting the Blur Effect for Better Results
While applying the blur effect is simple, getting it just right requires some fine-tuning. Here are a few tips for adjusting the blur effect to get the best results in PowerPoint:
- Test Different Blur Intensities: If the blur is too strong, it can overwhelm your slide, making it hard to see other elements. On the other hand, too little blur might not have the desired effect. Start by adjusting the slider to find a balance that works for your content.
- Use Subtle Blurring for Backgrounds: If you’re using blur to soften a background image, make sure the blur effect is subtle. A light blur keeps the background from distracting the viewer but still adds a nice touch.
- Layer Your Images: Consider layering multiple images with different levels of blur. This can add depth and interest to your slide, especially if you're working with graphics or visuals that need to stand out.
- Combine with Transparency: If the blur makes the image too harsh, adjust the transparency as well. This helps soften the image and ensures it complements the other elements on the slide without taking too much focus.
Taking the time to adjust the blur effect ensures that your image contributes to your slide without overpowering it. Experiment with these techniques to find the best look for your presentation.
Also Read This: Passing Alamy QC Guide for Meeting Quality Control Standards
Using Third-Party Tools for Advanced Blur Effects
If you want more advanced blur effects that PowerPoint can’t provide, third-party tools can help you achieve a more professional look. While PowerPoint’s built-in tools are great for basic effects, using external software allows you to create more complex blur patterns, gradients, and even selective blur. Here are some popular third-party tools:
- Adobe Photoshop: Photoshop is a powerful tool for creating custom blur effects. You can apply various blur filters, like Gaussian Blur or Motion Blur, and have full control over the intensity, shape, and direction of the blur. After editing, simply export the image as a PNG or JPEG and insert it into PowerPoint.
- GIMP: GIMP is a free alternative to Photoshop that offers similar blur options. It allows you to experiment with different types of blur, such as radial or zoom blur, which can add more dynamic effects to your images.
- Canva: Canva also has a blur feature for images. It’s easier to use than Photoshop and GIMP, and while not as powerful, it’s perfect for users who want a quick solution with minimal effort. You can use it directly online and save your blurred image to insert into PowerPoint.
These third-party tools provide greater flexibility when it comes to editing your images. If you want to achieve a professional-grade blur effect, using external software can help you create custom visuals that stand out in your presentations.
Also Read This: How Nonprofits Can Leverage Imago Images to Enhance Their Campaigns
Common Issues When Blurring Images in PowerPoint
While blurring images in PowerPoint is straightforward, you may encounter a few common issues that can affect the quality of your results. Here are some of the problems people face and how to solve them:
- Image Loss of Quality: One common problem is that images may lose sharpness or appear pixelated after applying the blur. This happens when the blur intensity is too high for the resolution of the image. To prevent this, try using higher-resolution images, as they maintain their quality even with a blur effect applied.
- Unwanted Artifacts: Sometimes, blurring can cause unwanted artifacts or a “halo” effect around the image, especially around the edges. This can make the image appear unnatural. To avoid this, try adjusting the blur intensity to a lower level or apply the blur effect to a duplicate image and reduce the opacity to soften the effect.
- Blur Not Applying Evenly: Another issue is when the blur effect doesn’t apply evenly across the image. This could happen due to specific settings or limitations within PowerPoint. To fix this, ensure that you are applying the effect through the "Format Picture" tool and adjusting the intensity for a smoother result.
- Image Not Selecting Properly: Occasionally, the image may not respond to the blur effect because it's locked or grouped with other elements. Make sure the image is selected individually and not part of a group. If necessary, ungroup elements before applying the effect.
By troubleshooting these common issues, you can achieve a clean and polished blur effect in your PowerPoint presentations.
Also Read This: How to Overlay Two Images in Preview for Mac Users
FAQs
Q: Can I blur an image in PowerPoint without affecting the entire image?
A: No, PowerPoint applies the blur effect to the entire image. However, you can duplicate the image, apply the blur to one version, and use the other as the clear focal point of your slide.
Q: How do I make a blurred image more visible?
A: If the blur effect is too strong and is affecting visibility, you can adjust the image’s transparency or reduce the blur intensity to ensure the image complements the text and other elements on your slide.
Q: Can I use blur effects for video in PowerPoint?
A: No, PowerPoint’s built-in blur effect only works on static images. For video, you’d need to use external video editing software before importing it into your presentation.
Q: Does blurring an image impact the file size of my presentation?
A: Blurring an image may slightly increase the file size due to the increased complexity of the image data. However, this is usually minimal unless you’re working with very high-resolution images or applying heavy blur effects.
Conclusion
Blurring images in PowerPoint is a simple yet powerful way to enhance your presentations, whether you're looking to highlight important content, create a soft background, or protect sensitive information. By using PowerPoint's built-in tools, adjusting the blur intensity, and experimenting with third-party software for more advanced effects, you can achieve the perfect balance for your slides.
While there may be occasional issues, most problems can be solved with some simple adjustments or troubleshooting. Whether you’re a beginner or a seasoned PowerPoint user, adding a blur effect can elevate the overall look of your presentation and help you communicate your message more effectively.
Take the time to experiment with these techniques, and soon, you’ll be using blurring like a pro to create stunning, impactful slides!

 admin
admin


