Inserting images into a canvas is a common task for designers and developers, especially in digital art and web development. Whether you're creating a website or working on a graphic design project, learning how to place images on a canvas is essential. This process allows you to layer, resize, and position images freely within a design, giving you full control over the visual outcome. In this guide, we'll cover everything you need to know about inserting images into a canvas, from the basics to more advanced tips and tricks.
What is a Canvas and Why Use It?

A canvas is a blank digital area where you can draw, manipulate, and position images or graphics. It serves as a space for creating content in various software applications, especially in web design and graphic editing tools like HTML5 canvas, Photoshop, or other design programs. Here's why using a canvas can be so useful:
- Flexibility: You can manipulate images, text, and other elements freely within a canvas without the constraints of a fixed layout.
- Control: It gives you precise control over each visual element, allowing for easy adjustments, such as resizing, rotating, and cropping.
- Creativity: Whether you're drawing or placing pre-existing images, the canvas provides an open space to bring your creative ideas to life.
- Interactivity: In web design, the canvas can be used for interactive features, like games or animations, adding functionality to your designs.
Overall, using a canvas gives you the freedom to craft and control your digital designs in an efficient, structured manner, which is why it's an essential tool for many digital projects.
Also Read This: Capturing Snow Across the USA in Beautiful Photos
Steps to Insert an Image in Canvas

Inserting an image into a canvas is a straightforward process. Depending on the tool or platform you're using, the steps can vary slightly. Here’s a general guide to get you started:
- Step 1: Choose Your Tool – Whether you’re using HTML5 canvas or a design software like Photoshop or Canva, make sure you’re working in the right environment for your project.
- Step 2: Prepare the Image – Before inserting, ensure that the image you want to use is in a compatible format, such as PNG or JPG. Resize or crop the image if needed to match the canvas size.
- Step 3: Load the Image – In most design tools, there will be an option to either drag and drop the image onto the canvas or use an “Insert Image” feature. In HTML5 canvas, you can use JavaScript to load the image dynamically.
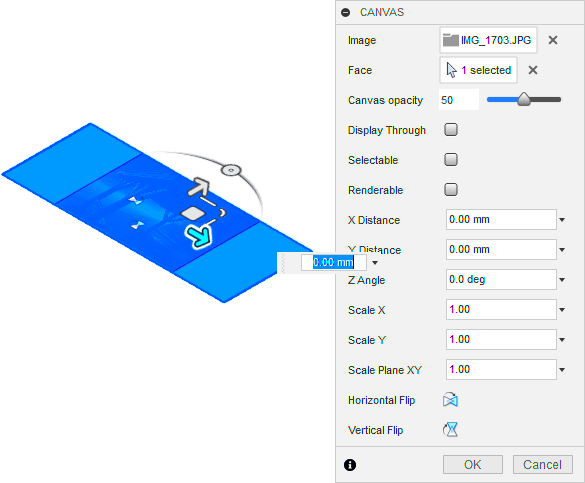
- Step 4: Position the Image – Once the image is on the canvas, you can adjust its position by dragging it around or using numerical coordinates to place it exactly where you want.
- Step 5: Resize and Edit – Resize the image if needed, using the corner handles in design software or through specific coding commands for web development. You can also apply filters or effects to enhance the image.
- Step 6: Save or Export – After inserting and adjusting the image, save your work. If you’re using HTML5 canvas, you may need to use a script to export or download the finished image.
These simple steps can be applied to most tools and platforms, making it easy to insert images into a canvas for any project. The key is to experiment with different techniques and options to find the best results for your needs.
Also Read This: How to Edit a YouTube Video That Is Not Yours
Different Image Formats for Canvas Insertion

When working with a canvas, choosing the right image format can significantly affect the quality and performance of your project. Different image formats offer various advantages depending on the type of
- JPEG (JPG): This is one of the most widely used image formats, especially for photographs and complex images. JPEGs offer a good balance between quality and file size, making them ideal for web use. However, they do lose some image quality due to compression.
- PNG: PNG images are great for web design and digital artwork because they support transparent backgrounds. They are lossless, meaning there’s no loss in image quality when saved. However, PNG files tend to be larger than JPEGs.
- GIF: GIF images are typically used for animations and simple graphics with limited colors. They are ideal for small animations but may not be the best choice for high-quality images due to their limited color palette.
- SVG: Scalable Vector Graphics (SVG) are vector-based images that can scale without losing quality. SVGs are perfect for logos, icons, and illustrations as they offer flexibility and sharpness at any size. They’re widely used for web design and user interfaces.
- WebP: A newer format developed by Google, WebP combines the best features of JPEG and PNG. It offers high-quality images with smaller file sizes, making it perfect for web use. However, not all browsers support it yet.
Understanding these formats and knowing when to use them will help you get the best results when inserting images into your canvas, balancing both quality and file size for your projects.
Also Read This: How to Remove the Alamy Watermark with Photoshop: A Step-by-Step Tutorial
Adjusting Image Size and Position on Canvas

After inserting an image into your canvas, adjusting its size and position is an important step to ensure it fits within your design. Whether you need to resize an image or move it to a specific location, the process can be done easily in most design tools and web development environments. Here's how to adjust your
- Resizing the Image: To resize an image, use the corner handles or input specific dimensions (width and height) in your design software. In HTML5 canvas, you can change the size using JavaScript commands, like
drawImage(), which allows you to specify new width and height parameters. - Aspect Ratio: Maintaining the image’s aspect ratio (the ratio of width to height) is crucial to avoid distortion. Most tools will allow you to resize the image while keeping the aspect ratio intact. This ensures the image doesn't get stretched or squished in a way that looks unnatural.
- Positioning the Image: You can move an image around the canvas by dragging it into place or setting its position with coordinates. In code, the
drawImage()function in HTML5 canvas allows you to define the X and Y coordinates where the image should be placed. - Alignment: If you need the image to be aligned with other elements on the canvas, make sure to use the alignment tools provided by the design software or calculate the coordinates programmatically to ensure a clean layout.
- Rotation: Sometimes, you may need to rotate the image to fit your design. Many design programs offer a rotate tool that lets you rotate the image at any angle. You can also rotate images using the
rotate()method in HTML5 canvas.
Adjusting the size and position of your images ensures they are placed exactly where you need them, helping you create a polished and cohesive design.
Also Read This: How to Apply Eyeshadow: Step-by-Step Images for a Flawless Look
Common Issues When Inserting Images and How to Solve Them
While inserting images into a canvas is generally straightforward, there are a few common issues that can arise. Thankfully, most of these problems have easy solutions. Below are some of the most frequent issues and how to solve them:
- Image Not Showing Up: If the image doesn’t appear on your canvas, it could be due to a broken link, an incorrect file path, or an unsupported image format. Double-check the file location and format to ensure they are compatible with your canvas environment.
- Distorted Images: Sometimes images appear stretched or compressed when inserted into a canvas. This typically happens if the aspect ratio isn’t maintained during resizing. To fix this, always ensure you are resizing images proportionally to avoid distortion.
- Image Quality Issues: If the image looks blurry or pixelated after insertion, it's likely because the image resolution is too low for the size it’s being displayed at. To solve this, use higher-resolution images or adjust the canvas size accordingly.
- Transparency Not Displaying: For images with transparent backgrounds (like PNGs), some canvases may not display the transparency correctly. Ensure that your canvas or design environment supports transparency, and check the image format to confirm it is a PNG or other format that supports transparency.
- Incorrect Image Positioning: If the image isn’t positioned correctly, it could be due to incorrect X and Y coordinates. Double-check the values you’ve entered for the image's position and adjust them as necessary. Using alignment tools in design software can also help ensure proper positioning.
- Slow Performance: If you notice slow performance after inserting large images, try optimizing the image file size before uploading it to the canvas. Tools like Photoshop or online image compressors can help reduce the file size without sacrificing too much quality.
By understanding and addressing these common issues, you can ensure a smoother experience when working with images on a canvas, leading to a more polished and professional final result.
Also Read This: How to Upload an MP3 File to YouTube
Enhancing Your Image with Filters and Effects
After inserting an image into your canvas, enhancing it with filters and effects is a great way to improve its visual appeal. Filters and effects can help you adjust the mood, style, and feel of the image, making it more engaging for your audience. Whether you're working on a web design or digital art project, applying the right effect can bring your
- Filters: Filters are pre-set adjustments that can dramatically change the appearance of your image. Some popular filter effects include:
- Black and White: Convert your image to grayscale for a classic, timeless look.
- Sepia: Apply a warm, brown tone to give the image an old-fashioned feel.
- Blur: Apply a blur effect to soften the image or focus attention on a particular area.
- Vintage: Add a retro look by applying a faded, worn effect.
- Color Adjustments: Use tools to change the brightness, contrast, saturation, and hue of your image. This allows you to make the image brighter, more vivid, or even shift the overall color palette.
- Special Effects: Apply more advanced effects like:
- Drop Shadows: Add depth to your image by applying a shadow effect that makes the image appear to float.
- Grain or Noise: Create a textured look by adding grain, which can give your image a more artistic or retro feel.
- Glow: Add a glow effect to make parts of the image appear illuminated or highlighted.
- Layering Effects: In more advanced editing tools, you can layer multiple images or effects on top of each other for a more complex result.
By experimenting with different filters and effects, you can transform your image into a visually striking element that complements your design and fits your overall creative vision.
Also Read This: How to Record YouTube Videos Exploring Different Methods
Best Practices for Image Insertion in Canvas
When inserting images into a canvas, following best practices can help you achieve professional-looking results while maintaining a smooth workflow. Whether you’re a designer or developer, these tips will ensure that your images fit seamlessly into your project:
- Use High-Quality Images: Always work with high-resolution images to avoid pixelation or blurriness. Low-quality images will look unprofessional, especially when resized.
- Optimize Image File Size: Large images can slow down your website or application. Use image compression tools to reduce file sizes without sacrificing too much quality. This helps your page load faster and improves performance.
- Maintain Aspect Ratio: When resizing images, make sure to maintain the original aspect ratio to prevent distortion. Most design tools offer a lock aspect ratio option when resizing images.
- Use Transparent Backgrounds When Necessary: If your image has transparency, like PNGs, ensure the canvas supports transparent backgrounds. This is especially important for logos, icons, or any design element where you want a seamless look.
- Ensure Proper Alignment: Position your images carefully to avoid clutter. Align your images with other elements on the canvas using grids, guidelines, or snapping tools. This ensures a balanced and polished layout.
- Test Across Devices: If you're working on a web project, make sure your images look good on different screen sizes. This includes adjusting image size and resolution to ensure a responsive design.
- Consider the File Format: Choose the right format for your images. For photos, JPEGs are best, while PNG is ideal for graphics with transparency. For vector images, SVG is a better choice.
By following these best practices, you’ll be able to insert images effectively into your canvas and create professional, visually appealing designs with ease.
Also Read This: how to round corners of images in google slides
FAQ
Here are some frequently asked questions about inserting and working with images in a canvas:
- How do I insert an image into an HTML5 canvas?
To insert an image into an HTML5 canvas, use JavaScript’s
drawImage()method. You can load the image using anImageobject and then draw it on the canvas using coordinates and dimensions of your choice. - Can I resize an image without distorting it?
Yes! When resizing, ensure that you maintain the image’s aspect ratio. Most design software and HTML5 canvas allow you to lock the aspect ratio so the image resizes proportionally.
- What’s the best file format for images in a canvas?
The best format depends on the image. Use PNG for transparent images, JPEG for photographs, and SVG for vector-based images like logos. WebP is also a good choice for high-quality, small-sized images on the web.
- Why is my image blurry after I insert it into the canvas?
The image may have low resolution, or it may have been resized beyond its capabilities. Always start with high-resolution images and avoid scaling them up too much, as this can lead to pixelation.
- Can I apply effects to an image after inserting it into the canvas?
Yes, many design tools and HTML5 canvas allow you to apply effects to images even after they’ve been inserted. You can use filters, color adjustments, and special effects to enhance your image.
Conclusion
Inserting images into a canvas is a simple yet essential skill for web designers, digital artists, and developers. By understanding the different image formats, how to adjust the size and position, and how to enhance your images with filters and effects, you can create visually appealing and interactive designs. Remember to follow best practices for image insertion to ensure your images look their best and perform well across all devices. With the knowledge gained here, you’ll be able to insert, adjust, and enhance your images with confidence, whether for a web project, graphic design, or digital artwork.

 admin
admin


