Xmanager Harmony: Installing Spotify with Xmanager for Enhanced Features
By: HD Stock Images
February 3, 2024
701
Choosing Xmanager Harmony for optimizing your Spotify experience is a decision that comes with a myriad of benefits. Let's delve into the compelling reasons why you should opt for Xmanager Harmony to enhance your music streaming journey.
1. Enhanced Performance
Xmanager Harmony is designed to boost the performance of applications like Spotify. With optimized resource utilization and efficient handling of data, you can enjoy a smoother and faster music streaming experience.
2. Seamless Integration
Integrating Xmanager Harmony with Spotify is a seamless process. The software ensures a tight integration that allows Spotify to harness the full potential of your system, providing an integrated and cohesive user experience.
3. Advanced Features Unlock
By using Xmanager Harmony, you unlock a range of advanced features in Spotify. From improved audio quality to additional customization options, you get access to a set of tools that take your music listening to the next level.
4. Cross-Platform Compatibility
Xmanager Harmony is designed to be compatible with various operating systems. Whether you are using Windows, macOS, or Linux, Xmanager Harmony ensures a consistent and reliable performance across different platforms, offering flexibility to users.
5. Resource Optimization
One of the key advantages of Xmanager Harmony is its resource optimization capabilities. The software intelligently manages system resources, ensuring that Spotify runs efficiently without causing any lag or slowdown, even on less powerful devices.
6. User-Friendly Interface
Xmanager Harmony boasts a user-friendly interface that simplifies the installation and integration process. Even for users with limited technical expertise, navigating through the software and configuring it to work seamlessly with Spotify is a straightforward process.
7. Regular Updates and Support
With Xmanager Harmony, you can expect regular updates and dedicated customer support. The development team is committed to providing users with the latest features, improvements, and assistance, ensuring a reliable and up-to-date experience.
8. Cost-Effective Solution
Considering the enhanced features and improved performance it brings to Spotify, Xmanager Harmony is a cost-effective solution. Users can enjoy a premium music streaming experience without breaking the bank.In summary, choosing Xmanager Harmony is not just about installing software; it's about unlocking a world of possibilities for your Spotify journey. From performance optimization to advanced features, Xmanager Harmony is the key to elevating your music streaming experience.
System Requirements
Before diving into the installation process of Xmanager Harmony for Spotify, it's crucial to ensure that your system meets the necessary requirements. Here's a comprehensive guide to the system specifications you need for a seamless experience:
1. Operating System Compatibility
Ensure that your system runs on a compatible operating system. Xmanager Harmony supports Windows (7, 8, 10), macOS (10.12 and later), and various Linux distributions, including Ubuntu, Fedora, and CentOS. Check the compatibility list to ensure your specific OS version is supported.
2. Processor and RAM
Xmanager Harmony is designed to work efficiently on a range of hardware configurations. However, for optimal performance, it's recommended to have a multicore processor (Intel or AMD) with a clock speed of at least 2.0 GHz. Additionally, a minimum of 4 GB RAM is advised, with higher configurations providing smoother operation.
3. Free Disk Space
Make sure your system has sufficient free disk space for both Xmanager Harmony and Spotify. A minimum of 500 MB of free space is required for Xmanager Harmony installation, while Spotify may require additional space for caching and storing downloaded content. Check the storage requirements for both applications to ensure you have an ample amount of space available.
4. Graphics Card
While Xmanager Harmony is not particularly demanding on graphics, having a dedicated graphics card with updated drivers can contribute to an improved overall experience. This is especially relevant if you plan to utilize advanced features in Spotify that may benefit from enhanced graphical capabilities.
5. Internet Connection
Ensure a stable and high-speed internet connection, as both Xmanager Harmony and Spotify require internet access for downloading, updating, and streaming content. A minimum recommended speed of 5 Mbps is advisable for a smooth streaming experience.
6. Additional Software Dependencies
Check for any additional software dependencies required by Xmanager Harmony. While the installation process typically includes the necessary components, it's essential to ensure that your system has the required libraries and dependencies to avoid any compatibility issues.
7. Security Software Considerations
Temporarily disable or configure your antivirus and firewall settings to allow the installation and functioning of Xmanager Harmony and Spotify. Some security software may interfere with the installation process, and adjusting settings can prevent any disruptions.By ensuring that your system meets these requirements, you set the foundation for a successful installation of Xmanager Harmony, paving the way for an enhanced Spotify experience with advanced features and optimized performance.
Downloading Xmanager Harmony
Embarking on the journey to enhance your Spotify experience with Xmanager Harmony begins with a simple yet crucial step - downloading the software. Follow these steps to seamlessly download Xmanager Harmony and prepare for the installation process:
1. Visit the Official Xmanager Harmony Website
Head to the official Xmanager Harmony website (provide hyperlink) to ensure that you are downloading the latest and most secure version of the software. Look for the designated download section or page.
2. Select Your Operating System
Xmanager Harmony is compatible with various operating systems, including Windows, macOS, and Linux. Choose the version that corresponds to your operating system by clicking on the respective download link. This ensures that you are getting the correct installer for your system.
3. Choose the Installation Package Type
Upon selecting the operating system, you may have options for different installation package types. Common options include standard installers or compressed packages. Choose the package type that aligns with your preferences and system requirements.
4. Review System Compatibility
Before initiating the download, double-check the system requirements mentioned on the download page. Ensure that your system meets the specified criteria for a smooth installation and optimal performance.
5. Initiate the Download
Click the "Download" button or link to initiate the download process. Depending on your internet connection speed, the download may take a few moments. Be patient and allow the download to complete fully.
6. Verify the Downloaded File
Once the download is complete, verify the integrity of the downloaded file by checking its digital signature or comparing its checksum with the provided values on the official website. This step ensures that the file has not been corrupted during the download process.
7. Save the Installer in a Convenient Location
Choose a location on your computer where you want to save the downloaded Xmanager Harmony installer. Having the installer in a readily accessible location will make the installation process smoother.
8. Additional Notes for Linux Users
If you are downloading Xmanager Harmony for Linux, be sure to follow any additional instructions provided for your specific distribution. This may include using package managers or executing certain commands to complete the installation process.With Xmanager Harmony successfully downloaded, you are now ready to proceed to the installation phase. The downloaded installer serves as the gateway to unlocking enhanced features and optimizing Spotify with Xmanager Harmony.
Installing Xmanager Harmony
Now that you've successfully downloaded Xmanager Harmony, let's walk through the installation process step by step. Follow these instructions to seamlessly install Xmanager Harmony on your system:
1. Locate the Downloaded Installer
Navigate to the location where you saved the downloaded Xmanager Harmony installer. This is typically the folder or directory you specified during the download process.
2. Double-Click the Installer File
Double-click on the Xmanager Harmony installer file to initiate the installation process. If you are using a different operating system, follow the specific instructions for launching the installer on your system.
3. Follow the Installation Wizard
Xmanager Harmony employs an installation wizard that guides you through the setup process. Follow the on-screen instructions, providing necessary information such as the installation directory and any preferences you may have.
4. Review and Accept License Agreement
Read through the license agreement presented during the installation. If you agree to the terms and conditions, select the option to accept the agreement. This step is typically required before proceeding with the installation.
5. Choose Components to Install
During the installation, you may be given the option to choose specific components or features to install. Ensure that the necessary components for Xmanager Harmony are selected. This may include drivers, utilities, and additional tools that enhance compatibility.
6. Select Start Menu and Desktop Shortcuts
Opt to create shortcuts for Xmanager Harmony on your Start Menu and Desktop for convenient access. This step streamlines the process of launching the application once the installation is complete.
7. Configure Additional Settings (if applicable)
Depending on your preferences and system requirements, you may have the option to configure additional settings during the installation. This could include network configurations or integration with other applications. Adjust these settings according to your needs.
8. Initiate the Installation Process
Once you've reviewed and configured the necessary settings, initiate the installation process by clicking the "Install" or "Finish" button. The installer will proceed to copy files and configure Xmanager Harmony on your system.
9. Completion and Verification
Upon successful installation, you should receive a notification indicating that Xmanager Harmony has been installed. Verify the installation by checking for the application in your Start Menu, Desktop, or designated installation directory.
10. Launch Xmanager Harmony
Now that Xmanager Harmony is installed, launch the application to ensure it runs smoothly. At this point, you are one step closer to enhancing your Spotify experience with Xmanager Harmony's advanced features.With Xmanager Harmony successfully installed, you are now ready to proceed to the next crucial step - integrating it with Spotify to unlock a host of enhanced features for your music streaming pleasure.
Now that you have Xmanager Harmony installed, let's explore the seamless process of integrating it with Spotify to unlock advanced features and optimize your music streaming experience. Follow these steps to ensure a smooth integration:
1. Launch Xmanager Harmony
Start by launching Xmanager Harmony on your system. You can find the application in your Start Menu, Desktop, or the designated installation directory. Double-click on the Xmanager Harmony icon to open the application.
2. Navigate to Spotify Integration Settings
Within the Xmanager Harmony interface, look for the settings or preferences section. Navigate to the Spotify integration settings, where you'll find options related to connecting Xmanager Harmony with your Spotify account.
3. Login to Your Spotify Account
To enable integration, you'll need to log in to your Spotify account from within the Xmanager Harmony interface. Enter your Spotify username and password when prompted, ensuring that you provide the correct credentials to establish the connection.
4. Authorize Xmanager Harmony
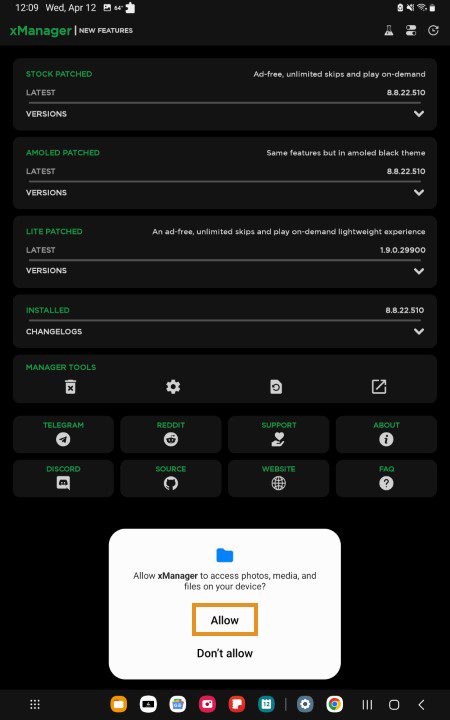
Upon logging in, Spotify may prompt you to authorize Xmanager Harmony to access certain features. Grant the necessary permissions to allow Xmanager Harmony to optimize and enhance your Spotify experience. This step is crucial for the seamless integration of both applications.
Depending on your preferences and requirements, Xmanager Harmony may offer additional advanced integration settings. These settings could include options for audio quality, playlist synchronization, and other customization features. Configure these settings according to your preferences.
6. Verify Integration Status
After configuring the integration settings, verify the integration status within Xmanager Harmony. Look for indicators or messages confirming that Xmanager Harmony is successfully connected to your Spotify account. This ensures that the integration process has been completed successfully.
7. Restart Spotify (if necessary)
In some cases, it may be necessary to restart the Spotify application to apply the changes and activate the integration with Xmanager Harmony. Close and reopen Spotify to ensure that the enhanced features are now accessible through the integrated setup.
8. Explore Enhanced Spotify Features
With the integration complete, explore the enhanced features that Xmanager Harmony brings to your Spotify experience. This could include improved audio quality, advanced playlist management, and other optimizations that elevate your music streaming journey.
9. Troubleshooting (if needed)
If you encounter any issues during the integration process, refer to the troubleshooting section in the Xmanager Harmony documentation. Common issues and solutions may be outlined to assist you in resolving any potential challenges.By following these steps, you have successfully integrated Spotify with Xmanager Harmony, unlocking a range of advanced features and optimizations that enhance your overall music streaming experience. Enjoy the enriched audio quality and enhanced functionalities as you delve into your favorite playlists and discover new music with Xmanager Harmony and Spotify.
FAQ
Explore this FAQ section to find answers to common questions about installing and using Xmanager Harmony for Spotify integration:
1. What is Xmanager Harmony, and how does it enhance Spotify?
Xmanager Harmony is a powerful tool that optimizes applications like Spotify, providing enhanced performance, improved audio quality, and advanced features. It seamlessly integrates with Spotify to elevate your music streaming experience.
2. Is Xmanager Harmony compatible with my operating system?
Xmanager Harmony is compatible with Windows (7, 8, 10), macOS (10.12 and later), and various Linux distributions. Check the system requirements on the official website to ensure compatibility with your specific operating system version.
3. What are the minimum system requirements for Xmanager Harmony?
The minimum requirements include a multicore processor (2.0 GHz or higher), 4 GB RAM, and 500 MB of free disk space. Additional details on graphics card recommendations and internet speed can be found in the system requirements section.
4. How do I download Xmanager Harmony?
Visit the official Xmanager Harmony website and select the download link corresponding to your operating system. Choose the appropriate installation package type and follow the on-screen instructions to complete the download process.
5. What steps are involved in installing Xmanager Harmony?
After downloading the installer, double-click on the file to launch the installation wizard. Follow the on-screen instructions, including accepting the license agreement, choosing components to install, and configuring settings. Once completed, Xmanager Harmony is ready for use.
6. How do I integrate Xmanager Harmony with Spotify?
Launch Xmanager Harmony, navigate to the Spotify integration settings, and log in to your Spotify account. Authorize Xmanager Harmony to access Spotify features, configure advanced integration settings if necessary, and verify the integration status. Restart Spotify if prompted, and explore the enhanced features.
7. What advanced features does Xmanager Harmony unlock in Spotify?
Xmanager Harmony unlocks features such as enhanced audio quality, playlist synchronization, and optimizations for a smoother streaming experience. Users can customize advanced integration settings based on preferences.
8. Is Xmanager Harmony a cost-effective solution?
Yes, Xmanager Harmony is a cost-effective solution for enhancing Spotify features. Users can enjoy advanced functionalities without significant financial investment, making it an attractive option for music enthusiasts.
9. Where can I find troubleshooting assistance?
If you encounter issues during installation or integration, refer to the troubleshooting section in the Xmanager Harmony documentation. It provides solutions to common problems and ensures a smooth user experience.These FAQs aim to address key inquiries about Xmanager Harmony and its integration with Spotify. If you have additional questions or encounter specific issues, consult the official documentation or reach out to the Xmanager Harmony support team for assistance.
Troubleshooting
Encountering issues during the installation or integration process? This troubleshooting guide provides solutions to common problems, ensuring a smooth experience with Xmanager Harmony and Spotify integration.
1. Installation Failure
If the installation fails, ensure that your system meets the minimum requirements. Check for sufficient disk space, correct operating system compatibility, and disable any antivirus or firewall temporarily during the installation process.
2. Integration Issues with Spotify
If you face challenges integrating Xmanager Harmony with Spotify, verify that you are using the correct Spotify credentials during the login process. Ensure that Xmanager Harmony has the necessary permissions to access Spotify features by checking the authorization settings.
3. Performance Lag or Freezing
If you experience performance lag or freezing after integration, check your system resources. Close unnecessary background applications, clear cache, and ensure that your internet connection is stable. Adjust advanced integration settings within Xmanager Harmony for optimal performance.
4. Audio Quality Problems
If there are issues with audio quality, ensure that your sound drivers are up to date. Check for conflicts with other audio-enhancing applications and adjust the audio settings within Xmanager Harmony. Experiment with different audio quality settings to find the optimal configuration.
5. Missing or Unresponsive Spotify Features
If certain Spotify features are missing or unresponsive, restart both Xmanager Harmony and Spotify. Ensure that you are using the latest versions of both applications. If the issue persists, check for updates on the official websites or contact customer support for assistance.
6. Error Messages or Crashes
If you encounter error messages or crashes, note down the error details and check the Xmanager Harmony documentation for specific error resolutions. Update Xmanager Harmony to the latest version, and if the problem persists, contact the support team for personalized assistance.
7. Network Connection Problems
If you face network connection problems, ensure that your internet connection is stable. Check for any network restrictions or firewalls that may be blocking the communication between Xmanager Harmony and Spotify. Adjust network settings and consider contacting your internet service provider for assistance.
8. Incompatibility with Operating System Updates
If Xmanager Harmony becomes incompatible after an operating system update, check the official website for compatibility updates. The development team may release patches or updates to ensure seamless integration with the latest operating system versions.
9. Uninstalling and Reinstalling Xmanager Harmony
If all else fails, consider uninstalling Xmanager Harmony, rebooting your system, and then reinstalling the latest version. This can resolve issues related to corrupted installations or conflicting configurations.By following these troubleshooting steps, you can address common issues and ensure a smooth and optimized experience with Xmanager Harmony and Spotify. If you encounter persistent problems, don't hesitate to reach out to the Xmanager Harmony support team for further assistance.
Conclusion
Congratulations on successfully installing and integrating Xmanager Harmony with Spotify! As you wrap up this journey, let's reflect on the key takeaways and the exciting possibilities that await you in your enhanced music streaming experience.
Unlocking Advanced Features
By choosing Xmanager Harmony, you've unlocked a host of advanced features in Spotify. From improved audio quality to customizable settings, each feature is designed to elevate your music listening experience to new heights.
Seamless Integration for Optimal Performance
The seamless integration of Xmanager Harmony with Spotify ensures optimal performance. Your favorite music is now complemented by a well-optimized system, providing a smooth and responsive interface for an immersive listening experience.
Troubleshooting for a Smooth Journey
In the event of challenges, this guide's troubleshooting section offers valuable solutions. Whether it's addressing installation issues or optimizing performance, the troubleshooting tips ensure that you can overcome hurdles and enjoy uninterrupted music streaming.
Personalized Customization
Xmanager Harmony not only enhances performance but also allows for personalized customization. Explore the advanced settings and features to tailor your music streaming setup according to your preferences, making it a truly unique and enjoyable experience.
Continued Support and Updates
As you continue to enjoy Xmanager Harmony and Spotify, anticipate continued support and updates. The development team is committed to refining and expanding the software, ensuring that you benefit from the latest features and improvements in the future.
Share Your Experience
We encourage you to share your enhanced Spotify experience with Xmanager Harmony. Connect with the community, share tips and tricks, and explore how others are optimizing their music streaming setups. Your insights may inspire and assist fellow music enthusiasts on their journey.In conclusion, Xmanager Harmony has empowered you to take control of your music streaming experience. The harmonious integration of technology and music awaits, promising a dynamic and enriched journey with every beat and melody. Thank you for choosing Xmanager Harmony, and may your musical adventures continue to be extraordinary!
About Author
admin
Making up design and coding is fun. Nothings bring me more pleasure than making something out of nothing. Even when the results are far from my ideal expectations. I find the whole ceremony of creativity completely enthralling. Stock Photography expert.
 Before diving into the installation process of Xmanager Harmony for Spotify, it's crucial to ensure that your system meets the necessary requirements. Here's a comprehensive guide to the system specifications you need for a seamless experience:
 admin
admin