Hey there! If you’re looking to step into the world of YouTube content creation, you’re likely to encounter the term screen recording. It’s a powerful tool that allows creators to capture their desktop or mobile screens and share tutorials, gameplay, presentations, or any visual content. With the right screen recorder, you can create engaging videos that resonate with your audience. Whether you're a seasoned YouTuber or just starting, mastering screen recording is essential for producing quality content that can help you grow your channel.
Importance of Choosing the Right Screen Recorder
When diving into screen recording, one of the most crucial decisions you'll face is selecting the right software. Not all screen recorders are created equal, and the right choice can make a significant difference in the quality of your videos. Here are some key factors to consider when choosing your screen recording software:
- Quality of Recording: Look for recorders that capture video in high definition. Your audience deserves the best visual experience, especially if you are teaching them something complex or showcasing gameplay.
- User Interface: A clean, intuitive user interface can save you a lot of time and frustration. You want a recorder that you can understand and use efficiently, especially when you’re in the heat of recording.
- Customization Options: Different projects have different needs. A good screen recorder allows you to customize the recording area, add annotations, and even include webcam footage. These features can enhance your videos and make them more engaging.
- Audio Quality: Some recordings require voiceovers or system audio. Choose a screen recorder that handles audio capture well, ensuring clarity and echo-free sound.
- Editing Features: Some software includes basic editing tools that allow you to trim, cut, or merge clips right after recording. This convenience saves time and provides a smoother workflow.
- File Format Support: Ensure that the software supports multiple file formats. You want to be able to export your videos in formats that are compatible with YouTube and other platforms.
- Cost: Think about your budget. While many great free screen recorders exist, some offer premium features that may be worth the investment. Evaluate what you need in relation to what you’re willing to spend.
In addition to the factors mentioned above, it’s also invaluable to read reviews and watch comparison videos. Many YouTubers share their experiences with different screen recorders, highlighting strengths and weaknesses that can help inform your decision.
Overall, investing time in finding the right screen recording software can lead to high-quality content that draws in viewers and keeps them coming back for more. Remember, the better your videos look and sound, the more professional you will appear to your audience, which can set your channel apart in the crowded YouTube landscape. Happy recording!
Also Read This: What Type of YouTube Content Makes the Most Money in 2024
3. Top Screen Recorders Preferred by YouTubers
When it comes to creating engaging content for YouTube, the right screen recorder can make all the difference. Here are some of the top screen recorders loved by YouTubers around the globe:
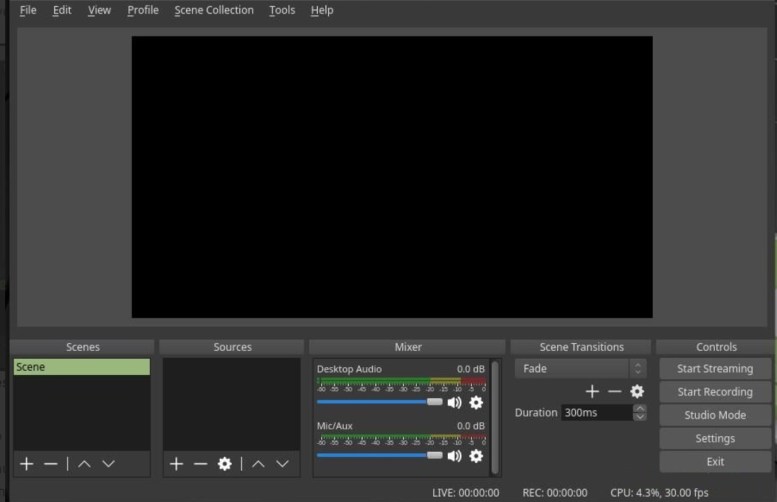
- OBS Studio:
This free and open-source software is a favorite among many creators. Its versatility allows for highly customizable screen recordings and live streaming options. Plus, it supports multiple platforms, including Windows, macOS, and Linux.
- Camtasia:
A more polished option, Camtasia offers a suite of editing tools that are perfect for producing professional-looking videos. It’s user-friendly and is especially favored for tutorial videos.
- Bandicam:
Perfect for gamers, Bandicam can capture high-quality video at high compression rates. It also has a simple interface to record specific areas of your screen, which is ideal for focused content.
- Screencast-O-Matic:
This tool is super easy to use and is available in both free and paid versions. It’s great for quick recordings and includes basic editing features that allow for some post-production polish.
- Snagit:
Though primarily a screenshot tool, Snagit offers excellent screen recording capabilities. Its strengths lie in its ability to quickly capture and annotate images, which is handy for tutorials and walkthroughs.
Each of these recorders has its unique appeal, catering to various needs within the YouTube community. Whether you're a gamer, educator, or just someone looking to share tips and tricks, there's a screen recorder tailored to your style.
Also Read This: How to Put Two YouTube Videos Side by Side Using HTML: A Step-by-Step Tutorial
4. Features to Consider When Selecting a Screen Recorder
Choosing the right screen recorder isn’t just about grabbing the first one you see on a list. It's about understanding your specific needs. Here are some important features to consider:
- Ease of Use:
Your screen recorder should be intuitive and easy to navigate. The last thing you want is to waste hours trying to figure out how to record!
- Recording Quality:
Look for recorders that can capture high-definition video. This is especially important for YouTube, as viewers expect crisp and clear visuals.
- Audio Options:
Check if the software allows you to record audio from multiple sources, such as system sounds and your microphone. Good audio can elevate your content significantly.
- Editing Capabilities:
If you prefer an all-in-one solution, consider a recorder that includes editing tools. It can save you the hassle of needing separate software for simple edits.
- File Formats:
Ensure your screen recorder supports popular video formats, as this can make uploading to YouTube smoother.
- Output Settings:
The ability to adjust settings like resolution, framerate, and file size can be crucial for optimizing your videos for YouTube.
- Customer Support:
If you run into issues, having reliable customer support or an active community can be a lifesaver.
In summary, take your time in selecting a screen recorder tailored to your workflow and content style. The right features can help you create captivating videos that keep your audience coming back for more!
Also Read This: Can You Watch YouTube on Android Auto? A Feature Breakdown
5. How to Use Screen Recorders Effectively
Using a screen recorder might seem straightforward, but there's definitely an art to doing it well! Whether you're creating tutorials, gameplay videos, or vlogs, effective screen recording can make a huge difference in the quality of your content. Here are some tips to ensure you're getting the best results:
- Choose the Right Settings: Always check your resolution settings before starting. For YouTube, 1080p is often the gold standard. You want your viewers to see every detail clearly, so make sure you’re not recording in a lower quality.
- Audio Quality Matters: Use a good microphone to improve the audio quality of your recordings. It’s not just about what viewers see; what they hear is just as important. Make sure to test your audio levels beforehand!
- Prepare Your Content: Before hitting that record button, take a moment to outline what you want to say or demonstrate. Having a clear plan will help you stay focused and reduce the need for edits later on.
- Use Hotkeys: Familiarize yourself with keyboard shortcuts for your screen recorder. Hotkeys allow you to start, stop, or pause recordings quickly without fumbling around with your mouse.
- Record in Segments: Instead of recording everything in one go, break your recording into sections. This makes it easier to edit later, and if you mess up, you can just re-record that segment without starting from scratch.
- Test Recordings: Always do a test recording to check your settings—both video and audio. This also helps to ensure your computer can handle the recording process without lagging.
Implementing these tips can greatly enhance your screen recording experience and result in high-quality content that resonates with your audience. Remember, practice makes perfect, so don’t hesitate to experiment a bit until you find what works best for you!
Also Read This: Why Ryan Trahan Stepped Back From YouTube and What’s Next
6. Common Mistakes to Avoid While Screen Recording
Even seasoned YouTubers can find themselves making mistakes while screen recording. Here are some common pitfalls to avoid, so you can create smooth and engaging videos:
- Neglecting to Prepare Your Desktop: A cluttered desktop can be distracting for viewers. Before you record, clear away any unnecessary files or applications that you don’t want on screen. Organization is key!
- Ignoring Frame Rate: A low frame rate can lead to choppy recordings. Make sure your frame rate is set appropriately—typically around 60fps is ideal for smooth gameplay footage.
- Not Using Annotations or Callouts: While recording, it’s easy to forget that viewers may not follow everything you’re doing. Use annotations or callouts to highlight important points or actions.
- Forgetting to Record System Audio: If you're showing a game or a tutorial that includes sound, don’t forget to set your screen recorder to capture system audio. Silence can be a big letdown!
- Overlooking Editing: Just hitting record isn’t enough; editing is where you can truly polish your video. Don’t skip post-production! Cut out unnecessary parts, add effects, or include background music to spice things up.
- Not Monitoring Performance: Running a screen recorder can be demanding on your system. Monitor your computer’s performance to ensure that the recording doesn’t lag or crash. Close any unnecessary applications to free up resources.
Avoiding these common mistakes will not only improve the quality of your recordings but will also save you time in post-production. Your viewers will appreciate the polished content, and it will keep them coming back for more!
Conclusion: Choosing the Right Tool for Your YouTube Channel
When it comes to screen recording for your YouTube channel, selecting the right tool is essential for producing high-quality content that resonates with your audience. Considering factors such as features, pricing, and ease of use will significantly influence your decision. Here are some key points to keep in mind:
- Features: Look for advanced capabilities like video editing, audio capture, and customizable settings to enhance your recordings.
- Pricing: Many options are available, from free software with basic features to premium versions offering comprehensive tools. Choose one that fits your budget but also meets your needs.
- Ease of Use: User-friendly interfaces allow for quick learning curves, helping you start recording without the technical hassle.
- Support and Updates: Consider software that is actively maintained and updated, ensuring compatibility with new operating systems and providing tech support.
For those just starting, free options like OBS Studio or ShareX might suffice, while advanced users may find value in software like Camtasia or ScreenFlow. Ultimately, the best screen recorder aligns with your content style and production values while enhancing your workflow.
In conclusion, investing the time to choose the right screen recorder can significantly impact the quality of your YouTube videos, helping you engage your audience and grow your channel effectively.
 admin
admin


