Have you ever found a video on Facebook that you absolutely loved but wished you could share it on YouTube as well? You’re not alone! Many people want to upload their favorite videos to YouTube for wider accessibility or for personal collections. In this guide, we’ll walk you through the ins and outs of uploading videos from Facebook to
Why You Might Want to Transfer Videos from Facebook to YouTube
So, why would anyone bother transferring videos from Facebook to YouTube? There are several compelling reasons, and understanding them can help you make the most of your video content.
- Wider Audience Reach: YouTube has a vast global audience, with over 2 billion logged-in monthly users. By uploading videos to YouTube, you can reach viewers who may not be on Facebook.
- Better Monetization Options: If you're looking to earn money from your video content, YouTube offers various monetization options that Facebook doesn’t. With tools like AdSense, sponsorships, and affiliate marketing, YouTube is a lucrative platform for content creators.
- Improved Video Management: YouTube’s interface allows for better organization of videos. You can create playlists, categorize content, and use SEO strategies to make your videos more discoverable.
- Enhanced Analytics: YouTube provides in-depth analytics to track your video performance. You can see watch time, audience demographics, and engagement metrics, allowing you to fine-tune your content strategy.
- Professional Presentation: YouTube offers advanced editing tools and options for video enhancements. This means you can present your videos in a more polished and professional manner, which can help in branding and audience retention.
Additionally, transferring videos can preserve your cherished memories and keep them accessible in multiple places. If you are a content creator, you may want to curate a library of your work to showcase on platforms where your audience prefers to engage, like YouTube.
Lastly, let’s not forget the personal touch! If you have family videos or sentimental clips that don't fit the casual nature of social media, moving them to YouTube allows for a private channel where you can share these moments with close friends and family. You can adjust the privacy settings to control who sees your content.
In summary, transferring videos from Facebook to YouTube can provide an array of benefits, enhancing your reach, management, and monetization for your video content. Ready to learn how to do it? Stick around for the next sections!
Also Read This: How to Get YouTube to Play in the Background on Your Device
3. Prerequisites for Uploading Videos
Before you dive into uploading videos from Facebook to YouTube, there are a few key prerequisites you should ensure are in place. This will make the process smoother and more efficient. Let’s break it down!
- Facebook Account: You need to have access to a Facebook account with the video you want to upload. Make sure you can view and download the video from your profile, page, or group.
- YouTube Account: Don’t forget that you need an active YouTube account to upload videos. If you’re not already a member, creating one is quick and free!
- Video Format Compatibility: YouTube supports a variety of video formats, but it's good to verify that your Facebook video is in a format compatible with YouTube. Popular formats include .MP4, .MOV, and .AVI.
Having the right permissions is also essential. If the video content is yours, you’re in the clear. However, if the content was created by someone else, ensure you have permission to download and upload it to avoid copyright issues.
Finally, check your internet connection. A stable connection will significantly reduce any upload time and prevent interruptions during the process. If you're working with larger video files, a wired connection may offer more reliability over Wi-Fi.
Also Read This: How to Reach a Million Views on YouTube: Proven Growth Strategies
4. Step-by-Step Process for Downloading Videos from Facebook
Now that you’ve handled the prerequisites, it’s time to get into the nitty-gritty of downloading your videos from Facebook. Here’s a straightforward guide to help you through the process.
Step 1: Navigate to the Video on Facebook
First, locate the video you wish to download. This could be on your personal timeline, a page you manage, or a group. Click on the video to bring it to the center of your screen.
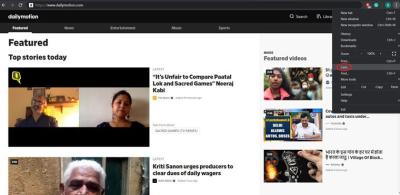
Step 2: Access Options
Once the video is playing, look for the three dots (or “...”) in the upper right corner of the video player. Click on these dots to reveal a drop-down menu.
Step 3: Select “Copy Link” (if needed)
Depending on your privacy settings and where the video is located, you might need to copy the link of the video. Click on “Copy Link” to get the URL if that option is available. If you have a video downloaded previously, you can skip this step!
Step 4: Use an Online Video Downloader
This is where it gets a little techy! Open a new tab and look for a reliable online Facebook video downloader. There are several options out there; just do a quick search for “Facebook video downloader.”
Step 5: Paste the Video URL
Once you’ve chosen a downloader site, paste the copied URL into the designated field. Click the download button, and the site will process the video.
Step 6: Choose the Video Quality
After processing, you may be presented with several quality options for downloading your video (like 720p or 1080p). Select the one that best suits your needs, and click “Download.”
Step 7: Save the Video
Your browser will prompt you to choose where to save the video file. Pick a location that you can easily remember, and hit “Save.” Now, you’re ready for the next step—uploading your video to YouTube!
And that’s it! Following these steps makes downloading your video from Facebook a breeze. Just remember to take it one step at a time, and you won’t run into any trouble.
Also Read This: How to Remove a YouTube Account: Managing Your Digital Footprint
5. How to Upload Downloaded Videos to YouTube
So you've successfully downloaded your video from Facebook and now you're ready to share it with the larger YouTube community. Great decision! YouTube is a fantastic platform for reaching a broader audience. But how exactly do you upload that video? Let's break it down step by step.
Step 1: Sign In to Your YouTube Account
First things first, make sure you’re logged into your YouTube account. If you don’t have one, the process is quick and easy—just follow the prompts to create an account.
Step 2: Click on the Upload Button
Once you're in, look for the camera icon with a "+" sign, typically located at the top right corner of the screen. Click on it, and then select “Upload Video” from the dropdown menu.
Step 3: Choose Your Video File
A new window will pop up prompting you to upload a video file. Click on “Select Files” or simply drag and drop your downloaded file from Facebook into the window. Remember, YouTube supports various video formats like .MP4, .MOV, and .AVI, so your downloaded video should fit right in!
Step 4: Add Video Details
Now it's time to fill in the details about your video. This includes:
- Title: Make it catchy and relevant!
- Description: This is where you can include more details about what the video is about. Don’t forget to add links or any necessary credits.
- Tags: Adding tags helps YouTube understand what your video is about. Use keywords related to your content.
Step 5: Choose a Thumbnail
Your video will need a thumbnail—this is the first thing people will see! You can choose from one of YouTube’s automatically generated thumbnails or upload your custom one for better branding.
Step 6: Select Video Settings
You’ll have settings like privacy options (Public, Unlisted, or Private) and monetization (if eligible). Take a moment to set them according to your preferences.
Step 7: Publish Your Video
Once everything looks good, hit the “Publish” button. Congratulations, you’ve just uploaded your video from Facebook to YouTube! Remember that it might take a few moments to process, so be patient. You can always check back later to see how it’s performing.
Also Read This: How Long Does It Take to Edit a YouTube Video? Understanding the Video Editing Process
6. Optimizing Your YouTube Video for Better Visibility
You’ve successfully uploaded your video, but how do you make sure it reaches the right audience? Optimizing your video is key to increasing its visibility on YouTube. Here are some tips to help your video shine:
1. Use SEO-Friendly Titles
Your title is crucial for both viewers and search engines. Make it keyword-rich, informative, and engaging. Think about what someone might search for when looking for content like yours.
2. Write a Compelling Description
Your video description is a fantastic opportunity to provide context. Here’s how to make it effective:
- Include relevant keywords early in your description.
- Summarize what the video is about, including any important points.
- Encourage viewers to like, subscribe, and comment.
- Add links to your social media or website.
3. Create Engaging Thumbnails
Thumbnails are essentially the cover of your video. A striking thumbnail will attract more clicks. Make sure it’s visually appealing and represents your video’s content accurately.
4. Utilize Tags
Tags help YouTube categorize your video. Use a mix of broad and specific tags that relate to your content. Think of keywords that viewers might type in when looking for videos like yours.
5. Encourage Viewer Interaction
The more engagement your video gets (likes, comments, shares), the better it will perform in terms of visibility. Encourage your viewers to engage by asking questions or prompting them to share their thoughts in the comments!
6. Promote Your Video
Don’t rely solely on YouTube’s algorithm! Share your video on social media, email newsletters, or blogs to drive traffic and boost views. The more eyes on your video, the higher your chances of discovery.
In summary, optimizing your video isn’t just a one-time task—it’s an ongoing process! With some effort and attention to detail, you’ll significantly increase your video’s visibility and reach on YouTube. Happy uploading!
Also Read This: Exploring the Removal of the Channels Tab on YouTube
7. Common Issues and Troubleshooting Tips
While uploading videos from Facebook to YouTube can be a straightforward process, you might encounter some issues along the way. Don’t worry; we’ve compiled a list of common problems and troubleshooting tips to help you smoothly transfer your videos. Let’s dive in!
Issue 1: Video Download Failure
If you’re trying to download a video from Facebook and it doesn’t work, first check your internet connection. A weak or spotty connection can hinder downloads. If your internet is fine, try the following:
- Ensure that the video privacy settings allow downloading. If it’s set to "Only Me," you won’t be able to download it.
- Use a different video downloader tool. Sometimes, specific tools have issues with certain videos.
- Clear your browser cache or try a different browser entirely.
Issue 2: Format Incompatibility
When you finally manage to download your video, you might find that the format is not supported by YouTube. Common formats that YouTube accepts include:
- MP4
- AVI
- MOV
If your video isn't in one of these formats, use a conversion tool to change it. There are many free online converters available that can handle this task efficiently.
Issue 3: Upload Errors
Sometimes, your upload to YouTube may get interrupted or result in an error. Common upload errors can include:
- File size too large: YouTube has a maximum file size limit of 128 GB or 12 hours.
- Network interruptions: If your connection drops, the upload may fail.
- Incorrect metadata: Ensure you fill in the necessary information while uploading, like title and description.
Make sure you’re working with a stable internet connection, keep your video under the size limit, and fill out all required upload fields before trying again.
Issue 4: Slow Processing Times on YouTube
After uploading, if you find that the video is taking forever to process, this is usually because of high traffic on YouTube or the resolution of your video. Higher resolutions take longer to process. If you need your video up quickly, consider uploading in a lower resolution initially and upgrading it later.
In addition to these troubleshooting tips, always keep your apps updated and check the YouTube Help Center for the latest known issues. Persistence is key; if one method doesn't work, try another!
8. Conclusion and Final Thoughts
There you have it—a complete guide to uploading videos from Facebook to YouTube! While navigating through the process may seem daunting at times, following the steps outlined above can make things much simpler.
It’s increasingly common for users to want to share their content across platforms, and knowing how to transfer videos efficiently will help you reach a broader audience. Not to mention, you'll get to preserve and showcase those memorable moments captured on Facebook in a more versatile platform like YouTube.
Just remember a few key takeaways:
- Utilize reliable tools for downloading videos from Facebook to ensure quality.
- Format your videos correctly to avoid playback issues.
- Stay patient if you encounter any hiccups; most issues can be easily resolved.
So, whether it’s a fun family gathering, a tutorial you want to re-share, or your latest creative project, uploading from Facebook to YouTube doesn’t have to be a hassle. Start sharing your videos today and engage with a wider audience. Happy uploading!
 admin
admin