Welcome to the exciting world of iStock! If you’re a creative individual looking to share your images and make some extra income, you’ve landed in the right place. iStock is a vibrant platform where photographers and illustrators from all over the globe come together to showcase their work. As part of this community, you not only gain exposure but can also connect with fellow creatives who share your passion for visual storytelling.
What sets iStock apart is its diverse collection of high-quality images, vectors, and videos that cater to a wide range of industries. Whether you’re a seasoned professional or just starting, iStock provides tools and resources to help you succeed. Plus, their supportive community fosters collaboration and learning, making it a fantastic place to grow your skills.
Understanding iStock's Contribution Process
Now, let’s dive into the contribution process. Getting started on iStock is straightforward, but understanding the nuances can make a significant difference in your success. Here’s a step-by-step breakdown:
- Create Your Account: To begin, you’ll need to register as a contributor on iStock. This involves providing some basic information and agreeing to their terms of service.
- Familiarize Yourself with the Guidelines: iStock has specific requirements for submissions. Make sure to review their contributor guidelines thoroughly. These guidelines cover image quality, content restrictions, and model/property releases.
- Select Your Best Work: Quality over quantity is key here. Choose images that showcase your unique style and creativity. Think about what’s trending and what potential buyers might be looking for. Use tools like Google Trends or social media hashtags to gauge popular themes.
- Edit and Prepare Your Images: Before uploading, ensure your images are properly edited. Use software like Adobe Lightroom or Photoshop to enhance your photos. Remember, iStock prefers images that are sharp, well-composed, and free of noise.
- Upload Your Files: Once your images are ready, it’s time to upload them to the iStock platform. You can do this through their web interface or mobile app. The upload process is fairly user-friendly; just follow the prompts to select your files.
- Keyword and Title Your Work: After uploading, you’ll need to add titles and keywords to your images. This is crucial for discoverability. Think like a buyer—what words would they use to search for your image? Aim for 7-15 relevant keywords that accurately describe your image.
- Submit for Review: Once everything is in place, submit your images for review. The iStock team will evaluate them based on their quality and adherence to guidelines. You’ll receive feedback, and if approved, your images will be available for purchase!
Understanding this process is essential for a successful start on iStock. Take your time with each step, and don’t hesitate to reach out to the iStock community for support. Happy contributing!
Also Read This: What is iStock? A Comprehensive Introduction to the Platform for Creatives
3. Preparing Your Images for Upload
Before you dive into uploading your images to iStock, it’s essential to ensure they’re ready for the spotlight. Proper preparation can significantly enhance your chances of approval and, ultimately, sales. Here’s what you should keep in mind:
- Image Quality: Your images should be sharp, well-composed, and properly exposed. Aim for high resolution—at least 4 megapixels, but more is often better.
- File Format: iStock accepts JPEG files, so make sure your images are saved in this format. Use high-quality settings when saving to avoid losing detail.
- Editing: Basic editing is fine, but avoid excessive alterations. Keep color corrections subtle and ensure the image remains realistic.
- Keywords and Metadata: While this comes more into play during the upload phase, think about relevant keywords and descriptions now. This helps in categorizing and making your images searchable.
Additionally, consider the following tips:
- Model Releases: If your images feature recognizable people, ensure you have signed model releases. This is crucial for commercial use.
- Property Releases: For images of private properties, include property releases to avoid legal issues.
- Technical Specifications: Check the technical requirements on iStock’s site. They might have specific guidelines regarding color profiles, dimensions, or other factors.
By paying attention to these details, you'll set a solid foundation for your image uploads and make the process much smoother!
4. Step-by-Step Guide to Uploading Images
Ready to upload your stunning images to iStock? Follow this step-by-step guide to make the process as seamless as possible:
- Create an iStock Account: If you haven’t done this yet, head to the iStock website and sign up. You’ll need to provide some basic information and verify your email.
- Log In: Once your account is set up, log in to your iStock contributor account.
- Navigate to Contributor Upload: Find the “Upload” button in your dashboard. It’s usually easy to spot!
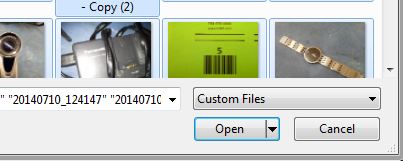
- Select Your Files: Click on the “Choose Files” button to browse your computer for the images you’ve prepared. You can select multiple files at once.
- Add Metadata: After selecting your images, you’ll be prompted to fill in details like titles, keywords, and descriptions. Make these as informative and relevant as possible—it helps potential buyers find your work.
- Review Your Images: Before finalizing, take a moment to review your images and the metadata. Make sure everything looks good and is free of errors.
- Submit for Review: Once you’re satisfied, hit the “Submit” button. Your images will go into a review process, where iStock’s team will check for quality and adherence to their guidelines.
And there you have it! Your images are on their way to being available for sale. Keep an eye on your account for feedback and approval status. Remember, persistence is key—if some images don’t make the cut, don’t be discouraged. Learn from it and keep improving!
 admin
admin


