Uploading an image to Cricut Design Space with multiple layers is a fantastic way to keep your designs organized. When you use layers, you can easily manipulate each part of your design separately. This process is ideal for creating complex projects, like multi-colored vinyl designs or intricate paper crafts. In this guide, we’ll walk you through how to upload images with layers intact, so you can start working on your project without losing any of the details that make it special.
What You Need Before You Start

Before uploading your image to Cricut Design Space, it's essential to ensure that you have everything in place. Here's a quick checklist to get you ready:
- Cricut Machine - Ensure that your Cricut machine is set up and ready to go. Whether it's the Cricut Explore, Maker, or Joy, your device should be connected to your computer or mobile device.
- Image File - Choose an image file that supports layers. Vector files, such as SVG or PDF, are preferred for retaining layer details.
- Cricut Design Space Account - Make sure you're signed into Cricut Design Space. This is where you'll upload and edit your images.
- Image Editing Software (Optional) - If your image needs adjustments, having access to software like Adobe Illustrator or Inkscape can help you prepare the file for uploading with the layers intact.
Once you’ve confirmed that you have all of the above, you’re ready to start the uploading process!
Also Read This: Exploring Adobe Stock’s Extended License: Expanding Usage Opportunities for Buyers
Steps to Upload an Image with Layers

Uploading an image with layers to Cricut Design Space is a straightforward process if you follow the steps carefully. Here's a step-by-step guide to ensure you don’t miss anything:
- Open Cricut Design Space - Start by opening Cricut Design Space on your computer or mobile device. Log in to your account if you haven’t already.
- Click on “Upload” - On the home screen, you'll see the “Upload” button on the left panel. Click on it to start the upload process.
- Select “Upload Image” - Choose the “Upload Image” button from the options. This will let you browse your files and select the image you want to upload.
- Choose Your Image File - When selecting an image, ensure it’s a file format that supports layers, like SVG or PDF. Files like PNG or JPG won’t keep the layers intact.
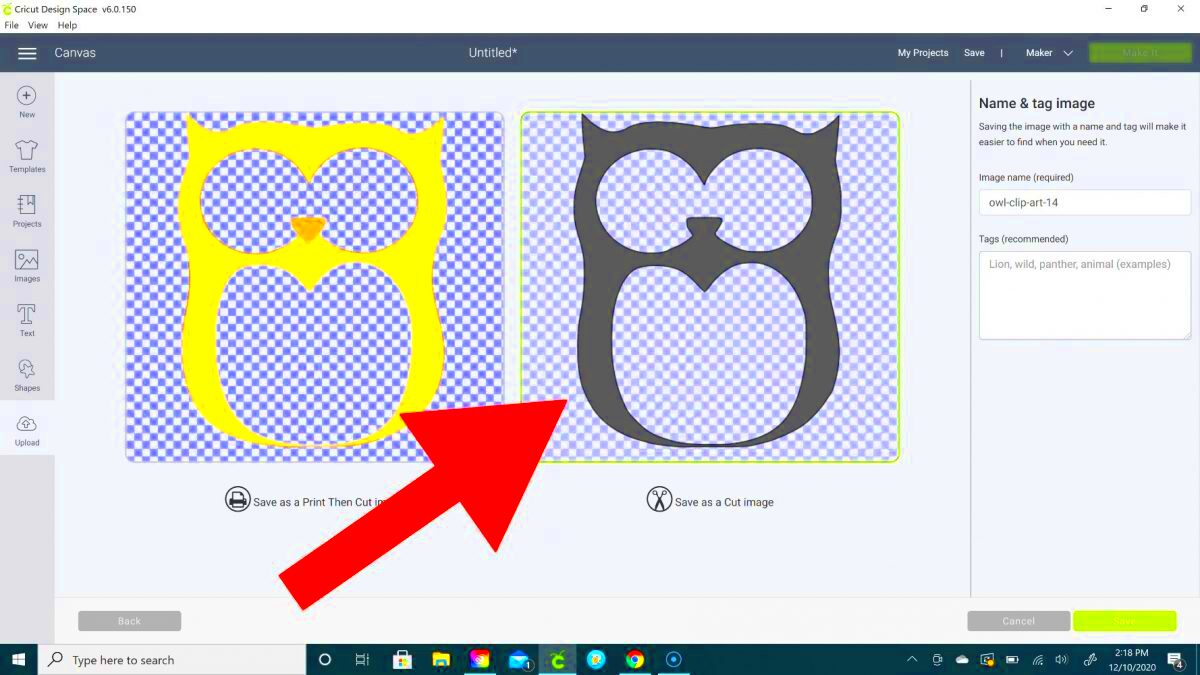
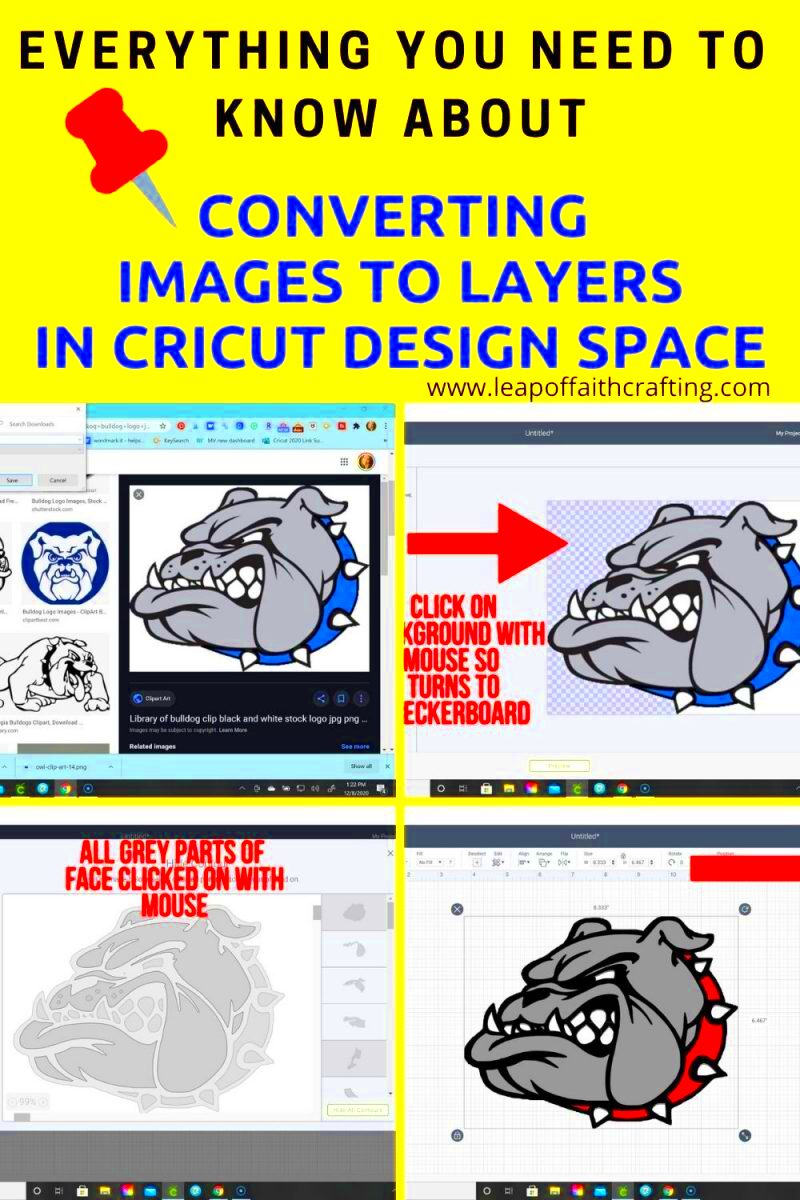
- Preview and Edit - After selecting the file, Cricut will show a preview of your image. If the image has multiple layers, Cricut will automatically recognize and separate them. You can use the “Erase” or “Select” tools to adjust any parts of the image before continuing.
- Save the Image - Once you’re satisfied with the image preview, click the “Save” button. The image will now be added to your library and ready for use in your project.
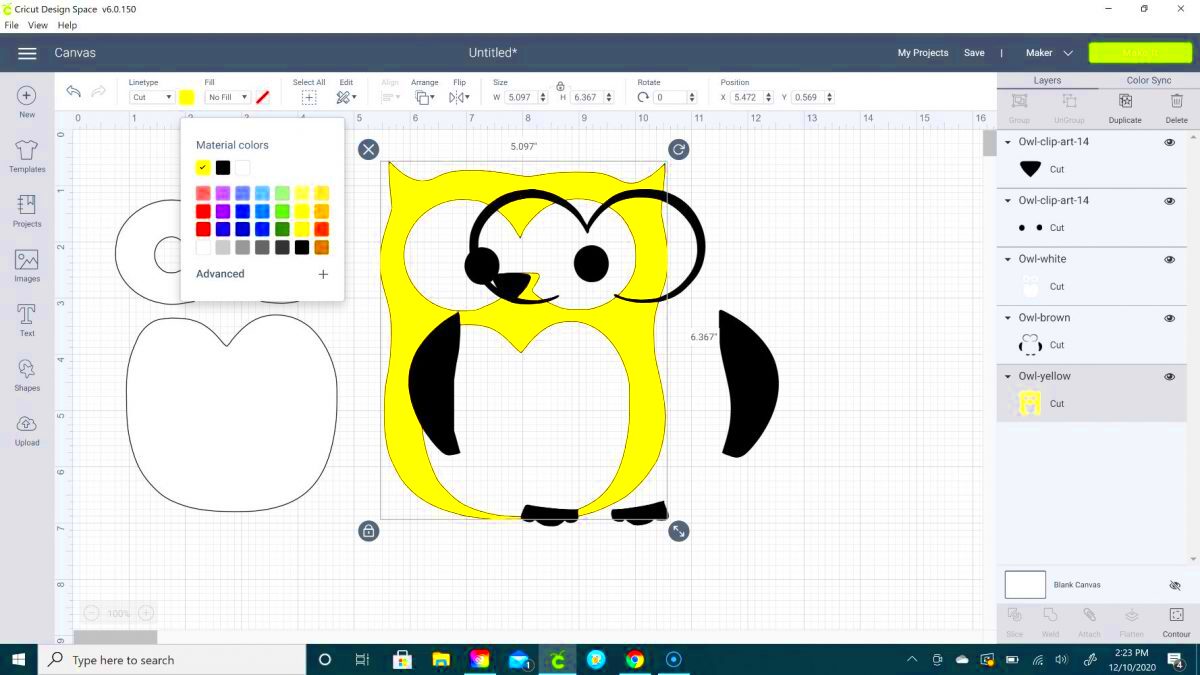
- Insert the Image Into Your Canvas - To begin working with your layers, click on the image in your library, then click “Insert Image.” The image will appear on your canvas, and each layer will be editable.
By following these steps, you can easily upload an image with all of its layers into Cricut Design Space, making your creative process much smoother.
Also Read This: How to Find the Pixel Size of an Image for Clarity
Choosing the Right Image Format for Layers
When uploading images to Cricut Design Space with layers, choosing the right file format is crucial. Some formats retain the layering structure better than others. If you want to keep each part of your design separate and editable, you'll need to pick a format that supports layers. Let’s take a look at the best formats for Cricut and why they work well for your layered designs:
- SVG (Scalable Vector Graphics) - SVG is the most recommended format for Cricut. It is perfect for maintaining layers and is compatible with all Cricut machines. SVG files store vector images, which means the layers stay intact during the upload process.
- PDF (Portable Document Format) - PDF files can also support layers and are great for more complex designs. However, you may encounter slight issues if the image has embedded raster graphics. Still, PDFs are a good alternative for multi-layered projects.
- DXF (Drawing Exchange Format) - DXF files are another option that can preserve layers, especially for CAD-based designs. However, they are more commonly used for specific types of projects, like those involving precise measurements.
- PNG and JPG - These image formats are not ideal for layered designs. While you can upload them to Cricut, they flatten the image, removing the layers. If you're working with simple designs or photos, these formats may work, but they’re not suitable for complex layered projects.
In short, SVG files are your best bet for retaining layers. They give you full control over each element of your design, making them the go-to choice for Cricut projects.
Also Read This: Discover the Quick and Easy Way to Download Facebook Stories Online for Seamless Sharing
How to Preserve Layers During Upload
Preserving layers during the upload process is essential for maintaining the integrity of your design. If you don't take the right steps, Cricut may combine your layers into a single image, making it hard to edit or separate them later. Here’s how you can ensure your layers stay intact:
- Use Supported Formats - As we mentioned, SVG and PDF are the best formats to use for images with layers. Make sure you save your file in one of these formats to prevent any loss of data during the upload.
- Check the Layer Settings Before Uploading - Before uploading, double-check that your image has separate layers in your image editor. If you are using software like Adobe Illustrator or Inkscape, ensure that each element of your design is on its own layer.
- Avoid Flattening Your Image - Some image editing software may flatten your image when saving, especially with PNG or JPG formats. Always check your file settings to make sure the image remains layered and editable.
- Preview Before Inserting - Cricut Design Space gives you a preview of your image when you upload it. Take a close look at the layers and how they’re displayed. If you notice that some layers are missing or combined, go back and adjust your settings before saving the image to your library.
By following these steps, you’ll be able to preserve your image layers and ensure that your project stays organized from the start.
Also Read This: “How Is Your Day?” Image Collection
Editing Layers After Uploading
Once your image is uploaded with all its layers, you might want to make some adjustments or edits. Cricut Design Space makes it easy to edit individual layers, whether you're changing the colors, resizing, or adding text. Here's how to edit the layers in your design:
- Selecting Layers - After uploading the image, each layer will appear in your canvas. To select a layer, simply click on it. Cricut Design Space allows you to select one layer at a time or multiple layers if needed.
- Resizing Layers - You can resize individual layers by clicking on the layer and dragging the corners. Hold down the shift key while resizing to maintain the aspect ratio. Alternatively, you can use the toolbar to enter exact dimensions.
- Changing Colors - To change the color of a layer, click on the layer and then choose the color box in the toolbar. You can select a color from the palette or enter a custom color code.
- Moving Layers - If you need to rearrange the layers, just select the one you want to move and drag it to a new position. Cricut Design Space also allows you to align and distribute layers evenly if you're working on a more complex design.
- Grouping Layers - If you want to keep layers together, you can group them by selecting multiple layers and clicking the “Group” button. This makes it easier to move, resize, or duplicate the entire group at once.
Editing layers in Cricut Design Space gives you the flexibility to make your design exactly how you want it. Whether you're adjusting a simple shape or a multi-layered complex design, these tools will help you stay in control of your project.
Also Read This: Removing Black Backgrounds from Images in Photoshop
Common Issues When Uploading with Layers
Uploading an image with layers to Cricut Design Space is a great way to organize your design, but it’s not always as smooth as you’d hope. Sometimes, you might run into issues that could prevent your layers from uploading correctly. Understanding these common problems and how to fix them can save you time and frustration. Here are some of the most common issues you might face when uploading an image with layers and how to resolve them:
- Layers Getting Flattened - One of the most common issues is when Cricut flattens all the layers into a single image. This often happens when the image is saved in a raster format (like PNG or JPG), which doesn’t support layers. To fix this, always save your image as an SVG or PDF file before uploading.
- Missing or Combined Layers - Sometimes, Cricut Design Space doesn’t recognize some layers, or it combines multiple layers into one. This usually happens if your file is improperly formatted or if layers weren’t created correctly in the image editor. Double-check the image in your editor to ensure each element is on a separate layer.
- Image Not Showing in Design Space - If your image doesn’t appear after uploading, it could be due to a corrupt file or an unsupported format. Make sure the file is saved in a Cricut-friendly format like SVG or PDF, and try re-uploading it. If the issue persists, try opening the file in another editor to ensure it’s not corrupted.
- Color Issues - Sometimes, the colors of your layers may not display as expected after uploading. This can happen if the color profile of your image doesn't match Cricut’s standards. Make sure your image colors are set to RGB mode before uploading.
- Too Many Layers - Cricut Design Space allows up to 200 layers in a single project. If you exceed this number, the upload may fail, or the software may slow down. Try simplifying your design or combining some layers before uploading.
If you run into any of these problems, don’t panic. Most issues can be fixed by reformatting your image, checking layer settings, or troubleshooting your file format. A little patience and attention to detail can go a long way in getting your design just right!
Also Read This: Making Images Transparent in Google Slides
FAQ - Frequently Asked Questions
Have questions about uploading images with layers to Cricut? Here are answers to some of the most common questions we get. These tips will help ensure your project runs smoothly:
- Q: What file format is best for uploading with layers?
A: The best file formats for preserving layers are SVG and PDF. These formats keep the elements of your design separate, so you can edit each layer individually in Cricut Design Space. - Q: Why is my image missing layers after uploading?
A: If your image is missing layers, it's likely due to the file format. Make sure your file is saved as an SVG or PDF. PNG and JPG files flatten the image and remove layers. - Q: Can I upload an image with text?
A: Yes! You can upload images with text, but make sure the text is converted to paths (or outlines) in your image editor before uploading. This prevents Cricut from treating the text as a raster image, which could cause issues with editing. - Q: How do I know if my layers are preserved?
A: After uploading the image, Cricut Design Space will show you a preview of your file. You should be able to see each layer in the preview. If the layers appear combined, go back and check your image format or layer settings. - Q: Can I edit my layers in Cricut Design Space?
A: Yes, once your image is uploaded, Cricut Design Space lets you edit each layer individually. You can change the colors, resize the elements, or even hide certain layers if needed.
If you still have questions, don’t hesitate to reach out to Cricut support or check out their online forums for more troubleshooting tips!
Conclusion
Uploading images with layers to Cricut Design Space opens up a world of creative possibilities. It allows you to create more intricate, multi-layered designs that stand out. By choosing the right file format, preserving the layers during upload, and editing your design after it's uploaded, you can ensure that your Cricut projects go smoothly from start to finish.
While there are common issues that might arise when uploading images with layers, they can often be fixed with a little attention to detail and some troubleshooting. Always make sure to check your file formats, layer settings, and design tools to get the best results.
Now that you know the ins and outs of uploading and editing layered images in Cricut Design Space, you’re ready to start working on your next project with confidence. Happy crafting!

 admin
admin


