Shrinking images in Paint can help you save storage space and make files easier to share. Whether you're preparing photos for a website, email, or social media, using Paint is a straightforward way to resize images. In this guide, we’ll cover everything you need to know about using Paint to shrink your
Step by Step Guide to Open Images in Paint

Opening images in Paint is a simple process. Follow these easy steps:
- Click on the Start menu.
- Type "Paint" in the search bar and hit Enter.
- Once Paint is open, go to the top left corner and click on the "File" menu.
- Select "Open" from the dropdown menu.
- Browse to the location of your image file, select it, and click "Open."
Now your image is ready to be edited. If you need to open multiple images, repeat the process for each one. It’s that simple!
Also Read This: how to use adobe stock templates
Using the Resize Option to Change Image Size

Once your image is open in Paint, resizing it is a breeze. Here’s how to do it:
- Click on the "Home" tab at the top of the window.
- Look for the "Resize" button in the toolbar. Click on it.
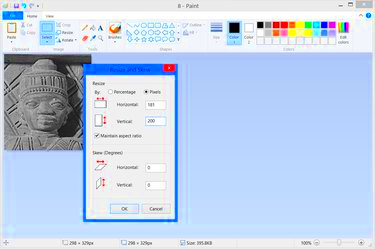
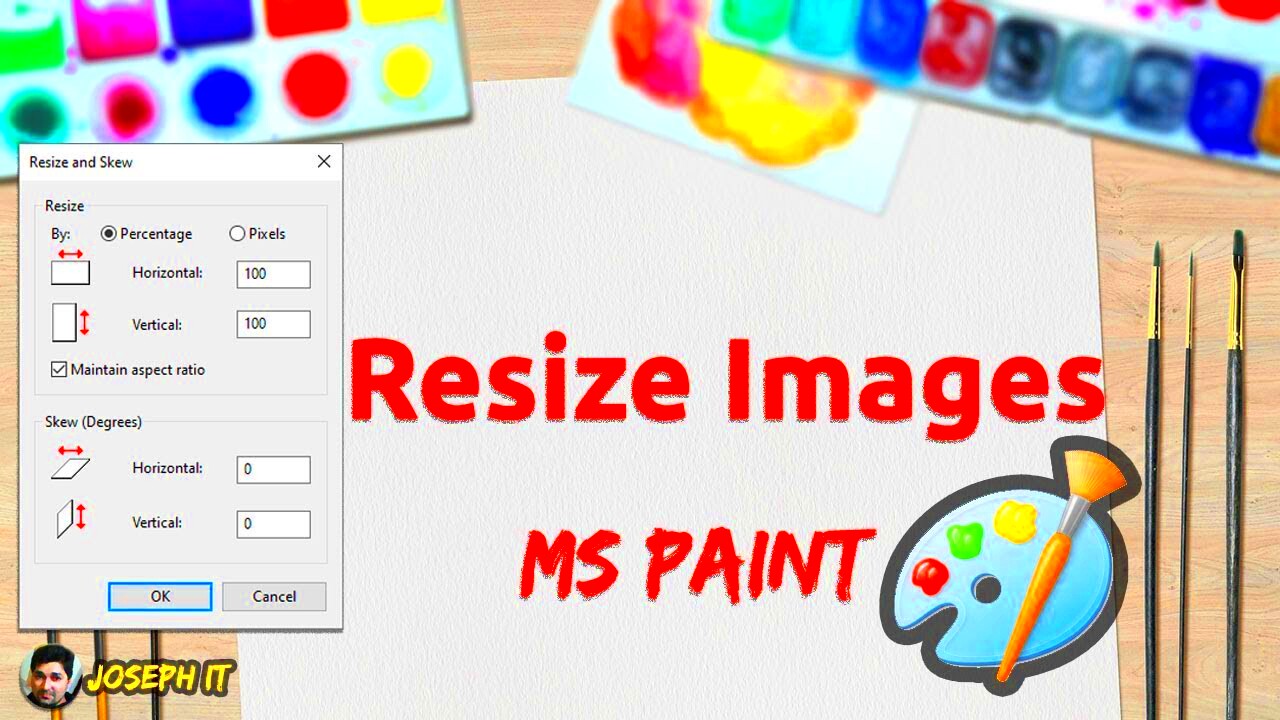
- A dialog box will appear. You can choose to resize by percentage or by pixels.
For example, if you want to reduce an image to half its original size, enter "50" in the percentage box:
- Percentage: Enter 50% to shrink to half.
- Pixels: Specify the new width and height in pixels.
Before clicking "OK," make sure to check the box that says "Maintain aspect ratio" if you want to keep the image proportions the same. Once you’re satisfied, click "OK" to apply the changes.
Now your image is resized! Remember, you can always undo changes if needed. Just click on the "Undo" button in the toolbar or press Ctrl + Z on your keyboard.
Also Read This: Bypassing Bing AI Image Restrictions
Maintaining Image Quality While Shrinking

When you shrink an image, it’s essential to maintain its quality, so it still looks good after resizing. Here are some tips to help you keep your image crisp and clear:
- Use the Right Format: Save your images in formats like JPEG or PNG. JPEG is great for photos, while PNG works well for images with text or sharp edges.
- Check the Resolution: Before resizing, know your original image resolution. Higher resolution means better quality. Aim to keep your resolution above 72 DPI for web images.
- Resize Gradually: Instead of making a drastic change all at once, try resizing in smaller increments. This method helps preserve details.
- Preview Your Changes: Use the zoom feature to preview your image after resizing. This way, you can check if it still looks sharp.
- Adjust After Resizing: If your image appears pixelated, consider sharpening it using the "Adjust" tool in Paint after resizing.
By following these tips, you can effectively shrink your images while keeping their quality intact.
Also Read This: Learn How to Draw Over an Image Like a Pro
Saving Your Shrunk Image Correctly
After you’ve resized your image, saving it correctly is crucial to avoid losing quality or overwriting the original. Here’s how to do it right:
- Click on the "File" menu in the top left corner.
- Select "Save As" to create a new file, which helps keep your original image untouched.
- Choose the file format from the dropdown menu. Popular choices include:
| Format | Best Use |
|---|---|
| JPEG | Best for photographs with many colors. |
| PNG | Best for images with text or transparent backgrounds. |
- Name your file something unique to avoid confusion.
- Select a location on your computer to save the image and click "Save."
Always check the final image to ensure it looks the way you want. You can open it again in Paint to confirm everything is in order.
Also Read This: How to Create a Mirror Image Using the Epson Smart Panel App
Common Issues When Shrinking Images in Paint
Shrinking images in Paint is usually straightforward, but you may run into some common issues. Here are a few problems and how to fix them:
- Loss of Quality: If your image looks blurry after resizing, it may be due to reducing its size too much. Try resizing in smaller increments.
- Wrong Aspect Ratio: If your image appears stretched or squished, make sure to check the "Maintain aspect ratio" box while resizing.
- Image Not Opening: If Paint cannot open your image, ensure the file format is supported. Common formats like JPEG and PNG should work fine.
- Unexpected Changes: If you notice unexpected changes in your image after saving, make sure you are using "Save As" to create a new file.
- Paint Crashes: If Paint freezes or crashes, try closing the program and reopening it. Make sure your software is up to date.
Being aware of these issues can help you troubleshoot and ensure a smooth experience while shrinking your images in Paint.
Also Read This: how to change the background colour of an image
Alternative Methods for Shrinking Images
If Paint isn't quite your style for shrinking images, don’t worry! There are plenty of other methods and tools available that can help you resize images effectively. Here are some popular alternatives:
- Online Image Resizers: Websites like TinyPNG and ResizeImage.com allow you to upload an image and resize it easily. Just upload, adjust your settings, and download the resized file.
- Photo Editing Software: Programs like Adobe Photoshop or GIMP provide advanced resizing options. These tools are great if you need more control over the resizing process.
- Mobile Apps: If you're on the go, apps like Image Size and Photo & Picture Resizer can help you resize images directly from your smartphone.
- Windows Photo Viewer: You can use the built-in Photo Viewer to resize images. Open your photo, click on "Edit," and use the resize options available.
Each of these methods has its advantages, so you can choose the one that suits your needs best. Whether you want something quick and easy or more feature-rich, there’s an option for you.
Also Read This: How to Upload a PDF on LinkedIn – A Simple Guide for Adding Documents to Your Profile
Frequently Asked Questions
Here are some common questions people have about shrinking images in Paint and other methods:
- Can I undo changes in Paint? Yes! If you make a mistake while resizing, you can click the "Undo" button or press Ctrl + Z to revert your last action.
- What file formats can I save my images in? Paint allows you to save images in several formats, including JPEG, PNG, BMP, and GIF.
- Will resizing affect the quality of my image? It can, especially if you make a significant reduction in size. Always check the quality after resizing.
- Can I batch resize images? Paint doesn’t support batch resizing, but other tools and software can help you resize multiple images at once.
If you have more questions, don’t hesitate to search for answers or try out different tools. You’ll find plenty of resources to guide you!
Conclusion on Shrinking Images in Paint
Shrinking images in Paint is a simple yet powerful skill to have. It allows you to save space and make your images more manageable for sharing online or via email. By understanding the process, maintaining quality, and knowing alternative methods, you can easily resize images to fit your needs.
Remember to explore various tools and techniques available to you. With practice, you’ll become more comfortable and efficient in resizing your images. Whether you choose Paint or another method, the key is to find what works best for you and your specific needs. Happy resizing!

 admin
admin


