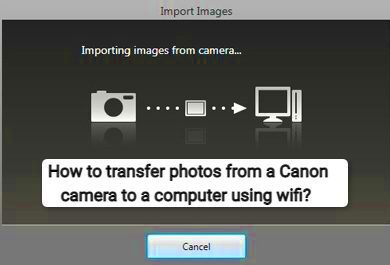
When you take photos with your Canon camera, the next step is getting those images onto your computer. Whether you're editing, organizing, or backing them up, transferring photos is an essential part of managing your photography. In this section, we'll cover why transferring images is important and how it can help you make the most out of your pictures.
Once you've captured the perfect shot, your computer becomes the next stop for your images. Whether you're sharing them with friends, creating photo albums, or editing them for a project, transferring photos is the gateway to all of that. Thankfully, the process is simple, and you have several options to do it smoothly and quickly.
Why You Should Transfer Your Photos from Your Canon Camera

There are many reasons to transfer your photos from your Canon camera to your computer. Let's break them down:
- Organization: Keeping your images organized on your computer makes it easier to find and access them later. You can sort them into folders by date, event, or theme.
- Backup: Transferring photos to your computer ensures you have a backup in case something happens to your camera’s memory card or your photos are accidentally deleted.
- Editing: Once your photos are on your computer, you can easily edit them using software like Adobe Photoshop or Lightroom, improving the quality and making them stand out.
- Sharing: Transferred images can be easily shared with family and friends, posted to social media, or sent via email without worrying about storage space on your camera.
- Printing: When your photos are on your computer, you can print them at home or send them to a professional printing service in high resolution.
Transferring your photos ensures that your memories are safe and accessible, making it a crucial step in the photography process.
Also Read This: how to project an image for tracing
Required Tools for Transferring Images

Before you start transferring your photos, you’ll need a few tools. Fortunately, most of these tools are common items you likely already have. Here's what you'll need:
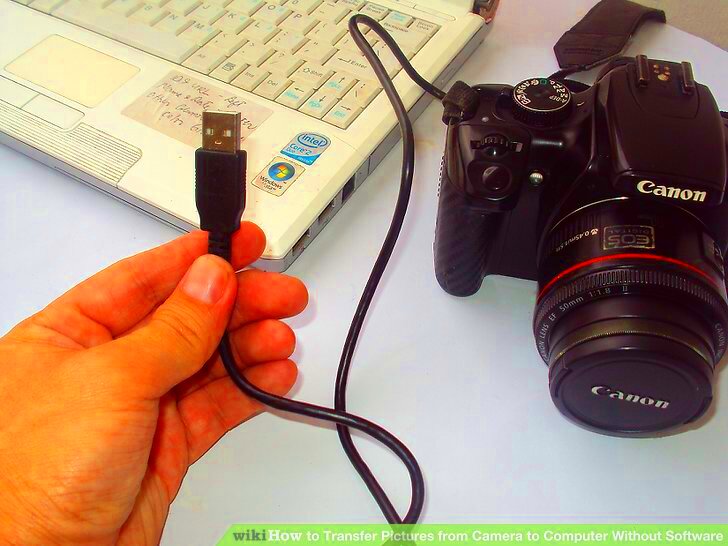
- USB Cable: A simple and reliable way to transfer your photos is by using a USB cable to connect your Canon camera directly to your computer. This is one of the most commonly used methods.
- Memory Card Reader: If you prefer to remove the memory card from your camera, a memory card reader can help you transfer the images to your computer. You’ll simply plug the card reader into your computer and insert your memory card.
- Wi-Fi or Bluetooth Connection: Some Canon cameras come with wireless capabilities that let you transfer photos without any cables. If your camera supports Wi-Fi or Bluetooth, you can easily send your images to your computer or even upload them directly to cloud storage.
- Photo Transfer Software: While not always necessary, some Canon cameras may come with software that helps streamline the transfer process, especially if you're transferring a large number of images. This software may also help with organizing and editing the photos.
Having these tools ready will make the transferring process faster and more efficient. Each option offers its own advantages, depending on what you prefer or what your Canon camera supports.
Also Read This: How to Properly List iStock Photo Attributions
Steps to Transfer Images Using a USB Cable

One of the simplest and most common ways to transfer images from your Canon camera to your computer is by using a USB cable. If you have the cable that came with your camera, you're all set. This method is quick and doesn't require any extra tools or complicated steps. Here’s how you can do it:
- Step 1: Connect the USB Cable - Plug one end of the USB cable into your Canon camera and the other end into a USB port on your computer.
- Step 2: Turn on Your Camera - Once the camera is connected, turn it on. Some cameras may automatically start transferring images, while others may need you to select the correct mode for file transfer.
- Step 3: Open the File Explorer - On your computer, open the File Explorer (Windows) or Finder (Mac). Your camera will appear as a new device or external storage drive.
- Step 4: Locate Your Photos - Navigate through the folders on your camera until you find the folder containing your photos (often labeled "DCIM").
- Step 5: Transfer the Files - Select the photos you want to transfer and drag them to a folder on your computer. You can also right-click and select "Copy" and then paste them into your desired location.
- Step 6: Safely Disconnect - Once the transfer is complete, make sure to safely eject the camera from your computer before unplugging it to avoid any data corruption.
This method works well for most users and doesn’t require any additional software. It's a quick and reliable way to transfer photos without worrying about battery life or wireless connectivity issues.
Also Read This: How to Use Estockphoto to Get High-Converting Images for Your Website
Transferring Photos via Memory Card Reader

If you don’t want to connect your Canon camera directly to your computer or if you prefer not to rely on a USB cable, using a memory card reader is another simple method. It’s easy to use and fast, especially when you need to transfer a large batch of photos. Here’s how you can do it:
- Step 1: Remove the Memory Card - Take the memory card out of your Canon camera. This is usually a SD card or microSD card, depending on your camera model.
- Step 2: Insert the Card into the Reader - Insert the memory card into a memory card reader. These readers are inexpensive and often have slots for different card types (SD, microSD, etc.).
- Step 3: Connect the Reader to Your Computer - Plug the memory card reader into a USB port on your computer. Your computer should automatically detect the device.
- Step 4: Open File Explorer or Finder - Like with the USB cable method, open File Explorer (Windows) or Finder (Mac) and locate the memory card, which should appear as an external drive.
- Step 5: Copy Your Photos - Navigate to the folder containing your photos, usually labeled "DCIM," select the images you want to transfer, and copy them to your desired location on your computer.
- Step 6: Safely Eject the Card - Once you’ve finished transferring the photos, be sure to safely eject the memory card reader from your computer before removing it to prevent data loss.
This method is popular for those who prefer not to connect their camera to the computer or if they are using a desktop that doesn’t have built-in card readers. It’s quick and can handle large amounts of data without any issues.
Also Read This: How to Add Music to iMovie from YouTube
Wireless Transfer of Images from Canon Camera
If you own a Canon camera with wireless capabilities, transferring your photos without cables is an incredibly convenient option. Many Canon cameras now come with Wi-Fi or Bluetooth support, making wireless transfers easy. Here’s how you can transfer your images wirelessly:
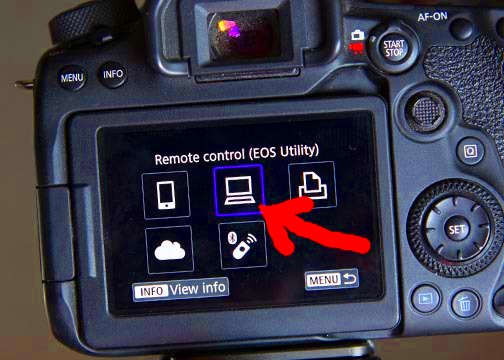
- Step 1: Enable Wi-Fi or Bluetooth on Your Camera - Turn on your Canon camera and navigate to the settings to enable Wi-Fi or Bluetooth. You may need to follow on-screen instructions to connect to a network or pair your camera with your computer.
- Step 2: Connect to Your Computer - On your computer, make sure you’re connected to the same Wi-Fi network as your camera. If using Bluetooth, ensure Bluetooth is enabled on your computer and the devices are paired.
- Step 3: Install Canon’s Software (If Needed) - Some Canon cameras require you to install the Canon software, like EOS Utility or Camera Connect, to enable wireless transfers. This software helps establish the connection and guides you through the process.
- Step 4: Select the Photos You Want to Transfer - On your camera, choose the photos you want to transfer. You may need to navigate to the specific photo transfer option in the menu or the app.
- Step 5: Initiate the Transfer - Once everything is set up, start the transfer process. The photos will wirelessly move from your camera to your computer in a few moments.
- Step 6: Verify Transfer and Disconnect - After the transfer, double-check your photos on the computer to ensure everything is in place. Once done, safely disconnect or turn off the camera’s Wi-Fi or Bluetooth.
Wireless transfers offer a convenient, cable-free way to move your photos. While it may take a bit longer than using a USB cable or memory card reader, it’s perfect when you need to quickly transfer a few images or if you don’t want to hassle with cables.
Also Read This: How to Remove Clothes from an Image
Common Issues and Troubleshooting Tips
Transferring images from your Canon camera to your computer is usually a smooth process, but sometimes things don’t go as planned. Whether it's a connection problem or missing files, a few common issues can arise. Here’s a look at the most frequent problems and how you can solve them:
- Connection Issues: If your computer isn't recognizing your camera or memory card, check the cable connections or try using a different USB port. Also, ensure that your camera is set to the correct mode for file transfer.
- Corrupted Files: If some of your photos don't transfer or appear corrupted, it might be due to a bad memory card or interrupted transfer. Try restarting the transfer, or use a different memory card reader.
- Slow Transfer Speed: If transferring images is taking longer than usual, check your camera's settings. Lower resolution images or using Wi-Fi instead of a cable might cause delays. You can also try transferring smaller batches of photos.
- Missing Photos After Transfer: If you can't find your transferred photos on your computer, they might have been saved in a different folder. Use the search function on your computer to locate the images by filename or file type (e.g., .jpg or .raw).
- Power Issues: If the camera turns off during transfer, it could interrupt the process. Always ensure that your camera has enough battery or keep it plugged into a charger during the transfer.
By keeping these troubleshooting tips in mind, you can easily resolve most issues and get your photos transferred with minimal hassle.
Also Read This: how to add images in apa format
Maintaining Your Canon Camera and Computer for Smooth Transfers
To ensure that your Canon camera and computer are always ready for hassle-free transfers, proper maintenance is key. Both devices need to be in good condition, and keeping them clean and up to date can save you from many common problems. Here are some tips for maintaining both:
- Keep Your Camera Firmware Updated: Camera manufacturers regularly release firmware updates to fix bugs and improve performance. Always check for updates and install them to ensure your camera functions properly during transfers.
- Use Reliable Memory Cards: Opt for high-quality, trusted memory cards to avoid data loss or corruption. Avoid using old or damaged cards, as they can cause problems during transfers.
- Clean Your Camera's Ports and Connections: Dust or dirt in the USB ports, card slots, or cables can disrupt the transfer process. Clean the ports and connections on your camera regularly using a soft, dry cloth.
- Keep Your Computer Updated: Ensure your computer's operating system is up to date, especially if you're using software to manage transfers. Updates can improve compatibility and fix bugs that might affect your file transfer process.
- Check for Malware or Viruses: Malware can affect your computer’s performance, including file transfers. Make sure your computer has up-to-date antivirus software and conduct regular scans to keep your system running smoothly.
- Ensure Sufficient Storage Space: Make sure your computer has enough space for the images you're transferring. If your hard drive is almost full, the transfer might fail or be delayed.
By maintaining both your camera and computer, you ensure smoother and more efficient photo transfers every time, minimizing the chances of running into problems.
Also Read This: Creating Image URLs in Easy Steps
Frequently Asked Questions
Here are some common questions that users often have when transferring images from their Canon camera to their computer:
- Do I need special software to transfer photos from my Canon camera? - Generally, no. You can transfer images using a USB cable or memory card reader without any additional software. However, Canon does provide some software, like EOS Utility, that can help with transfers and organizing photos.
- Can I transfer images wirelessly without using a USB cable? - Yes, if your Canon camera supports Wi-Fi or Bluetooth, you can transfer photos wirelessly using Canon’s apps like Camera Connect or through your computer’s Wi-Fi network.
- What do I do if my photos don’t appear on my computer after transferring? - First, check that your photos were successfully transferred by searching for them in the File Explorer (Windows) or Finder (Mac). If they are not there, try transferring them again or check for issues with the memory card or cable.
- Why are my photos transferring slowly? - Slow transfers can be due to large image file sizes, wireless transfer speeds, or connection issues. Try transferring smaller batches or using a direct USB connection for faster speeds.
- Can I transfer images directly from my Canon camera to cloud storage? - Some Canon cameras allow for direct cloud uploads through Wi-Fi. Alternatively, you can manually upload photos to cloud services like Google Drive or Dropbox after transferring them to your computer.
- Is it safe to remove the memory card during a transfer? - No, removing the memory card while files are transferring can result in data loss. Always safely eject the device from your computer before removing the memory card or camera.
If you have any other questions or run into issues, you can refer to your camera's user manual or reach out to Canon’s support for assistance.
Conclusion
Transferring images from your Canon camera to your computer is a simple yet crucial step in managing your photos. Whether you choose to use a USB cable, a memory card reader, or a wireless connection, each method offers unique advantages to suit your needs. By understanding common issues and maintaining both your camera and computer, you can ensure smooth transfers and avoid frustration. Regular maintenance, such as keeping your firmware updated, using quality memory cards, and keeping your devices clean, will help make each transfer process faster and more reliable. With these tips in mind, you can confidently manage your photos, making them ready for editing, sharing, and storing without any hassle. Always remember, transferring your photos is the first step to preserving your memories in the best possible way.

 admin
admin


