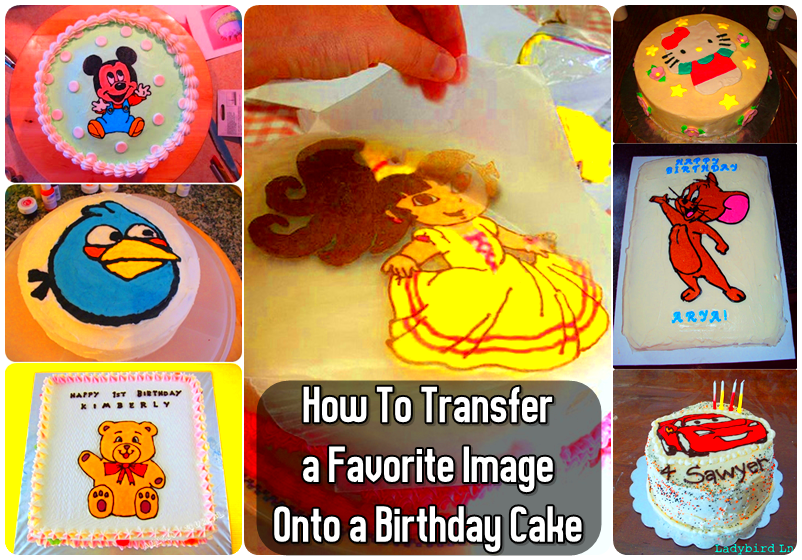
Transferring an image onto a cake is a fun and creative way to add a personal touch to your desserts. Whether it's for a birthday, wedding, or special event, this technique allows you to showcase your favorite designs, photos, or artwork directly on the cake's surface. The process is simple and can be done at home with a few essential tools. It’s a great way to turn a plain cake into something extraordinary, capturing the essence of any occasion with a custom design.
The process of image transfer is quite flexible, and you can choose to work with edible paper, frosting sheets, or even direct drawing methods. Regardless of the technique, the end result is always a unique and impressive cake. In the next sections, we’ll dive into the details of how to select the right image, prepare your cake, and explore the different methods available for transferring your designs onto a cake.
Choosing the Right Image for Cake Transfer

When it comes to transferring images onto a cake, choosing the right image is key to achieving a professional-looking result. Not all images work well with this technique, so it's important to think about how your image will appear when transferred onto the cake's surface.
Here are some tips for selecting the best image for cake transfer:
- High Resolution: Choose an image with a high resolution to ensure the details are sharp and clear once transferred. Low-resolution images can look blurry or pixelated on the cake.
- Simple Designs: Images with fewer details tend to transfer better. Complex or busy designs may not look as clean when transferred, especially on a smaller cake.
- Contrast and Color: Images with good contrast are easier to transfer. Bright, bold colors also show up better compared to soft, pastel tones.
- Size and Proportion: Make sure the image you choose fits the size of your cake. A large image on a small cake can appear overwhelming, while a small image on a large cake might get lost.
Once you have chosen an image that meets these criteria, you’ll be ready to move on to preparing the cake and selecting a transfer method. Let’s look at some of the different methods you can use to transfer your image onto the cake.
Also Read This: Adding Transparent Images in Google Slides
Different Methods for Transferring Images

There are several ways to transfer images onto a cake, each with its own set of tools and techniques. Below, we’ll explore the most popular methods to help you choose the one that works best for your needs and skill level.
1. Edible Image Paper Transfer
One of the most popular methods for transferring images onto cakes is using edible image paper. This technique involves printing your image onto a special edible paper, which is then applied to the cake using a thin layer of frosting.
- Pros: This method is straightforward and produces sharp, vibrant images.
- Cons: You need access to an edible printer, and the paper can sometimes peel off if not applied correctly.
2. Freehand Drawing
If you have artistic skills, freehand drawing is a great way to transfer an image onto a cake. You can either use edible markers or paint directly onto the cake with food coloring. This method allows for total control over the design.
- Pros: It’s a creative, personalized option that works for unique or custom designs.
- Cons: It requires a steady hand and patience, especially for detailed images.
3. Sugar Sheets or Fondant Transfer
Another option is to use sugar sheets or fondant to create your image. This method involves printing or hand-painting your design onto the sugar sheet or fondant and then placing it on the cake. It works best for designs that need to be cut out or shaped.
- Pros: This method can give a professional-looking finish and is ideal for intricate designs.
- Cons: It requires some skill with handling fondant or sugar sheets and may take a bit longer to complete.
4. Transfer Paper Method
Transfer paper is a simple yet effective way to copy an image onto a cake. You place the image on the cake’s surface, trace it with a pen or edible marker, and then fill in the design with frosting or icing.
- Pros: Easy to use and doesn’t require any special equipment.
- Cons: The image might not be as vivid as the edible paper method, and it may take a bit longer.
Each of these methods offers unique benefits depending on your design and available tools. Choose the one that best fits your level of expertise and the desired look for your cake.
Also Read This: How Many Photos Does Depositphotos Have? Exploring the Platform's Image Library
Preparing the Cake for Image Transfer
Before you start transferring your image onto a cake, it’s essential to prepare the cake surface properly. A smooth, even surface ensures that the image transfers cleanly and looks professional. Whether you're using fondant, buttercream, or whipped cream, the way you prepare your cake can make a significant difference in the final result.
Here are the key steps to properly prepare your cake:
- Leveling the Cake: If your cake has domed on top, it’s best to level it before proceeding. Use a serrated knife to trim off any uneven edges. This helps create a flat surface that will hold your image without distortion.
- Applying a Base Coat: Apply a thin layer of frosting or fondant to the cake. This serves as a base for the image to adhere to. If you’re using fondant, you can roll it out and cover the cake entirely, smoothing out the surface to avoid any wrinkles.
- Chilling the Cake: Refrigerating your cake for 30-60 minutes helps the frosting or fondant set. A firm, chilled surface makes it easier to work with when transferring the image and ensures the design stays intact.
Tip: Ensure the surface is clean and free of crumbs before you start the image transfer process. You can use a bench scraper to smooth out any imperfections in the frosting or fondant.
Once your cake is properly prepared, you’re ready to start transferring the image. The next step involves gathering your tools and understanding the process thoroughly.
Also Read This: Is Getty Images a Trustworthy Source for Stock Photography?
Tools You Will Need for Image Transfer
Having the right tools is crucial to achieving a successful image transfer onto a cake. The tools you choose will depend on the method you select for transferring your image. Below is a list of essential tools you’ll need for the most common methods of cake image transfer.
| Tool | Purpose |
|---|---|
| Edible Printer | For printing images onto edible paper or frosting sheets. |
| Edible Paper/Frosting Sheets | Special paper used to print or transfer images onto cakes. |
| Fondant or Sugar Sheets | Used for hand-painting or printing images and cutting out designs. |
| Edible Markers/Pens | To draw or trace images onto the cake surface directly. |
| Offset Spatula | For spreading frosting or smoothing fondant onto the cake. |
| Rolling Pin | For rolling out fondant or sugar sheets to the desired thickness. |
| Image Transfer Paper | Used for tracing designs onto the cake’s surface. |
Tip: Before using any tools, make sure they are clean and ready to work with. Any residue can interfere with the transfer process.
With these tools in hand, you’ll be equipped to transfer your image with ease. Now that you’re ready, it’s time to dive into the step-by-step process for transferring the image onto your cake.
Also Read This: Does Shutterstock Have a Free Trial? Exploring Options for Exploring the Platform
Step-by-Step Guide to Transferring an Image Onto a Cake
Now that you’ve prepared your cake and gathered all the necessary tools, it’s time to walk through the steps of transferring your image onto the cake. This process is easier than it seems, and with a little patience, you can create a stunning custom cake design.
Follow these simple steps for a successful image transfer:
- Step 1: Prepare Your Cake Surface
Ensure that your cake has been leveled and frosted or covered with fondant. The surface should be smooth and firm, which will help the image stick better.
- Step 2: Print Your Image (if using edible paper)
If you’re using an edible printer, print your chosen image onto edible paper or frosting sheets. Make sure your image is the right size for your cake.
- Step 3: Trim the Image
Once your image is printed, carefully trim the edges using scissors. You can leave a small border around the image or trim it to fit perfectly on the cake surface.
- Step 4: Apply the Image to the Cake
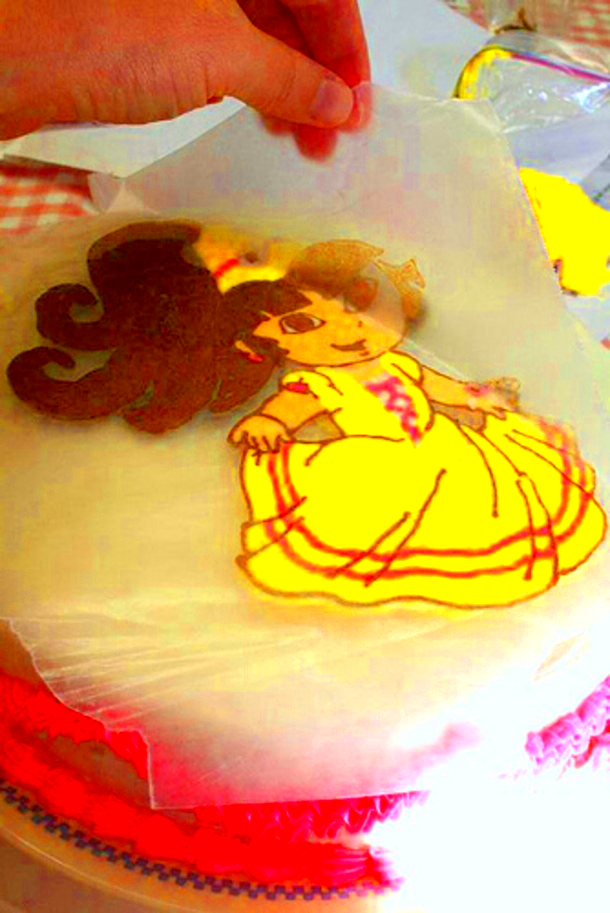
Gently lift the image and place it onto the cake. If you are using edible paper or frosting sheets, you can lightly moisten the back of the image with a small amount of water or alcohol to help it adhere. Press gently to avoid wrinkles or air bubbles.
- Step 5: Smooth and Set
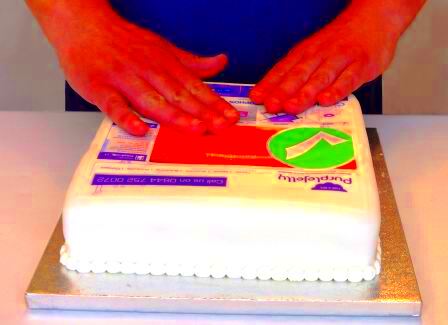
Use a smooth tool, like an offset spatula, to gently smooth the image down, ensuring there are no air pockets or wrinkles. If needed, refrigerate the cake to set the image in place.
- Step 6: Touch Up
If there are any edges of the image that haven’t fully adhered, you can use frosting or fondant to touch them up. You can also add details around the image using edible markers or icing for an extra decorative touch.
Tip: Always work in a cool environment to prevent the image from melting or smudging, especially if you’re using edible ink.
Once you’ve followed these steps, your cake will be ready to impress! Transferring an image onto a cake may seem complex, but with these clear steps, you’ll be able to do it with confidence and ease.
Also Read This: How Much Does Shutterstock Pay for Photos? Insight into Compensation Rates
Common Mistakes to Avoid During Image Transfer
When transferring an image onto a cake, there are a few common mistakes that can affect the final result. While this process is fairly straightforward, knowing what pitfalls to avoid will help you achieve the best outcome. Let’s take a look at some of the most frequent mistakes people make and how to steer clear of them.
Here are the key mistakes to avoid:
- Using Low-Resolution Images: One of the biggest mistakes is choosing an image with low resolution. When printed or transferred, the image may appear blurry or pixelated. Always choose high-quality images to ensure crisp details.
- Not Preparing the Cake Surface Properly: A rough or crumbly surface can make it difficult for the image to adhere. Make sure your cake is leveled, smooth, and preferably chilled before transferring the image.
- Not Using the Right Transfer Paper: Using the wrong type of edible paper can cause the image to smudge or not adhere properly. Always use the right kind of frosting sheets or edible paper designed for cake decorating.
- Over-wetting the Image: If you're using a transfer paper, too much moisture can cause the image to run or tear. Lightly dampen the back of the image with a brush or cloth, just enough to help it stick.
- Not Smoothing the Image After Transfer: It’s easy to forget to smooth out air bubbles or wrinkles after applying the image. Use a fondant smoother or your hands to gently press the image into place, ensuring no air pockets are trapped.
- Skipping the Refrigeration Step: Chilling your cake before transferring the image helps set the frosting or fondant, making the transfer easier and preventing it from smudging. Don’t skip this important step!
By being mindful of these common mistakes, you’ll set yourself up for success and ensure your image transfer goes smoothly. Keep these tips in mind for a flawless, professional-looking cake!
Also Read This: Making Money from Shutterstock Images: Exploring Revenue Opportunities
Frequently Asked Questions About Transferring Images Onto a Cake
Transferring an image onto a cake can be a bit tricky if you're new to the process. But don’t worry – we’ve got you covered with some answers to the most frequently asked questions about this technique. Let’s tackle some common concerns that may arise along the way.
1. Can I use any printer to print on edible paper?
No, you need to use a special edible ink printer for printing on edible paper. Regular printers use ink that is not safe for consumption. Be sure to invest in a printer specifically designed for edible inks.
2. How long will the edible image last on my cake?
Edible images generally last for a few days when stored properly. However, the image may begin to soften or discolor over time, especially if it’s exposed to moisture. To keep it fresh, store the cake in a cool, dry place.
3. Can I transfer a photo of any size?
Yes, you can transfer photos of any size, but make sure that the image fits the dimensions of your cake. A smaller image might get lost on a large cake, while a larger image could overwhelm a smaller cake.
4. What if my image wrinkles after transfer?
If your image wrinkles after applying it, gently smooth it out with a fondant smoother or your hands. If you’re using edible paper, avoid over-wetting it, as excess moisture can cause it to tear or wrinkle.
5. Can I add color or details to the transferred image?
Yes, after transferring the image, you can enhance it with icing, edible markers, or food coloring. This is a great way to add extra detail and personalize your design even more.
These FAQs should help clear up any confusion and make your image transfer process much easier. If you have any other questions, don’t hesitate to ask!
Conclusion: Perfecting the Art of Cake Image Transfer
Transferring images onto cakes is a fun and rewarding way to add a personal touch to your baked creations. Whether you’re making a birthday cake, wedding cake, or simply a special dessert, this technique can help take your cake decorating skills to the next level. With the right tools, a little practice, and an understanding of the process, you can achieve beautiful, professional-looking results.
To perfect the art of cake image transfer, remember the following:
- Choose high-quality images that suit your cake size and design.
- Properly prepare your cake to ensure the image adheres smoothly.
- Use the right tools and techniques, whether you're printing an image or drawing by hand.
- Avoid common mistakes such as over-wetting the image or using low-quality paper.
With these tips and a little creativity, you’ll be able to create stunning cakes that are as beautiful as they are delicious. So go ahead and experiment with different designs, and soon you’ll be mastering the art of image transfer with ease!

 admin
admin


