If you’ve ever found yourself humming a catchy tune or recalling an insightful podcast from a YouTube video, you might have wondered about stripping audio from those clips. Whether it's for enjoying music on the go or compiling audio notes for study, extracting audio can enhance your experience. In this post, we’ll dive into the ins and outs of how to strip audio from YouTube videos for personal use. Let’s get started!
Legal Considerations for Audio Extraction
Before diving into the how-tos of extracting audio, it’s crucial to understand the legal landscape surrounding this practice. Many people overlook these considerations, which can lead to unintended consequences. Here’s a breakdown of what you should know:
- Copyright Laws: Most audio and video content on YouTube is protected by copyright. This means the original creator holds exclusive rights to how that content is used. Stripping the audio without permission can infringe upon these rights, even if it’s for personal use.
- Fair Use Doctrine: In some cases, using a portion of audio may qualify as "fair use," especially for purposes like commentary, criticism, or educational use. However, fair use is a complex legal area and varies by jurisdiction.
- YouTube’s Terms of Service: YouTube has clear terms about downloading content. According to their policy, downloading videos without explicit permission or a provided download button is against their terms. Violating these terms can result in penalties, including account suspension.
- Public Domain and Creative Commons: Not all content on YouTube is under strict copyright. Some videos are released into the public domain or shared under Creative Commons licenses, allowing for certain types of reuse. Always check the video description for licensing details.
While you might feel tempted to extract audio for convenience, it's essential to respect creators' rights. Using the audio in a way that violates copyright can lead to legal consequences, and no one wants to face a copyright infringement suit.
A good practice is to consider reaching out to the content creator for permission, especially if you plan to use the audio significantly or in a public setting. Many creators appreciate when people value their work and are often more than willing to grant permission for personal use.
In conclusion, while stripping audio can be an exciting way to enjoy content, it's vital to approach it with caution and respect for copyright laws. Keeping these legal considerations in mind will not only protect you but also honor the hard work of content creators. So, always remember: the creativity and effort behind the content is worth protecting!
Also Read This: What Happened to Lalate on YouTube? Exploring the Mystery Behind the Channel's Absence
3. Tools and Software for Extracting Audio
When it comes to extracting audio from YouTube videos, there are plenty of options to choose from. Depending on your needs—whether it's simplicity, advanced features, or compatibility with various devices—you'll find a tool that fits the bill. Here’s a rundown of some popular tools and software that can help you strip audio effortlessly:
- Online Converters: These are great for users who don't want to download software. Websites like YTMP3.cc and Convertio allow you to paste the YouTube video link, select the audio format you want (MP3, WAV, etc.), and download it directly.
- Desktop Applications: For those who prefer a more robust solution, programs like 4K Video Downloader and Freemake Video Converter allow you to download videos and extract audio easily. These tools often come with additional features, such as batch downloading and format conversion.
- Browser Extensions: Extensions like Video DownloadHelper integrate directly into your browser, making it super easy to extract audio with just a few clicks. Just be mindful of the permissions they request.
- Mobile Apps: If you’re on the go, apps like TubeMate (for Android) and Documents by Readdle (for iOS) let you download and extract audio directly on your smartphone.
Each of these tools has its pros and cons, so think about what features are most important to you. Need batch processing? Go for a desktop app. Prefer a no-download solution? An online converter might be your best bet. The important thing is to choose the right tool that makes your audio extraction process smooth and easy.
Also Read This: How to See Downvotes on YouTube Videos: Updated Methods
4. Step-by-Step Guide to Stripping Audio from YouTube Videos
Now that you know about the tools available, let’s walk through a simple step-by-step guide to stripping audio from a YouTube video. I’ll cover the process for both online converters and a desktop application, so you can pick what suits you best!
Using an Online Converter
- Find Your Video: Go to YouTube and find the video from which you want to extract audio. Copy the URL from your browser’s address bar.
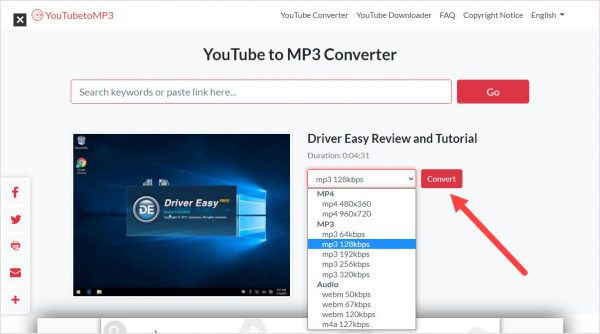
- Open the Converter: Navigate to your chosen online converter website, such as YTMP3.cc.
- Paste the URL: Look for the input box and paste the YouTube link you copied earlier.
- Select Audio Format: Choose the audio format you’d like to download (MP3 is usually a safe bet for most users).
- Start the Process: Click the “Convert” button. The process will take a few moments, depending on the length of the video.
- Download Your Audio: Once the conversion is complete, a download link will appear. Click it to save the audio file to your device!
Using a Desktop Application (4K Video Downloader)
- Download and Install: Go to the 4K Video Downloader website and download the application. Follow the prompts to install it on your computer.
- Copy the Video Link: Just like before, find the YouTube video and copy its URL.
- Open the Application: Launch 4K Video Downloader on your computer.
- Add the Link: Click on the “Paste Link” button in the application. It will analyze the video.
- Choose Audio Format: Select the “Extract Audio” option and choose your desired format and quality.
- Download: Click the “Extract” button to begin downloading the audio. It’ll be saved directly to your computer!
And there you have it! In just a few simple steps, you can have audio from your favorite YouTube videos saved for your personal listening pleasure, whether you’re at home or on the go. Just remember to respect copyright laws and use the audio for personal use only!
Also Read This: How Much Do YouTubers Make for 1 Million Views? Earnings Breakdown
5. Best Formats for Extracted Audio Files
When it comes to extracting audio from YouTube videos, choosing the right audio format is crucial. The format you choose can affect the quality, file size, and compatibility with your audio players or editing software. Here’s a quick rundown of some of the best audio formats you might consider:
- MP3: This is by far the most popular format. MP3 files are compressed, which means they take up less space on your device. They balance good sound quality with small file size, making them ideal for personal use.
- WAV: If you’re looking for high fidelity, WAV files are a great choice. They are uncompressed and provide excellent sound quality, but they can be quite large. This format is perfect if you plan to do detailed editing.
- FLAC: Similar to WAV, FLAC (Free Lossless Audio Codec) provides high-quality audio. However, it compresses the file without losing any audio data, which makes it suitable for audiophiles who want to save space without sacrificing quality.
- AAC: This format offers better sound quality than MP3 at similar bit rates. It's widely supported by most devices and is particularly useful for those who listen to music on Apple devices.
- OGG: This is an open-source format that provides good sound quality and is used by various platforms. OGG files are compressed like MP3 but often have better audio quality at the same file size.
Ultimately, the best format for your extracted audio files depends on your intended use. If you're simply listening for personal enjoyment, MP3 is likely sufficient. However, if you're into music production or need the best quality for professional use, WAV or FLAC might be more appropriate. Just keep in mind the trade-offs regarding file size and quality when making your choice!
Also Read This: How to Download Ringtones from YouTube for Your Phone in Simple Steps
6. How to Edit and Enhance Your Extracted Audio
Once you’ve extracted the audio, you might find that it needs a little tweaking before it’s perfect. Editing and enhancing your audio can make a world of difference, whether you're preparing a podcast, creating a remix, or just cleaning up a recording. Here are some tips and tools to help you along the way:
- Choose Your Editing Software: Start by selecting the right audio editing software. There are many options available depending on your experience level, such as:
- Audacity (free and user-friendly)
- Adobe Audition (professional-grade features)
- GarageBand (great for Mac users)
- Reaper (affordable yet powerful)
- Trim and Cut: Remove any unnecessary sections from the audio. For example, if you’ve extracted music, you might want to cut out long gaps at the beginning or end. This helps to create a cleaner listening experience.
- Noise Reduction: If there’s background noise, many editing tools offer noise reduction features. This can significantly improve the clarity of your audio. In Audacity, for instance, you can sample a portion of the noise and then apply noise reduction to the entire track.
- Normalize Audio Levels: Sometimes, audio levels can vary. Normalize the audio to ensure a consistent volume throughout your track. This is especially important if you’ve combined different audio sources.
- Add Effects: Don’t be afraid to experiment with effects like reverb, EQ, or compression to enhance the overall sound. Just remember, moderation is key! Too many effects can make audio sound cluttered.
- Export in Your Desired Format: After editing, export your audio in the format that suits your needs (remember the previous section!). Ensure you consider the desired quality settings to maintain the audio's integrity.
Editing your extracted audio can open up a whole new world of possibilities! By utilizing these tools and techniques, you’ll enhance your listening experience and create audio that meets your needs perfectly. Go ahead and give it a try—you might surprise yourself with what you can create!
Also Read This: How to Block Access to the YouTube Website on Any Device
7. Common Issues When Stripping Audio and How to Solve Them
Stripping audio from YouTube videos can be a straightforward task, but like any digital process, it has its hiccups. Let’s explore some of the common issues you might encounter, along with practical solutions to get you back on track.
1. Audio Quality Loss
One of the most frequent complaints is a noticeable drop in audio quality. This often happens if you're using a converter that compresses the audio too much. To avoid this, choose a reliable tool that offers options to maintain the original bitrate. For optimal results, consider converting to a lossless format like WAV instead of MP3.
2. Compatibility Issues
Sometimes, the audio file may not play on your device due to format compatibility. This can be frustrating! Always check what audio formats your device supports before converting. If you encounter an incompatible file, use a format converter to switch to a more universal format.
3. Failed Downloads
Occasionally, a YouTube video may not download correctly, either due to connectivity issues or restrictions set by YouTube. If this happens, try using a different downloader or check your internet connection. You might also want to try downloading a different video to see if the issue persists, which helps in pinpointing the problem.
4. Video Unavailable or Removed
Sometimes the video you want has been set to private or removed by the uploader, leaving you unable to access the audio. In this scenario, unfortunately, there isn’t much you can do. If you’re set on getting an audio track, consider looking for alternative videos that might have the same content!
5. Issues with Download Speed
If the download process is slower than expected, this might be due to your internet service provider (ISP) throttling your connection for video streaming. Try downloading during off-peak hours or use a different network. If you have access, using a wired connection rather than Wi-Fi may also help improve speed.
6. Software Errors
At times, the software being used can malfunction, leading to errors during the stripping process. Always ensure you are using the latest version of the software and check for any updates. Restarting your computer or trying a different application can also resolve unexpected bugs.
8. Conclusion and Best Practices for Personal Use
Stripping audio from YouTube videos can be incredibly rewarding, giving you access to your favorite music or commentary for personal enjoyment. To wrap things up, here are some best practices to keep in mind:
- Always Respect Copyright: While it might be tempting to download audio for broader use, it's crucial to respect copyright laws. Stripping audio is best reserved for personal use. Avoid sharing or distributing it without permission.
- Use Trusted Sources: Opt for well-reviewed and trusted software to strip audio. Ensure these tools are safe to protect your data and devices from malware.
- Keep Your Files Organized: As your collection of audio files grows, maintaining a neat file structure will make it easier to find what you want later. Organize by artist, genre, or whatever system works best for you.
- Stay Informed: Technology changes rapidly, and so do the policies of platforms like YouTube. Stay informed about any changes in the terms of service or best practices for downloading content.
In conclusion, with the right approach and tools, stripping audio from YouTube videos can be a simple and enjoyable experience. Follow these guidelines, and you'll not only create a fantastic audio library but do so responsibly.
 admin
admin


