Removing color from an image can transform the way it communicates. Whether you’re aiming for a timeless black and white effect or simply want to emphasize certain elements, this technique can add depth and focus. By reducing distractions, you allow your audience to engage more fully with the subject. In this post, we’ll explore how to effectively remove color from an image and why it’s beneficial for your visual storytelling.
Understanding the Importance of a Clean Look

A clean look in images often conveys professionalism and clarity. Here are a few reasons why this style is significant:
- Focus on the Subject: A monochrome palette draws attention to the subject without the distraction of vibrant colors.
- Emotional Impact: Black and white images can evoke stronger emotions, often enhancing the storytelling aspect.
- Versatility: Clean images can be used across various platforms and mediums without losing their impact.
- Timelessness: A lack of color can give your images a classic and enduring feel, suitable for both modern and traditional contexts.
By understanding the importance of a clean look, you can make more informed choices when editing your images, enhancing both their aesthetic and communicative power.
Also Read This: How to Prepare Potato Rice with Dailymotion Guide
Choosing the Right Tools for Image Editing
Selecting the right tools for editing images is crucial for achieving the desired results. Here’s a rundown of some popular options:
| Tool | Best For |
|---|---|
| Adobe Photoshop | Professional editing with advanced features |
| GIMP | Free alternative with robust tools |
| Canva | User-friendly design for beginners |
| Pixlr | Online editing without software installation |
When choosing a tool, consider your level of expertise, the complexity of your projects, and your budget. Many of these tools offer tutorials and community support, making it easier for you to learn and master the art of image editing. Ultimately, the right tool can help you create stunning images that align with your vision.
Also Read This: Mastering the Sale of Stock Video Footage on Adobe
Step by Step Guide to Remove Color from an Image
Removing color from an image can seem daunting, but it’s quite straightforward when you break it down into steps. Let’s walk through a simple process that you can follow using most image editing tools:
- Open Your Image: Start by loading the image you want to edit into your chosen software.
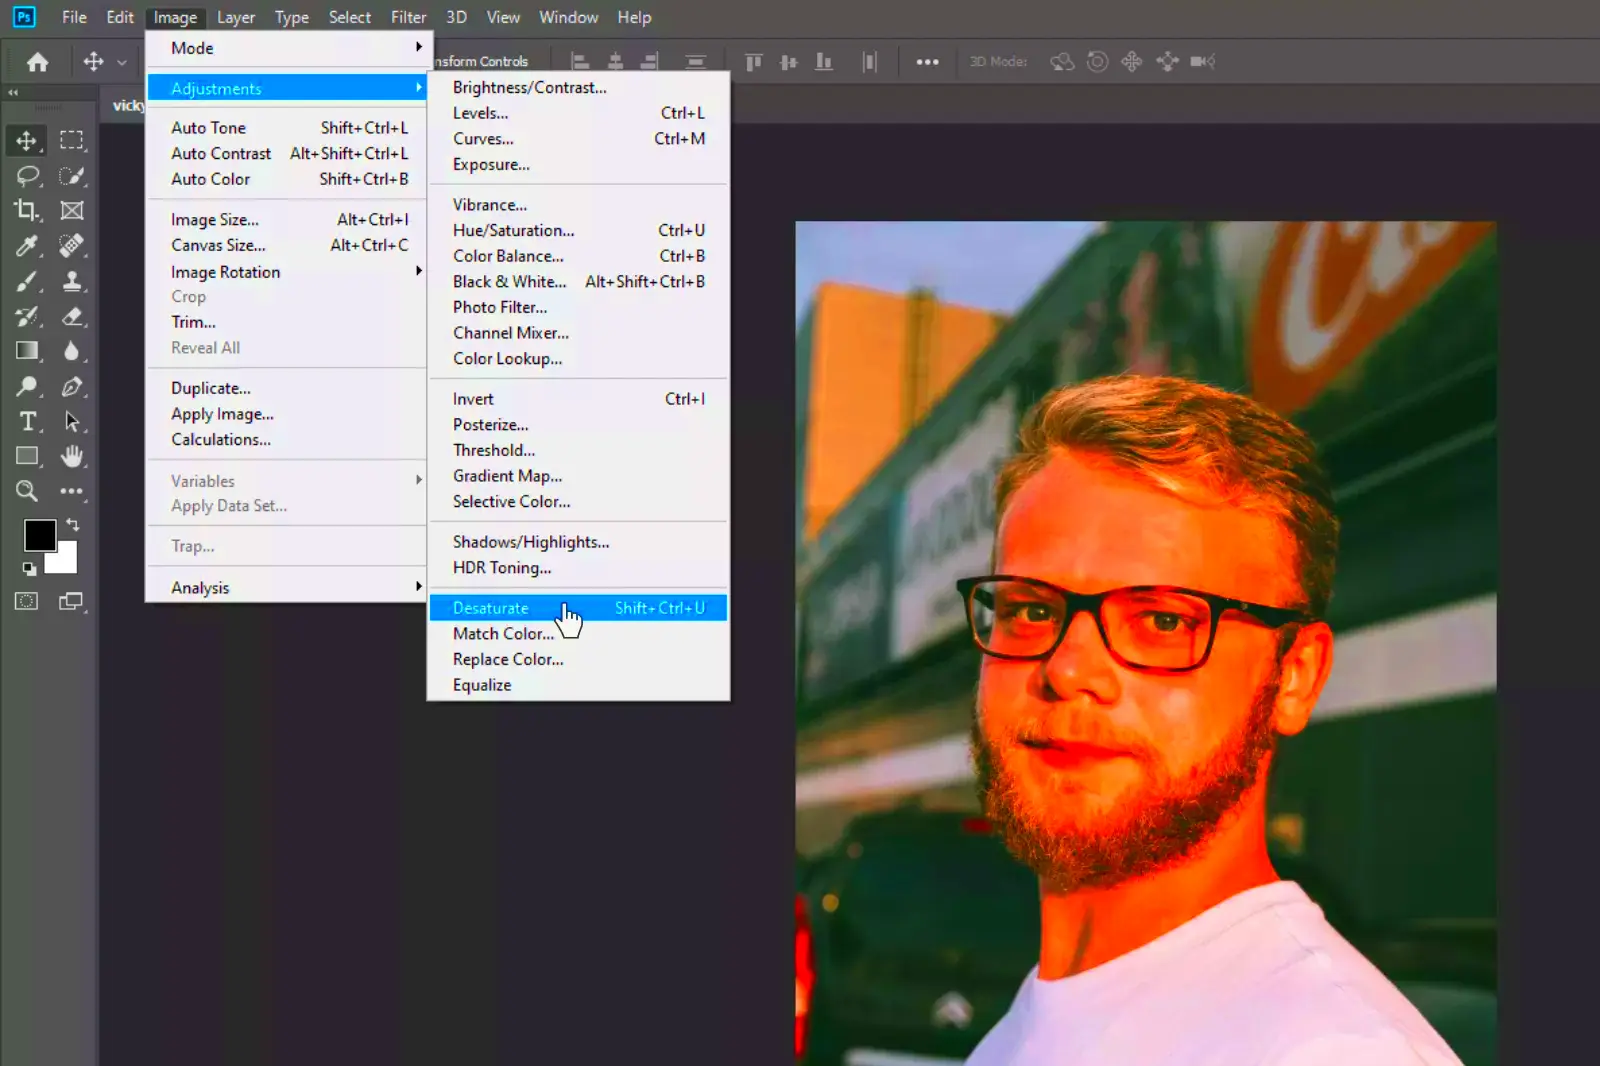
- Select the Color Removal Tool: Look for options like "Desaturate," "Grayscale," or "Black and White" in the editing menu.
- Adjust Settings: Most tools will let you tweak how the colors are removed. You can often choose to keep certain colors while removing others, so experiment a bit!
- Preview Changes: Always preview your changes. This helps you see how the image looks without the colors before finalizing.
- Save Your Work: Once satisfied, save your image. It’s wise to keep a copy of the original just in case.
With these steps, you can quickly remove color and achieve a clean, professional look for your images!
Also Read This: Page Ownership: Claiming Your IMDb Page – Taking Control of Your IMDb Presence
Adjusting Brightness and Contrast for Better Results
After removing color, adjusting brightness and contrast can enhance your image even further. Here’s why these adjustments are essential:
- Brightness: This controls the overall lightness or darkness of your image. Adjusting brightness can help clarify details that might be lost in a grayscale image.
- Contrast: This setting determines the difference between the darkest and lightest parts of the image. Higher contrast can make elements pop, while lower contrast can create a softer look.
To adjust brightness and contrast, follow these simple steps:
- Locate the Adjustment Tools: In your editing software, find the brightness and contrast sliders.
- Make Adjustments: Start with small changes. Gradually increase brightness or contrast until you reach the desired look.
- Preview Changes: Always check the preview to see how your adjustments affect the overall image.
Playing with these settings can significantly improve the final outcome of your image, making it more striking and engaging!
Also Read This: Mastering Image Rounding in Google Slides
Using Filters and Effects to Enhance Your Image
Once you've removed color and adjusted brightness and contrast, it’s time to get creative with filters and effects. These tools can add a unique flair to your images. Here are some popular filters and effects to consider:
- Vignette: This effect darkens the edges of the image, drawing attention to the center.
- Blur: A slight blur can soften the overall look, creating a dreamy quality.
- Sharpen: This enhances details, making certain elements stand out even more.
- Texture: Adding a texture filter can create a vintage or artistic feel.
To apply these effects:
- Select the Filter or Effect: Most editing tools have a menu for filters. Browse through and choose one that fits your style.
- Adjust the Intensity: Don’t hesitate to adjust how strong the effect is. Too much can overwhelm the image.
- Combine Effects: You can layer multiple effects for a more complex look. Just be mindful to keep it balanced!
Using filters and effects wisely can transform your image into a captivating visual that grabs attention and conveys your intended message.
Also Read This: How to Get Signature Collection on iStock: Everything You Need to Know
Common Mistakes to Avoid When Editing Images
Editing images can be a fun and rewarding process, but it’s easy to make mistakes along the way. Being aware of common pitfalls can help you achieve better results. Here are some mistakes to watch out for:
- Over-editing: It’s tempting to apply every filter and effect, but too much can make an image look unnatural. Aim for subtlety.
- Ignoring Image Resolution: Always keep an eye on the resolution of your image. Editing a low-resolution photo can lead to pixelation when printed or displayed.
- Not Saving a Copy: Before making major edits, always save a copy of the original. This way, you can revert back if needed.
- Inconsistent Styles: If you're editing a series of images, ensure they have a consistent look. This creates a cohesive feel, especially for projects like portfolios or social media feeds.
- Skipping the Preview: Always take a moment to preview your edits. What looks good on a small screen may not work well when viewed larger.
By being mindful of these mistakes, you can enhance your editing process and produce stunning images that truly reflect your vision.
Also Read This: How to Install Shutterstock Free Editor Toolkit: A Step-by-Step Guide
Frequently Asked Questions
When it comes to removing color from images and editing in general, many people have similar questions. Here are some of the most common ones:
- Can I remove color using free software? Absolutely! Programs like GIMP and online tools like Pixlr offer great features for color removal.
- Will removing color affect the image quality? If done correctly, it shouldn’t affect the quality. Just be cautious with resolution.
- How do I know if my edits are too much? If your image looks unnatural or hard to recognize, you might have overdone it. Trust your instincts and don’t hesitate to get a second opinion.
- Can I add color back after removing it? Yes, you can always use tools to selectively add color back into specific areas of your image.
These FAQs cover some basic concerns about image editing. Remember, practice makes perfect, and don’t be afraid to experiment!
Conclusion on Achieving a Clean Look in Images
Achieving a clean look in images is all about understanding the tools and techniques at your disposal. By removing color, adjusting brightness and contrast, and creatively using filters, you can create images that are visually appealing and impactful. Always keep in mind the importance of subtlety and consistency throughout your editing process.
As you develop your skills, don’t shy away from experimenting. Every edit is a chance to learn something new. Remember to save your original images, so you can return to them if needed. Whether you’re editing for personal projects or professional work, a clean and polished look will help your images stand out and resonate with your audience.
Happy editing!
 admin
admin


