If you're a designer using Figma, you might want to export background images for various purposes, like creating presentations, web designs, or marketing materials. Exporting these images is a straightforward process, but it helps to know the steps involved. In this guide, we’ll walk you through everything you need to know about exporting background images effectively from Figma. By the end, you'll be comfortable with the process and ready to put your designs into action.
Understanding Figma's Export Settings
There are various export options available in Figma that will greatly improve your productivity. In summary:
- Resolution: Choose the pixel density of your images. Options typically include 1x, 2x, or even higher resolutions.
- File Formats: Figma supports several formats, including PNG, JPG, and SVG. Each format has its specific use cases.
- Export Slices: This feature allows you to export only specific parts of your design, which is handy for complex layouts.
Achieving knowledge on the aforementioned configurations would guide you in making choices that are well-informed when it comes to the preview of pictures after exportation.
Preparing Your Design for Export
Prior to exporting the background images, it's essential that you adequately prepare your design. To make sure that everything proceeds without hitches, consider these helpful hints:
- Organize Layers: Make sure your layers are organized and named appropriately. This makes it easier to find and select the background images you want to export.
- Check Image Quality: Ensure that any images used in your design are high-resolution and fit well within your layout. Low-quality images can lead to poor export results.
- Set Background Color: If your background includes a solid color, make sure it's set correctly in Figma. This will ensure the exported image looks exactly how you want it.
- Use Frames: Consider placing your background images inside frames. This helps with scaling and positioning during export.
To have a flourishing exportation course of action, take these actions and make your creations stand out in appearance.
Selecting Background Images for Export
Picking the suitable background images for export in Figma is an important stage that can have significant consequences for the end product. It is not simply about selecting any image; it is about taking the time necessary to find those which improve your design and meet its objectives. You could use these tips to guide yourself in making a good choice of pictures:
- Relevance: Ensure that the images align with your design theme. Ask yourself if the image communicates the message or feeling you want to convey.
- Quality: Always opt for high-quality images. Blurry or pixelated images can detract from your overall design. Aim for images that are clear and crisp.
- Contrast: Consider the contrast between your background images and other design elements. You want the images to complement rather than clash with the text or graphics in your design.
- Color Palette: Choose images that fit your color scheme. Consistency in colors will create a more harmonious and visually appealing design.
Whenever you carefully pick the images for background, it can assure that your exported design would be not only beautiful but can also pass the information required to be communicated.
Choosing the Right File Format
When you export your photos from Figma, selecting the appropriate format is necessary for ensuring an improved quality and usability. Here are several options to consider:
| File Format | Best Use Case | Advantages |
|---|
| PNG | Web images, graphics with transparency | High quality, supports transparency, suitable for detailed images |
| JPG | Photographs and complex images | Smaller file sizes, great for photos |
| SVG | Logos and simple graphics | Scalable without losing quality, ideal for web use |
You can choose the format which matches with your requirements best by knowing what each format has in store regarding its efficiency. As an illustration, it would be wise to select PNG if you need pictures for a site that will require them to have transparency. Alternatively, when looking for photos, JPG may serve better.
Exporting Images from Figma
Now that you have created your design and selected the right images and file format for your background, it is time to export your Figma background images. This process is straightforward and can be completed in just a few steps:
- Select the Images: Click on the background images you want to export. You can select multiple images by holding the Shift key and clicking on each one.
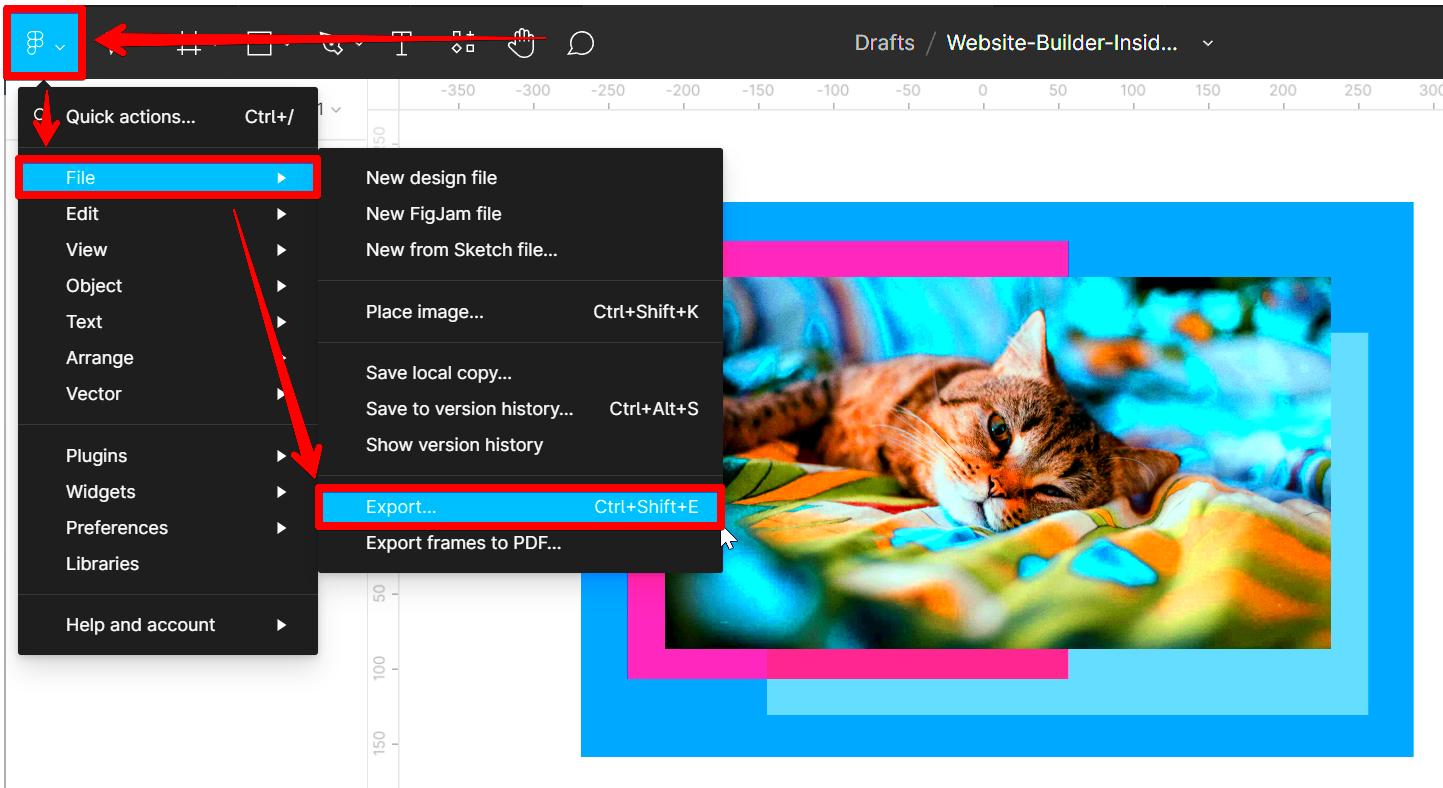
- Open Export Panel: Once your images are selected, navigate to the right-hand panel in Figma and find the "Export" section. Click on the "+" icon to add an export setting.
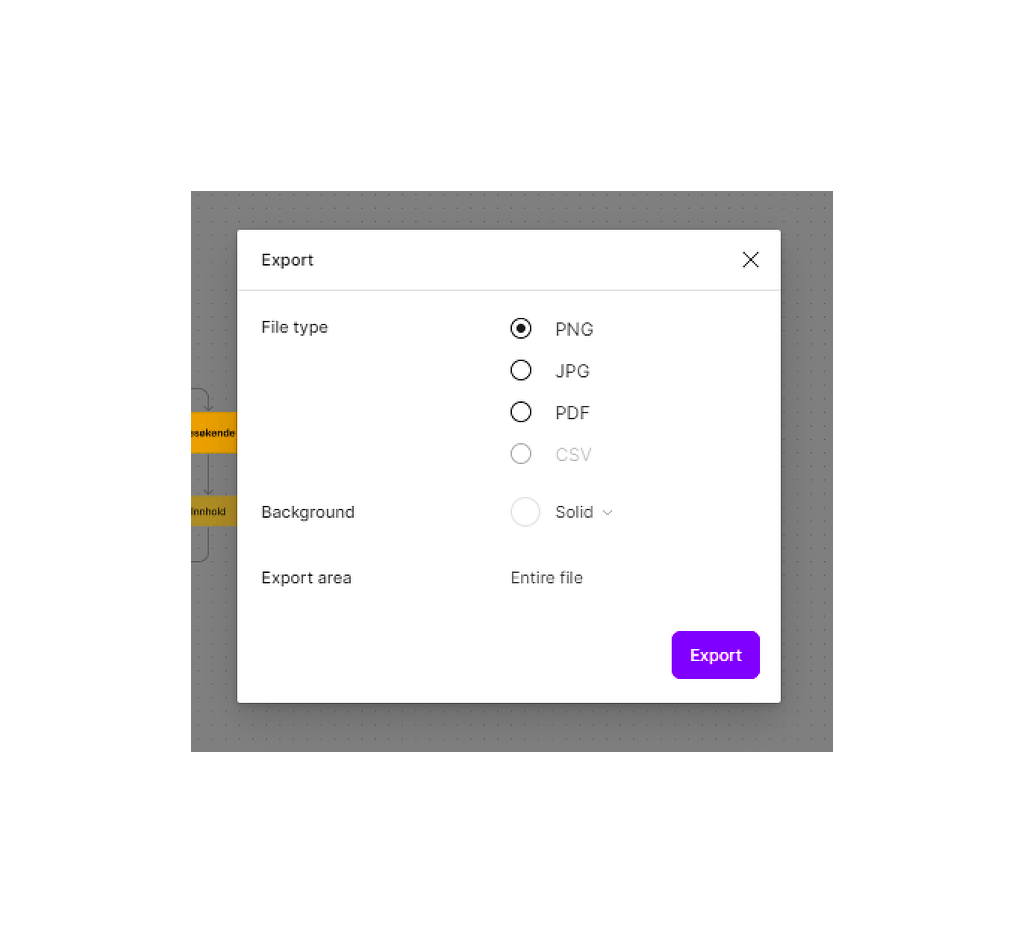
- Set Export Options: Choose the file format, resolution, and any additional settings you need. Make sure everything is set according to your requirements.
- Export the Images: After setting everything up, click the “Export [number] layers” button at the bottom of the panel. Figma will prompt you to choose a destination on your computer.
There you go, your drafted images have been taken out and are waiting to be used for your designs. By observing these procedures, you make certain that your creations shall hold on to their purity and value.
Checking the Exported Images
It is very important to verify the exported background pictures from Figma for they might have some alterations of expectations. This action can prevent you future frustrations as well as wasting of time. Whenever you review your exported images, consider these things:
- File Format: Make sure the images are in the correct file format as per your needs. Double-check the extensions to confirm they match what you intended to export.
- Image Quality: Open the exported files and examine them closely. Look for any signs of pixelation or blurriness, which could indicate issues during export.
- Color Accuracy: Check if the colors in the exported images match what you see in Figma. Sometimes colors can shift slightly during the export process.
- File Size: Take a look at the file size of your exported images. If they're larger than expected, you might want to re-export them with different settings.
Verifying your exported images means you will have good quality ones for yourself; thus ensuring that they fit seamlessly with your project. If there’s anything wrong with them, just go back and fix them in Figma before re-exporting them.
FAQs about Exporting Background Images from Figma
While exporting background images from Figma there are definitely some questions that may arise. The following are some Frequently Asked Questions (FAQs) designed to answer these concerns:
- What file formats can I use for export?
- Figma allows you to export images in several formats, including PNG, JPG, and SVG, each suited for different needs.
- Can I export multiple images at once?
- Yes, you can select multiple layers or images and export them all at once, saving you time and effort.
- Is there a limit to the size of images I can export?
- Figma does not impose strict limits on image sizes, but large images can result in longer export times and larger file sizes.
- What should I do if the exported image quality is poor?
- Check your export settings, especially the resolution and file format. You may need to adjust these settings and re-export.
When you respond to these frequent inquiries, you will be able to move through the export process in a more assured and efficient manner.
Conclusion on Exporting Images Effectively
Exporting background images from Figma is basic but important ability every designer needs. Thus if you choose the right images, select a proper file format and check your exports according to what we have discussed; this will make sure that your images remain intact and improve your designs. Do not forget that practice makes everything better. It gets easy when you do it often.Thus, invest in exploring the features of Figma, playing with configurations and always taking into account to verify your exports two times. This way, you will come up with captivating images that convey messages and catch the attention of those who view them. Wishing you happy designing!
 admin
admin


