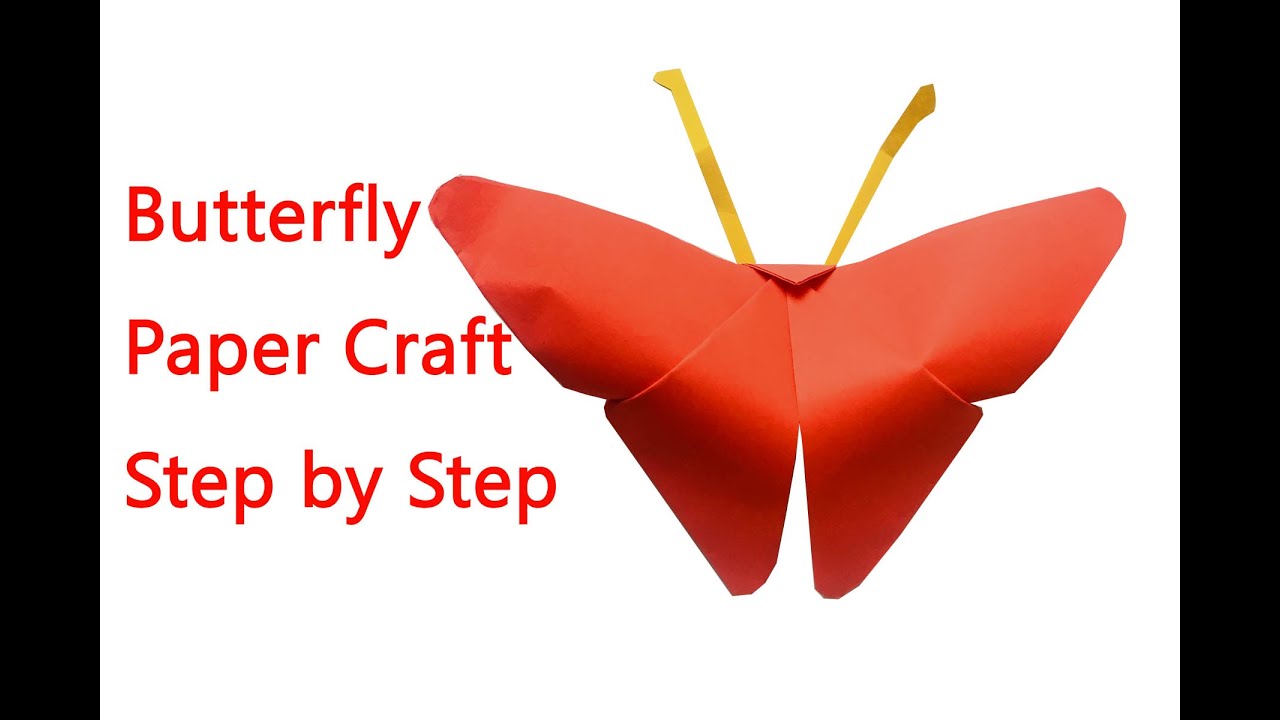
Welcome to the whimsical world of paper butterflies! Crafting these delicate beauties is not only a delightful way to spend your time but also an opportunity to unleash your creativity. Whether you're looking for a fun activity to do with kids, a unique decoration for your room, or an artistic gift for a friend, making paper butterflies is an enjoyable and fulfilling project. Plus, it's remarkably simple! In this guide, we'll walk you through the process, starting from gathering your materials to creating your very own fluttering décor. Let’s dive in!
Materials Needed for Making Paper Butterflies
Before we start folding, gluing, and creating, it's essential to gather all the materials you'll need for this craft. Don't worry—most of these items are common household supplies or can be easily found at your local craft store. Below is a list of materials that will make your paper butterfly-making experience smooth and enjoyable:
- Colored Paper: You can use scrapbook paper, construction paper, or even leftover gift wrap. The choice of colors and patterns will significantly influence the aesthetics of your butterflies!
- Scissors: A good pair of sharp scissors will help you achieve clean cuts when creating your butterfly shapes.
- Glue or Tape: Use craft glue or double-sided tape to attach the wings and body parts securely.
- Pencil: A pencil will come in handy for sketching out your butterfly design before cutting.
- Marker or Pen: You can use these to add details such as patterns on the wings or facial features.
- Pipe Cleaners: These are optional but great for creating the butterfly's antennae. They come in various colors, adding to your butterfly's charm.
- Stickers or Decorative Items: Think of embellishments like sequins, rhinestones, or glitter to add sparkle and character to your butterflies.
Having everything ready will help you enjoy the process without the need to pause to find materials. Creating beautiful paper butterflies can be a wonderful way to express your artistic side, so don’t hesitate to try different styles and designs! Now that we have our list of materials, we’re all set to embark on this crafty adventure. Let’s continue our journey into the enchanting art of paper butterfly crafting!
Also Read This: How to Hack a WiFi Password: A Guide to Gaining Access on Dailymotion
3. Step 1: Choosing the Right Paper
When it comes to crafting beautiful paper butterflies, the first step is selecting the right paper. The type of paper you choose can significantly impact the final look and feel of your butterflies. Here are some great options to consider:
- Origami Paper: This is perhaps the most classic choice! Origami paper comes in a variety of colors and patterns, and it’s specifically designed to hold creases well, which is perfect for detailed folds.
- Craft Paper: Available in many weights and shades, craft paper is durable and easy to work with. You can find some beautiful textured options that can give your butterflies an extra dimension.
- Scrapbook Paper: If you want vibrant designs or specific themes, scrapbook paper is a fantastic choice. It often features lovely patterns that can really make your butterfly stand out.
- Watercolor Paper: If you’re feeling adventurous, try using watercolor paper! You can paint or dye it before cutting, allowing for personalized designs. Just remember, it’s thicker, so you might need a sharp craft knife for cutting.
- Old Book Pages or Sheet Music: For a vintage or artistic flair, repurpose old book pages or sheet music. The text adds a unique texture and creative element to each butterfly.
As you consider your options, keep in mind the color scheme you want for your butterflies. Whether you prefer bold and bright hues or soft pastel tones, your choice of paper sets the stage for the visual impact of your creations. Additionally, don’t shy away from mixing and matching different types of paper. A combination of patterned and solid colors can lead to stunning results!
Lastly, remember the size of the paper as well. Standard origami paper is typically 6x6 inches, but if you're making larger butterflies, you might want to go for A4 or even larger sheets. The size will affect how intricate your butterfly can be, so choose wisely based on your design plans!
Also Read This: Is Dailymotion Safe from COPPA Violations and How to Protect Children’s Privacy
4. Step 2: Cutting Your Paper for the Butterfly Shape
Now that you've chosen the perfect paper, it’s time for the fun part: cutting your paper into the shape of beautiful butterflies! Don’t worry, this doesn’t have to be difficult if you follow these simple steps.
First up, gather your supplies:
- Your chosen paper
- Scissors or a craft knife
- A cutting mat (if you're using a craft knife)
- A pencil or pen for tracing
- Butterfly templates (optional)
If you're feeling confident and want to freehand it, you can skip the templates, but if you're a beginner or want a specific design, using a template can be incredibly helpful. You can find plenty of butterfly shapes online to print out, or you can draw your own!
Here’s how to cut your paper:
- Trace the Design: Lay your template over the paper and lightly trace around it with a pencil. Make sure to keep your lines light so they don’t show on your butterfly after cutting.
- Cut Out the Butterfly: Carefully cut along the lines you traced. If you're using scissors, go slowly to ensure smooth edges. If you’re using a craft knife, place your paper on a cutting mat and apply gentle pressure as you cut.
- Detailing: If your design has inner cuts or patterns (like antennae or delicate wing details), do these last for better control. Take your time to ensure everything is neat and precise.
Once you’ve cut out your butterflies, you can experiment with folding, shaping, or decorating them further. And remember, practice makes perfect! If your first few attempts don’t turn out exactly as you’d like, don’t get discouraged. Each butterfly is a step towards mastering the art of paper crafting!
So, grab your supplies and let your creativity flow as you bring your beautiful paper butterfly designs to life! Happy crafting!
Also Read This: How to Style a Niqab with a Hijab: Watch Step-by-Step Guide on Dailymotion
5. Step 3: Folding Techniques for Beautiful Wings
Now that you’ve got your paper cut out, it’s time for one of the most exciting parts: folding the wings! This step can really make or break the beauty of your paper butterflies. But don’t worry! With a little practice and some simple techniques, you’ll have gorgeous wings in no time.
Basic Folding Technique
Start by taking your rectangular piece of paper and folding it in half lengthwise. Make sure to align those edges neatly! This will create a nice central crease that acts as the butterfly’s spine. Unfold the paper to reveal that crease, which will guide your subsequent folds.
Next, fold the top corners of the paper inward to meet at the crease line you just made. You’ll end up with a triangle shape at the top. This forms the upper wings of your butterfly. To create a more dynamic look, consider giving each wing a slight upward curve by gently rounding them while folding.
Now, it’s time to shape the lower wings! Fold the bottom corners inward, also meeting at the central crease. Unlike the upper wings, let’s keep these parts a bit wider. This gives your butterfly a fuller appearance.
Advanced Folding Techniques
If you’re feeling adventurous, try these advanced techniques:
- Accordion Fold: Add texture to your wings with an accordion fold. Instead of folding flat, create multiple small folds that alternate directions. This adds a pretty layered effect!
- Diagonal Fold: For a unique butterfly design, try folding diagonally across the wings. This gives a more dynamic angle to your butterfly and can create a stunning visual contrast.
- Curved Edges: Instead of straight edges, try rounding them off when you’re making your folds. This can emulate the natural shape of real butterfly wings.
Experiment with these techniques! The key is to find your personal style. Each method gives you a different kind of butterfly, so feel free to mix and match, or even come up with your own unique folds!
Also Read This: How to Make a Tablet Cover at Home: Simple DIY Craft on Dailymotion
6. Step 4: Adding Details and Decorations to Your Butterflies
Your butterfly is really starting to take shape, but we’re not finished yet! Adding details and decorations is what truly brings your paper butterfly to life. This is where you can express your creativity and make each butterfly uniquely yours!
Color and Patterns
Use colored pencils, markers, or watercolor paints to create patterns on the wings. Here are a few ideas:
- Spots and Stripes: Draw small dots or stripes across the wings in complementary colors. This mimics the beautiful patterns of real butterflies.
- Gradient Effect: Blend colors from dark to light to create a stunning gradient look. This adds depth to your butterfly wings.
- Nature-Inspired Designs: Get inspired by nature! Try drawing flowers, leaves, or even little stars to give your butterflies a whimsical touch.
3D Effects and Texture
Add dimension to your butterflies with simple techniques:
- Layering: Cut out additional wing shapes and glue them on top of your base wings with glue dots. This gives a multi-dimensional look!
- Foil or Glitter: For a little sparkle, use adhesive foil or glitter on some areas of the wings. It will catch the light beautifully!
- Wings with Realistic Veins: Draw or lightly score (with a pencil!) vein-like lines on your wings to mimic the intricate structures of real butterfly wings.
Finishing Touches
Lastly, think about how you want to display your butterflies. You might want to add a little body using a thin strip of paper rolled tightly or even a small pom-pom! Attach a string if you wish to hang them or consider gluing a magnet at the back for a charming fridge decoration. The possibilities are endless!
As you finalize your butterflies, remember that the beauty is in the details. Take your time, play with different materials, and most importantly, have fun! Your beautiful paper butterflies are just a few steps away!
Also Read This: Turning Subtitles On and Off on the Dailymotion App Made Easy
7. Step 5: Assembling Your Paper Butterflies
Alright, we are almost there! It’s time to bring your beautiful paper butterflies to life by assembling them. This is where all the fun comes together, and you can truly showcase your artistic flair. Grab your supplies, and let’s get started!
Supplies You’ll Need:
- Your beautifully crafted paper butterfly wings
- Colored paper or cardstock for the body
- Glue or double-sided tape
- Scissors
- Pencil (for marking)
- Pipe cleaners (optional, for antennae)
Here’s how to assemble your paper butterflies:
- Cut the Body: Using a contrasting colored paper or cardstock, cut out a thin strip for the body of your butterfly. A length of about 2-3 inches would work well, and a width of around half an inch should be perfect. Feel free to experiment with different shapes!
- Attach the Wings: Take your wings and position them at the top of the body strip. Ensure that they are equal on both sides. Use glue or double-sided tape to secure the wings in place. It’s helpful to hold them for a few seconds to make sure they stick well.
- Add Antennae: If you’d like to give your butterfly some antennae, cut two short pieces of a pipe cleaner and bend them into a “U” shape. Attach them to the top of the body using a dab of glue. This adds a beautiful touch and makes your butterfly look more realistic!
- Final Touches: Once the wings and antennae are secure, you might want to draw facial features or patterns on the body using markers or colored pencils. This is your opportunity to get creative! You can even add stickers or glitter for some extra sparkle.
And there you have it! Your paper butterflies are fully assembled and ready to take flight in your creative world. You can make several of these beauties in different colors and sizes, too. The more, the merrier!
Also Read This: How to Create Beautiful Stars with Paper: Step-by-Step Guide on Dailymotion
8. Creative Ways to Display Your Paper Butterflies
Now that you’ve made these gorgeous paper butterflies, it’s time to consider how you want to display them! After all, what’s the point of creating such lovely art if you don’t show it off?
Here are some creative ideas for displaying your paper butterflies:
- Butterfly Mobile: Create a whimsical mobile by hanging your butterflies from a sturdy branch or a circular frame. Attach them with strings at varying heights to add movement and dimension. This would look stunning in a child’s room or as decoration for a party!
- Wall Art: Arrange your paper butterflies on a canvas or a framed board to create a beautiful wall art piece. You can create a pattern or let them spread out for a more free-form look. Just make sure to use glue that can hold them securely in place!
- Table Centerpieces: Use your butterflies in table settings by attaching them to floral arrangements or decorative vases. They can add a delightful touch to your dining experience, especially during gatherings or special occasions.
- Greeting Cards: Use your paper butterflies to embellish handmade greeting cards! Glue them to the front of the card for a 3D effect, and add your personal message inside. It’s a thoughtful and unique way to send best wishes.
- Gift Wrapping: Attach a butterfly to the top of a gift package as a charming accent. It adds a whimsical touch that will surely delight the recipient.
Remember, the possibilities are endless when it comes to displaying your creations. Use your imagination and personal style to find the perfect way to showcase your butterflies. Enjoy watching them flutter around your space, bringing joy and color wherever they land!
Conclusion and Final Tips for Butterfly Crafting
Creating beautiful paper butterflies is not only a delightful craft but also a fantastic way to unleash your creativity. As you wrap up your butterfly-making journey, keep these final tips in mind to enhance your crafting experience:
- Experiment with Patterns: Don’t hesitate to explore various paper designs, colors, and textures. Use patterned scrapbook paper or recycled pages for unique butterflies.
- Use Quality Materials: Invest in good-quality paper and adhesives to ensure your butterflies are durable and look great. Consider using acid-free papers to keep colors vibrant.
- Incorporate Accessories: Add embellishments like glitter, sequins, or stickers to make your butterflies truly stand out. A touch of shimmer can elevate their charm.
For those looking to take their crafting skills to the next level, consider trying various folds and creases or exploring different butterfly shapes. This can lead to stunning variations that will impress anyone who sees them!
Finally, remember that practice makes perfect. The more you create, the better your butterflies will become. Don't be afraid to make mistakes; in crafting, each attempt is educational and contributes to your artistic growth.
Happy crafting, and may your space be filled with vibrant paper butterflies!
 admin
admin


