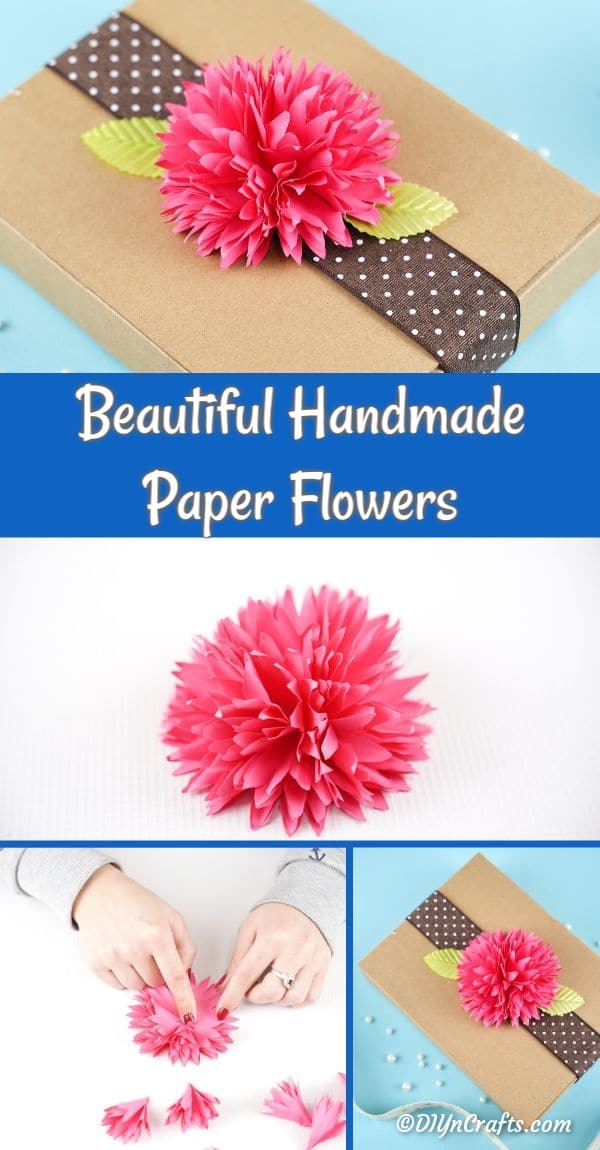
Welcome to the wonderful world of handmade paper flowers! If you’re looking for a fun, creative activity that brings a splash of color to your home or makes for a lovely gift, you’ve landed in the right spot. Crafting paper flowers is not only an enjoyable pastime, but they also never wilt and can last for years! Whether you're a seasoned crafter or a complete beginner, this guide will walk you through everything you need to know to get started.
Materials Needed for Crafting Paper Flowers
Before diving into the exciting process of making your own paper flowers, it’s essential to gather the right materials. Here’s a comprehensive list to help you get started:
- Paper: Choose any type of paper you like! Options include:
- Crepe paper – for a soft, natural look
- Cardstock – for sturdier flowers
- Origami paper – for colorful and patterned flowers
- Recycle your old book pages or magazine cutouts for a vintage vibe
- Tools: Basic crafting tools that are a must:
- Scissors – for cutting your paper into desired shapes
- Glue – to hold your flower parts together. Hot glue works great, but school glue or craft glue can also do the job
- Wire or floral tape – optional, for creating stems
- Pencil – for sketching petal shapes
- Ruler – to measure your paper pieces accurately
- Optional Decorative Items: To make your flowers stand out, consider including:
- Markers or colored pencils – for adding details on petals
- Glitter – for a touch of sparkle
- Beads or buttons – as centers of your flowers
- Leaves cut from green paper – to complement your blooms
Gathering these materials will ensure that you have everything you need at your fingertips, allowing your creativity to flow smoothly. Remember, crafting is all about experimentation! Feel free to improvise with what you have on hand. Now that you're equipped with supplies, you're ready to delve deeper into the process of making beautiful handmade paper flowers. So, let’s get crafting!
Also Read This: How to Create a Frock at Home Using Dailymotion
Step 1: Choosing Your Paper Type

Before diving into the world of handmade paper flowers, the first and most crucial decision you'll make is selecting the right paper type. Different kinds of paper can completely transform the look and feel of your flowers, so let’s explore some popular options.
Here are a few paper types you might consider:
- Cream or White Cardstock: This is a sturdy choice that holds its shape well. It’s ideal for more structured flower designs, like roses or lilies.
- Colored Paper: Available in various shades, colored paper allows for vibrant and eye-catching flowers. It’s perfect for simple designs where you want the color to be the star!
- Crepe Paper: Known for its beautiful texture and stretch, crepe paper is great for soft, flowing petals. It's often used for making realistic flowers like peonies and tulips.
- Recycled Paper: Want to be eco-friendly? Recycled paper can add some character to your flowers. Its irregular texture and colors can create a unique aesthetic!
- Patterned Paper: If you’re looking to add some flair, patterned paper can infuse your flowers with personality. Think floral designs, polka dots, or stripes for a whimsical touch.
When choosing paper, consider the following factors:
- Durability: Will your flowers be used for decoration, gifts, or special occasions? Choose a paper that will hold up well.
- Flexibility: Do you want to create intricate shapes? Opt for paper that can be easily manipulated without tearing.
- Color and Texture: Think about how the colors will complement your decor. The right textures can also enhance the realism of your flowers.
Ultimately, your choice of paper will depend on your personal style and the specific flowers you want to create. Don’t hesitate to experiment! Try mixing different types of paper for a unique look. Grab a few samples and see how they feel in your hands; this tactile experience can really guide your decision.
Also Read This: How to Change Your Dailymotion Channel URL in 2017
Step 2: Cutting the Paper for Flower Petals
Once you’ve settled on the perfect paper, it’s time to start cutting! The shape and size of your petal pieces are vital to achieving a beautiful flower. Here’s how to cut your paper for those stunning flower petals:
First, you’ll need some supplies:
- Scissors or a craft knife
- A cutting mat (if using a knife)
- A ruler
- Pencil for marking
Here’s a step-by-step guide to help you through the cutting process:
- Measure and Mark: Decide on the size you want your petals to be. Use a ruler to measure out the dimensions on your paper, then lightly mark with a pencil. This will help you keep your lines straight.
- Cut the Paper: For a clean edge, slowly cut along your marked lines. If you’re using scissors, ensure they’re sharp for the best results. If you’re using a craft knife, press gently but firmly to avoid tearing.
- Create Petal Shapes: Flowers often have pointed or rounded petal shapes. Use your scissors to round off edges or create points as desired. Don’t worry if they’re not perfect; nature is beautifully imperfect!
- Vary Sizes: For a more dynamic flower, consider cutting petals in various sizes. Larger petals can lay on the outer layers, while smaller ones can fill in the center.
As you cut, remember to keep a clean workspace. A clutter-free area helps maintain focus and prevent accidents. Plus, it’s a nice way to organize your materials for the next step!
Once you finish cutting, take a moment to admire your work! You’re already well on your way to crafting beautiful handmade paper flowers that will bring a splash of color and creativity to your space.
Also Read This: Here’s How to Download Dailymotion Videos with Subtitles in Any Language
5. Step 3: Shaping the Petals
Now that you’ve got your petals cut out, it’s time to give them some form and life! Shaping the petals is where your flower truly starts to take shape, and this step can really add dimension and character to your creation.
Start by examining each petal. You want to think about the type of flower you’re trying to create. Some petals are sleek and simple, while others are more ruffled and textured. Here are a couple of techniques to shape the petals:
- Curling Edges: Use a pencil or a skewer to gently curl the edges of each petal. This will give them a natural, rounded appearance. Simply place the petal against the pencil and roll it slightly to create that lovely curve.
- Creating Fringes: For petals that look delicate and soft, consider adding fringes. Use scissors to make tiny cuts along the edges (be careful not to cut all the way through). This will help create that soft, textured feel that many flowers have.
- Using Heat: If you want to get fancy, you can lightly heat your petals with a hairdryer. Be cautious! This can cause the paper to warp, but it can also give it a nice, gentle wave that mimics real flowers.
Once you’ve shaped each petal, gently manipulate them with your fingers. Twist and bend them to give them a more organic feel. Place them aside for a moment; we’ll need them again soon!
Also Read This: Exploring How to Use Dailymotion for Sharing Personal Creative Projects
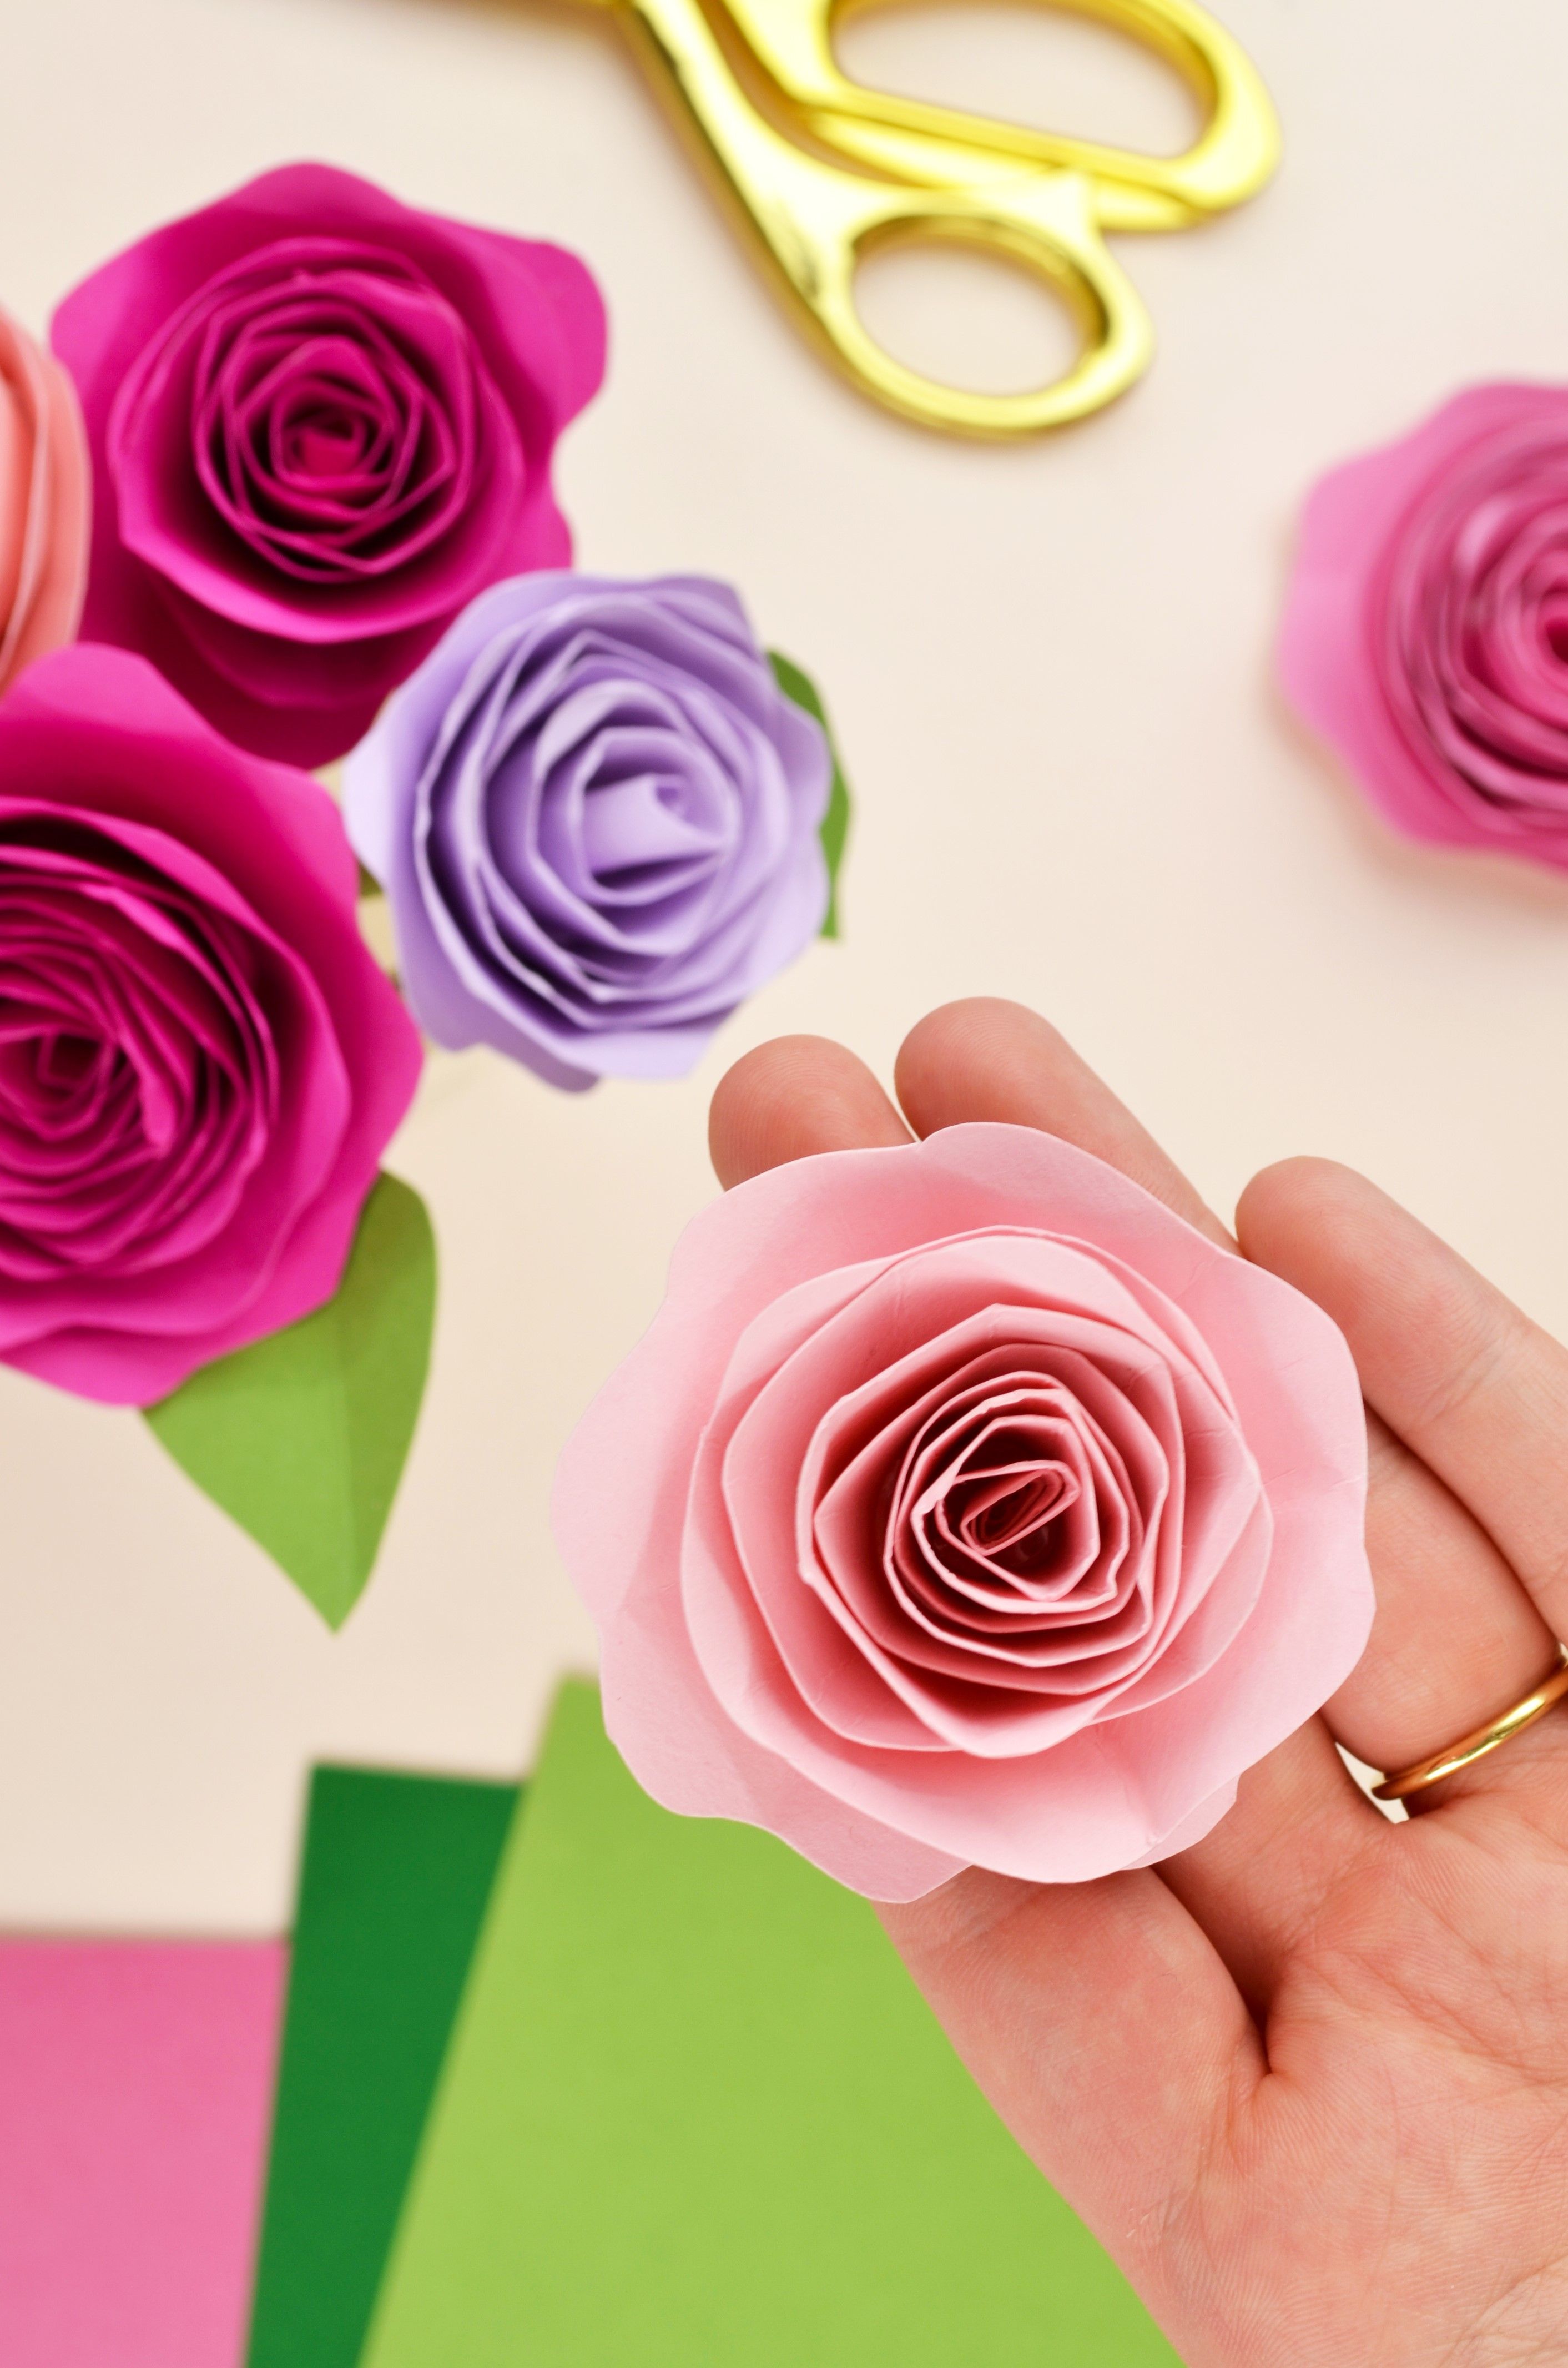
6. Step 4: Assembling Your Paper Flowers
Finally, we reach the exciting part: assembling your paper flowers! If you’ve followed the previous steps, your petals should be looking beautiful and ready to come together to form a stunning flower.
Here’s what you need to do:
- Gather Your Materials: You’ll need all your shaped petals, some floral wire or a sturdy stem, and glue (hot glue works best for quick adhesion). If you’re opting for more stability, consider adding some floral tape as well.
- Layering the Petals: Start with the largest petal in your hand. This will serve as your base. Apply glue to the bottom of the petal and attach your next largest petal, slightly overlapping it. Continue this process, layering smaller petals over the top, until you achieve the desired fullness. Make sure to stagger the petals for a realistic look!
- Adding Details: Once your petals are secured, consider adding a center to your flower. You could use a pom-pom made from paper or even some beads for a bit of sparkle. Attach it with glue and let it sit to dry for a few minutes.
- Creating the Stem: Take your floral wire and, if you want, tape it together with some green floral tape to make it look more lifelike. Attach it to the base of your flower using glue. Ensure it's stable—after all, you want your beautiful creation to stand tall!
- Adjust and Perfect: Give your flower a final inspection. Fluff the petals, adjust the stem, and make sure everything looks just the way you want it. Don’t be afraid to play around with the arrangement until you’re absolutely happy!
And there you have it! Your handmade paper flowers are coming to life! Whether you’re making them for decoration, as a gift, or just for the joy of creating, you’ll find that the assembly process is incredibly rewarding. Enjoy the fruits of your labor, and get ready for the compliments! Happy crafting!
Also Read This: How to Make Eyeshadow at Home on Dailymotion
7. Step 5: Adding Finishing Touches and Decorations
Now that your paper flowers are shaped and assembled, it's time to give them that final flair! Adding finishing touches and decorations can elevate your handmade creations, making them look even more stunning. Here are some ideas to enhance your paper flowers:
- Petal Highlights: Use a brush or sponge to add a lighter shade of your flower's main color to the edges of the petals. This technique creates a beautiful gradient effect that adds depth and dimension.
- Glitter Glam: If you're feeling a little extra, sprinkle some glitter on the petals after applying adhesive in specific areas. This will catch the light beautifully and give your flowers a whimsical touch!
- Stamen and Centers: Transform the center of your flowers by adding tissue paper balls or pompoms. You can also use buttons, beads, or foil to bring some fun textures and colors into the mix.
- Leaf Details: Don’t forget about the leaves! Draw or paint veins on your green paper leaves to mimic the real thing. Not only does this add realism, but it also makes the arrangement feel complete.
- Spray Finishes: Consider using a temporary fixative spray to protect your flowers and give them a slightly glossy finish. Just make sure to follow the manufacturer’s instructions!
Once you've added your finishing touches, arrange your paper flowers in a beautiful display. You can use vases, mason jars, or baskets to showcase your flowers like they deserve to be seen. And remember, it's all about personal expression here—let your creativity shine!
Also Read This: How to Make a Doll Car – Fun Craft Tutorial on Dailymotion
8. Tips for Perfecting Your Paper Flower Technique
Whether you’re a complete beginner or looking to improve your skills, here are some handy tips for mastering the art of making paper flowers:
- Quality Paper Matters: Invest in high-quality paper. While crafting paper can work, using cardstock or specialty paper makes your flowers sturdier and more vibrant.
- Practice Makes Perfect: Don’t get discouraged if your first few flowers don’t turn out exactly as you envisioned. Practice is key in finding your style and mastering different techniques.
- Use the Right Tools: Having the right tools on hand can make a big difference. Make sure to use a sharp pair of scissors, a reliable glue (like hot glue or tacky glue), and perhaps even a bone folder for crisp folds.
- Color Coordination: When selecting your paper colors, think about complementary shades that can make your flowers pop. You can also try a monochromatic scheme for a more sophisticated look.
- Stay Organized: Keep your workspace tidy and all materials easily accessible. Creating a designated area for your paper crafting will help you stay focused.
- Learn From Others: Don’t hesitate to watch video tutorials or join online communities. You can pick up new techniques and ideas from fellow crafters!
By taking these tips into account, you’ll be well on your way to creating gorgeous handmade paper flowers that you can proudly display or gift to someone special. Remember to enjoy the process; after all, crafting should be a joyful experience! Happy flower-making!
Also Read This: How to Play Dailymotion Videos on Android Devices with Ease
9. Creative Ideas for Using Handmade Paper Flowers
Handmade paper flowers are not only delightful to make but also incredibly versatile! Once you've mastered the art of crafting these beauties, you might be wondering how to use them to add a touch of charm to your life. Here are some creative ideas to inspire you:
1. Home Décor
Transform your living space with paper flowers. Consider creating a stunning wall arrangement or a colorful wreath for your front door. A here’s a quick tip: mix different flower types and colors for a vibrant, eye-catching display. You can also place them in unique vases or repurposed jars for a rustic look!
2. Gift Wrapping
Elevate your gift presentation by using handmade paper flowers as decorative accents. Instead of a traditional bow, attach a cluster of small paper blooms to your gift. Not only does it look beautiful, but the recipient can also keep the flower as a lovely keepsake.
3. Party Decor
Throwing a birthday party or bridal shower? Use paper flowers as centerpieces, garlands, or even table settings. Create a themed color palette and design flowers to match! They're especially great for creating a whimsical, festive atmosphere without breaking the bank.
4. Weddings and Special Events
If you're a DIY bride or event planner, handmade paper flowers can add a personal touch to your special day. They can be used in bouquets, boutonnieres, and even in floral arrangements to adorn tables and chairs. The best part? They won't wilt, making them a long-lasting keepsake from the celebration.
5. Personalized Cards and Invitations
Why not add a pop of creativity to your cards? Use your paper flowers to embellish greeting cards or invitations. A small flower can be the perfect touch to convey your heartfelt message, and friends will appreciate the handmade effort!
6. Educational Crafts with Kids
Get the little ones involved! Making paper flowers can be a fun, educational activity that promotes creativity and fine motor skills. Children will love decorating their rooms with flowers they made themselves, and you’ll create lasting memories together.
7. Seasonal Decorations
Depending on the season, you can change the colors and styles of your paper flowers to match. Think soft pastels for spring, vibrant colors for summer, warm tones for fall, and even icy hues for winter. It's a simple way to keep your home feeling fresh and festive throughout the year!
8. Bulletin Boards and Scrapbooking
Add a personal touch to your bulletin board or scrapbook by incorporating paper flowers. They can brighten up any space and make your memories more visually appealing.
With these ideas, the possibilities are truly endless! So unleash your creativity, and don't be afraid to experiment with different styles, sizes, and colors of handmade paper flowers.
10. Conclusion and Encouragement to Share Your Creations
Congratulations! You’ve made it through the complete guide on how to create beautiful handmade paper flowers. By now, you should have a good grasp of the techniques, tools, and creative possibilities that come with this fun craft. Remember, the best part of creating handmade art is that it’s a reflection of you—your style, personality, and creativity.
As you embark on your paper flower-making journey, don’t hesitate to let your imagination run wild. Experiment with different paper types, colors, and designs! Every flower you create should tell a story, whether it's a bold statement piece or a delicate bloom hiding in a corner.
We’d love to see what you create! Share your beautiful paper flowers with friends, family, or the online crafting community. You can take pictures of your projects and post them on social media, join crafting forums, or start your own blog to inspire others!
And remember, crafting is about joy and exploration, so enjoy every moment you spend making your paper flowers. Let them brighten up your life and the lives of those around you. Happy crafting!
 admin
admin


