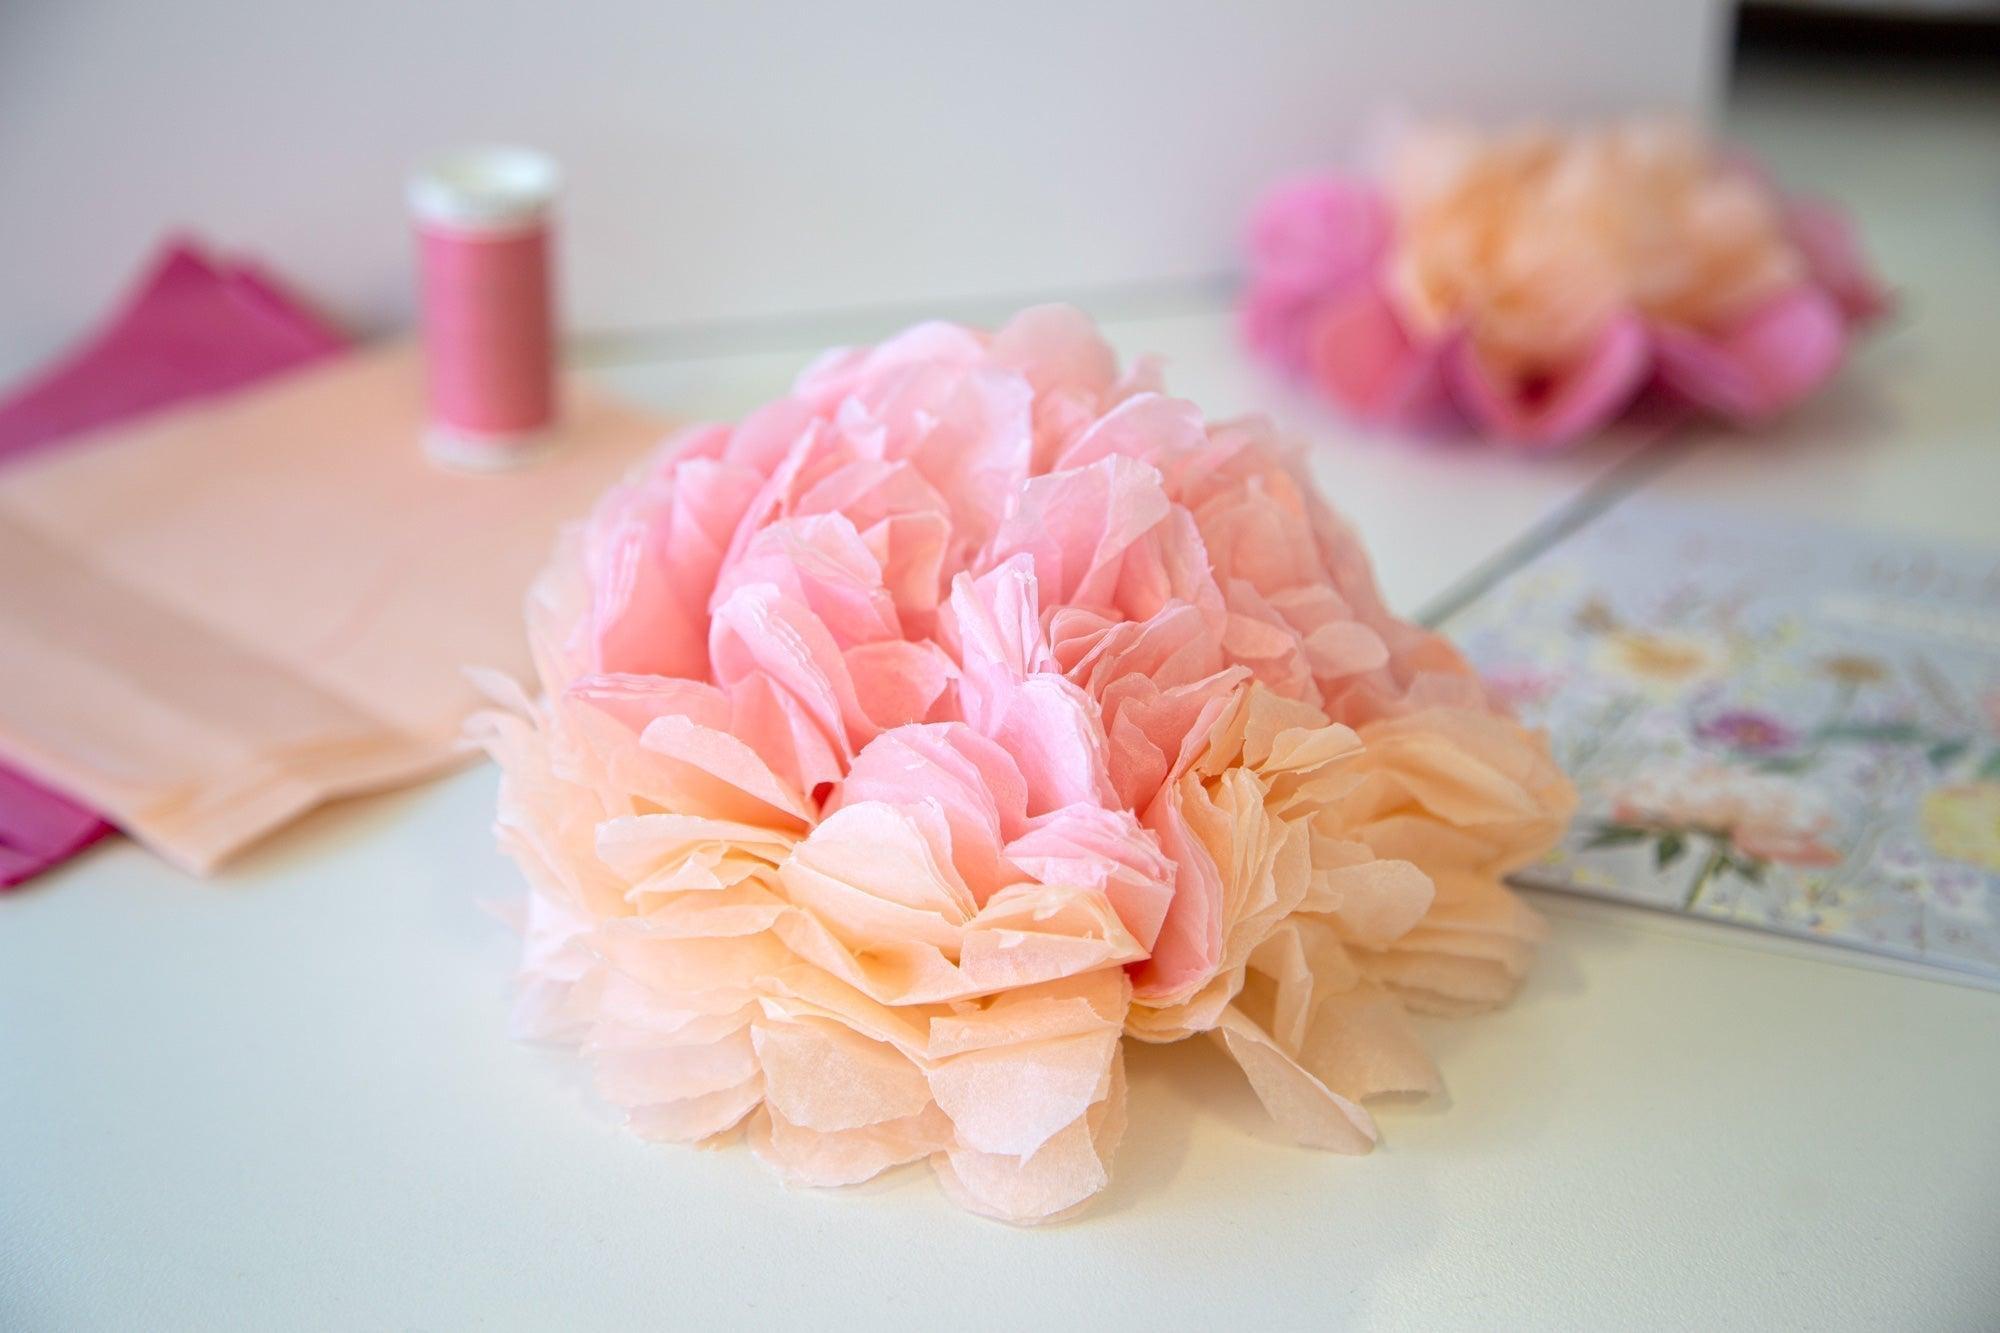
Welcome to the delightful world of tissue flowers! These charming creations are not only a fantastic way to add a pop of color to any space but also make for perfect gifts or party decorations. Whether you’re prepping for a wedding, a birthday party, or just want to brighten up your home, tissue flowers are an easy and fun craft project. Plus, they require minimal materials and skill, making them a great choice for crafters of all ages. Ready to get started? Let’s dive into what you’ll need!
Materials Needed for Making Tissue Flowers
Before you start crafting your beautiful tissue flowers, let’s gather all the materials you'll need. Here’s a handy list to ensure you have everything at your fingertips:
- Tissue Paper: Choose vibrant colors to create stunning blooms. You’ll need several sheets for each flower.
- Scissors: A good pair of scissors is essential for cutting the tissue paper into the desired shapes.
- Floral Wire: This will serve as the stem of your flower. You can find it at any craft store.
- Green Tape (Florist Tape): This helps wrap the floral wire to give it a natural look.
- Glue (Optional): While not always necessary, glue can help secure layers or embellishments.
- Ruler: For measuring and ensuring your tissue paper pieces are uniform.
- Pencil or Marker: Ideal for marking measurements on the tissue paper.
Here’s a quick breakdown of how each item contributes to your project:
| Material | Purpose |
|---|---|
| Tissue Paper | Forms the petals of the flower. |
| Scissors | Cuts tissue paper to shape and size. |
| Floral Wire | Acts as the flower's stem. |
| Green Tape | Covers the floral wire for a natural look. |
| Glue | Secures layers or adds decorations. |
| Ruler | Ensures precise measurements. |
| Pencil/Marker | Helps in marking tissue paper. |
Now that you have gathered your materials, you’re all set to unleash your creativity and start making stunning tissue flowers!
Also Read This: Finding Educational and Fun Content for Kids and Adults on Dailymotion
3. Step 1: Preparing Your Tissue Paper
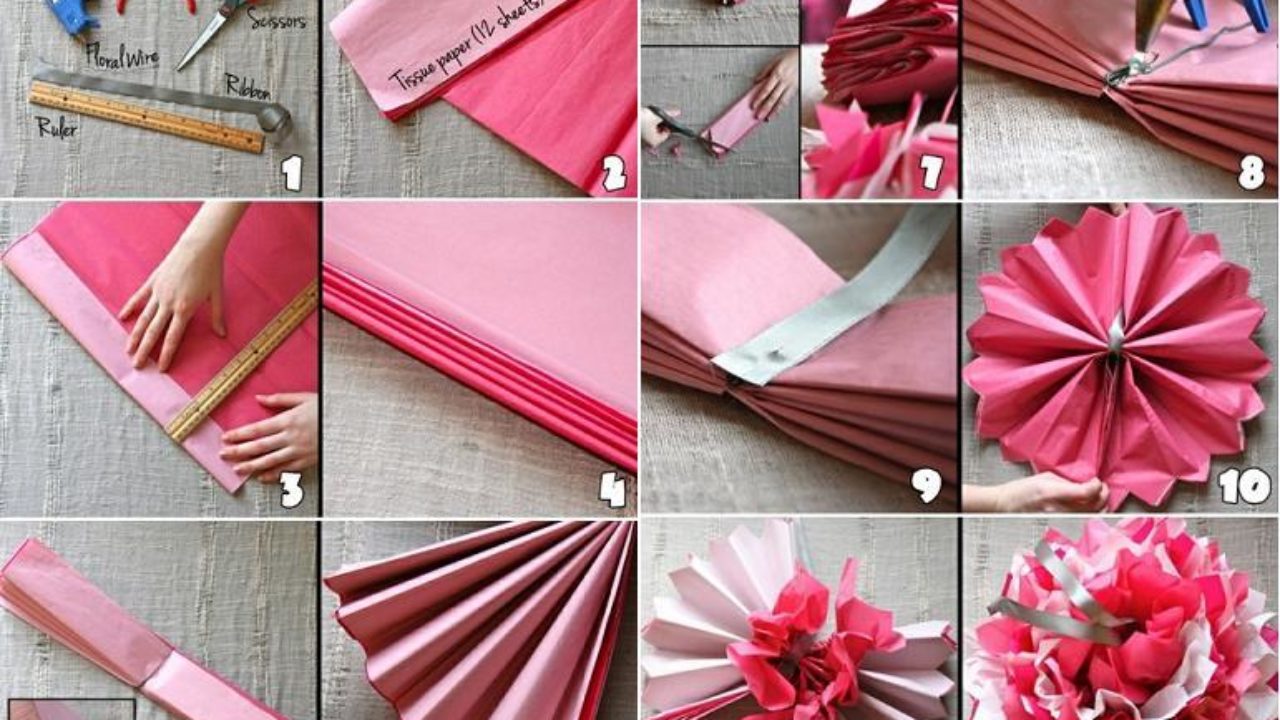
Before you dive into the colorful world of tissue flowers, the first step is preparing your tissue paper. This is crucial because the right preparation sets the stage for beautiful blooms!
To start, gather your materials:
- Tissue paper in various colors
- Scissors
- Wire or string for stems
- Floral tape (optional)
Once you have everything, it’s time to cut your tissue paper. Here’s how:
- Choose your colors. Go for a mix of vibrant hues or stick to a single color for a more monochromatic look.
- Cut the tissue paper into sheets. A standard size is about 20x30 inches, but feel free to adjust based on the size of the flower you want to create.
- Stack multiple layers. Using 6-10 layers of tissue paper will give your flower a fuller look. You can mix colors for a fun, multi-toned flower!
When stacking, make sure the edges align. Precise cutting will ensure that your flowers look professional and polished. If you’re feeling adventurous, try using patterned tissue paper for an extra flair!
Now that your tissue paper is cut and layered, it’s time to move on to the folding techniques, which will transform these flat pieces into stunning three-dimensional flowers.
Also Read This: Create Stunning Paper Flowers: Watch Videos on Dailymotion
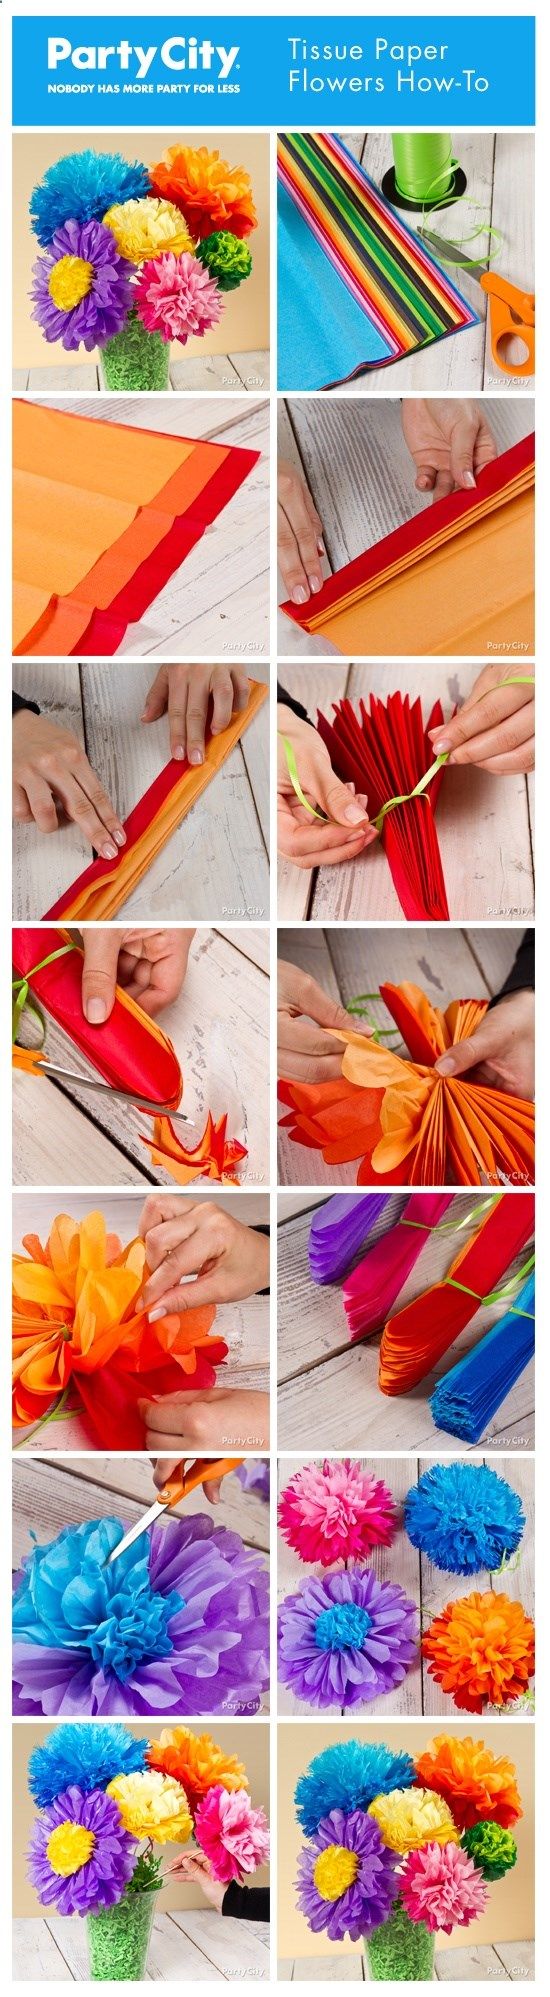
4. Step 2: Folding Techniques for Tissue Flowers
Here comes the fun part! Folding your tissue paper correctly is essential for creating those lovely flower petals. Let’s get into the folding techniques that will bring your tissue flowers to life.
Follow these simple steps:
- Accordion Fold: Start by folding the stacked tissue paper back and forth, like an accordion. Each fold should be about 1-2 inches wide. This method creates the layered effect that gives flowers their fullness. Remember to keep your folds even!
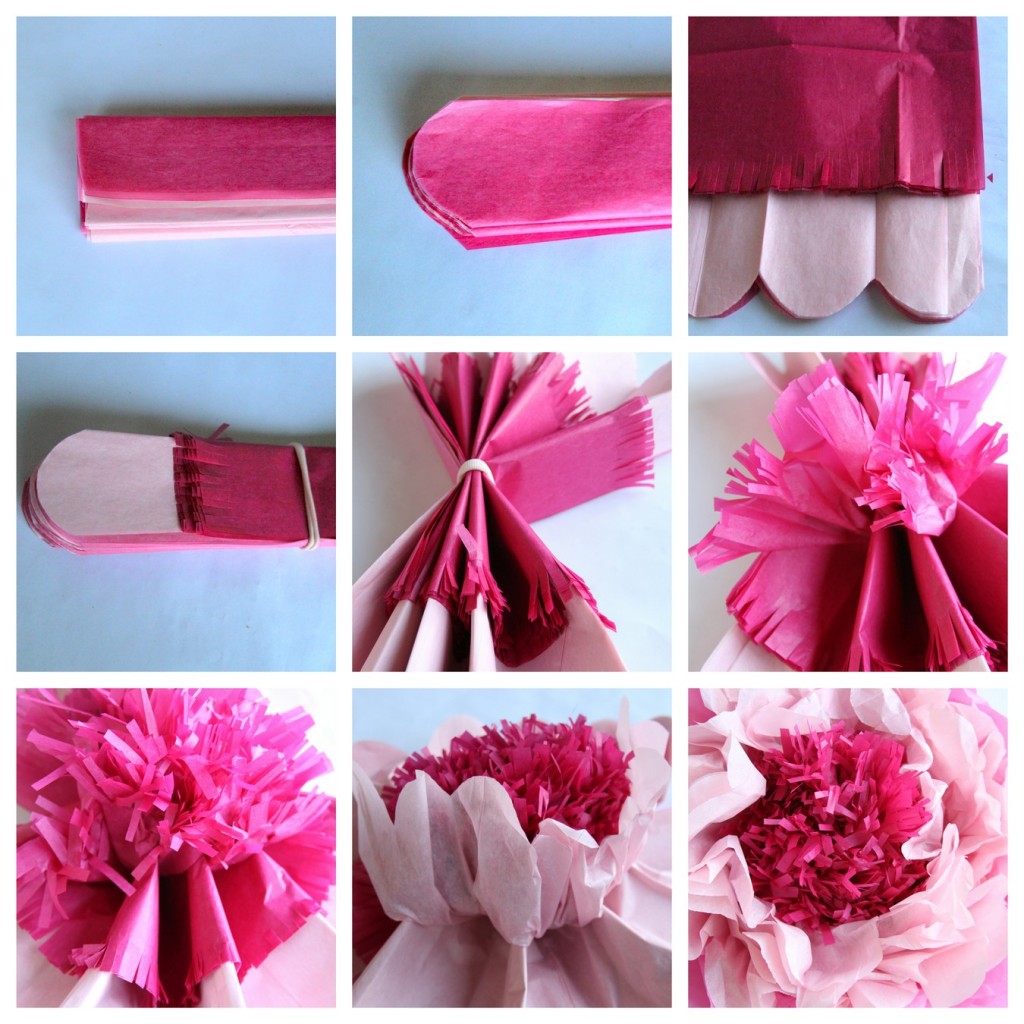
- Angle Your Cuts: Once you’ve created your accordion fold, it’s time to shape the petals. Use scissors to round off the top edges or create a point. This will give each petal its unique shape. Try experimenting with different cuts to see what looks best!
- Secure the Center: After shaping your petals, pinch the center of the folded tissue and twist it gently. If you’re using floral wire, wrap it around the center tightly to hold everything in place. If you don’t have floral wire, a piece of string will work just as well!
- Fluff and Separate: Now comes the exciting part! Carefully pull apart the layers of tissue paper, one at a time, starting from the top. Fluff the petals outwards to create a beautiful bloom. Don’t be afraid to get in there and adjust the petals until you’re happy with the shape!
And there you have it! By following these folding techniques, you’re one step closer to crafting your beautiful tissue flowers. The best part is that you can mix and match colors and shapes, making each flower entirely unique!
So, gather your friends or family, and let the flower-making fun begin!
Also Read This: How to Achieve a Gorgeous Hair Makeover with Revlon Hair Color
5. Step 3: Shaping Your Tissue Flowers
Now that you’ve assembled your tissue paper layers, it’s time to give your flowers some real personality! Shaping your tissue flowers is where the magic happens. Let’s dive into the process!
1. Start with the Basics: Gently separate each layer of the tissue paper. Be patient and take your time; rushing can tear the delicate paper. Once you’ve separated the layers, you should see a beautiful, fluffy bouquet starting to take shape.
2. Fluff It Up: Hold the base of the flower with one hand and use the other hand to gently lift and separate the layers. Think of it like a delicate dance where you want to reveal the beauty without causing any damage. Aim for a rounded, full flower shape. If you’ve made a larger flower, you can even create more dramatic curves to mimic real petals.
3. Adjust the Shape: Depending on the type of flower you’re going for, you might want to manipulate the petal shapes a bit more. For instance, if you're making a rose, you can curve the edges inward slightly for that classic petal look. On the other hand, if you’re crafting daisies, a more open, flatter shape works wonders.
4. Experiment with Layers: The beauty of tissue flowers comes from the layers. If you want a more vibrant look, consider mixing different colors or patterns in your layers. For example, if you start with a white base, adding a pink layer on top can create a lovely gradient effect.
5. Secure Your Shape: Once you’re pleased with how your flower looks, it’s a good idea to secure it. Use floral tape or wire at the base where you gathered the layers to keep everything in place. This will ensure your flower holds its shape beautifully while being displayed or arranged.
Shaping your flowers is a fun part of the process, allowing your creativity to shine. Don’t hesitate to try different techniques or styles until you find what works best for you!
Also Read This: How to Watch Dailymotion on PS3 – A Complete Guide to Watching Videos
6. Step 4: Adding Decorative Touches
Now that your flowers are shaped and ready, let’s make them pop with some decorative touches! This is where you can really let your creativity flow and personalize your creations.
1. Choosing Your Embellishments: Think about your overall vision. Do you want your flowers to be whimsical, elegant, or vibrant? Depending on your theme, you can choose from a variety of decorative elements:
- Beads and Pearls: Glue these around the center of your flower for a touch of glamour.
- Glitter: Add some sparkle by misting with a spray adhesive and sprinkling glitter over your flowers.
- Ribbons: Tie a pretty bow around the base of the flower stem or add ribbons cascading down for a romantic effect.
- Leaves: Create simple leaves using green tissue paper. Cut out shapes and attach them to the flower base for a more natural look.
2. Paint for Extra Flair: If you want to add a unique touch, consider using fabric paint or acrylics. You can lightly brush the edges of the petals with a coordinating color to give them depth. For instance, if your flower is blue, a touch of purple at the tips can create a beautiful ombré effect.
3. Mixing Textures: Don’t be afraid to mix materials! Adding lace, burlap, or even feathers can make your flowers stand out. For a rustic look, wrap burlap around the stems or incorporate lace into the flower center.
4. Create Bouquets or Arrangements: Once your flowers are decorated, think about how you want to display them. Consider making a bouquet by grouping several together and securing them with a ribbon. Or, if you want a more dynamic display, arrange them in a vase with some greenery.
By adding these decorative touches, you’ll transform your tissue flowers into stunning, one-of-a-kind pieces that can brighten up any space or event. Let your imagination run wild, and happy crafting!
Also Read This: How to Make Backcombing Hairstyle: Dailymotion’s Easy Guide
7. Step 5: Displaying Your Beautiful Tissue Flowers
Congratulations on creating your stunning tissue flowers! Now comes the fun part: showcasing your creations. How you display them can enhance their beauty and make them the focal point of any room. Here are some creative ideas to display your tissue flowers:
- Vases: Use clear glass vases to showcase your tissue flowers. You can mix different colors and sizes for a vibrant arrangement. For a whimsical touch, fill the bottom of the vase with decorative stones, beads, or even colorful confetti.
- Wall Art: Create a beautiful wall display by attaching your tissue flowers to a canvas or a wooden board. Arrange them in a pattern or cluster for a striking visual effect.
- Table Centerpieces: Place a bouquet of tissue flowers in the center of your dining or coffee table. It adds a pop of color and elegance, perfect for gatherings or everyday cheer.
- Wreaths: Craft a lovely wreath by attaching tissue flowers to a foam or grapevine base. Hang it on your front door or as a wall decoration to welcome guests with a burst of color.
- Gift Wrapping: Use a few small tissue flowers to embellish gifts. Tuck them into the ribbon or attach them to the top of the gift box for a personal touch.
When displaying your flowers, consider their colors and how they fit within your decor. Group similar colors together for a cohesive look or mix and match for a more playful vibe. Don't forget to use different heights and arrangements to create visual interest!
Lastly, remember to change your displays with the seasons. You can create autumn-themed arrangements with warm colors or festive decorations during the holidays. This keeps your decor fresh and exciting!
8. Conclusion and Final Tips for Crafting Success
Creating beautiful tissue flowers can be an incredibly rewarding experience, and it’s a fantastic way to express your creativity. As we wrap up this guide, here are a few final tips to ensure your crafting journey is successful:
- Practice Patience: The first few flowers may not turn out perfectly, and that’s okay! Take your time to practice the techniques, and soon you’ll be crafting like a pro.
- Experiment with Colors: Don’t shy away from trying out different color combinations. Mixing vibrant shades can lead to stunning results that catch the eye!
- Incorporate Personal Touches: Add unique embellishments like ribbons, glitter, or beads to your flowers. This not only enhances their beauty but also adds a personal flair.
- Involve Friends and Family: Crafting can be a social activity. Invite friends or family to join you for a craft night—sharing ideas and techniques can lead to even more creativity!
- Keep Your Workspace Organized: A clean and organized workspace can significantly enhance your crafting experience. It allows you to focus on your project without distractions.
With these tips in mind, you’re ready to take on any tissue flower project! Whether you’re making them for home decor, gifts, or special occasions, your beautiful creations are sure to bring joy and color to any setting. Happy crafting!
 admin
admin


