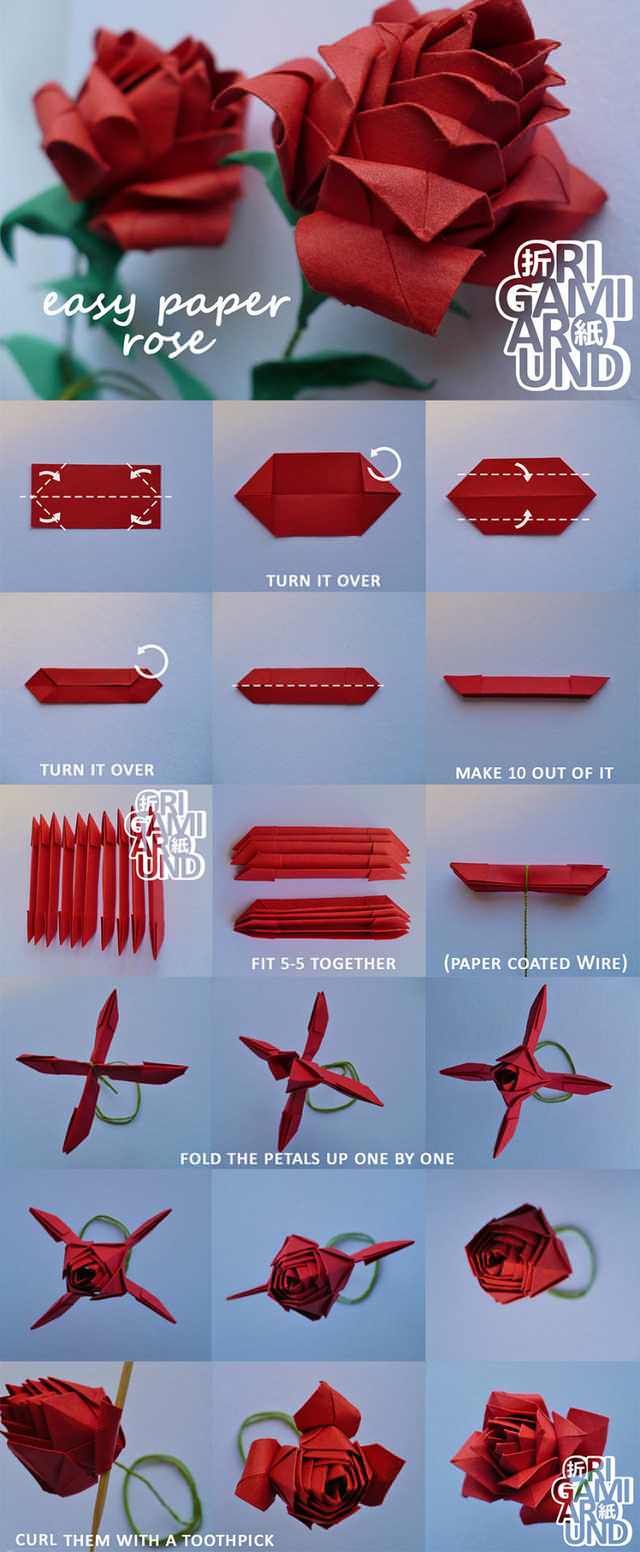
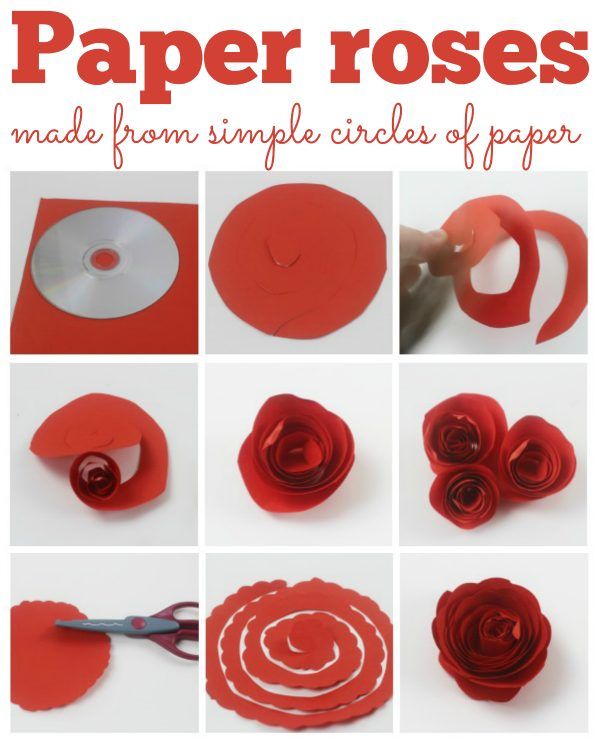
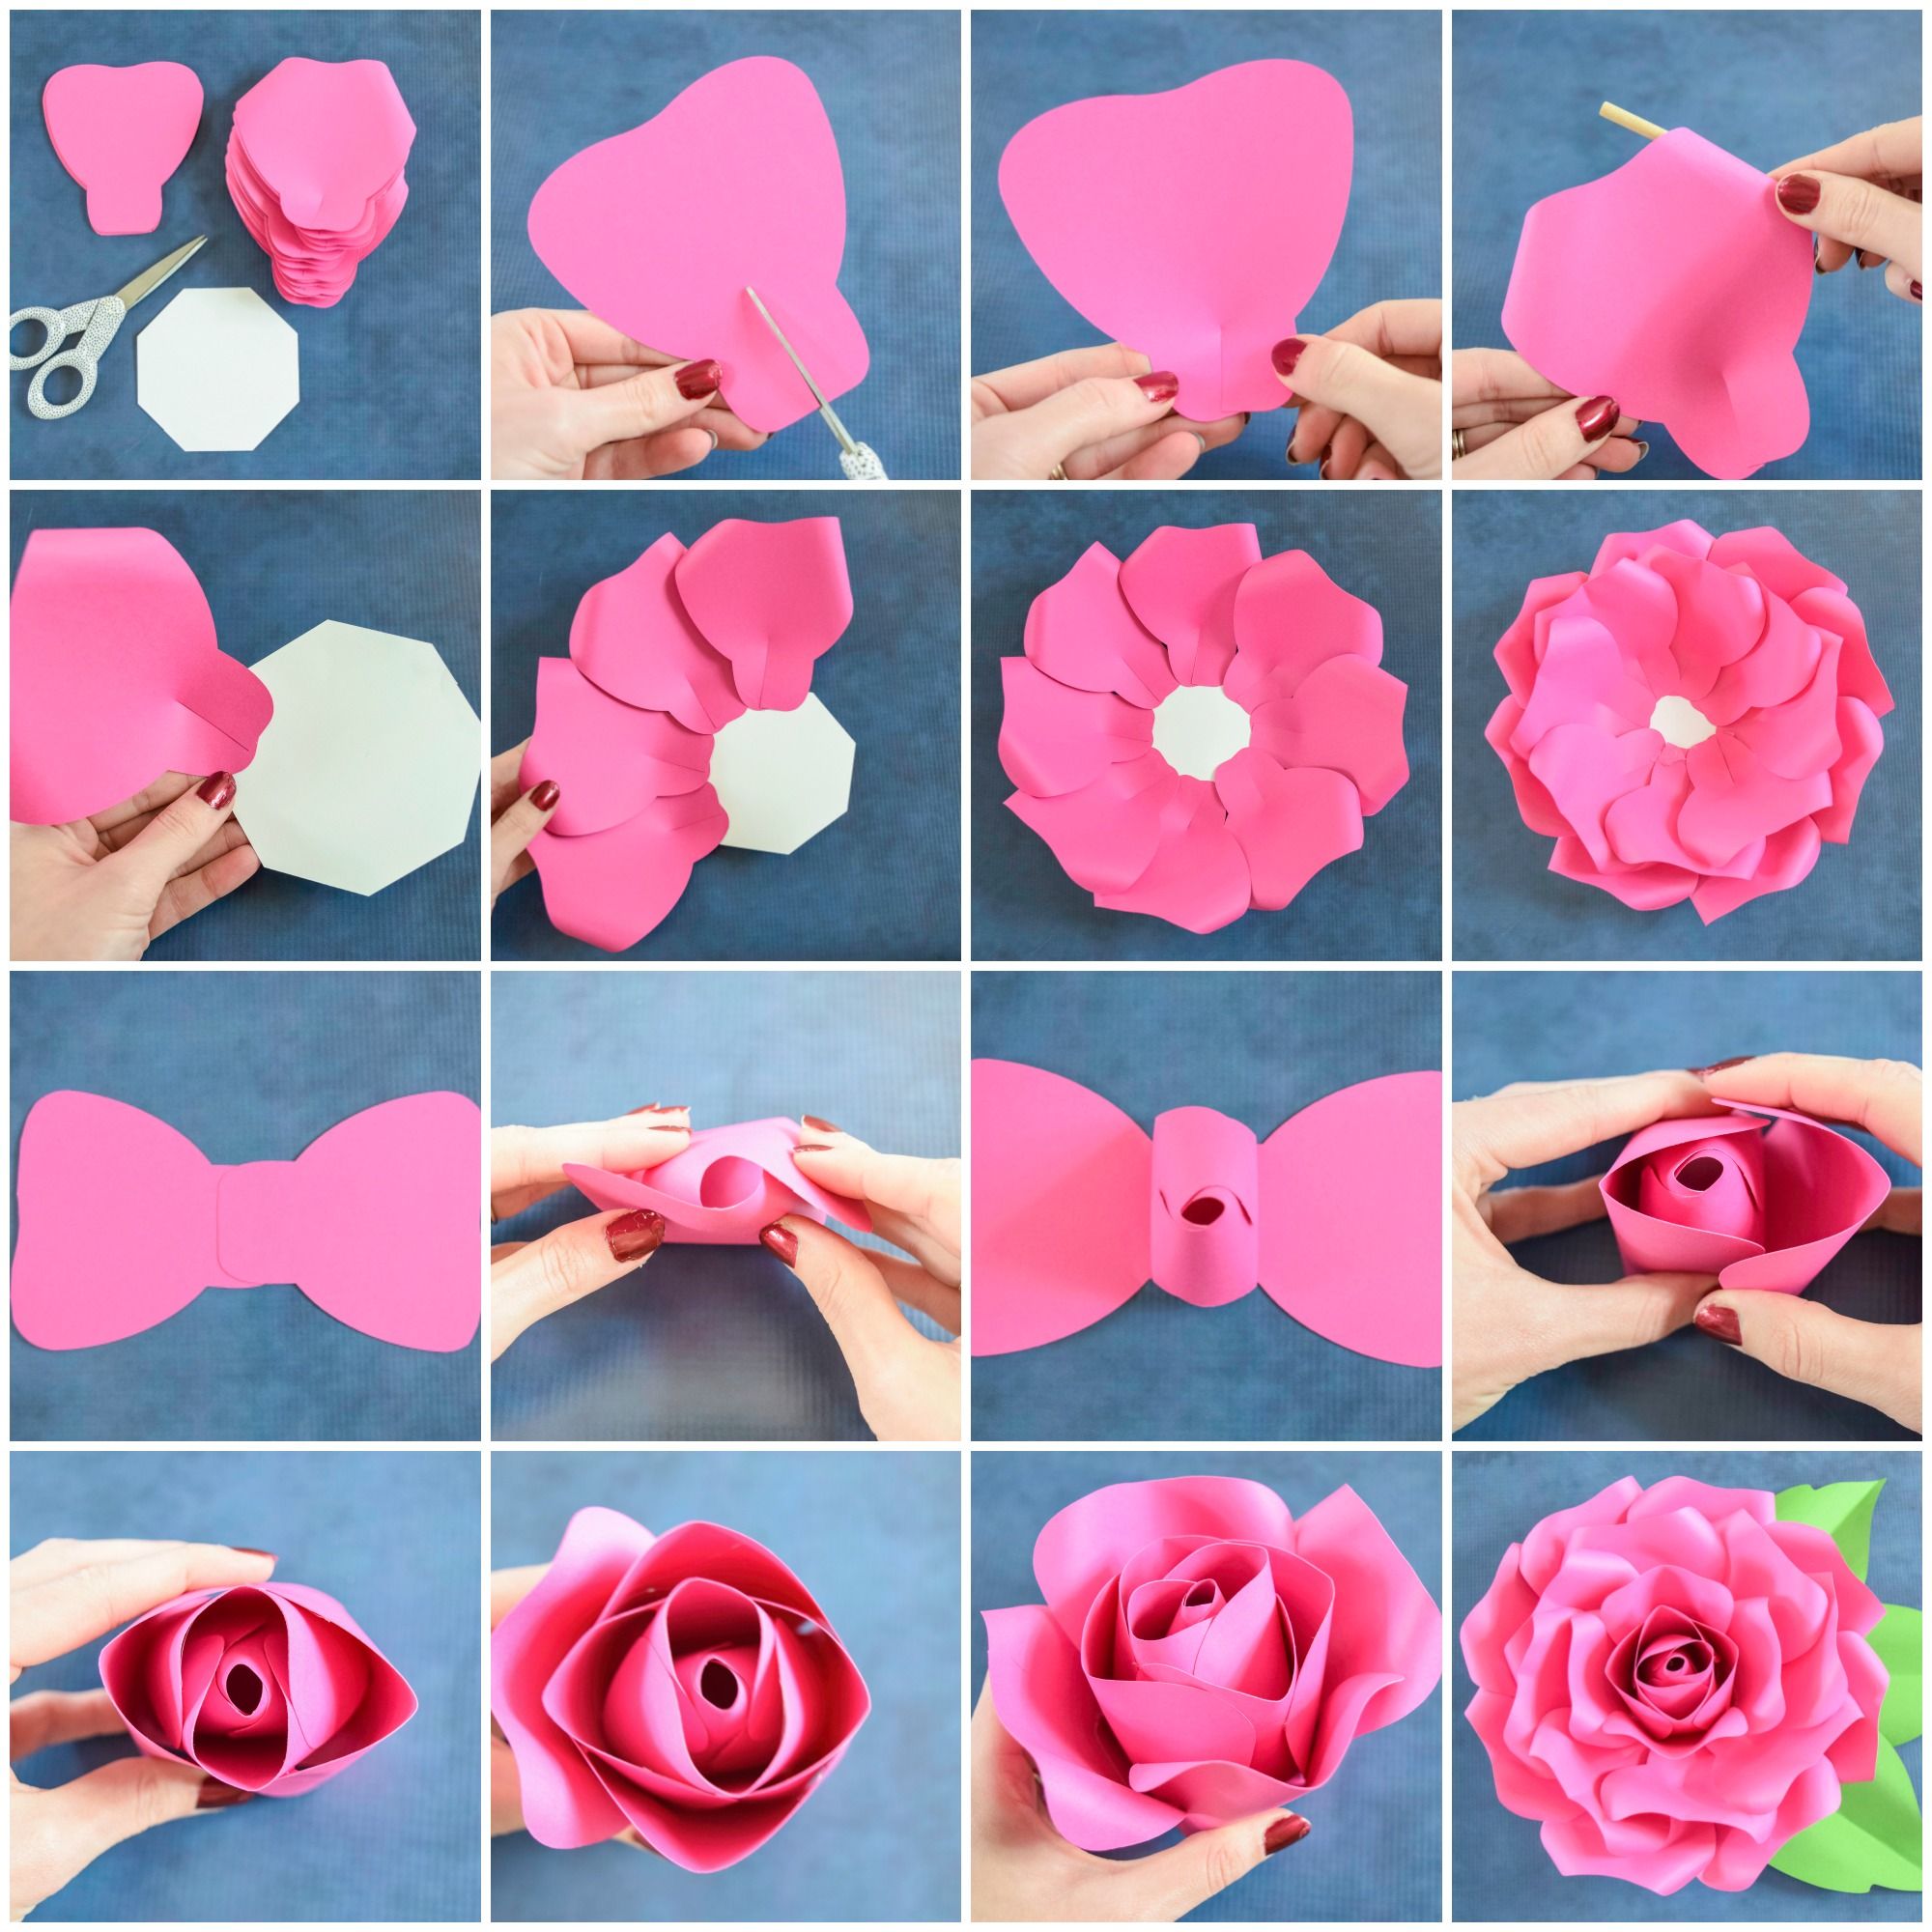
Have you ever admired the intricate beauty of a paper rose and wondered how to create one? Well, you’re in luck! Making a paper rose is not only a fun craft activity but also a delightful way to express your creativity. Whether you’re looking to decorate your home, create a thoughtful gift, or simply engage in a relaxing pastime, this step-by-step guide will walk you through the entire process, making it easy and enjoyable. Let’s gather our materials and get started on this beautiful journey of crafting!
Materials Needed

Before we dive into the step-by-step instructions for crafting your stunning paper rose, it’s essential to gather the right materials. Here’s a comprehensive list to ensure you have everything you need:
- Colored paper: You can use vibrant origami paper, scrapbook paper, or any other craft paper you have on hand. Pink, red, or white are classic colors for roses.
- Scissors: A good pair of scissors will help you cut your paper into the right shapes and sizes.
- Glue: Hot glue works best for holding your rose together firmly, but regular craft glue or a glue stick will do just fine as well.
- Floral wire or pipe cleaners: These will serve as the stem for your rose, providing stability.
- Floral tape: This is optional and is useful if you want to wrap your floral wire for a more polished look.
- Pencil/marker: You’ll need something to outline your petals before cutting them out.
- Ruler: A ruler will help you measure and create symmetrical petals.
- Optional decorative elements: Think rhinestones, glitter, or other embellishments to personalize your rose!
Now that you’ve gathered all your materials, you’re ready to roll up your sleeves and craft a gorgeous paper rose that will impress anyone who sees it!
Step 1: Cutting the Petals

Cutting the petals is the first crucial step in creating your beautiful paper rose. It’s like giving your flower the right foundation to bloom, so let’s dive into it!
To get started, you’ll need a few materials:
- Colored paper (green for leaves, and your choice of color for the petals)
- Scissors
- Pencil
- Ruler
Once you have your materials ready, follow these steps:
- Choose Your Petal Shape: Decide on how many petals you want your rose to have. A common choice is between 5 to 7 petals. You can create a petal shape by sketching it lightly on your colored paper. Typically, it looks like an elongated teardrop.
- Measuring and Cutting: Use your ruler to ensure all petals are uniform. Each petal can be around 3 inches wide and 5 inches long, but feel free to adjust according to your desired size. After marking, carefully cut them out using your scissors.
- Make Leaves (Optional): If you'd like to add leaves, draw a similar teardrop shape on green paper. You can cut out 2-3 leaves to give your paper rose a more complete look.
And there you have it! You now have beautifully cut petals ready and waiting to be formed into a stunning paper rose. Next, let’s talk about how to shape those petals to make them come alive!
Step 2: Shaping the Petals

Now that you have your petals cut out, it’s time to shape them! This is where the magic happens—shaping your petals gives them the depth and beauty that’ll transform simple paper into an enchanting rose.
Here’s what you need for this step:
- Cut petals from Step 1
- Round pencil or dowel stick (for curling)
- Mod Podge or glue (optional, for a more permanent hold)
Ready? Let’s shape those petals!
- Curling the Edges: Take one petal at a time and carefully roll the edges around the round pencil or dowel stick. This will create a natural curl that mimics real flower petals. Do this gently to avoid tearing the paper.
- Adding Texture: You can also crumple the petals lightly to give them a more realistic look. Just be cautious—too much crumpling can lead to tears.
- Repeat for All Petals: Continue to shape each petal in the same manner. This repetition helps in establishing a uniform old-world charm across your rose.
- Organizing Petals: Once you’ve shaped all the petals, arrange them in a way that feels pleasing to you. Think of how real roses present their layers—let that inspire your arrangement.
And there you go! You've beautifully shaped your petals, bringing your paper rose one step closer to blooming into a charming piece of art. Up next, we’ll talk about assembling the petals together to finish your creation!
Step 3: Assembling the Rose
Now that you have all your individual petals ready, it’s time to bring them together to create the beautiful flower you’ve envisioned. Assembling the paper rose can be the most rewarding part of this project, as you’ll finally get to see all your hard work come to life.
Here’s how to do it:
- Start with the largest petal: Take the largest petal as your base. This will form the outer layer of your rose.
- Position the petals: Begin placing the smaller petals around the base petal. Overlap each petal slightly for a more natural look. You can use glue or double-sided tape to secure them in place.
- Add more layers: Continue adding the next size of petals, working inwards until you reach the smallest petals. Each layer should slightly overlap the previous one. Aim for a spiral formation, as this mimics the natural look of a blooming rose.
- Secure the petals: Once you’re satisfied with the arrangement, gently press down on the assembled petals to secure them. Make sure to keep the shape of the rose intact while doing this.
- Final adjustments: Take a step back and look at your rose. You may want to adjust the petals for symmetry or to achieve a fuller look. This is your chance to make it truly unique!
Remember, practice makes perfect. Your first paper rose may not be flawless, but with a bit of patience, you’ll improve with each attempt!
Step 4: Adding Leaves and Finishing Touches
With the rose now expertly assembled, it’s time to add those final touches that will really elevate your paper flower. The leaves not only add a lovely contrast but also complete the overall look of your rose.
Here’s how to go about it:
- Create leaves: Cut out several leaf shapes from green paper. You can use an oval shape and then cut a point at one end to resemble rose leaves. Make sure the size is proportionate to your rose!
- Add veins: Use a darker shade of green or a contrasting color to draw veins on your leaves. You can do this by lightly scoring lines with a craft knife or simply drawing them with a marker.
- Attach the leaves: Position the leaves around the base of your rose. You can tuck them under the petals or place them at an angle to add some dimension. Use glue or tape to secure them in place.
- Optional decorations: Consider adding a decorative element such as glitter or a small embellishment to the center of your rose. This can give it a touch of elegance and uniqueness.
- Final inspection: Give your creation a once-over. Check if the petals and leaves are secure, and see if there’s anything else you’d like to adjust. This is your chance to perfect your paper rose!
And there you have it! Your paper rose, complete with leaves and all the finishing touches, is ready to be displayed or gifted. It’s a delightful way to show someone you care, and it will surely brighten anyone's day!
7. Tips for Creating Realistic Roses
Creating paper roses that look realistic takes a bit of practice, but with the right techniques, you can achieve stunning results. Here are some expert tips to help you master the art of paper flower making:
- Select the Right Paper: Choose high-quality paper that mimics the texture and weight of real rose petals. Crepe paper is a popular choice because it has a natural stretch and can be easily shaped.
- Use Layering: To create depth and realism, use multiple layers for your petals. Vary the sizes and colors slightly to mimic nature. A mix of dark, light, and even variegated shades can enhance the visual appeal.
- Shape Your Petals: Give each petal a more organic shape. Use your fingers to gently curl the edges or employ a bone folder for more defined curves. This will help each petal look unique, just like in a real bloom.
- Add Texture: To make your roses look even more lifelike, consider adding texture. You can lightly crinkle the petals or paint them with acrylic to create a more authentic look.
- Focus on the Assembly: Pay attention to how you arrange and attach the petals. Start with the smallest petals in the center and gradually build outward. Make sure to stagger the petals for a natural flow.
- Don’t Forget the Leaves: Real roses don’t just have petals; they also have leaves! Adding a few green paper leaves can make your floral arrangement more believable and visually appealing.
By implementing these tips, your paper roses will not only look stunning but also add a touch of realism that’s sure to impress!
8. Conclusion
Crafting paper roses is a delightful and rewarding experience that can bring joy to your life and to those around you. Whether you’re creating them for a special occasion, as home décor, or just for fun, the tactile nature of paper combined with your creativity can yield beautiful results.
Remember, practice makes perfect! Don’t be discouraged if your first attempts don’t turn out as expected. Each rose you create will help you refine your skills. Here are some final thoughts:
- Embrace Creativity: Feel free to experiment with colors, sizes, and techniques. There’s no right or wrong way to make a rose, so let your imagination lead the way.
- Enjoy the Process: Take your time and enjoy the crafting journey. Making paper roses is not just about the end result; it’s also about the joy of creating.
- Share Your Creations: Don’t hesitate to share your beautiful paper roses with friends and family. You never know, you might inspire someone else to start their own crafting adventure!
With this step-by-step guide, you now have all the tools you need to embark on your paper rose-making journey. So grab some paper, scissors, and your favorite crafting supplies, and let’s get started on making something beautiful!
 admin
admin


