Water rockets are not just a fun backyard activity; they also offer a fascinating glimpse into the principles of physics and aerodynamics. These DIY projects are perfect for kids and adults alike, providing an engaging way to explore concepts like thrust, pressure, and propulsion. By using simple materials and a bit of creativity, you can launch a rocket that soars high into the sky, all propelled by the power of water and air pressure.
Whether you're preparing for a science project, an outdoor party, or just a weekend adventure, making a water rocket can be both educational and entertaining. Let’s dive into the exciting world of water rockets and get ready to launch!
Materials Needed for Your Water Rocket

Creating your own water rocket can be a straightforward process, especially if you have the right materials on hand. Below is a comprehensive list of what you'll need to get started:
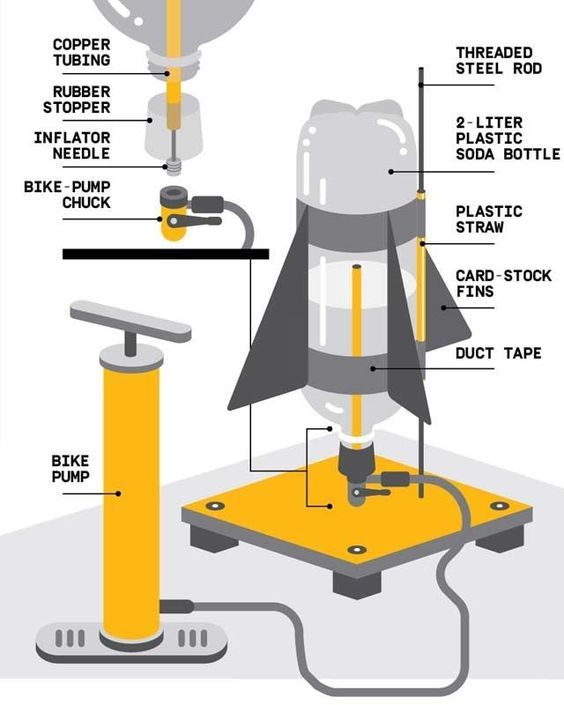
- Plastic Bottle: A standard 1.5-liter soda bottle works great.
- Water: You'll need some water to fill the bottle, typically about one-third full.
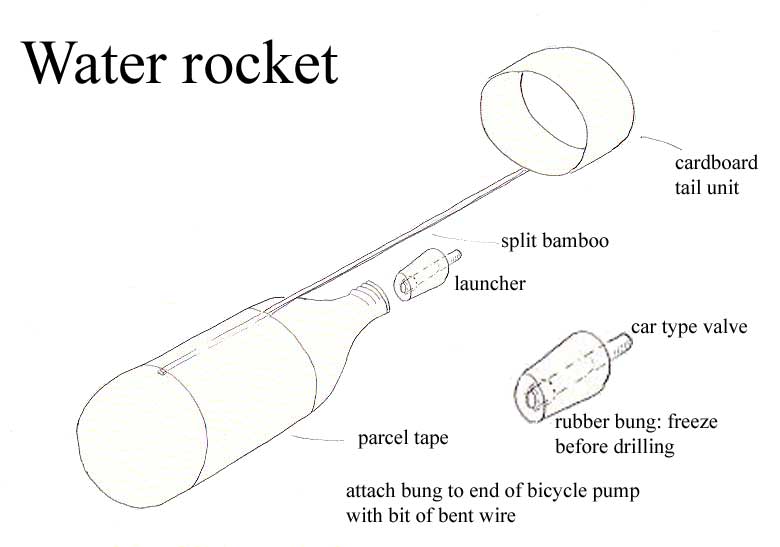
- Cork or Rubber Stopper: This will seal the bottle opening and hold the pressure until launch.
- Air Pump with a Needle Adapter: A basketball pump is perfect for this; it allows you to pressurize the air inside the bottle.
- Cardboard Fins (optional): These can help stabilize your rocket during flight.
- Lightweight Nose Cone (optional): A plastic or paper cone can help improve aerodynamics.
- Safety Goggles: Always protect your eyes, as water rockets can launch unexpectedly!
- Measuring Cup (optional): To accurately measure the water you add.
Once you've gathered these materials, you'll be well on your way to crafting your very own water rocket. In the next steps, we’ll guide you through the assembly and launching process. So, hang tight!
Step-by-Step Instructions

Making a fun water rocket is an exciting project that combines scientific principles with pure entertainment. Here’s a simple guide to help you build your own water rocket from scratch. Just gather the materials listed below, and let’s get started!
Materials Needed
- 1 plastic soda bottle (2-liter works best)
- Water
- A cork that fits snugly in the bottle opening
- Bicycle pump with a needle adapter
- Safety goggles
- Outdoor launch area (preferably on grass)
Step-by-Step Process
- Prepare the Bottle: Rinse out your soda bottle and remove any labels. This way, it’s clean and ready for action!
- Fill with Water: Fill the bottle with water about one-third of the way up. This water will create thrust when launched.
- Insert the Cork: Place the cork in the mouth of the bottle securely. Make sure it’s tight enough to hold pressure, but not so tight that it can’t be released easily.
- Attach the Bike Pump: Insert the needle adapter into the cork. This will allow you to pump air into the bottle.
- Get Ready for Launch: Put on your safety goggles and find a good area to launch. An open field works best.
- Pump and Launch: Start pumping air into the bottle. Watch as pressure builds up. Once you’re at a good pressure, step back and give the cork a flick to release the rocket!
And voilà! You’ve successfully made your very own water rocket. Adjust the amount of water or pressure for different flight heights. It’s all about experimenting and having fun!
Safety Tips While Launching

Safety should always come first, especially when it comes to launching rockets (even water ones!). Following these tips will ensure a fun and safe experience for everyone involved.
Essential Safety Tips
- Wear Safety Goggles: Always wear protective eyewear to shield your eyes from any unexpected projectile.
- Choose the Right Location: Launch in an open area, away from people, buildings, and trees. Grass is ideal to prevent damage and injuries.
- Keep a Safe Distance: Ensure that everyone stands back at least 10 feet from the launching area. Safety is paramount!
- Control the Launch Angle: Point the rocket away from people and objects. This helps avoid accidents as the rocket launches.
- Check Equipment: Before launching, inspect your materials. Make sure the bottle, cork, and pump are in good working condition to avoid any mishaps.
- Supervise Children: If kids are involved, ensure they are supervised by an adult throughout the process.
By following these simple yet essential safety tips, you can enjoy the thrill of launching water rockets without any worries. Have fun, and safe launching!
5. Enhancing Your Water Rocket Experience
Now that you’ve mastered the basics of building a water rocket, it’s time to take your experience to the next level! There are various fun ways you can enhance your water rocket experience and make it even more enjoyable for both you and your audience. Here are a few ideas to consider:
- Experiment with Different Designs: Why stick to just one design? Try varying the shape of your rocket or using different materials. You could even go for a two-stage rocket!
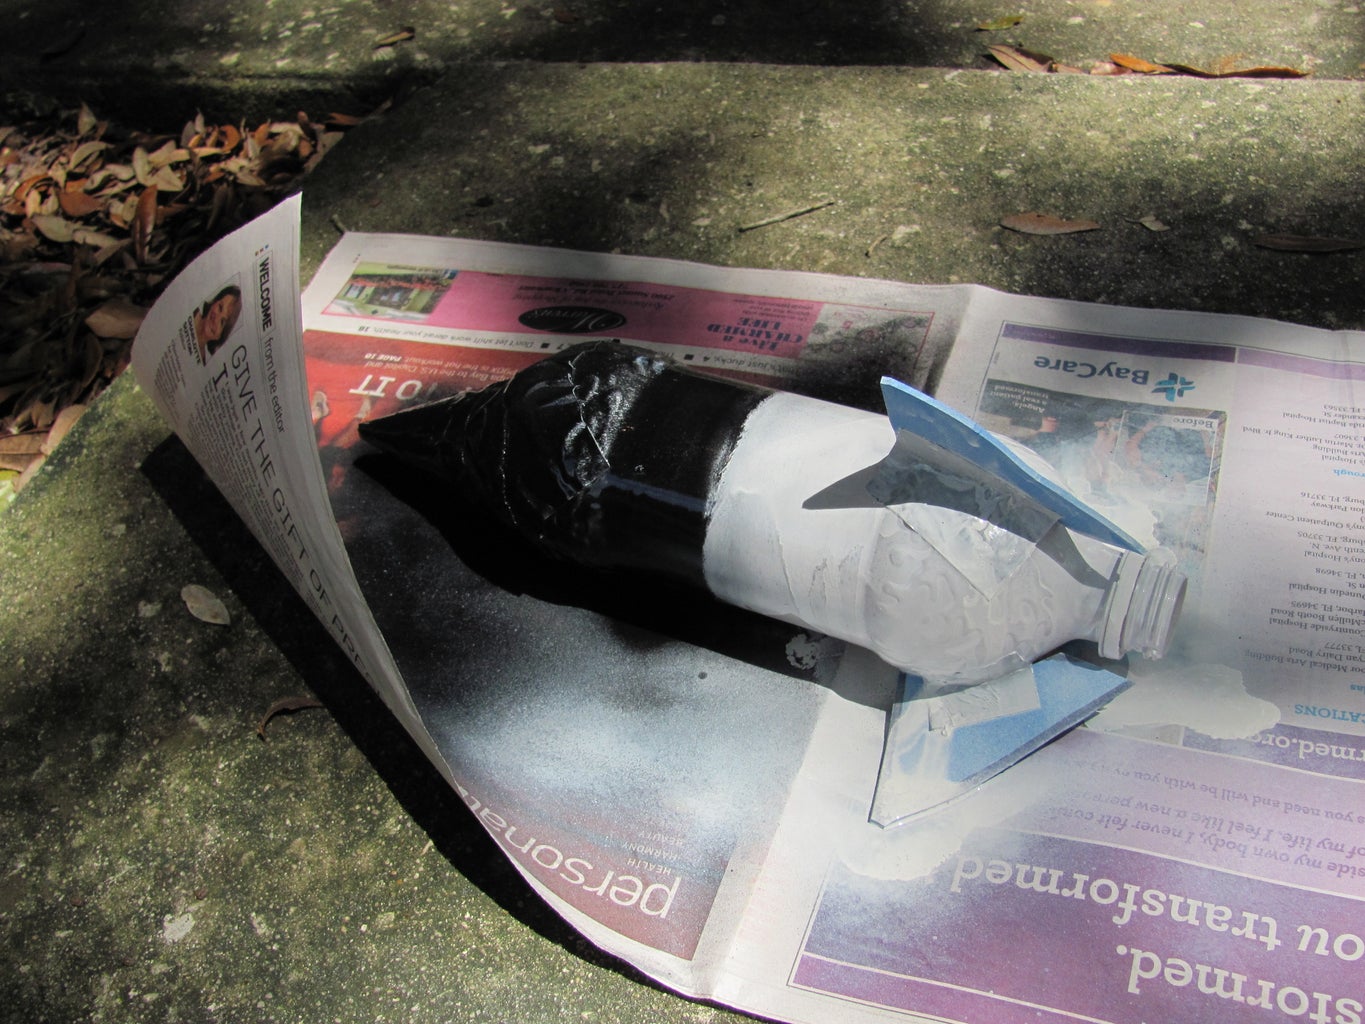
- Add Fins: Fins help stabilize your rocket during its flight. By experimenting with the size, shape, and placement of fins, you can enhance both the rocket's performance and its appearance.
- Utilize Colorful Decorations: Get creative with your water rocket! Use markers, stickers, or paint to personalize it. Making your rocket visually appealing can also be a great way to engage younger participants.
- Organize a Launch Party: Gather friends and family for a rocket launching event. Set up a friendly competition to see whose rocket flies the highest or furthest. Provide refreshments and make it a festive occasion!
- Incorporate Science Lessons: If you’re doing this with kids, use the activity as a teaching moment. Discuss concepts like thrust, gravity, and aerodynamics to make it both fun and educational.
- Record Your Launches: Use a smartphone or camera to film your water rocket launches. You can review the footage later to analyze performance and share the results.
Remember, the goal is to have fun while learning and experimenting, so feel free to let your creativity soar!
6. Conclusion and Final Thoughts
Building and launching a water rocket can be an exhilarating experience filled with laughter, learning, and a touch of science magic! Whether you're a beginner or an experienced rocket scientist, the joy of watching your creation soar can’t be beaten. It’s a fantastic way to engage with friends, family, or even the local community.
As you reflect on your water rocket adventures, consider the following:
| Value | Benefit |
|---|---|
| Creativity | Encourages imaginative thinking by allowing for diverse designs. |
| Science Learning | Teaches valuable principles like propulsion and aerodynamics. |
| Teamwork | Promotes collaboration when working with others. |
| Fun | Creates enjoyable memories for participants of all ages. |
So, gather your materials, invite your friends, and get ready for a fantastic adventure in the world of water rockets! Just remember, even if your rocket doesn’t go as high as you hoped, every launch is an opportunity to learn and improve for next time. Happy launching!
 admin
admin


