Adding images to your Squarespace site is one of the easiest ways to enhance the look of your website and make it more visually appealing. Whether you are showcasing a product, blogging, or just want to personalize your website, images play a huge role in catching the attention of your visitors. In this guide, we’ll walk you through the simple steps needed to add images to your Squarespace site, no matter if you're a beginner or have some experience with website building. Let’s get started with the basics and make sure your site stands out!
Why Adding Images is Important for Your Squarespace Website

Images are one of the most important elements of any website. They help grab attention, communicate your message clearly, and make your website more engaging. Here are some reasons why adding images to your Squarespace site is crucial:
- Enhance Visual Appeal: A picture is worth a thousand words. Well-chosen images can make your website look professional and visually interesting.
- Support Branding: Images can help establish your brand’s identity by using colors, logos, and themes that reflect your style or business.
- Increase Engagement: People tend to engage more with visual content, whether it’s sharing on social media or staying longer on your site.
- Improve User Experience: Well-placed images break up large chunks of text, making your content easier to digest and more visually appealing.
Incorporating high-quality images that align with your content can increase your website’s overall performance, making it more user-friendly and attractive to your audience. Let’s dive into the steps on how you can start adding them.
Step 1: Choose the Right Image for Your Site

Choosing the right image for your Squarespace website is essential for creating the right impression. The image you select should align with your content and enhance the message you're trying to convey. Here are some tips to help you choose the perfect
- Relevant to Your Content: The image should reflect the content of your page or post. For example, if you're writing about nature, select images that match that theme.
- High-Quality Images: Always choose high-resolution images that won’t appear blurry or pixelated on your site. The quality of the image reflects the professionalism of your brand.
- Optimize for Web: Large image files can slow down your website, so make sure to resize your images for web use while maintaining quality.
- Consistent Style: Keep a consistent visual style across your site. Use images with similar tones or themes for a cohesive design.
- Appropriate for Your Audience: Choose images that resonate with your target audience. What type of images will appeal to them? Consider age, interests, and preferences.
Now that you know how to choose the right image, make sure you’re ready to add it to your Squarespace site. The next step will walk you through the process of uploading images with ease.
Step 2: Log in to Your Squarespace Account

Before you can start adding images to your Squarespace site, you need to log in to your account. This is the first step in accessing your site’s dashboard, where you can manage all aspects of your website, including content, design, and media. If you don’t have an account yet, it’s quick and easy to create one. Here’s how you can log in:
- Visit the Squarespace Website: Open your web browser and go to the Squarespace website at www.squarespace.com.
- Click the Log In Button: On the top right corner of the homepage, click the “Log In” button to enter your credentials.
- Enter Your Credentials: Type in your email address and password associated with your Squarespace account. If you use Google or Apple to log in, you can select those options as well.
- Access Your Dashboard: Once logged in, you’ll be taken directly to your website’s dashboard, where you can start editing and adding images.
If you’re logged in and ready to manage your site, the next step will show you how to add images easily using the Image Block feature. Let’s move on and get your images ready!
Step 3: Use the Image Block to Add Your Image
Now that you're logged into your Squarespace account, it's time to add an image to your website. The Image Block is the primary tool you’ll use to insert images into any page or post. Here’s how you can do it:
- Navigate to the Page or Post: First, go to the page or post where you want to add your image. You can edit an existing page or create a new one from the “Pages” section of the dashboard.
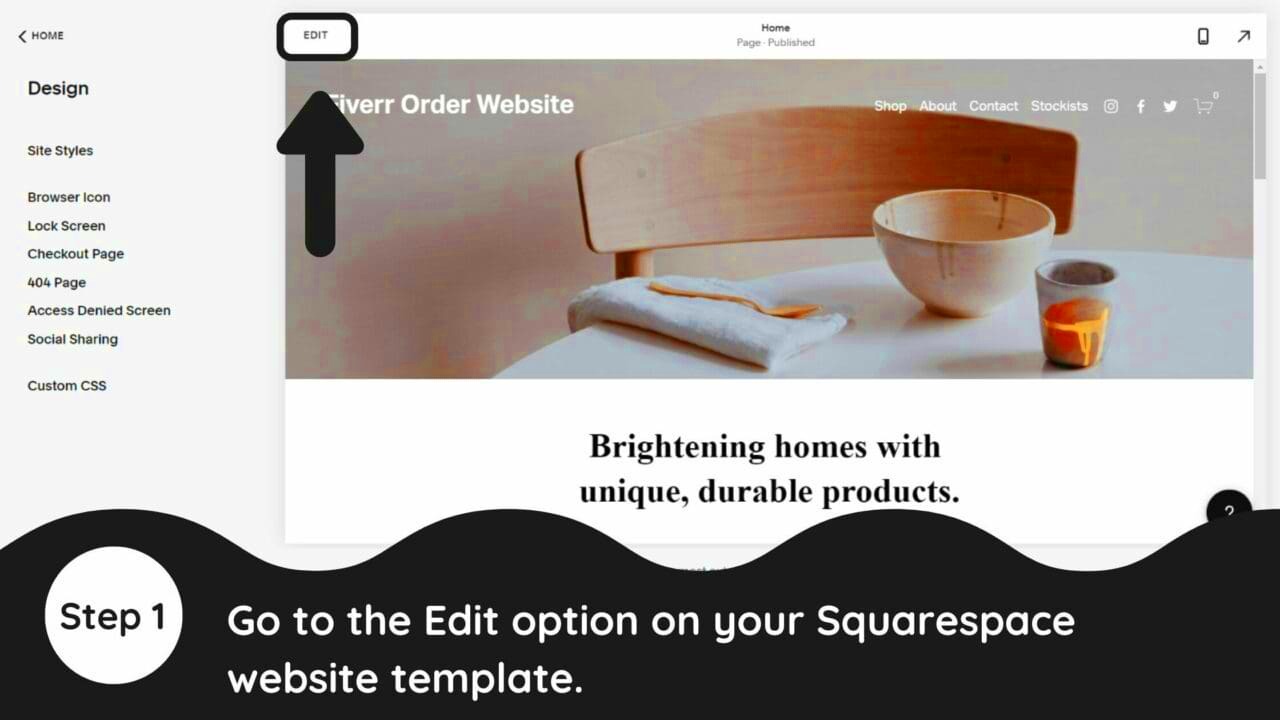
- Click to Edit the Content: Once you’ve selected the page, click the “Edit” button to enter the editing mode where you can add or modify your content.
- Add a Block: In the editor, hover over the section where you want the image to appear. Click on the “+” button to add a new block. From the options presented, select the “Image” block.
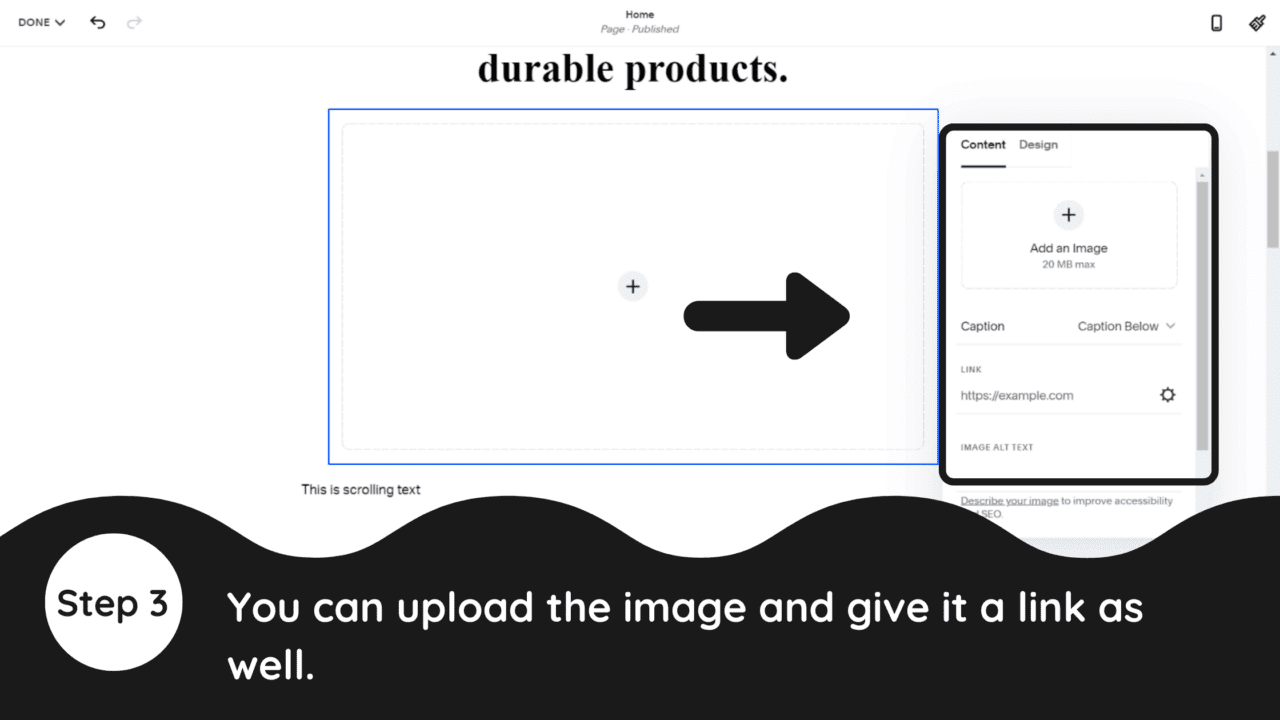
- Upload Your Image: After selecting the Image Block, you’ll see an option to upload your image. You can either upload an image from your computer or select one from your existing library if you've uploaded images previously.
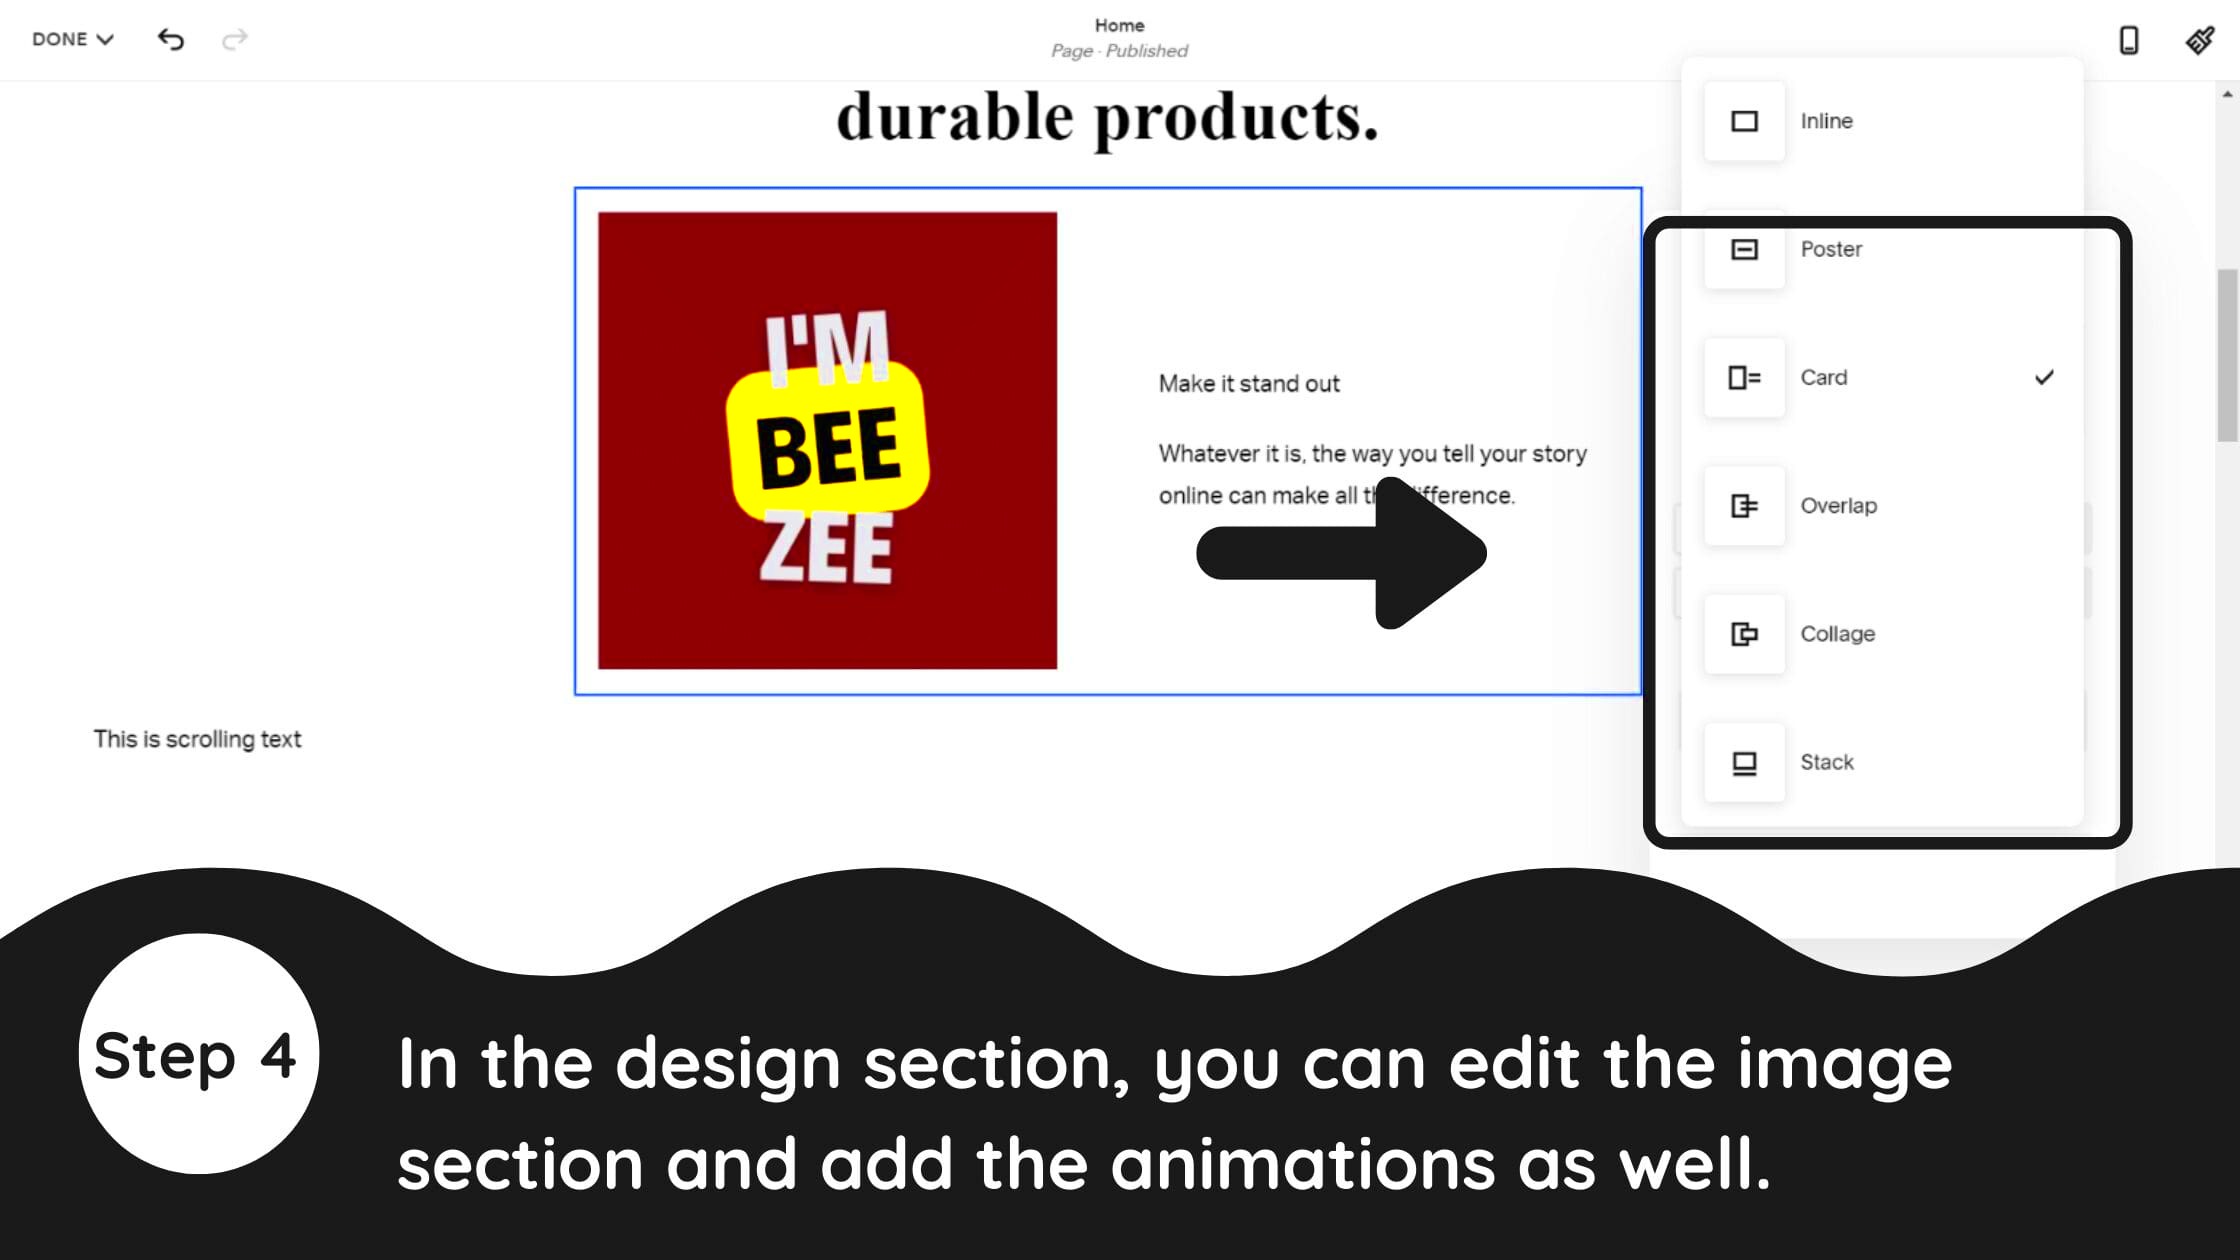
- Insert the Image: After uploading, the image will automatically appear on your page. You can adjust its size, alignment, and other settings at this point.
Once your image is uploaded, the next step is to tweak the image settings to ensure it looks just right. Let’s take a look at how to adjust those settings for a perfect appearance.
Step 4: Adjusting Image Settings for a Better Appearance
After adding your image, it’s important to adjust the settings to ensure it fits well with the rest of your content and looks great on all devices. Squarespace gives you several options to customize your image, from sizing to alignment and more. Here’s how you can adjust the image settings:
- Resize the Image: Click on the image to select it, and then resize it by dragging the corners or entering specific dimensions. Squarespace will automatically maintain the aspect ratio to avoid distortion.
- Align the Image: You can adjust the alignment of your image to the left, center, or right, depending on where you want it positioned within your text or other content.
- Adjust Image Spacing: You can change the spacing around the image (padding) to make sure it doesn’t look crowded. Use the spacing options in the block settings to add margin or padding around the image.
- Apply Image Effects: Squarespace offers filters and effects that you can apply to your images for a more stylish look. You can add grayscale, blur, or other effects directly within the image settings.
- Optimize for Mobile: Check how your image looks on mobile devices. Squarespace automatically adjusts images for mobile, but you can fine-tune it by previewing the mobile version of your page.
- Add a Caption: If you want to provide more context for your image, you can add a caption beneath it. This is useful for giving credit to photographers or explaining what the image represents.
Once you’ve made all the adjustments, click “Save” to apply the changes. Your image will now be properly optimized and aligned, ready to enhance your Squarespace website.
Step 5: Adding Captions and Links to Your Image
Adding captions and links to your images is a great way to provide additional context and improve the interactivity of your Squarespace site. Captions allow you to describe or credit your image, while links can guide visitors to other pages or external sites. Let’s walk through how to add both:
- Adding a Caption: After selecting the image in your Image Block, you’ll see an option to add a caption. Just type the text in the field provided. This text will appear below the image and can be styled in the block settings.
- Editing the Caption: You can customize the font, size, and alignment of the caption. This helps ensure that it blends seamlessly with the rest of your site’s design.
- Adding Links to the Image: To make your image clickable, select the image and click on the link icon that appears. You can link it to another page on your site, an external website, or even an anchor link that scrolls to a specific section of the same page.
- Open Links in a New Tab: If you want the link to open in a new tab (which is often helpful when linking to external sites), simply check the “Open in New Tab” option in the link settings.
By adding captions and links to your images, you not only provide more information but also increase the functionality of your website. This makes your site more user-friendly and can help guide your visitors to other important content.
Step 6: Preview and Save Your Image Changes
Once you’ve added and adjusted your images, it’s time to see how everything looks before finalizing the changes. Previewing your site is an important step, as it allows you to check the visual appearance and ensure that the images are displayed properly on all devices. Here’s how you can preview and save your changes:
- Preview Your Changes: After making adjustments to your images, click the “Preview” button at the top of the editor. This will allow you to see how your images appear in real-time on your page.
- Check Mobile View: Don’t forget to check how your images look on mobile. Squarespace automatically optimizes images for mobile, but you may want to double-check that everything looks good on smaller screens. You can toggle between desktop and mobile views in the preview mode.
- Adjust if Needed: If something doesn’t look quite right—whether it’s the alignment, size, or caption—make the necessary changes before moving forward.
- Save Your Changes: Once you’re happy with how your images look in the preview, click “Save” to apply your changes. If you’re editing a page or post, you’ll also need to click “Publish” to make your updated content live.
Previewing and saving your changes ensures that everything looks polished and professional before it’s visible to your website visitors. Now that your images are set, it’s time to share them with the world!
FAQ about Adding Images on Squarespace
Here are some frequently asked questions that can help you when adding images to your Squarespace site:
- What is the recommended image size for Squarespace?
It’s best to use images that are 1500px or wider in width. This ensures that your images look good on all screen sizes without being too large to slow down your site’s load time. - Can I use my own images or do they need to be stock images?
You can upload your own images or use stock images. Just make sure they are high quality and properly licensed for your use. - How do I adjust the image resolution?
Squarespace automatically optimizes image resolution for different devices. However, you can use external tools like Photoshop or online services to adjust the resolution before uploading. - Can I add an image gallery?
Yes, Squarespace offers several gallery block options to showcase multiple images. You can create a slideshow, grid, or carousel to display your images in different layouts. - Why do my images look blurry on mobile?
If your images are not appearing clearly on mobile devices, it might be because the original file size is too large or the resolution is too low. Try uploading higher-resolution images for better clarity.
These FAQs should help you troubleshoot common image-related issues while adding images to your Squarespace site. If you have more specific questions, don’t hesitate to consult Squarespace’s support resources or community forums.
Conclusion: Mastering Image Uploads on Squarespace
In conclusion, adding and managing images on Squarespace is a straightforward process that can significantly enhance the overall look and functionality of your website. From selecting the right images to fine-tuning settings like captions, links, and image alignment, Squarespace offers various tools to make your images look great across different devices. By following the steps outlined in this guide, you’ll be able to add high-quality images that not only improve the aesthetic appeal of your site but also provide a better user experience.
Whether you're showcasing products, blogging, or simply adding visual content to support your messaging, the process is simple and customizable. Regularly previewing and saving your changes ensures your images always appear as you intend, and with the added ability to link images and add captions, your website becomes more interactive and engaging for your visitors. Mastering image uploads on Squarespace is a crucial skill for building a professional and attractive website, so take the time to experiment with different settings to make your site stand out.


