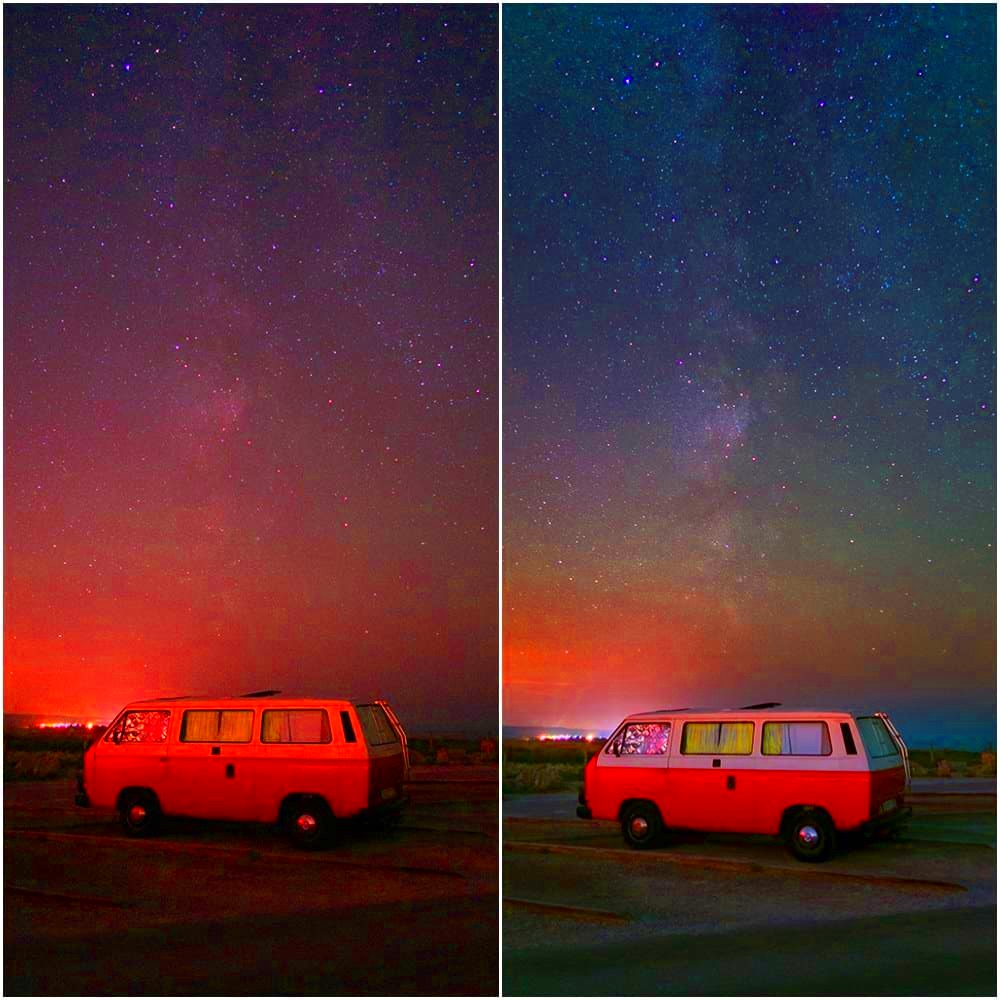
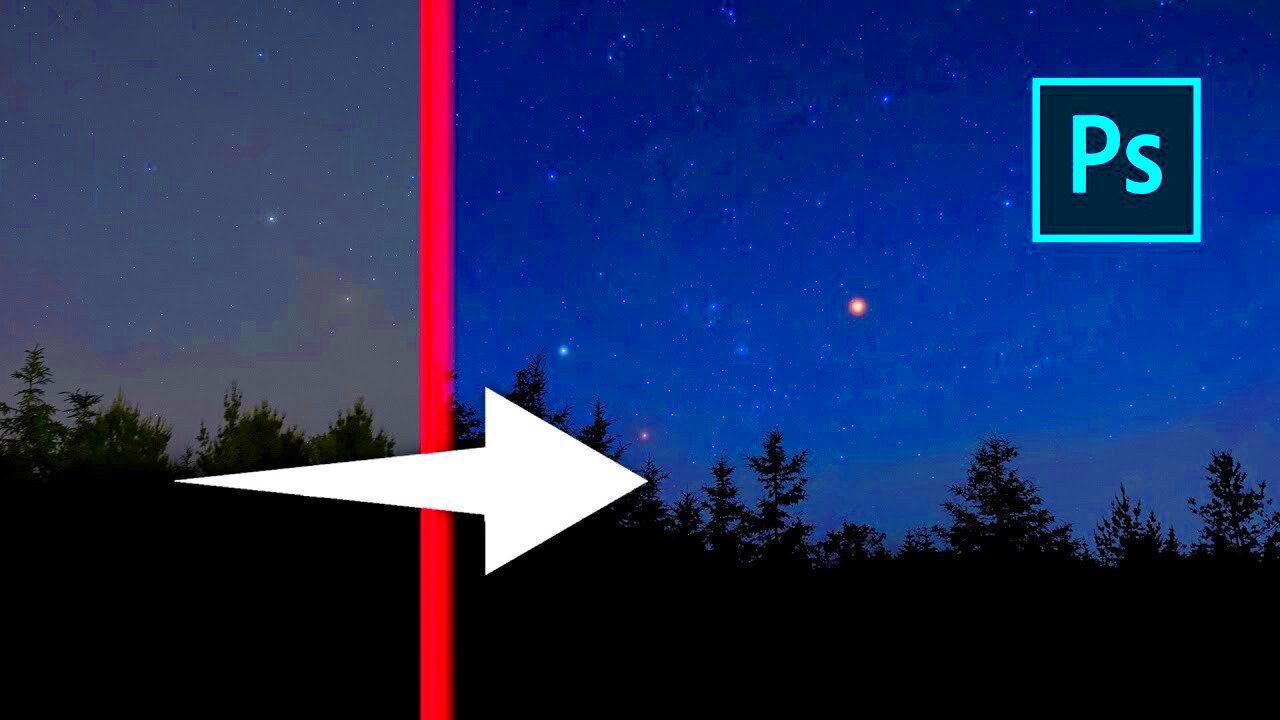
The excitement of encountering the beauty of the sky at night is possible through astrophotography. Image stacking is one of the main techniques employed in this field. Here, multiple images of the same scene are combined together to improve their details, minimize noise and generally enhance their quality as a whole. Stacking images allows you to display more faint details on celestial objects than would be possible with only one exposure.
This technique makes everyone individual photograph commutative for final image, leading to a crisper and clearer depiction of the universe. This invariably leads to a breathtaking picture depicting how fascinating stars, galaxies and nebulae look like. Stacking images is something anyone can benefit from regardless of their skill level in astrophotography to boost the quality of captured pictures.
Gathering Your Images and Equipment

Before embarking on astrophotography, there are several essentials and a large collection of images that you will require. Here is what to collect:
- Camera: A DSLR or mirrorless camera is ideal for capturing high-quality images.
- Tripod: A sturdy tripod is crucial to keep your camera steady during long exposures.
- Lens: A wide-angle lens works best for capturing large sections of the night sky.
- Remote Shutter Release: This helps prevent camera shake when taking long exposures.
- Software: Programs like Photoshop or dedicated stacking software will be needed for the stacking process.
Once your equipment is ready, head out to a dark location away from city lights to capture your images. Aim for clear nights with minimal atmospheric disturbances. It’s helpful to take multiple shots of the same scene, as this will provide you with the necessary images to stack later. Aim for at least 10-20
Also Read This: Mastering Adobe Stock Transition Templates in Premiere Pro
Preparing Your Images for Stacking

Firstly images are collected when they have been aligned or when they have been placed in the same scene. After that, they are assembled. This is an important step because it helps to ensure that the aim is realised. Below are the necessary procedures that one needs to undertake:
- Review Your Images: Check each photo for quality. Look for focus issues or noise that might affect the final stack.
- Sort Your Images: Organize the images based on exposure time and conditions. You might want to group similar exposures together.
- Adjust Exposure Settings: If you notice significant differences in brightness or exposure, consider adjusting these settings in your editing software before stacking.
- Align Your Images: Use software that offers automatic alignment features. This step ensures that each image lines up correctly for the stacking process.
Subsequent to executing this, your photos are prepared for accumulation. The aim is to have a consistent collection of photos that would be merged together without any apparent seams. As a result, the end photograph would display all the beautiful intricacies of the nocturnal heavens.
Also Read This: How to Make an Image Transparent in Google Slides
Using Photoshop to Stack Images
Now that your images are all set, it’s time for you to get into Photoshop for stacking. The process may sound complicated but when you get used to it you will find it more manageable. Powerful tools that can be used in combining your astrophotography images, improving detail and quality are provided by Photoshop.
Here's a simple guide for stacking photos using Photoshop.
- Open Photoshop: Start by launching the application on your computer.
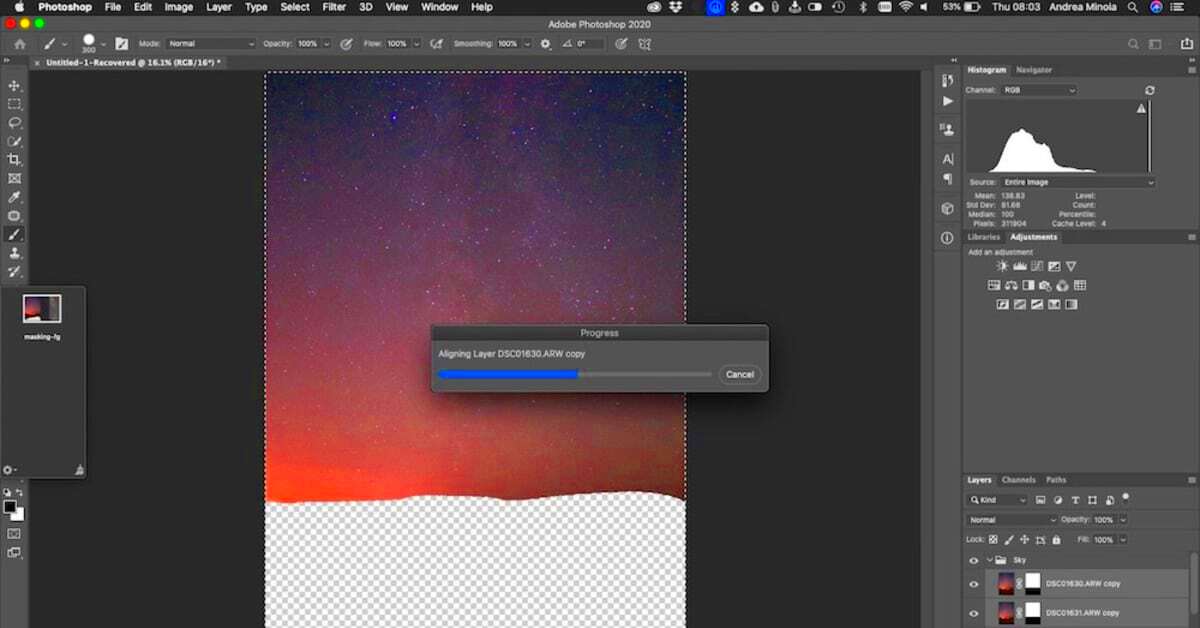
- Load Your Images: Go to File > Scripts > Load Files into Stack. In the dialog box, click Browse to select your prepared images. Click OK to import them.
- Select All Layers: Once your images are loaded, press Ctrl + A (Windows) or Command + A (Mac) to select all layers in the Layers panel.
- Align Layers: With all layers selected, go to Edit > Auto-Align Layers. Choose Auto and click OK to ensure all images are perfectly aligned.
- Blend the Layers: Again, select all layers, then go to Edit > Auto-Blend Layers. Choose Stack Images and click OK. Photoshop will work its magic, blending the layers to create one stunning image.
As soon as it’s done, you will possess an exquisitely piled photograph open for some more edits. This whole procedure exposes the distinguishable characteristics of your astronomy images making it possible for one to generate breathtaking graphic representations of the night sky.
Also Read This: Saving Images from Cricut Design Space on Mac
Adjusting Settings for Best Results
Once you have accumulated your images stacking, at this point it is time to modify certain settings so that you can have the right outcome. This step is critical because even tiny changes can greatly improve the final image quality. The following are some important parameters which may be worth considering:
- Brightness and Contrast: Use the Image > Adjustments > Brightness/Contrast feature to find the right balance that brings out the details in your image.
- Levels and Curves: Adjust the levels and curves to enhance the tonal range. Go to Image > Adjustments > Levels or Curves to refine shadows, midtones, and highlights.
- Saturation: Boost the color saturation slightly to make your astrophotography pop. Navigate to Image > Adjustments > Saturation and adjust to your preference.
- Noise Reduction: If your image has noise, consider using the Filter > Noise > Reduce Noise option to clean up the details without losing clarity.
Embrace these modifications for they might determine how real your dream gets. It is possible to play around with some settings to give it that intended appeal as a genuine representation of the night sky.
Also Read This: Quickly Save LinkedIn Video With This Simple Tool
Fine-Tuning Your Stacked Image
The place where you start adding your personal touch to the stacked image is called fine-tuning. After making basic adjustments, you can enhance your photo further by focusing on specific areas. Below are some techniques:
- Sharpening: Apply sharpening to enhance details. Go to Filter > Sharpen > Unsharp Mask or Smart Sharpen to bring out the finer points of your image.
- Selective Editing: Use masks to selectively adjust brightness, contrast, or color in specific areas. This technique can help you emphasize certain celestial features.
- Removing Artifacts: Use the Spot Healing Brush Tool or Clone Stamp Tool to clean up any unwanted spots or artifacts that may have appeared during stacking.
- Framing and Cropping: Consider cropping the image to enhance composition. A well-framed image can make a significant difference in overall presentation.
Lastly, but equally important, ensure you keep your photo in high-quality format. JPEG is great for online sharing, while TIFF is suited for print-outs.In performing these final adjustments and modifications towards rendering an amazing astrophotography using stacked images which are visually attractive and clarifies how beautiful our galaxy can be defined by the scientific terms universe components or objects rather than emotions.
Also Read This: Download Nature Images from Shutterstock With These Steps
Saving and Exporting Your Final Image
Since your stacked image has been refined, it is time to save and export it. This is critical in this process because a poor quality export can affect the appearance of your image when it is shared or printed. You want to make sure that you get what you have worked for, and for this reason, the final product should be splendid.
In the following paragraphs, you will find a couple of steps that may assist you in the process of correctly saving and exporting an image:
- Choose the Right Format: Depending on how you plan to use your image, choose an appropriate format. For web use, JPEG is common, while TIFF is great for high-quality prints.
- Save a PSD Copy: Before exporting, save your project as a PSD file. This way, you can return to it later if you want to make further adjustments.
- Export Settings: For exporting, go to File > Export > Export As. Choose your file format and adjust the quality settings as needed. A quality setting of around 80-100% is generally recommended for JPEGs.
- Image Size and Resolution: Adjust the image size and resolution based on your needs. For web, 72 PPI (pixels per inch) is sufficient, while for printing, aim for 300 PPI to ensure clarity.
After adjusting these settings, click Export, choose your destination folder, and you’re all set! Your stunning astrophotography image is now ready to be shared with the world.
Also Read This: How to Reflect an Image in DaVinci Resolve for Mirror Effects
Common Mistakes to Avoid in Image Stacking
Similar to any imaginative method, there tend to be typical snags in image stacking that you must take into consideration. Evading these blunders will enable you to obtain the finest results conceivable with your astrophotography. Below are some of the major errors you need to keep an eye on:
- Insufficient Image Quantity: Stacking only a couple of images may not yield the desired detail. Aim for at least 10-20 quality images for optimal results.
- Poor Alignment: If your images aren’t aligned correctly, the final stacked image can appear blurry or misaligned. Always use the auto-align feature in Photoshop.
- Neglecting Noise Reduction: Failing to reduce noise before stacking can result in a noisy final image. Use noise reduction techniques on your individual frames before stacking.
- Ignoring Lighting Conditions: Stacking images taken under varying lighting conditions can lead to inconsistent results. Try to shoot all images under similar conditions.
- Over-Editing: While it’s tempting to enhance every detail, overdoing it can make your image look unnatural. Keep edits subtle to maintain realism.
Taking into account these usual blunders can greatly enhance your stacking methods and make astrophotography images a lot clearer with finer details.
Also Read This: Sizing Images for Sublimation Tumblers: A Quick Guide
FAQ About Stacking Images in Photoshop
When one is just starting out, image stacking can be quite challenging. Below are some common inquiries that can help demystify the process:
What is image stacking in astrophotography?
Numerous images illustrating identical landscape characteristics are consolidated in image stacking for the aim of improving clarity and minimizing sounds. It is this technology that enables prominent faint space objects to be photographed eventually.
How many images should I stack?
It’s recommended to stack at least 10-20 images. The more images you use, the better the final result will be, as this helps to average out noise and enhance detail.
Can I stack images taken at different exposures?
Though feasible, it is advisable to have a set of images that have similar exposures for the best outcomes. On the other hand, combining different exposed photographs may bring about illumination disparities as well as artifacts that are undesired.
Do I need special software for stacking?
It is not that Photoshop does not do well in stacking; there are also some programs like DeepSkyStacker and RegiStax that are more tailored for astronomical pictures.
How can I reduce noise in my stacked image?
To lower noise levels, it is wise to use noise-reduction methods on single pictures prior to piling them up. Once they have been piled up apply the noise-reduction filters in Photoshop for polishing your conclusive image.
Having received this FAQs, then you will have more belief in your capability to manipulate images in Photoshop and produce breathtaking astrophotography works.
Conclusion on Stacking Images for Astrophotography
Wrapping it all, stacking images is one of the most effective techniques used in astrophotography which can make your photos look unbelievable. When multiple exposures are combined, the details are enhanced and noise is minimized thus producing a clearer representation of the night sky. Some of the important steps include gathering quality images, preparing them correctly and using software such as Photoshop to stack and fine-tune them. Be careful to avoid common mistakes while maintaining uniformity in your pictures. What’s more, by practicing this art you will not only get better but also create breathtaking pieces of astrophotography that depict how beautiful the universe really is. Therefore digital camera should be taken out to remote areas while stacking these images so that you may reveal these mysteries surrounding us!

 admin
admin


