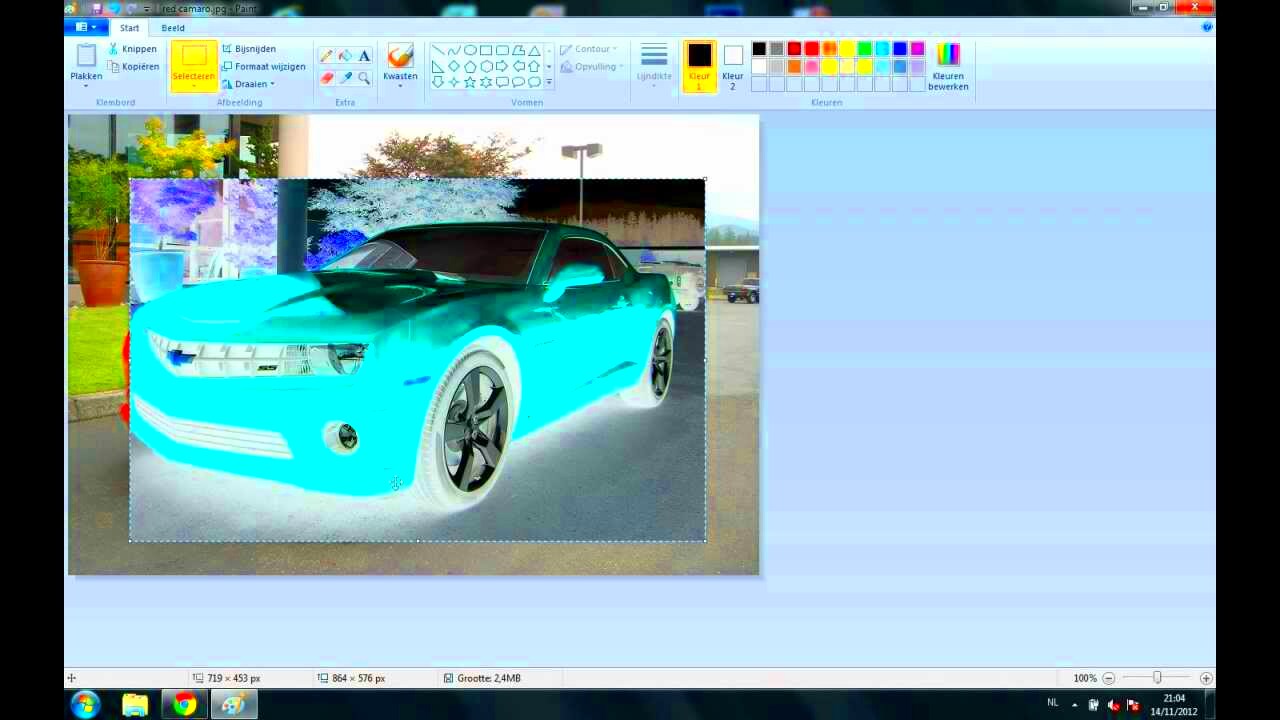
If you’ve ever wanted to transform your photos into something unique, creating a negative image in Paint 3D is a fun and easy way to do so. A negative image inverts the colors, making whites turn black and blacks turn white, while also altering the colors in between. This process can be a useful tool for creating dramatic effects or just experimenting with a different look for your images.
In this guide, we’ll walk you through each step of creating a negative image, from opening the image in Paint 3D to making adjustments and saving your final creation. You don’t need any advanced editing skills to follow along—just a bit of patience and creativity!
What is a Negative Image and Why Use It?

A negative image is essentially the reverse of a regular image. In a traditional photograph, colors and brightness are captured as they appear in real life. When you create a negative, all the colors and tones are flipped. For instance, blue becomes orange, green becomes purple, and bright colors turn dark. The result is often a striking, unusual
Why would you want to create a negative image? Here are some reasons:
- Creative projects: A negative image can give your designs or artwork an abstract, surreal quality.
- Visual impact: Negative images can create dramatic contrasts, making certain elements stand out more.
- Artistic experiments: If you're a photographer or graphic designer, experimenting with negative images can help you discover new styles or perspectives.
Creating a negative image in Paint 3D can be a fun way to explore these possibilities, whether you're working on personal art or just playing around with your photos.
Steps to Open Your Image in Paint 3D

Before you can start creating your negative image, you first need to open your image in Paint 3D. This is a quick process, and here’s how you can do it:
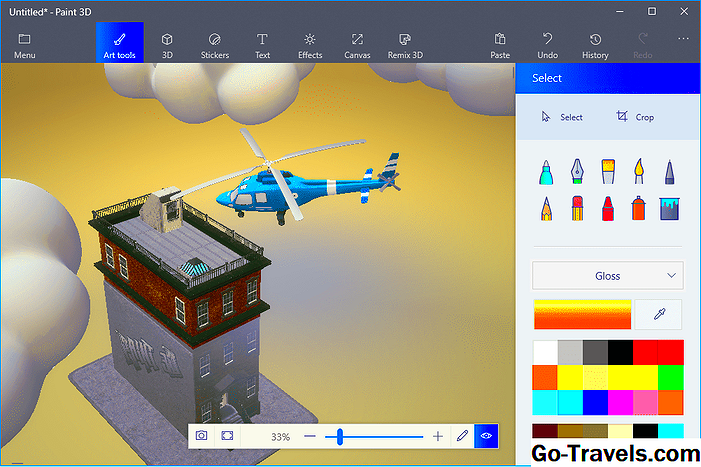
- Open Paint 3D: Click on the Paint 3D app from your start menu or taskbar. If you don't have it open already, now is the time!
- Select ‘New’ or ‘Open’: When you open Paint 3D, you’ll have the option to start a new project or open an existing one. Click on ‘Open’ to choose the image file you want to work on.
- Choose Your Image: Navigate to the folder where your image is stored, select the image, and click ‘Open.’ Your image will appear in the workspace, ready for editing.
Once the image is open, you're all set to move forward and start editing. It's always a good idea to keep the original image saved elsewhere, so you can always return to it if you need to start over or make further adjustments.
In the next steps, we’ll show you how to start making those adjustments and apply the negative effect.
How to Adjust the Colors of Your Image

Once you’ve opened your image in Paint 3D, the next step in creating a negative image is to adjust the colors. In a typical image, you’ll have a range of colors that make up the picture, but to create a negative, you need to invert these colors. Here's how to adjust the image in a few simple steps:
- Access the Color Tools: Click on the 'Magic Select' tool in the toolbar to focus on specific areas of the image. For a more general color adjustment, use the 'Brush' or 'Fill' tools depending on what effect you want to achieve.
- Invert the Colors: To manually invert the colors, select the area or the whole image and start adjusting the hue using the color sliders. While Paint 3D doesn’t offer a direct “invert” tool, you can replicate this by using the color adjustments available in the program.
- Adjust the Brightness: Play around with the brightness and contrast sliders to make the colors stand out more, especially if you want a more dramatic negative effect.
When you adjust the colors, remember that Paint 3D offers basic editing options, so achieving a perfect negative image may require a bit of creativity. You can also use a color picker tool to help you choose specific colors if you want to match the negative effect precisely. It’s all about experimenting with the available tools to get the look you want.
Using the Filters in Paint 3D to Create a Negative Effect
In Paint 3D, filters aren’t as advanced as some other photo editing software, but there’s still a way to achieve a negative effect with a little creativity. Here's how to apply filters and make your image look like a negative:
- Open Filters and Effects: After you’ve uploaded your image, click on the 'Effects' tab found in the toolbar. This section contains several options like 3D shapes, stickers, and filters.
- Choose a Suitable Filter: While Paint 3D doesn’t offer a direct negative filter, you can experiment with filters that create high contrast, such as 'Posterize' or 'Color Adjustment.' These will help invert colors and create the illusion of a negative image.
- Adjust the Effect: Once the filter is applied, tweak the intensity of the effect by adjusting the slider. This will allow you to perfect the negative look by manipulating color saturation and brightness.
Although Paint 3D lacks a dedicated "invert colors" button, you can create a visually similar effect by adjusting the settings in the 'Effects' tab. Experiment with different combinations of filters to get the negative effect that works best for your image.
Fine-Tuning Your Negative Image for Better Results
Now that you’ve applied the color adjustments and filters, it’s time to fine-tune your negative image to make it look even better. Fine-tuning involves small tweaks that can really enhance the overall effect. Here’s how to do it:
- Refine the Contrast: The contrast between dark and light areas is key in a negative image. If the image looks too flat, increase the contrast. This will make the darker areas of the image darker and the lighter areas lighter, giving it a more dramatic look.
- Adjust the Saturation: If the negative effect seems too washed out, increase the saturation of the image. This will make the colors pop and give a stronger negative appearance.
- Use the Brush Tool for Details: If there are areas of your image that you want to emphasize, use the brush tool to add highlights or additional color adjustments. This is helpful if you want to make specific parts of the image stand out more.
- Zoom In for Precision: Zooming in on your image allows you to make detailed adjustments in certain areas, like sharp edges or smooth transitions between colors. Fine details can make a big difference in achieving a polished negative image.
Fine-tuning isn’t just about the main color adjustment. It’s about making small edits that give your image depth and clarity. Whether you’re adjusting shadows, highlights, or using the brush tool for additional highlights, these steps help to perfect your negative image.
Saving Your Negative Image in the Right Format
After creating a negative image in Paint 3D, the final step is to save your work in the right file format. This ensures your image retains its quality and can be easily shared or used for other projects. Paint 3D offers several formats to choose from, and each serves different purposes. Let’s take a look at how to save your negative image and the formats you should consider.
- Select ‘Save As’: Once you’re happy with the final result, click on the 'Menu' button in the top left corner, then select 'Save As.' A drop-down menu will appear, offering different saving options.
- Choose the Format: Paint 3D allows you to save images in formats like PNG, JPEG, or BMP. If you want a high-quality image with transparency, PNG is a good choice. JPEG is ideal for general use when file size matters, while BMP is useful for uncompressed files, though it can result in large file sizes.
- Saving for Web Use: If you plan to use your image online, saving it as a PNG or JPEG is recommended. These formats are widely supported and maintain good quality while keeping file sizes manageable.
- Adjust the Resolution: Before saving, make sure the image resolution matches the intended use. If you’re printing, higher resolution is important, but for web use, you can save it with a smaller resolution to keep the file size low.
Once you’ve selected the right format and resolution, click 'Save.' Your negative image is now ready to be used, whether for printing, sharing online, or incorporating into other creative projects.
Common Issues and Troubleshooting Tips
While creating a negative image in Paint 3D is straightforward, sometimes you might encounter issues along the way. Here are some common problems users face and how to solve them:
- Color Inversion Doesn’t Look Right: If the colors don’t appear as you expected, double-check your adjustments. Paint 3D doesn’t have a one-click "invert" button, so achieving the effect might require tweaking contrast, saturation, and hue. Try experimenting with these settings for a more dramatic effect.
- Too Much Noise or Distortion: If your image looks distorted after applying filters, it might be due to overusing certain effects or adjustments. Try reducing the intensity of the filter or adjusting the contrast to minimize distortion.
- Low-Quality Image After Saving: If your image looks blurry or pixelated after saving, it might be due to low resolution. Be sure to save your image in a higher resolution if you intend to print it, or try using a PNG format for better quality.
- Paint 3D Freezing or Crashing: If Paint 3D freezes or crashes while working on the image, ensure that your software is updated to the latest version. Also, try closing other applications to free up system resources, or restart the program and try again.
- Undoing Changes: If you make a mistake during the editing process, you can always undo your last action by pressing ‘Ctrl + Z’ or using the undo button. This is a quick way to fix any accidental changes.
By keeping these tips in mind, you can troubleshoot and continue editing your image with ease. Remember, sometimes taking a break and coming back to the project with fresh eyes can help you see the problem more clearly!
FAQ
Here are some of the most frequently asked questions about creating negative images in Paint 3D:
- Can I create a true negative effect in Paint 3D? While Paint 3D doesn’t have a built-in "invert" button, you can achieve a similar effect by adjusting the colors, brightness, and contrast manually or by using filters like 'Posterize' to create a negative-like appearance.
- Is there a way to make more advanced edits in Paint 3D? Paint 3D offers basic editing tools, but for more advanced edits, consider using other software like Photoshop. However, Paint 3D is great for quick edits and creative projects.
- What file formats are best for saving my negative image? PNG is ideal for high-quality images, especially if you need transparency. JPEG works well for general use, such as web sharing, while BMP is a good option for uncompressed images, although it may result in larger file sizes.
- How do I ensure my image looks good on different devices? To ensure your image looks great on various devices, save it at a high resolution and choose a widely supported format like PNG or JPEG. Also, test the image on different screens to check for consistency.
- Can I edit images with transparency in Paint 3D? Yes, you can edit images with transparency in Paint 3D. Just be sure to save your file as a PNG if you want to preserve the transparent areas.
These answers should help clarify some of the common questions and guide you through any issues you encounter while creating your negative image. If you have more questions, feel free to check the help section or experiment with the tools until you find what works best for you!
Conclusion
Creating a negative image in Paint 3D is a fun and straightforward process that anyone can master with a little practice. By following the simple steps outlined in this guide—adjusting colors, using filters, fine-tuning, and saving your work in the right format—you can transform any image into a striking, negative version. Whether you're creating a negative image for artistic purposes, graphic design, or just for fun, Paint 3D provides the basic tools you need to get the job done. With these tips and techniques, you can now explore the world of negative images and apply your creativity in new and exciting ways!


