Figma is a powerful tool for designers, allowing them to create and edit
images easily. One common task in design is cropping
images to fit specific dimensions or to focus on particular details. Cropping helps enhance your design by removing unwanted parts of an image. In this guide, we'll explore how to crop an image.
Accessing the Image in Figma
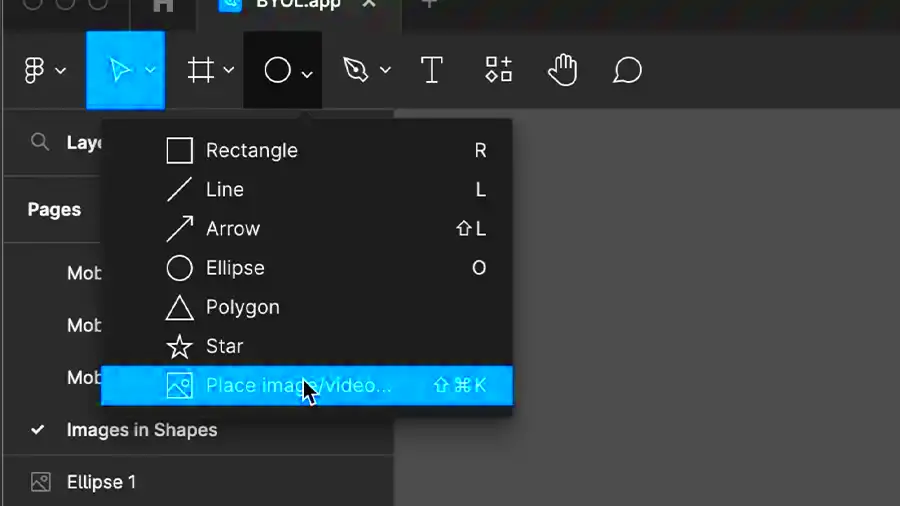
To crop an image in Figma, you first need to access it within your project. Follow these steps:
- Open your Figma project where the image is located.
- Click on the frame or canvas to ensure you are in the right workspace.
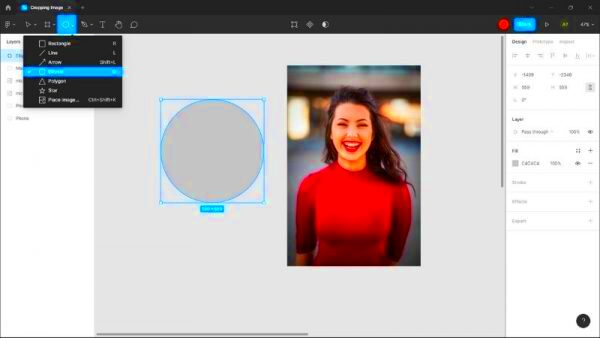
- Import the image by dragging it into Figma from your files or using the File menu to select Import.
- Once the image is on your canvas, select it by clicking on it.
Now that your image is ready, you can move on to the cropping process. This initial step is essential as it sets the stage for effective editing.
Selecting the Crop Tool
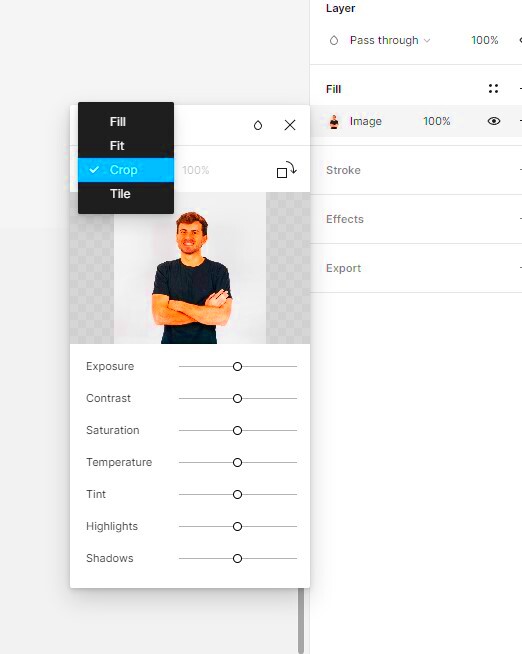
After accessing your image, the next step is to select the crop tool. Here’s how to do it:
- With the image selected, look for the toolbar at the top of the Figma window.
- Find the Crop icon, which looks like two overlapping right angles.
- Click on the crop icon. You will notice crop handles appear around the image.
- Alternatively, you can right-click on the image and choose Use as Mask to access cropping options.
Now you are ready to adjust the cropping area. Selecting the crop tool is a straightforward process, but it’s crucial for your design to ensure that you can customize your image effectively.
Adjusting the Crop Area
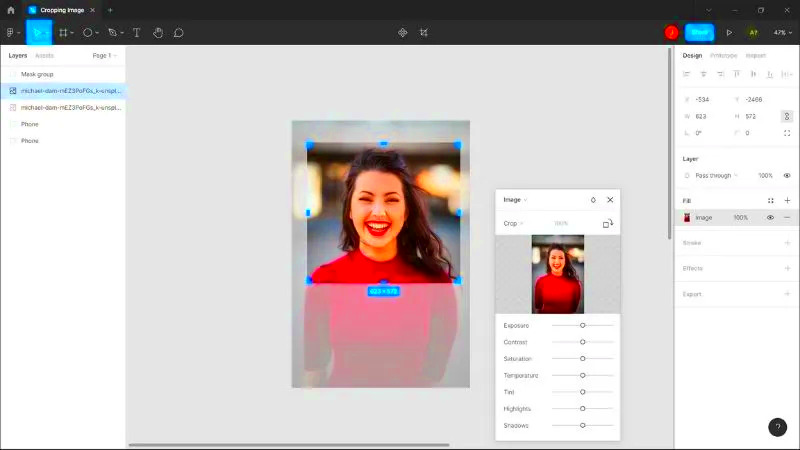
Now that you have selected the crop tool, it’s time to adjust the crop area to fit your needs. This step is where you can really tailor the image to focus on the important elements. Here’s how to do it:
- Click and drag the crop handles around the edges of your image. You will see a shaded area representing the cropped section.
- To maintain the aspect ratio, hold down the Shift key while dragging a corner handle. This keeps your image proportions intact.
- If you want to reposition the image within the crop area, click and drag the image itself. This allows you to center the most important part of the image.
- Use the grid lines as a guide for alignment. These can help you ensure that your crop looks balanced and professional.
Don’t hesitate to experiment with different crop sizes and positions. The goal is to create an image that effectively conveys your message or enhances your design.
Previewing the Cropped Image
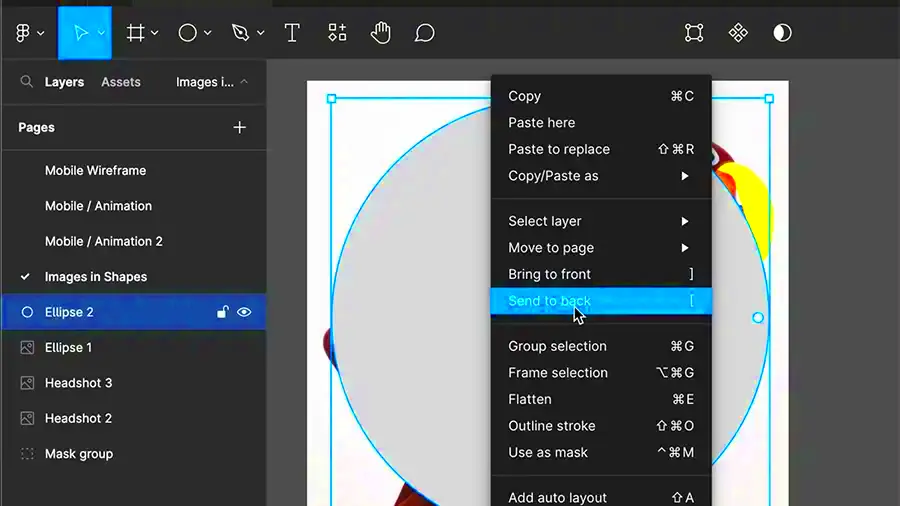
After adjusting the crop area, it’s important to preview how the cropped image will look. This step helps you see if any adjustments are needed before finalizing. Here’s what to do:
- Once you’ve adjusted the crop area, take a moment to step back and assess the image.
- To preview the cropped image, click anywhere outside the crop area. This will show you how it looks without the crop handles.
- Use the zoom tool to get a closer look at the details. This can help you spot any areas that might need tweaking.
- If you’re not satisfied, click on the image again to bring back the crop handles and make further adjustments.
Previewing your cropped image is crucial. It ensures that the final result matches your vision, allowing you to make any necessary tweaks before you finish.
Finalizing the Crop
Once you are happy with the crop area and have previewed your image, it’s time to finalize the crop. This step will lock in your changes and complete the cropping process. Here’s how to do it:
- Click on the Done button in the toolbar at the top of the window, or simply click outside the image to finalize the crop.
- If you want to revert to the original image at any point, just select the image and click on Reset Crop in the same toolbar.
- Take a moment to review the final cropped image. Make sure it meets your design needs and fits well with the rest of your project.
- Once satisfied, you can proceed to save your project or export the image by going to the File menu and selecting Export.
Finalizing the crop is a straightforward process, but it’s essential to ensure everything looks just right before moving on. A well-cropped image can enhance your design significantly, so take your time with this step.
Tips for Effective Cropping
Getting the best results from cropping requires a bit of thought. Here are some tips to help you crop
images effectively in Figma:
- Know Your Purpose: Always have a clear idea of why you’re cropping. Are you focusing on a subject, creating a specific composition, or fitting an image into a design? Knowing your goal will guide your cropping decisions.
- Maintain Aspect Ratio: When cropping, it’s often best to keep the aspect ratio consistent, especially for web images or print. Holding down the Shift key while cropping helps with this.
- Consider Composition: Use the rule of thirds as a guideline. Try to place important elements along the lines or at the intersections of these lines for a more balanced look.
- Leave Space: Sometimes, leaving a little extra space around your subject can make the image feel less cramped and more inviting.
- Check for Details: Zoom in and check your cropped image for any unwanted elements. Make sure that the edges of your crop are clean and don’t include distractions.
- Experiment: Don’t be afraid to try different crop sizes and positions. Figma allows you to easily adjust and experiment until you find the perfect fit.
These tips will help ensure that your
images look professional and are effective in conveying your intended message.
Frequently Asked Questions
Here are some common questions about cropping
images in Figma:
- Can I revert to the original image after cropping? Yes, you can reset the crop by selecting the image and clicking Reset Crop in the toolbar.
- How do I crop multiple images at once? You can select multiple images and use the crop tool. Each image will have its own crop handles.
- Is there a way to adjust the cropping after finalizing? Unfortunately, once you finalize the crop, the image is set. However, you can always reset it and crop again.
- Does cropping affect the image quality? Cropping an image does not affect its quality, but be mindful of the resolution. Make sure the remaining area is still clear and detailed.
- Can I add effects after cropping? Absolutely! You can apply filters, shadows, or other effects after finalizing your crop.
These answers should help clarify any concerns you have about cropping
images in Figma.
Conclusion
Cropping images in Figma is a straightforward process that can significantly enhance your design work. By accessing the image, selecting the crop tool, adjusting the crop area, and finalizing your edits, you can create stunning visuals tailored to your projects. Remember to keep your purpose in mind and use the tips provided to achieve the best results. With a little practice, you’ll be able to crop images like a pro, making your designs more effective and appealing. So, go ahead, experiment with cropping, and see how it can transform your design work!
 To crop an image in Figma, you first need to access it within your project. Follow these steps:
 After accessing your image, the next step is to select the crop tool. Here’s how to do it:
 Now that you have selected the crop tool, it’s time to adjust the crop area to fit your needs. This step is where you can really tailor the image to focus on the important elements. Here’s how to do it:
 After adjusting the crop area, it’s important to preview how the cropped image will look. This step helps you see if any adjustments are needed before finalizing. Here’s what to do:
 admin
admin


