Introduction to Streamable
If you've ever found yourself frustrated with clunky video platforms or ones that just don’t meet your needs,
Streamable might just be the breath of fresh air you've been looking for. I remember the first time I stumbled upon
Streamable; it was like finding a cozy little cafe after a long day of searching for the perfect spot. It’s designed to be straightforward and user-friendly, making video sharing a breeze. Whether you're a casual user sharing family videos or a content creator looking for an efficient platform,
Getting Started: Creating Your Account
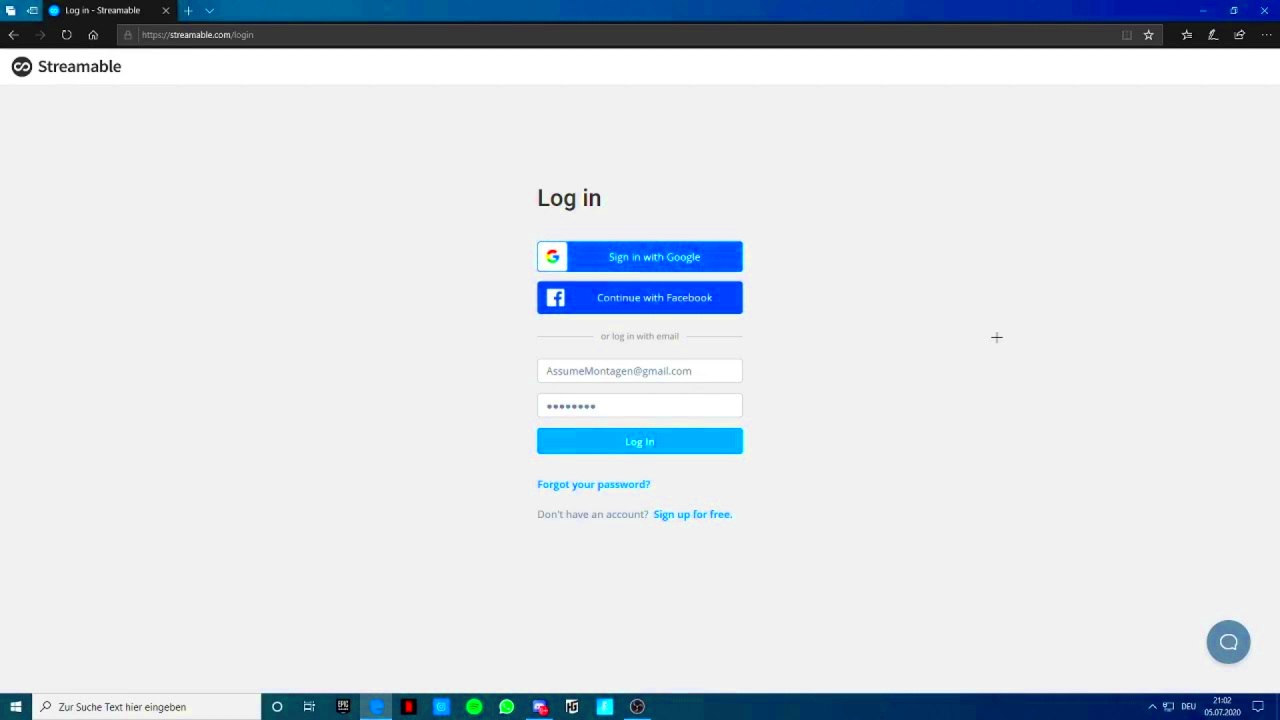
Setting up your
Streamable account is a breeze, and I mean it when I say it's one of the easiest sign-ups out there. Here’s how you can get started:
- Visit the Streamable Website: Head over to Streamable. You’ll be greeted with a clean, welcoming interface.
- Sign Up: Click on the 'Sign Up' button. You can use your email or link it with your social media accounts for a quicker setup.
- Fill in Your Details: Enter your name, email address, and create a password. Make sure it's something you’ll remember but secure!
- Verify Your Account: You might need to verify your email address. Check your inbox for a verification email and follow the instructions.
- Complete Your Profile: Add a profile picture and a short bio if you wish. It’s always nice to personalize your account.
And just like that, you’re all set. I vividly recall how relieved I was not to have to jump through hoops or sift through endless settings just to get started.
Streamable keeps it refreshingly simple.
Uploading Videos: A Step-by-Step Guide
Uploading videos to
Streamable is as intuitive as it gets. Here’s a breakdown of how to get your videos online without a hitch:
- Log In to Your Account: Once you’re logged in, you’ll see an easy-to-navigate dashboard.
- Find the Upload Button: Click on the ‘Upload’ button prominently displayed on your dashboard.
- Select Your Video: Browse your files and select the video you want to upload. Streamable supports a variety of formats, so you’re likely to find that it’s compatible with what you’ve got.
- Add Details: Enter a title and description for your video. I’ve found that adding a few keywords in the description helps make your video easier to find.
- Choose Privacy Settings: Decide who can view your video. You can make it public, private, or shareable with specific people.
- Upload and Process: Hit ‘Upload’ and wait for the video to process. This usually takes just a few minutes, depending on your file size.
I’ve uploaded a fair share of videos over the years, and
Streamable’s process stands out for its simplicity and speed. No more waiting forever for a video to process or dealing with confusing options. It’s just straightforward and effective.
Organizing Your Content: Tags and Categories
One thing that makes Streamable a cut above the rest is how effortlessly you can organize your content. I still remember the chaos of trying to find a specific video amidst a sea of uploads on other platforms. Streamable offers a tidy solution with its tagging and categorizing system. Here’s how you can make your content easy to navigate:
- Use Tags Wisely: Tags are like breadcrumbs that help viewers find related content. Add relevant keywords that describe your video. For instance, if you upload a cooking tutorial, tags like “recipe,” “cooking tips,” and “easy meals” can be incredibly helpful.
- Create Categories: Organize your videos into categories. This is especially useful if you have a lot of content. Categories like “Travel,” “Tech Reviews,” or “DIY Projects” can streamline your content library and make browsing a breeze.
- Be Consistent: Consistency is key. Use a uniform system for tagging and categorizing to keep things organized. It helps not only in finding your own videos but also in helping your viewers navigate through your content.
- Regular Updates: Periodically review and update your tags and categories as your content grows. This ensures everything remains relevant and easy to find.
Having a system that works smoothly has made my life so much easier. The ability to quickly locate a video or find similar content has saved me time and kept my content organized. It’s these small touches that make Streamable feel like a well-oiled machine.
Customizing Your Video Player: Tips and Tricks
Customizing your video player on Streamable is like decorating your room – it makes it feel more like home. I’ve had some great experiences tweaking my video player to match my style and needs. Here’s how you can personalize yours:
- Adjust the Player Size: Choose a size that fits well with your website or blog layout. Streamable allows you to resize the player, so it looks just right wherever you’re embedding it.
- Pick the Right Color Scheme: Customize the player’s color scheme to match your branding. This might seem like a small detail, but it can make a big difference in maintaining a cohesive look across your content.
- Add Branding Elements: If you’re a content creator or business, you can add your logo or watermark. It’s a subtle way to brand your videos without being too obtrusive.
- Enable or Disable Controls: Depending on your needs, you might want to hide certain controls or features. For example, if you want to prevent viewers from skipping ahead, you can disable the seek bar.
These customizations might seem like minor adjustments, but they make a significant impact on how your videos are presented and perceived. Making your video player reflect your personal or brand identity can create a more engaging experience for your audience.
Sharing and Embedding Videos: What You Need to Know
When it comes to sharing and embedding videos, Streamable makes the process straightforward, but there are a few tricks and tips that can help you get the most out of it. I remember the first time I tried embedding a video – it was like a puzzle that needed to fit perfectly into my website. Here’s what I’ve learned:
- Get the Embed Code: Once your video is uploaded, Streamable provides a convenient embed code. You can find this by clicking on the video and selecting the ‘Embed’ option. Copy this code to place it into your website’s HTML.
- Adjust Embed Settings: You can customize the embed settings, such as player size and start time. This is particularly useful if you want to focus on a specific part of the video or fit it neatly into your page layout.
- Share via Social Media: Streamable makes it easy to share your videos directly to platforms like Facebook, Twitter, or LinkedIn. Just use the share buttons provided and add a caption to draw viewers in.
- Monitor Engagement: Keep an eye on how your embedded videos perform. Streamable offers analytics so you can track views and engagement. This can provide insights into what’s working and what might need tweaking.
Sharing and embedding videos has never been easier, thanks to Streamable’s user-friendly tools. These features have helped me reach a wider audience and integrate videos seamlessly into my content. The ease of sharing and embedding makes promoting and distributing your videos a hassle-free experience.
Optimizing Video Quality: Best Practices
Getting the best quality from your videos can make all the difference. I still remember the first time I uploaded a video that looked grainy and was frustrated trying to figure out why. It turns out, optimizing video quality is both an art and a science. Here are some tips to help you get the most out of your Streamable videos:
- Choose the Right Format: Streamable supports several formats, but for the best quality, go with MP4. It strikes a balance between high quality and manageable file size.
- Resolution Matters: Upload videos in the highest resolution possible. For most content, 1080p is ideal. If your original video is in 4K, that’s even better. Streamable will automatically adjust the resolution for different devices, but starting with high quality is key.
- Compression Tips: Use a good video compression tool to reduce file size without sacrificing too much quality. Tools like HandBrake or Adobe Media Encoder can help maintain clarity while making the file easier to upload and stream.
- Check Your Internet Speed: A slow upload speed can affect video quality. Make sure you have a stable and fast connection when uploading. If you’re working with large files, a wired connection is preferable.
- Preview Before Publishing: Always preview your video after uploading but before sharing. This can help catch any issues with quality or playback that you might have missed.
Improving video quality has really transformed how my content is received. High-quality videos not only look more professional but also keep viewers engaged longer. It’s these little details that make a big impact in the long run.
Exploring Streamable’s Features: Beyond the Basics
Once you’ve gotten the hang of the basics, diving into Streamable’s advanced features can be like finding hidden treasures. I remember feeling like a kid in a candy store when I first explored all the options available. Here’s a look at some features that go beyond the ordinary:
- Video Analytics: Streamable offers in-depth analytics that help you understand how your videos are performing. You can track metrics like view counts, average watch time, and engagement rates. This data is invaluable for tweaking your content strategy.
- Customizable Thumbnails: Make your videos stand out with custom thumbnails. Instead of using a random frame, upload a thumbnail that best represents your video’s content and grabs attention.
- Video Chapters: If your video is long, adding chapters can be a game-changer. It allows viewers to jump to specific sections of the video easily. This is especially useful for tutorials or lengthy presentations.
- Embed Options: Beyond basic embedding, Streamable allows you to customize how your video player looks on other sites. Adjust player size, add or remove controls, and more.
- Privacy Controls: Fine-tune who can see your videos with advanced privacy settings. You can choose to share videos with specific people, keep them private, or make them public.
Exploring these features has opened up so many possibilities for how I can present and manage my content. It’s amazing how much more you can do once you dig a little deeper.
Frequently Asked Questions (FAQ)
Here are some common questions about using Streamable that might help you navigate the platform more smoothly:
What file formats does Streamable support?
- Streamable supports a range of formats, including MP4, MOV, and AVI. MP4 is generally recommended for the best balance between quality and file size.
How long can my videos be?
- Streamable allows for video uploads up to 2 hours long. If you need to upload longer content, consider breaking it into smaller parts.
Can I edit my videos after uploading?
- While you can’t edit the video directly on Streamable, you can update the title, description, and tags. For editing the actual video, you’ll need to use external video editing software before uploading.
How do I manage my video privacy settings?
- You can set privacy controls when you upload a video. Choose between public, private, or restricted access, depending on your needs.
Is there a limit to how many videos I can upload?
- Streamable does not impose a strict limit on the number of videos you can upload, but be mindful of your storage quota and file sizes.
Answering these common questions has helped me navigate Streamable more effectively, and I hope they provide clarity for you too. Don’t hesitate to dive into the help sections or community forums if you have other queries!
Conclusion: Making the Most of Streamable
Using Streamable has been like finding the perfect tool for the job—straightforward, reliable, and surprisingly powerful. Reflecting on my own journey with the platform, I’ve come to appreciate just how much Streamable can enhance video sharing and management. Here’s a quick recap of how you can really get the most out of it:
- Embrace Simplicity: Streamable thrives on its simplicity. Don’t overcomplicate things; stick to the basics, and let the platform’s ease of use work for you.
- Utilize Advanced Features: Once you’re comfortable, dive into advanced features like analytics and custom thumbnails. They’re game-changers for tracking performance and enhancing your content’s visual appeal.
- Stay Organized: Make use of tags and categories to keep your content neatly organized. This will not only help you but also make it easier for viewers to find what they’re looking for.
- Regular Updates: Keep your content fresh and relevant by updating your tags, descriptions, and privacy settings regularly.
In my experience, the little things make a big difference. Whether you’re a casual user or a serious content creator, Streamable’s thoughtful design and features can make your video management smoother and more efficient. Take the time to explore and optimize, and you’ll find that Streamable can be an incredibly powerful ally in your video-sharing endeavors.
 admin
admin


