Saving Cricut designs as images is an essential part of using Cricut software effectively. Whether you're a beginner or an experienced user, knowing how to save your work in the right format can save you time and effort when using your designs for various purposes. From uploading to other platforms to sharing designs with others, converting your Cricut designs into images is a simple yet important step. This guide will help you understand why and how to save your Cricut designs as images so you can make the most out of your creative projects.
Understanding Cricut Design Software

Cricut Design Space is the software used to create and edit designs for Cricut cutting machines. It's available on both desktop and mobile devices, allowing users to design and customize a wide range of projects, from vinyl decals to paper crafts and more. The software offers various tools to manipulate shapes, text, and images, enabling you to create personalized designs tailored to your needs.
Key features of Cricut Design Space include:
- Designing from scratch or using ready-made templates.
- Accessing a library of images, fonts, and projects.
- Editing and resizing shapes and images.
- Previewing and adjusting the design for precise cuts.
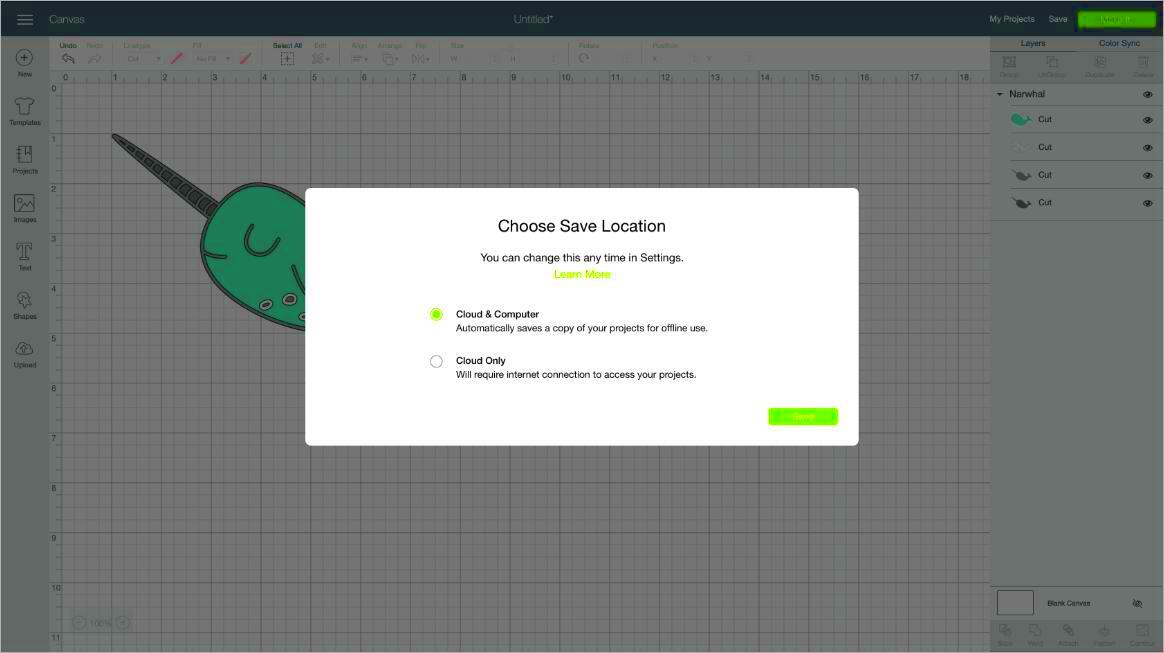
Once your design is complete, you can use the software to save it, but to share or use the design in other applications, you often need to save it as an image. Understanding this process can help you avoid any frustration when it comes time to export or share your designs.
Also Read This: Making an Image a Clickable Link in Webflow
Why Save Cricut Designs as Images

There are several reasons why you might want to save your Cricut designs as images. Here are a few key ones:
- Sharing Designs with Others: If you want to share your Cricut designs with friends, family, or the online crafting community, saving them as images allows you to easily send them via email, social media, or other platforms.
- Use in Other Software: Sometimes, you might need to use your Cricut designs in other design programs, such as Photoshop or Illustrator. Saving your design as an image allows you to import it into those programs for further editing.
- Printing Your Designs: You may want to print your Cricut designs, whether it's for personal use or for selling products. Saving as an image helps you get the best resolution for clear, sharp prints.
- Backing Up Your Work: Saving your Cricut designs as images provides an easy way to back up your work. If you need to reset your software or change devices, you can always retrieve your saved images.
By saving your Cricut designs as images, you give yourself flexibility and convenience for using your creations in many different ways.
Also Read This: how to lock images
Step-by-Step Guide to Saving Cricut Designs as Images
Saving your Cricut designs as images is easy once you know the steps. Follow this simple guide to ensure you save your designs correctly:
- Complete Your Design: Finish your design in Cricut Design Space, making sure all elements are in place, properly sized, and aligned.
- Preview Your Design: Before saving, preview your design to ensure there are no errors. You can use the "Preview" button to see what it will look like when cut or printed.
- Select the Image: Click on the “Select All” button if you have multiple elements in your design. This will ensure everything is captured in the final image.
- Click "Save As Image": In Cricut Design Space, you will find the “Save As Image” option in the File menu. Click it to begin the export process.
- Choose the Image Quality: When prompted, select the quality of your image. Higher quality images are ideal for printing, while lower quality might be sufficient for web use.
- Save the Image: Choose the destination folder on your device where you'd like to store your image file. Select your preferred file format (e.g., PNG, JPG) and click "Save".
Now your Cricut design is ready to be shared, printed, or used in other applications. It’s as simple as that!
Also Read This: How to Change a YouTube Video from Short to Regular Upload
Choosing the Right Image Format for Cricut Designs
When saving your Cricut designs as images, selecting the right format is crucial. The image format affects both the quality and versatility of the design for different uses. Here are the most common formats you can choose from:
| Format | Best For | Pros | Cons |
|---|---|---|---|
| PNG | Web use, transparent backgrounds | Supports transparency, high-quality | Large file size |
| JPG | General use, social media | Smaller file size, good for photos | No transparency support, quality loss on compression |
| SVG | Scalable vector graphics for cutting machines | Can be resized without losing quality | Not suitable for photo-based designs |
Here’s a quick guide to choosing the right format:
- Use PNG for designs with transparent backgrounds or for web use.
- Use JPG for photo-like designs or when file size is a concern.
- Use SVG for designs you plan to cut with Cricut or scale without losing quality.
Choosing the right format helps ensure your Cricut designs are used efficiently in different projects.
Also Read This: How to Download Pictures from Behance
Tips for Optimizing Cricut Design Images
Optimizing your Cricut design images ensures the best possible quality, especially when printing or sharing. Here are some tips to help you get the most out of your saved designs:
- Use High-Resolution Images: Always start with high-resolution images to prevent pixelation, especially for print. Aim for at least 300 DPI for printed designs.
- Avoid Over-Compressing: When saving as JPG or PNG, avoid over-compressing your image, as it can reduce the quality and cause blurry or pixelated results.
- Maintain Proportions: Ensure the image is saved in the correct dimensions. Resizing later can distort your design, especially if you change the resolution or aspect ratio.
- Use Transparent Backgrounds: If your design requires a cut-out effect or layering, save it with a transparent background (PNG format) to make your design look clean and professional.
- Test Before Printing: If you're printing your design, test it by printing a small sample first. This helps you spot any issues with resolution or color accuracy.
- Organize Your Files: Save and name your files systematically. Create folders for different projects, so you can easily locate your designs later.
By optimizing your Cricut design images, you'll ensure they look crisp and professional, whether you're using them for cutting, printing, or sharing online.
Also Read This: Understanding Earnings Potential on Adobe Stock
Common Issues When Saving Cricut Designs as Images
While saving Cricut designs as images is usually a straightforward process, there are a few common issues you might encounter. Let’s go over these challenges and how to handle them:
- Image Resolution Problems: One of the most common issues is low resolution. If your design is saved at a low resolution, it may appear pixelated or blurry when printed or used on larger screens. Always aim for a high DPI (dots per inch) of at least 300 when saving your image.
- Transparency Issues: Sometimes, you may try to save a design with a transparent background, only to find it saved with a white or solid-colored background instead. Make sure you're using the PNG format, which supports transparency, and double-check the export settings.
- Incorrect File Format: Another common mistake is saving your design in the wrong file format for your intended use. For instance, saving a complex design as a JPG might result in quality loss or lack of transparency. Choose the appropriate file type, such as PNG or SVG, depending on your needs.
- Large File Sizes: If your design includes a lot of intricate details or high-resolution elements, the file size may become too large. This can make the file difficult to upload or share. In this case, you can try reducing the resolution slightly or using compression tools to shrink the file size.
- Designs Not Saving Properly: Occasionally, Cricut Design Space might glitch or fail to save your design as an image. If this happens, try restarting the software or clearing your cache. Also, ensure that your internet connection is stable if you're working with the online version of Cricut Design Space.
By being aware of these issues and how to solve them, you can ensure that your Cricut designs are saved properly every time.
Also Read This: How to Incorporate PDF Files into Your Behance Portfolio
Frequently Asked Questions
Here are some of the most common questions people have about saving Cricut designs as images:
- Can I save Cricut designs as SVG files? Yes, Cricut allows you to save your designs as SVG files, which are perfect for cutting machines and can be resized without losing quality. This is especially useful if you plan to use your design with other software or tools.
- What’s the difference between JPG and PNG formats? The main difference is that PNG supports transparency, while JPG does not. If you need a design with a transparent background, PNG is your best choice. However, JPGs are smaller in file size and are suitable for images without transparency.
- How do I fix a low-quality design? If your design is blurry or pixelated, try to start with a higher resolution image or adjust the quality settings when saving. Ensure you use at least 300 DPI for print quality, or use a vector format like SVG for scalable designs.
- Can I use Cricut designs on other software? Yes, you can export your Cricut designs as PNG or JPG images and use them in other graphic design software, such as Adobe Photoshop, Illustrator, or Canva. If you need to preserve layers or scaling, use the SVG format.
- How do I save a Cricut design with a transparent background? To save with transparency, select the PNG format when exporting your design. Make sure that the background is not filled with a color in Cricut Design Space before saving it as a PNG.
If you have other questions, don't hesitate to consult the Cricut support forums or explore the detailed help sections available within Cricut Design Space.
Conclusion: Final Thoughts on Saving Cricut Designs
Saving Cricut designs as images is an essential skill for any Cricut user. Whether you're preparing to print, share online, or use your designs in other software, understanding how to properly save your work will save you time and frustration in the long run. By choosing the right file format, optimizing image quality, and avoiding common issues, you’ll be able to create professional-quality designs that are ready for any project.
Remember to always check the resolution, use the correct file type for your needs, and take extra care when handling transparency and file sizes. Once you get the hang of saving your Cricut designs as images, it will become second nature, and you’ll be able to make the most out of every creative project.
Happy crafting!

 admin
admin


