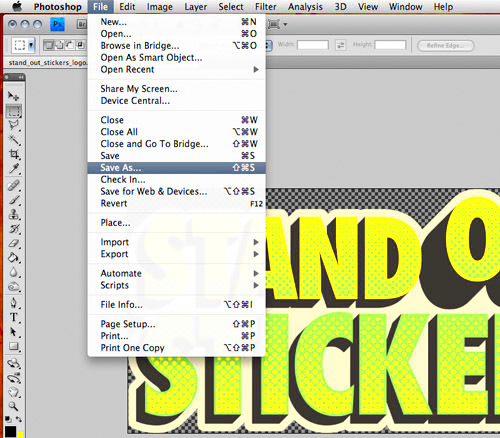
If you’ve ever used stickers in your digital projects or social media posts, you know how fun and creative they can be. Saving a sticker as an image allows you to reuse it in different places or add it to other designs. Whether you want to keep a favorite sticker for later use or need it for a project, knowing how to save it as an image is a useful skill. With tools like PNGEgg, you can easily save stickers in high quality and make them a permanent part of your
Why You May Want to Save Stickers as Images

There are several reasons why saving stickers as images might be useful for you. Let’s explore a few:
- Reusability: Saving stickers allows you to reuse them across different projects, such as graphic design, presentations, or social media posts.
- Customization: After saving a sticker, you can edit it, resize it, or add text or effects to match your needs.
- Offline Access: By saving stickers, you won’t always need an internet connection to use them, making them easily accessible anytime.
- Better Quality: Saving stickers as images ensures you have high-quality versions of your favorites, which is essential for professional designs or print materials.
With these reasons in mind, knowing how to save stickers is a helpful tool for anyone working with digital media, from hobbyists to professionals.
Also Read This: Managing Multiple YouTube Channels Under One Email
Steps to Save a Sticker as an Image Using PNGEgg
PNGEgg offers a simple way to save stickers as images. Follow these easy steps:
- Step 1: Open your browser and go to the PNGEgg website.
- Step 2: Browse through the sticker library and find the one you want to save.
- Step 3: Once you find the sticker, click on it to open the download page.
- Step 4: Look for the download button on the page. It’s usually located below or beside the sticker image.
- Step 5: Click the download button. The sticker will be saved as an image file (PNG format) to your device.
- Step 6: Check your downloads folder or the location you saved the file to confirm the sticker is saved as an image.
Once saved, you can access your sticker anytime and use it for your designs, posts, or any creative project.
Also Read This: Making Money from Getty Images Images: Exploring Revenue Opportunities
Choosing the Right Format for Saving Stickers
When saving stickers, choosing the right format is crucial to maintain the quality and usability of the image. Different formats offer distinct advantages depending on how you plan to use the sticker. Here’s a breakdown of the most common formats:
| Format | Best For | Pros | Cons |
|---|---|---|---|
| PNG | High-quality designs with transparency | Supports transparency, lossless compression, high-quality images | Larger file sizes |
| JPEG | General use where file size is important | Smaller file sizes, good for web use | Does not support transparency, loss of quality with compression |
| GIF | Animated stickers | Supports animation, small file sizes | Limited to 256 colors, lower image quality |
PNG is the most recommended format for stickers, especially if you need transparency or high-quality images. However, if you need smaller file sizes for web use or social media, a JPEG might be more suitable. For animated stickers, GIF is your best choice. Always consider the intended use of the sticker to choose the appropriate format.
Also Read This: how to end my adobe stock contributor account
How to Edit Stickers After Saving Them
Once you have saved your sticker as an image, you might want to edit it to better fit your project. Here are some common ways you can customize your sticker after saving it:
- Resizing: If you need to make the sticker smaller or larger, use an image editing tool like Photoshop, GIMP, or even online editors like Canva.
- Adding Text: To make your sticker more personalized, you can add text using any photo editing app. This is great for creating memes or adding a message to your sticker.
- Changing Colors: You can adjust the color balance or add filters to change the sticker’s appearance. Use tools like Adobe Photoshop or even mobile apps like PicsArt for this.
- Removing Background: If your sticker has a background that you don’t need, you can remove it with tools like remove.bg or Photoshop’s Magic Eraser tool.
Editing stickers gives you full control over how they look and allows you to integrate them seamlessly into your designs. Whether you’re adjusting the size or adding creative effects, the possibilities are endless!
Also Read This: Discover How to Generate AI Images for Free with This Simple Tool
Common Issues and How to Fix Them
While saving and using stickers is generally simple, you might encounter a few common issues along the way. Here are some potential problems and how to solve them:
- Sticker Doesn't Download: If the sticker fails to download, ensure that your internet connection is stable and try refreshing the page. If that doesn't work, check for browser issues or try using a different browser.
- Low-Quality Image: If the sticker appears pixelated after saving, it's likely that the original sticker was low resolution. Try to find a higher-quality version or consider resizing it with an editing tool to reduce the blur.
- File Format Issues: Sometimes, the saved sticker might not open correctly on certain platforms or apps. Make sure you save the sticker in a format that's compatible with your desired software, such as PNG for high-quality images with transparency.
- Background Not Transparent: If you’re using a PNG file but the background is still visible, the sticker might not have been created with transparency. In this case, you can manually remove the background using a tool like remove.bg.
Most of these issues can be easily solved by double-checking your download process, ensuring compatibility, or using the right tools for editing. Don’t hesitate to explore other resources or guides to improve your sticker-saving experience.
Also Read This: Adding Images in Blender for Creative Projects
Best Practices for Using Saved Stickers in Projects
Once you have saved your stickers, it’s essential to use them effectively in your projects. Whether you're working on digital designs, social media content, or presentations, following best practices can make a big difference. Here are some tips to ensure your stickers shine in your projects:
- Use Appropriate Sizes: Always resize your stickers to fit your design without compromising the quality. Avoid stretching stickers too much as it can make them blurry or pixelated.
- Maintain Consistency: When using multiple stickers, ensure they follow a consistent theme or style. This creates a cohesive look in your project.
- Layering for Impact: Experiment with layering your stickers on top of backgrounds or other elements. This adds depth to your design and can make the sticker stand out more.
- Combine with Other Graphics: Stickers work well when combined with other visual elements like icons, text, or photos. Create a balanced composition to avoid cluttering the design.
- Respect Copyright: If you're using stickers in commercial projects, ensure that you have the right to use them. Some stickers may have copyright restrictions, so check the licensing terms before including them in your work.
By following these best practices, you can ensure that your stickers add value and creativity to your projects, whether they’re for personal use or professional work.
Also Read This: Removing Backgrounds From Images on Mac
Conclusion
Saving stickers as images is a simple yet powerful way to enhance your digital projects. By understanding the right formats to save them in, how to edit them, and the best practices for using them, you can maximize their potential in your designs. Stickers can help you express creativity, add fun elements to your visuals, and make your content stand out. Whether you're designing for social media, presentations, or personal projects, knowing how to save and use stickers will give your work a unique touch.
FAQ
- What format should I save my stickers in?
The most recommended format for stickers is PNG, as it supports transparency and maintains high-quality images. However, if you're working with animated stickers, GIF is the best choice.
- Can I edit stickers after saving them?
Yes! Once you've saved your sticker, you can resize, add text, change colors, or remove the background using various image editing tools like Photoshop or online editors.
- Why are my stickers blurry after saving them?
Blurry stickers often result from saving low-resolution images. Try to find higher-quality versions of the stickers or ensure you're saving them in the right format and size.
- How can I remove the background from a sticker?
If the sticker has an unwanted background, you can use tools like remove.bg or Photoshop's Magic Eraser tool to make the background transparent.
- Can I use saved stickers for commercial projects?
It depends on the sticker’s copyright and licensing terms. Always check if the sticker is free for commercial use, or if you need to purchase a license to use it.

 admin
admin


