Reversing an image in PowerPoint might seem like a simple task, but it can make a huge difference to the overall look of your presentation. Whether you want to create symmetry, flip an image for better alignment, or simply achieve a different visual perspective, reversing images in PowerPoint is a great way to add variety to your slides. In this section, we'll briefly cover why reversing images is useful and how it can enhance your design process.
Steps to Reverse an Image in PowerPoint

Reversing an image in PowerPoint is quick and easy. Follow these steps to flip your images horizontally or vertically:
- Select the image: Click on the image you want to reverse. This will activate the image editing options in PowerPoint.
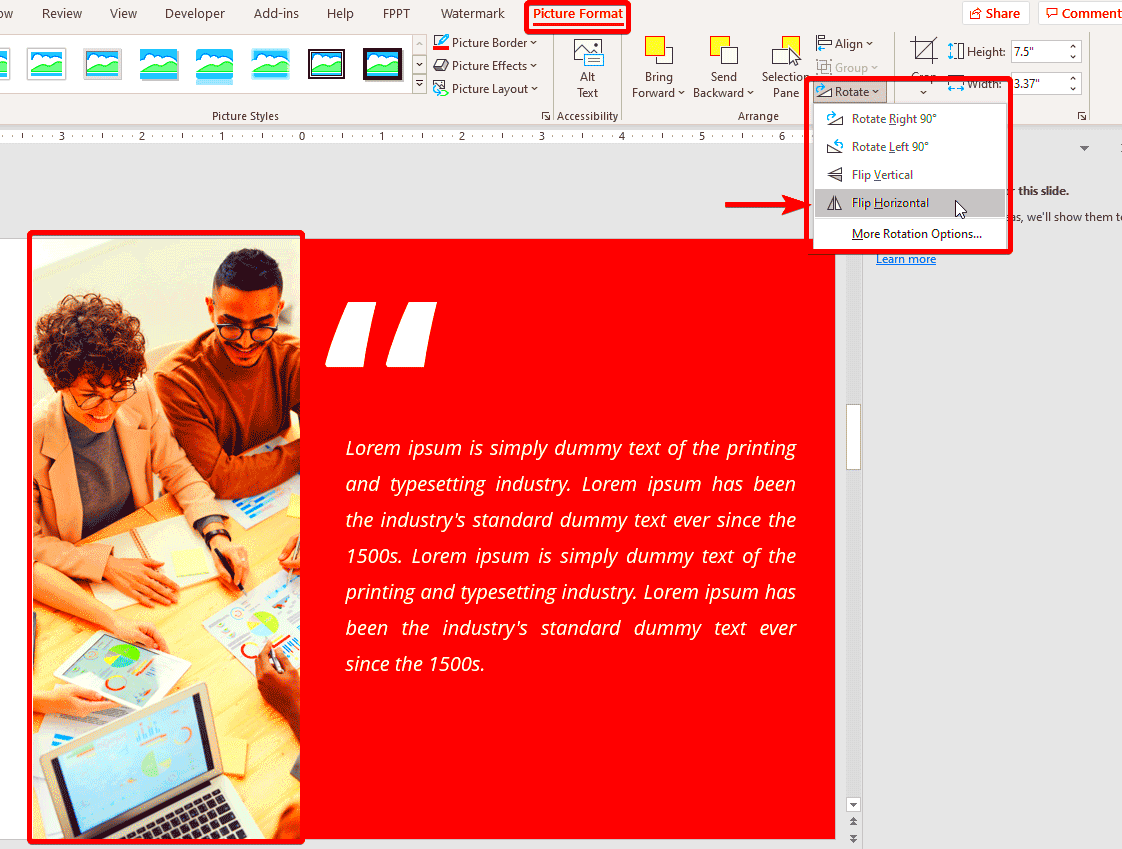
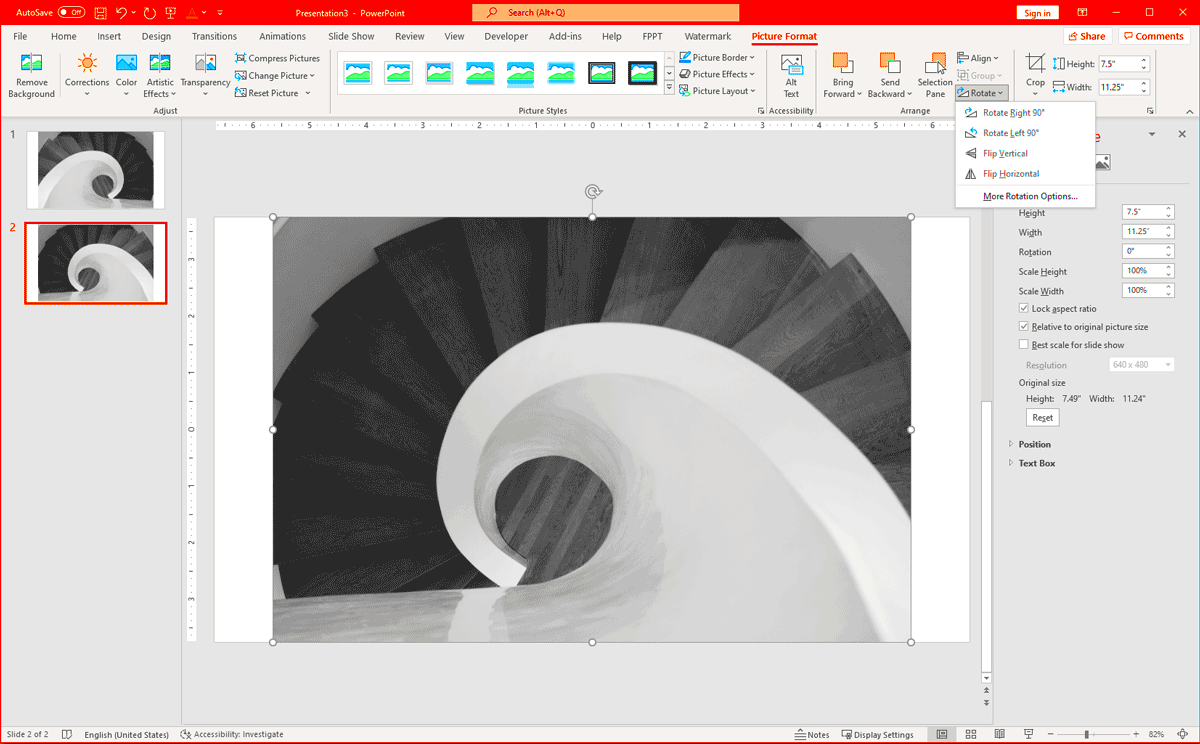
- Open the Format tab: Once the image is selected, navigate to the 'Picture Format' tab at the top of the screen.
- Find the Rotate option: Look for the 'Rotate' button in the 'Arrange' group. Click on it to open a dropdown menu.
- Choose the flip option: In the dropdown menu, you'll see options to 'Flip Horizontal' or 'Flip Vertical'. Select the one that best fits your needs.
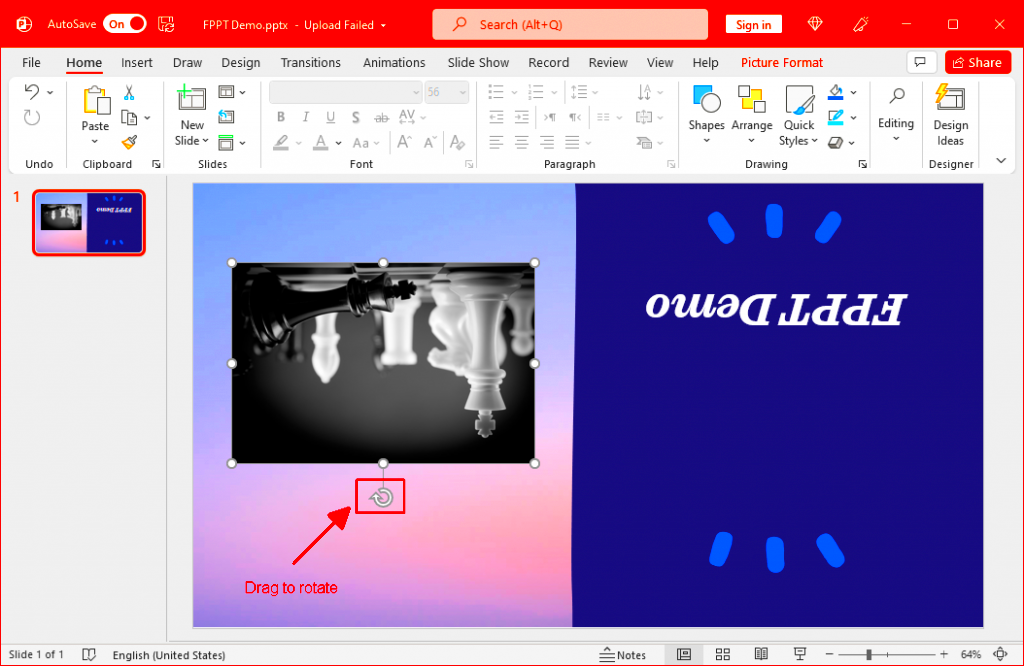
- Adjust the positioning: After flipping the image, you might need to reposition it to fit your slide layout. Simply drag the image to your desired position.
These steps are all you need to reverse an image in PowerPoint. The process works seamlessly, and the results can completely transform the visual impact of your presentation. Play around with different flip options to see how they affect the overall design.
Also Read This: Complete Guide to Posting Pictures on LinkedIn
Why Reversing an Image Can Be Useful in Presentations

Reversing images can be a powerful tool in your presentation design. Here are some reasons why this feature is valuable:
- Creating Symmetry: Flipping images horizontally can help you create a symmetrical design. This is especially useful for layouts that need a balanced and clean look.
- Improving Alignment: Sometimes, images need to be flipped to align better with text or other elements on the slide. This ensures a more cohesive and visually appealing layout.
- Reflecting Perspective: Reversing an image can alter the perspective of your slide. This can be useful when you want to convey a change in viewpoint or present the same subject matter from a different angle.
- Enhancing Visual Interest: Flipping an image can add a new visual element to your slide, making it stand out. This can be especially useful for creating a dynamic and engaging presentation.
In short, reversing images isn’t just a trick—it’s a way to improve your slides and make your content more engaging. By using this tool, you can improve the overall flow and design of your presentation while also maintaining a polished, professional look.
Also Read This: How to Remove the Getty Images Watermark with a Step-by-Step Guide
Common Mistakes to Avoid While Reversing Images

Reversing an image in PowerPoint is straightforward, but it's easy to make mistakes if you're not careful. To help you avoid errors, here are some common pitfalls people face when flipping images in PowerPoint:
- Distorting Image Proportions: Flipping an image doesn't change its aspect ratio, but resizing it after the flip might. Always make sure to maintain the correct proportions to avoid a stretched or squished image.
- Ignoring Image Alignment: After flipping an image, it’s easy to forget about alignment. Check to make sure your flipped image aligns with the rest of the content on the slide, such as text or other visuals.
- Overflipping: Sometimes, when experimenting with flip options, you might end up flipping an image multiple times. Make sure to keep track of how many times you've flipped an image, as this can lead to confusion and unnecessary design clutter.
- Not Reviewing the Flip in Context: Always view the flipped image in the context of your entire slide. It’s easy to miss how the new image will look in combination with other elements or text.
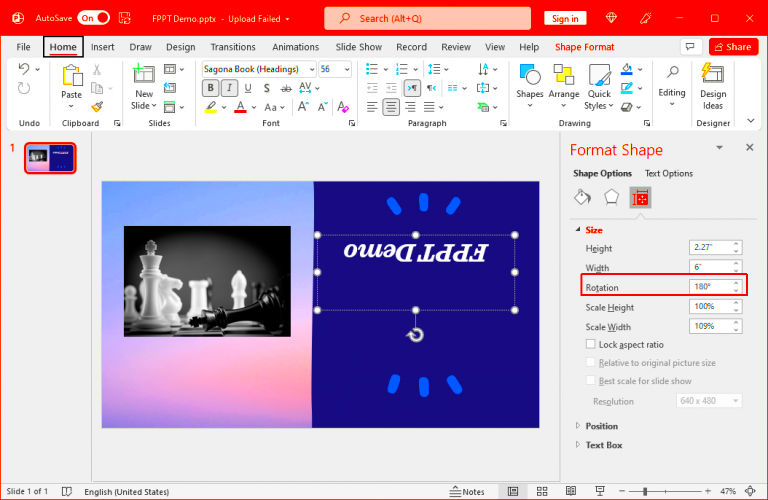
- Forgetting to Adjust the Image’s Orientation: If you're using the vertical flip option, ensure that the content (such as text or logos) doesn’t become upside down unless that's the effect you want.
By being mindful of these common mistakes, you’ll be able to reverse images without affecting your slide’s overall look or design quality. It’s always a good idea to double-check the alignment, proportions, and context before finalizing your work.
Also Read This: Adding a Transparent Image in Google Slides
How to Adjust Image Quality After Reversing
Flipping an image can sometimes impact its quality. If you notice any blurriness or pixelation after reversing an image, there are a few steps you can take to maintain the best possible quality in your PowerPoint presentation:
- Use High-Resolution Images: Always start with a high-quality, high-resolution image. The clearer the original image, the better it will look after any edits or reversals.
- Keep Image Size Consistent: Avoid resizing the image too much after flipping. Resizing can lead to a loss of detail and cause the image to look blurry. Keep the image size proportional and make minor adjustments if needed.
- Use PowerPoint’s Built-In Compression Tools: PowerPoint offers tools that can help maintain the image’s quality. In the 'Picture Format' tab, there’s an option to compress images—choose a higher resolution setting to keep details intact.
- Adjust the Brightness and Contrast: After flipping, you might notice changes in the brightness or contrast. Use PowerPoint’s 'Picture Tools' to fine-tune the brightness, contrast, and sharpness, helping restore any lost detail.
- Check for Distortion: Sometimes, flipping an image may introduce some minor distortion. Use the 'Crop' and 'Resize' options to fix any issues with the image’s appearance, ensuring that the image looks clear and professional.
By following these steps, you can ensure that your image remains sharp, clear, and high-quality even after flipping it. High-resolution images combined with careful adjustments will make your presentation stand out in a professional way.
Also Read This: Mirroring an Image on a Mac
Using Advanced Features for Reversing Images in PowerPoint
PowerPoint has some advanced features that can give you more control over how you reverse and manipulate images. If you're looking to take your image editing skills to the next level, here are some features you can explore:
- Image Effects: PowerPoint offers a variety of image effects under the 'Picture Format' tab. You can combine these effects with image reversals for added visual appeal, such as adding a reflection or shadow that complements the flipped image.
- Freeform Cropping: After reversing an image, you can use the 'Crop' tool to adjust its shape. This allows you to focus on the most important part of the image or create a custom design that fits your layout.
- Picture Styles: PowerPoint includes built-in 'Picture Styles' that apply borders, shadows, and 3D effects. These can enhance the visual impact of a reversed image, making it look more polished and professional.
- Picture Corrections: Under 'Picture Tools', you can fine-tune the color, brightness, contrast, and sharpness of your reversed image. This is especially useful when the flip causes any noticeable shifts in color or clarity.
- Grouping Multiple Images: If you are working with more than one image, you can group them together for easier manipulation. This allows you to reverse, resize, or rotate multiple images simultaneously, saving time and effort.
These advanced tools can help you achieve more precise control over your images and ensure that your PowerPoint presentations look even more dynamic and professional. Experimenting with these features can give your slides that extra edge, creating visually stunning designs.
Also Read This: Imago Images for Event Planners Showcasing Stunning Themes
Frequently Asked Questions (FAQs)
Reversing images in PowerPoint is a useful skill, but you may have some questions about the process. Here are some frequently asked questions to clear up any confusion:
- Can I reverse multiple images at once in PowerPoint?
Unfortunately, PowerPoint doesn't offer a way to flip multiple images simultaneously. You will need to flip each image individually. However, you can group images together after flipping them to make adjustments as a unit. - Will reversing an image affect its quality?
Reversing an image itself doesn’t directly affect the quality. However, if you resize the image too much after flipping it, you might notice a drop in quality. Always use high-resolution images and avoid excessive resizing. - What is the difference between flipping an image horizontally and vertically?
Flipping an image horizontally mirrors it along the vertical axis, so it appears as a reflection of the original. On the other hand, flipping vertically mirrors it along the horizontal axis, which can create a top-to-bottom reflection. - Can I reverse an image with text in PowerPoint?
Yes, you can flip images that contain text. However, be cautious—flipping text may make it unreadable if it appears upside down or distorted. For best results, consider adjusting the image's position or layout to maintain legibility. - How do I maintain the alignment of my flipped image?
After reversing an image, make sure to recheck its alignment with other elements on the slide. Use PowerPoint's alignment tools to ensure the image is positioned correctly within the layout, maintaining a balanced design.
Conclusion: Reversing Images to Enhance Your PowerPoint Presentations
Reversing images in PowerPoint is a simple yet powerful tool to enhance your presentation design. Whether you're aiming for symmetry, improving alignment, or adding a creative touch, flipping an image can make a noticeable difference. By following the correct steps and avoiding common mistakes, you can effectively use this feature to create more dynamic and visually engaging presentations. Experiment with different effects and adjustments to maximize the impact of your slides and give your content a professional edge.

 admin
admin


