Vector graphics have become a vital part of digital design, offering unparalleled flexibility and precision. Unlike raster images, which are made up of pixels, vector graphics are created using mathematical equations to define shapes, colors, and lines. This means that no matter how much you resize a vector image, it will maintain its sharpness and clarity. Think of vector graphics as the ultimate tool for designers who want their work to look pristine, whether it’s on a business card or a massive billboard.
VectorStock, a popular platform for sourcing such graphics, provides a plethora of vector images that can be easily customized and resized. This is particularly beneficial for businesses and individuals who require graphics that can adapt to various formats and dimensions without losing quality. So, let’s dive deeper into the world of vector graphics and explore why they are the go-to choice for many design projects.
Understanding Resolution and Quality
When we talk about graphic design, resolution and quality are critical factors that can make or break a project. Understanding these concepts is especially important when working with vector graphics. Here’s a closer look:
- Resolution: This refers to the amount of detail an image holds. In the context of vector graphics, resolution isn't a concern like it is with raster images. Because vector images are based on mathematical formulas, they can be scaled to any size without losing quality, making them resolution-independent.
- Quality: The quality of a vector graphic is determined by its design elements. A high-quality vector graphic will have clean lines, balanced colors, and smooth curves. The better the vector is designed, the more professional and polished it will appear, regardless of size.
Here’s a simple comparison of vector and raster images to illustrate the differences:
| Aspect | Vector Graphics | Raster Graphics |
|---|---|---|
| Scalability | Infinite without loss | Limited; pixelation occurs |
| File Size | Larger, especially at high resolutions | |
| Editability | Highly editable | Less editable without quality loss |
In summary, understanding resolution and quality is crucial for any designer. By choosing vector graphics, you ensure that your designs will always look their best, no matter the size or application.
Also Read This: How VectorStock Simplifies Design Projects for Professionals
Best Practices for Resizing Vector Graphics

Resizing vector graphics can be a breeze, but there are a few best practices you should keep in mind to ensure you maintain the quality and integrity of your designs. Here are some key tips:
- Start with the Right File Format: Always use formats like SVG, AI, or EPS when working with vector graphics. These formats inherently support scalability without losing quality.
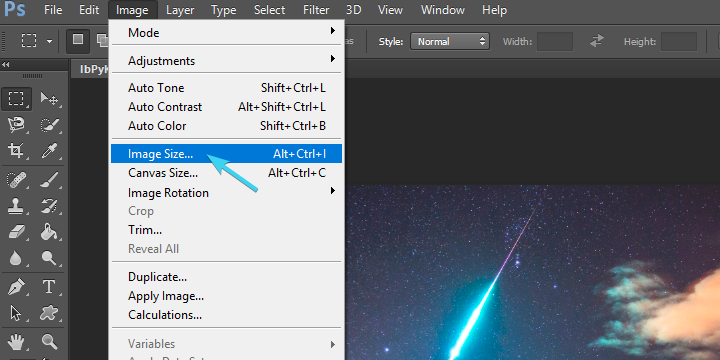
- Use Vector Editing Software: Programs like Adobe Illustrator or Inkscape are designed for vectors. They provide tools that help manage shapes, paths, and layers, making resizing much more effective.
- Maintain Aspect Ratio: To avoid distortion, always hold down the Shift key (or choose the appropriate option) when resizing. This ensures that the height and width change proportionally.
- Check for Overlapping Paths: Before resizing, inspect your graphic for any overlapping paths. It’s crucial to resolve these issues to avoid complications afterward.
- Preview Before Finalizing: Always preview your resized graphic at different scales. This will help you spot any areas that may not look right and need adjustments.
By following these best practices, you can ensure that your vector graphics remain sharp and professional, no matter how large or small you need them to be.
Also Read This: Why VectorStock Is a Go-To for Back-to-School Graphics and Posters
Tools and Software for Resizing
When it comes to resizing vector graphics, having the right tools at your disposal can make all the difference. Here’s a rundown of some of the best software options:
| Tool/Software | Key Features | Best For |
|---|---|---|
| Adobe Illustrator | Advanced vector editing, powerful resizing tools, extensive file format support | Professional designers and extensive graphic projects |
| Inkscape | Open-source, user-friendly interface, great for beginners | Budget-conscious users and hobbyists |
| CorelDRAW | Robust vector design tools, versatile resizing options, great typography features | Print and web design professionals |
| Gravit Designer | Web-based, easy to use, free version available | Casual users and those needing quick edits |
| Vectr | Simple interface, real-time collaboration, free with basic features | Teams working on collaborative projects |
Each of these tools offers unique strengths, so consider your specific needs and skill level when choosing the right one for resizing your vector graphics!
Also Read This: How VectorStock Can Inspire Your Next Big Design Breakthrough
5. Common Mistakes to Avoid
When working with VectorStock graphics, it’s easy to make a few missteps that could affect the quality of your designs. Here are some common mistakes to watch out for:
- Ignoring the Original Format: Always start with the original vector file (like .AI or .EPS). Converting to raster formats (like .JPEG or .PNG) before resizing can lead to quality loss.
- Overlooking Scaling Proportions: Resizing without maintaining the aspect ratio can distort your graphics. Always hold down the Shift key (or use the lock aspect ratio option) while resizing.
- Neglecting Preview Options: Many design tools offer preview modes. Not using these can lead to surprises once you export your graphic, as your design might look different than expected.
- Forgetting to Clean Up Artwork: Before resizing, take the time to clean up your vector file. Remove unnecessary layers or elements to avoid complications during the resizing process.
- Using Inappropriate Software: Not all software handles vector graphics equally. Make sure you’re using a program that supports vector resizing properly, like Adobe Illustrator or Inkscape.
By avoiding these pitfalls, you’ll ensure that your VectorStock graphics maintain their sharpness and clarity, no matter how much you resize them.
6. Conclusion and Final Tips
Resizing VectorStock graphics can be a breeze if you follow the right steps and avoid common mistakes. Remember, the beauty of vector graphics lies in their scalability, allowing you to adapt them for various uses without sacrificing quality. Here are some final tips to keep in mind:
- Always Work with Vectors: Stick to vector formats for any resizing tasks. This ensures you maintain the integrity of the graphic.
- Save Multiple Versions: When resizing, create and save different versions of your artwork. This way, you can revisit earlier iterations if needed.
- Utilize Layers Wisely: Organize your artwork into layers. This makes it easier to manage complex graphics and helps in resizing specific elements without affecting the entire image.
- Experiment with Different Sizes: Don’t hesitate to try out various dimensions. Sometimes, a size that seems odd can turn out to be the perfect fit.
- Seek Feedback: Getting a second set of eyes on your designs can provide valuable insights and help you catch any overlooked issues.
By incorporating these tips into your workflow, you’ll be better equipped to create stunning, high-quality designs that shine, no matter the size!
 admin
admin


