Image resizing is a crucial aspect of photo editing, especially for those who work with digital
images regularly. In Lightroom, resizing
images means adjusting their dimensions or file size without compromising quality.
Benefits of Resizing Images for Your Projects

Resizing
images comes with numerous benefits that can significantly impact your projects:
- Improved Loading Times: Smaller images load faster, enhancing user experience on websites.
- Space Management: Reducing file sizes saves storage space on your devices and hosting services.
- Better Printing Quality: Properly resized images ensure high-quality prints without pixelation.
- Optimized for Social Media: Different platforms have specific image size requirements, and resizing helps you meet these standards.
- Consistency: Resizing ensures uniform dimensions across multiple images, providing a cohesive look to your project.
How to Resize Images in Lightroom Step by Step

Resizing
images in Lightroom is straightforward. Follow these steps to resize your
images effectively:
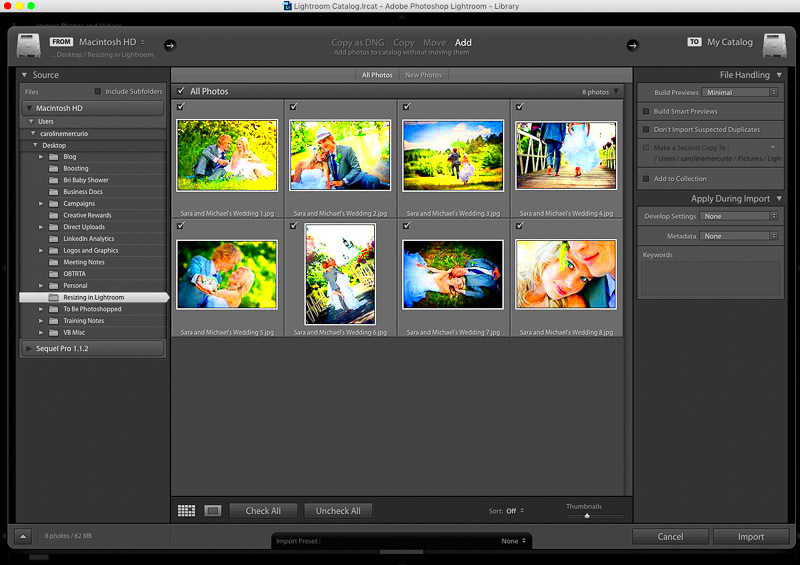
- Import Your Images: Start by importing the images you want to resize into Lightroom.
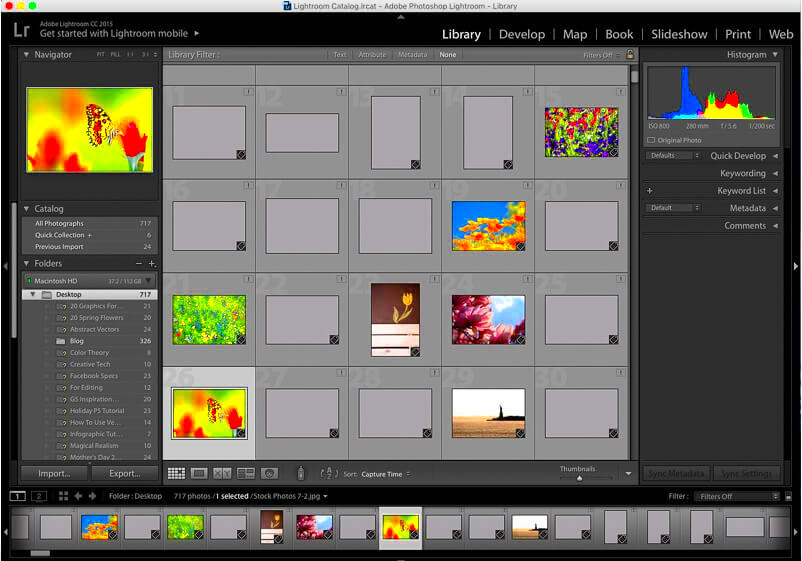
- Select the Image: Click on the image you wish to resize in the Library module.
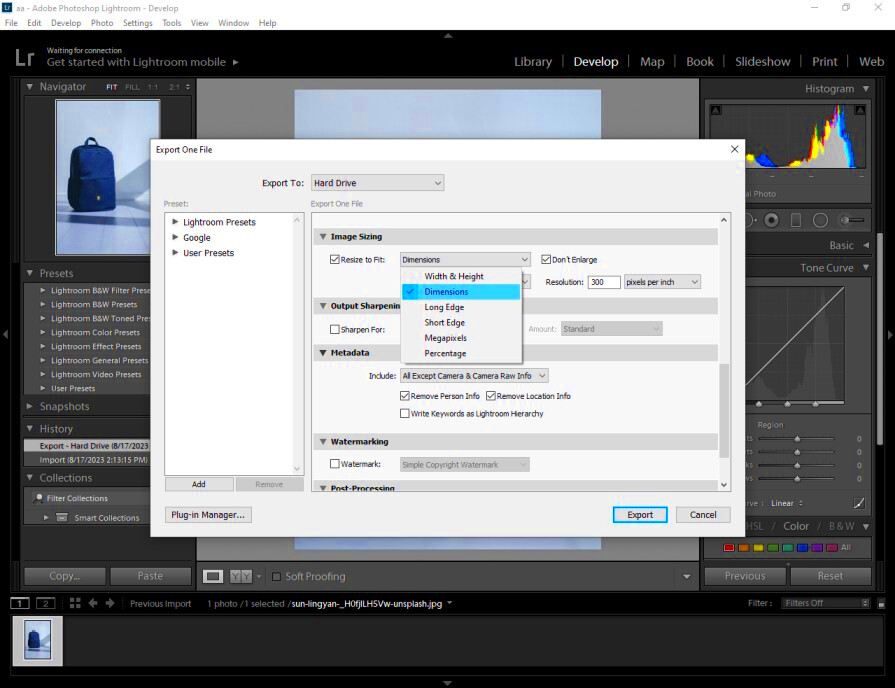
- Go to the Export Dialog: Click on 'File' in the menu, then select 'Export.' This opens the export dialog.
- Adjust Image Sizing Settings:
- Check the box for 'Resize to Fit.'
- Select your desired dimensions, such as 'Long Edge' or 'Short Edge.'
- Set the resolution, typically 72 PPI for web use or 300 PPI for print.
- Choose File Format: Select the appropriate file format, like JPEG or TIFF, based on your needs.
- Export Your Image: Click the 'Export' button to save your resized image.
Following these steps will ensure your
images are resized correctly while maintaining their quality.
Adjusting Resolution and Dimensions

When resizing
images, understanding resolution and dimensions is vital for achieving the best results. Resolution refers to the amount of detail an image holds, typically measured in pixels per inch (PPI). Dimensions refer to the width and height of an image in pixels. Adjusting these two aspects correctly ensures your
images look great, whether for web use or print.Here’s how to adjust resolution and dimensions in Lightroom:
- Resolution: For web images, a resolution of 72 PPI is often sufficient. For print, aim for 300 PPI to ensure high quality.
- Dimensions: Specify the width and height based on where you’ll use the image. Common dimensions include:
| Use Case | Recommended Dimensions |
|---|
| Website Banner | 1920 x 600 pixels |
| Social Media Post | 1080 x 1080 pixels |
| Print (Photo) | 2400 x 3000 pixels |
By adjusting both resolution and dimensions, you can ensure your images are not only visually appealing but also functional for their intended use.
Maintaining Quality While Resizing Images
One of the biggest challenges when resizing images is maintaining their quality. No one wants pixelated or blurry images! Fortunately, there are several techniques you can use to preserve image quality:
- Use the Right Software: Programs like Lightroom are designed to handle resizing without significant quality loss.
- Keep the Original: Always keep a copy of the original image. This way, you can start over if something goes wrong.
- Avoid Extreme Resizing: Try to avoid enlarging small images significantly. This often leads to pixelation.
- Sharpen After Resizing: Use Lightroom’s sharpening tools after resizing to enhance details.
Following these tips will help you keep your images crisp and clear, no matter how much you resize them.
Common Mistakes to Avoid When Resizing
Even experienced photographers can make mistakes when resizing images. Here are some common pitfalls to avoid:
- Ignoring Aspect Ratio: Resizing images without maintaining the aspect ratio can stretch or squish the image. Always lock the aspect ratio to avoid distortion.
- Not Using the Right Resolution: Using a low resolution for print can result in poor-quality images. Always check the resolution before finalizing your images.
- Over-compressing Images: While reducing file size is important, over-compressing can lead to quality loss. Find a balance between size and quality.
- Forgetting Metadata: When exporting images, ensure that relevant metadata is included, especially for copyright purposes.
Avoiding these mistakes will help you achieve the best results when resizing your images, ensuring they look fantastic wherever they are used.
Tips for Optimizing Resized Images
Optimizing resized images is essential for ensuring they look great and perform well across various platforms. Whether you’re sharing on social media, uploading to a website, or preparing for print, taking the time to optimize can make a significant difference in both quality and loading speed. Here are some effective tips to help you optimize your resized images:
- Choose the Right File Format:
- Use JPEG for photos and images with gradients.
- Use PNG for images with transparency or text.
- Use TIFF for high-quality prints.
- Compress Your Images: Use tools or settings in Lightroom to compress images without losing quality. This reduces file size, which is particularly important for web use.
- Resize Before Uploading: Always resize your images to the appropriate dimensions before uploading. This saves time and storage space.
- Utilize Color Profiles: Embed the correct color profile for your target medium (sRGB for web, Adobe RGB for print) to maintain color accuracy.
- Preview Your Images: Check how your images look on different devices. Sometimes an image that looks great on a computer might not appear the same on a mobile device.
By following these tips, you’ll ensure your resized images are optimized for the best performance and visual appeal.
Frequently Asked Questions
When it comes to resizing images in Lightroom, many people have similar questions. Here are some frequently asked questions to help clear up any confusion:
- Can I resize images without losing quality? Yes, if you use the right techniques and software like Lightroom, you can resize images while maintaining quality.
- What’s the difference between resolution and dimensions? Resolution refers to the detail an image holds (measured in PPI), while dimensions are the width and height in pixels.
- Should I always keep the original file? Absolutely! Keeping the original file allows you to go back if needed.
- Is it okay to enlarge small images? Enlarging small images can lead to pixelation. It’s best to start with high-resolution images for resizing.
- What file format should I use for web images? JPEG is typically the best choice for web images due to its balance of quality and file size.
Conclusion on Resizing Images in Lightroom
Resizing images in Lightroom is an essential skill for anyone involved in photography or digital content creation. By understanding how to adjust resolution and dimensions, maintain quality, and optimize images for various uses, you can significantly enhance the visual appeal of your work. Remember to avoid common mistakes, keep your originals, and follow best practices for file formats and compression.With these tips and insights, you’re now equipped to resize your images effectively and confidently. Whether you’re preparing images for a portfolio, a website, or social media, mastering the art of resizing in Lightroom will take your projects to the next level.
 Resizing images comes with numerous benefits that can significantly impact your projects:
 Resizing images in Lightroom is straightforward. Follow these steps to resize your images effectively:
 When resizing images, understanding resolution and dimensions is vital for achieving the best results. Resolution refers to the amount of detail an image holds, typically measured in pixels per inch (PPI). Dimensions refer to the width and height of an image in pixels. Adjusting these two aspects correctly ensures your images look great, whether for web use or print.Here’s how to adjust resolution and dimensions in Lightroom:
 admin
admin


