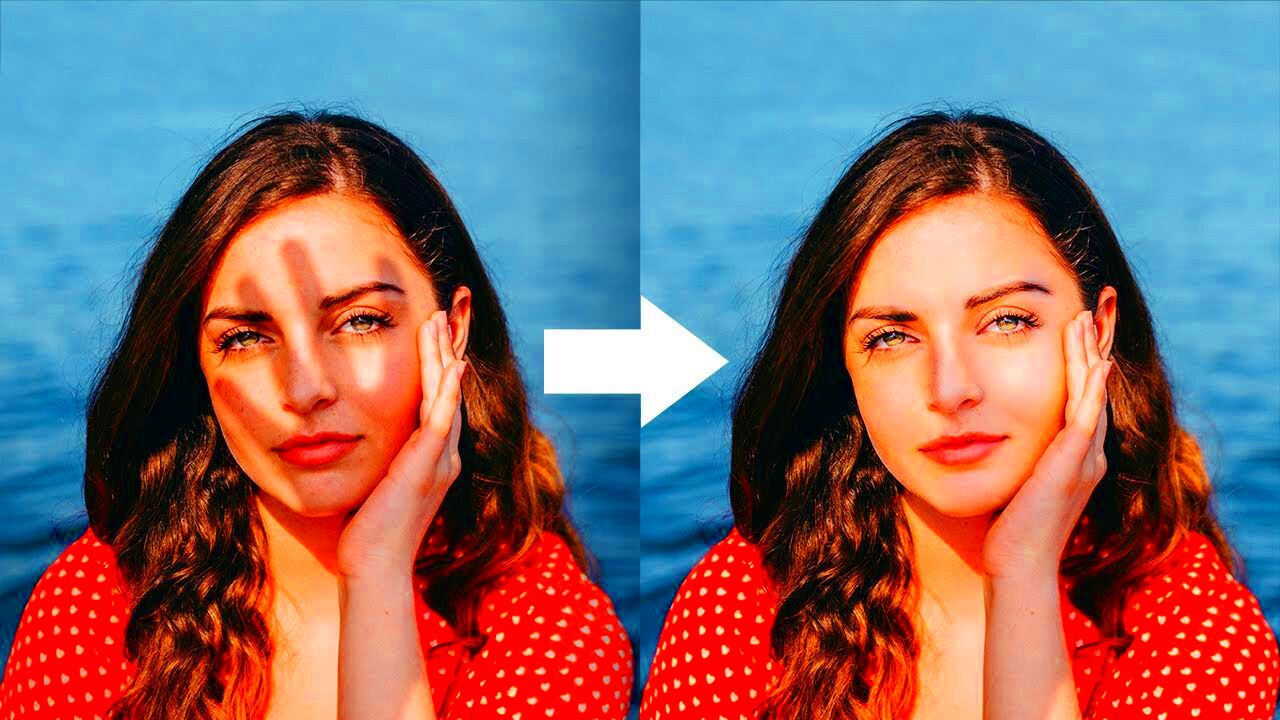
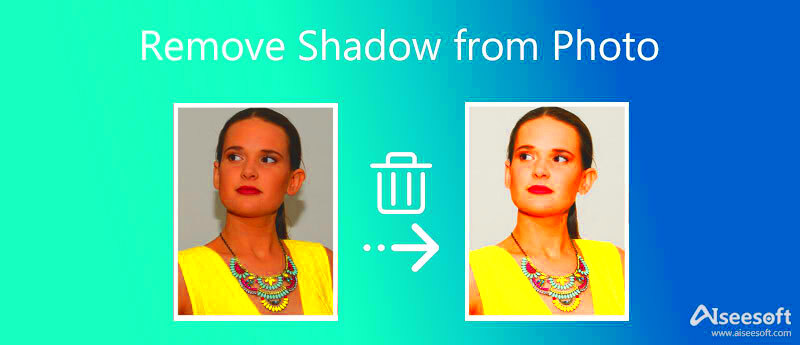
Shadows in images can sometimes be distracting or unwanted, especially when they obscure important details. Whether you're working with product photos, portraits, or landscapes, removing shadows can significantly improve the overall appearance of your image. This process helps make the image cleaner and more professional, allowing the focus to stay on the subject. In this post, we'll explore how to remove shadows effectively using various tools and techniques. You don't need to be an expert to achieve great results, so let’s dive in and learn how you can remove those unwanted shadows with ease.
Understanding the Impact of Shadows on Image Quality

Shadows can have a major effect on the way an image is perceived. They can either add depth and dimension to a scene or take away from the main subject. Here are some ways shadows can impact image quality:
- Distraction: Shadows may divert attention from the key focus of the image, making it harder for the viewer to engage with the subject.
- Distorted Color and Lighting: Harsh shadows can make colors appear uneven and can affect how light and dark areas are represented, causing an imbalance.
- Unwanted Darkness: Sometimes shadows can obscure parts of the image, hiding important details that could have enhanced the composition.
- Unprofessional Appearance: In product photography or portraits, visible shadows can make the image look less polished and less professional.
Understanding these effects helps when deciding whether to remove or adjust shadows in your images for better results. Reducing unwanted shadows can enhance clarity, highlight details, and provide a more appealing, well-lit look.
Also Read This: iMovie Melodies: Putting Music on iMovie from Spotify – Elevate Your Video Projects
Common Methods for Removing Shadows from an Image

There are several methods you can use to remove or reduce shadows from your images. Here are some common techniques:
- Adjusting Brightness and Contrast: Tweaking the brightness can help lighten the shadows, while adjusting contrast can balance the image, making shadows less prominent.
- Using the Clone Tool: The clone tool allows you to sample pixels from a nearby area and paint over the shadowed area. This technique works well for small shadows and detailed areas.
- Content-Aware Fill: Many advanced editing programs have a content-aware fill tool that automatically fills in shadow areas with pixels that match the surrounding area. This is a quick and effective method for removing shadows from larger sections of an image.
- Using Layer Masks: Layer masks can help you isolate shadows and apply adjustments selectively. By using gradients or soft brushes, you can smooth out shadows without affecting the rest of the image.
These methods can be used individually or together, depending on the severity of the shadow and the specific editing software you're using. Experimenting with different approaches will help you find the best solution for your images.
Also Read This: How Often YouTube Views Refresh and Update for Content Creators
Using Editing Software to Remove Shadows
One of the most effective ways to remove shadows from an image is by using editing software. Whether you’re a beginner or an expert, there are tools within popular software like Photoshop, GIMP, or even online editors that allow you to easily remove or minimize shadows. These programs offer various features that can help you adjust lighting, clone out shadows, or use advanced tools like content-aware fill. Here’s how editing software can help:
- Advanced Features: Many editing programs come with advanced features that can help remove shadows, such as layer adjustments, gradient tools, and more.
- Precision Control: With software, you can control exactly where and how much shadow you want to remove, ensuring a more natural look.
- Non-Destructive Editing: Most editing software allows you to work with layers, so you can make adjustments without permanently altering the original image.
- Easy Undo: Made a mistake? With editing software, you can quickly undo any changes and try a different method to remove shadows.
By using these tools, you can refine your images and get rid of unwanted shadows to achieve a professional look. It’s important to explore the editing software of your choice to familiarize yourself with its shadow removal tools and features.
Also Read This: How to Add an Image to Squarespace for Your Website
Adjusting Brightness and Contrast to Minimize Shadows
One of the easiest ways to reduce or remove shadows is by adjusting the brightness and contrast of an image. This method can often bring out hidden details in shadowed areas while keeping the rest of the image intact. Here's how brightness and contrast adjustments can help:
- Brightness: Increasing the brightness helps lighten darker shadow areas. However, be careful not to overdo it, as this can lead to washed-out highlights.
- Contrast: Adjusting contrast allows you to balance the dark and light areas in the image. By reducing contrast slightly, you can soften the harshness of shadows.
- Shadow Slider: Many editing tools offer a "shadow" slider specifically designed to target shadowed areas without affecting the mid-tones or highlights.
To get the best results, make small adjustments and evaluate the changes regularly. While this method is quick and simple, it works best when the shadows aren’t too harsh or deep. Here’s a quick guide:
| Adjustment | Effect |
|---|---|
| Increase Brightness | Lightens dark shadowed areas. |
| Decrease Contrast | Reduces the intensity of shadows. |
Experimenting with brightness and contrast settings will help you reduce shadows and achieve a more balanced and natural look.
Also Read This: Reducing TIFF Image File Size Efficiently
Using the Clone Tool to Remove Shadows Effectively
The clone tool is a popular and effective method for removing shadows, especially in images with small or localized shadows. This tool allows you to paint over the shadow area by sampling pixels from a nearby region that doesn't have a shadow. Here’s how you can use the clone tool to remove shadows:
- Select the Clone Tool: In most photo editing programs, the clone tool is easily accessible. Select it from the toolbar and choose the area from which you want to sample pixels.
- Set Brush Size and Hardness: Adjust the brush size to match the shadow area and make sure the hardness is set to a soft value for smoother blending.
- Sample and Paint: Hold the “Alt” or “Option” key to sample the nearby pixels, then paint over the shadowed area. Be patient, as this process requires careful attention to detail.
- Blend Seamlessly: Use small brush strokes to gradually blend the cloned pixels with the surrounding areas. This will help make the removal look natural.
While the clone tool can be effective, it’s important to use it in moderation. Over-cloning can lead to a patchy or unrealistic look. It’s often best to use the clone tool on smaller shadowed areas and combine it with other methods, like adjusting brightness or contrast, for larger shadow issues.
By mastering the clone tool, you’ll have more control over shadow removal and can achieve precise, clean results that seamlessly blend with the rest of the image.
Also Read This: What Resolution Should You Use for YouTube Shorts Optimizing Your Videos
Additional Tips for Perfecting Image Shadow Removal
While removing shadows can significantly improve your image, there are a few additional tips and techniques you can use to perfect the process. These tips will help you achieve more natural and seamless results, ensuring your image looks polished and professional. Let’s take a look at some ways to enhance your shadow removal skills:
- Use Layer Masks: When working with shadow removal, using a layer mask gives you more control over the areas you adjust. You can mask the shadows and make gradual adjustments, ensuring a smooth transition between shadowed and lit areas.
- Work with Multiple Layers: For complex images, consider duplicating your image layer before editing. This allows you to make adjustments without affecting the original image. If needed, you can always return to the original layer.
- Use Soft Brushes: When using tools like the clone tool or the healing brush, choose soft brushes to blend the shadow removal smoothly into the surrounding areas. Hard edges can create visible patches that are difficult to fix later.
- Consider Lighting: While removing shadows is important, you should also think about the lighting in your image. Sometimes adjusting the overall lighting and shadows in the scene can lead to a more natural and balanced look.
- Zoom In: Zoom in to get a closer look at the details when removing shadows. Working at a zoomed-in view allows for finer control and prevents leaving any visible traces of the editing process.
By incorporating these additional techniques, you’ll be able to refine your shadow removal process and create flawless images with minimal effort.
Also Read This: Finding Image DPI on iPhone Made Easy
FAQ
Q: How do I know if I’ve removed the shadows properly?
A: A good test is to zoom out and look at the image as a whole. The edited areas should blend seamlessly with the rest of the image, without noticeable patches or overly brightened spots. If it looks natural and the subject is clearly visible, you've likely done a great job!
Q: Can I remove shadows from any type of image?
A: Yes, shadows can be removed from most types of images, including portraits, landscapes, and product photos. The process may vary depending on the severity of the shadows and the complexity of the image, but with the right tools and techniques, you can improve almost any image.
Q: Are there any quick fixes for shadows?
A: Yes! Simple adjustments to brightness, contrast, or using the shadow slider in your editing software can often reduce the impact of shadows in just a few clicks. However, for more stubborn shadows, tools like the clone tool or content-aware fill are more effective.
Q: Can removing shadows affect the overall lighting of my image?
A: Yes, removing shadows may impact the overall lighting and tone of your image. It’s important to adjust the brightness and contrast after shadow removal to ensure the image remains balanced and natural-looking.
Conclusion
Removing shadows from images is an essential skill that can dramatically enhance the clarity and appearance of your photos. Whether you’re improving product photos, portraits, or other types of images, learning the best techniques for shadow removal will help you create cleaner, more professional-looking visuals. From using editing software to applying advanced methods like cloning or adjusting brightness, there are plenty of ways to get rid of unwanted shadows. Keep experimenting with different tools and techniques, and with time, you'll achieve perfect results every time. Don’t forget to use the additional tips and make adjustments as needed to ensure your images always look their best.

 admin
admin


