Resizing images in Lightroom is a crucial step for photographers and designers, whether you're preparing images for web use, printing, or simply editing them to fit a specific layout. Lightroom makes it easy to adjust the size of your images without compromising quality. By resizing, you can optimize images for different platforms and purposes. Understanding how to resize effectively will help you improve your workflow and ensure your images look their best.
Why Resizing Images is Important for Editing

Resizing images plays a key role in the editing process for several reasons. When you adjust the size, you’re not just changing the dimensions but also preparing the image for its final use, whether it's online, print, or social media. Here's why resizing matters:
- Improved Performance: Smaller image sizes load faster, making them ideal for websites and online portfolios.
- Better Print Quality: For print purposes, resizing ensures the image resolution is high enough for sharp, clear prints.
- File Size Management: Large image files can slow down your computer or cause uploading issues. Resizing can make the file easier to handle.
- Aspect Ratio Adjustment: Sometimes, resizing is needed to maintain the right aspect ratio for your design or layout.
In short, resizing images is a versatile tool in Lightroom, helping you get the right look and feel for your project while also keeping file sizes manageable.
Also Read This: Crediting 123RF Images: Understanding Attribution Requirements
Understanding the Resizing Process in Lightroom

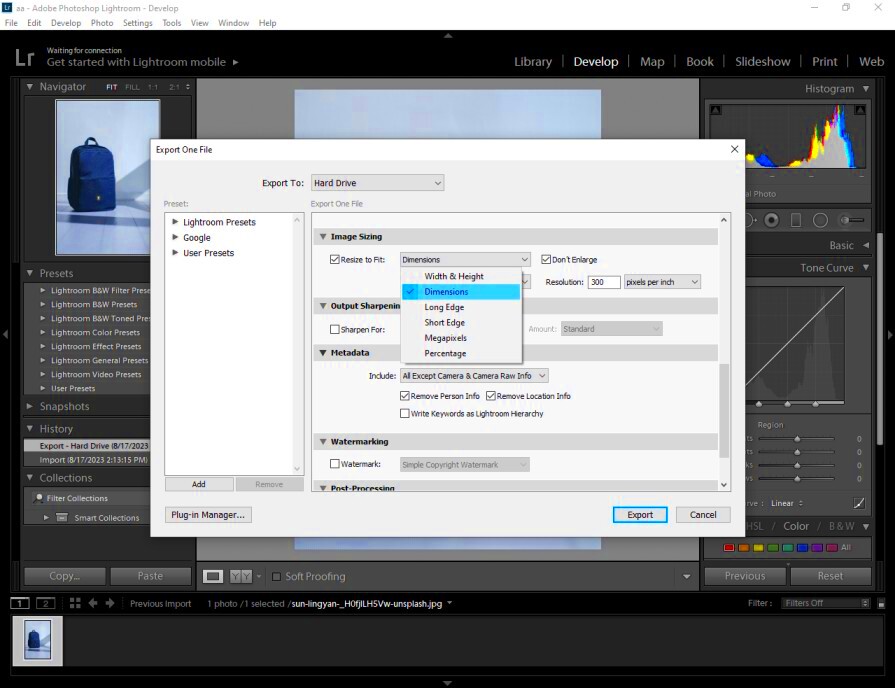
In Lightroom, resizing is done through the Export function, which allows you to change both the image dimensions and resolution. Understanding this process is important to ensure that you’re not losing image quality while resizing.
Here’s a breakdown of how resizing works in Lightroom:
- Resolution: This refers to the pixel density of your image. Increasing the resolution can enhance print quality but may not be necessary for web images.
- Dimensions: This refers to the width and height of the image. You can adjust these by specifying pixel values to make the image fit specific requirements.
- Quality vs. File Size: When resizing, the quality of the image can be affected by the level of compression you apply. Lightroom allows you to adjust the file size without sacrificing too much quality.
The process in Lightroom is simple yet powerful. You can resize images while retaining control over the final output, ensuring the image looks great no matter where it’s displayed.
Also Read This: Locking Images in Google Slides for Secure Presentations
Step-by-Step Guide to Resize an Image in Lightroom

Resizing an image in Lightroom is a simple process, but understanding the steps involved can make the task smoother and more effective. Whether you want to resize for web use or printing, Lightroom gives you full control over the size and resolution. Follow these easy steps to resize an image in Lightroom:
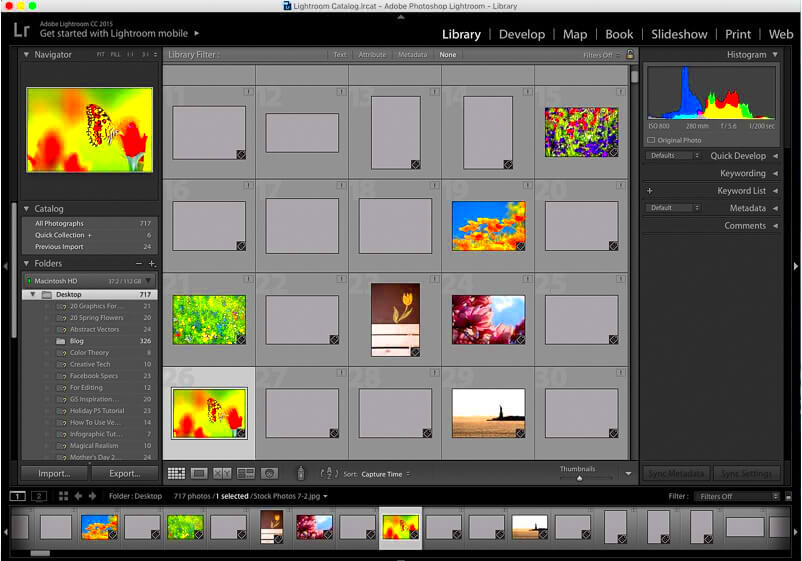
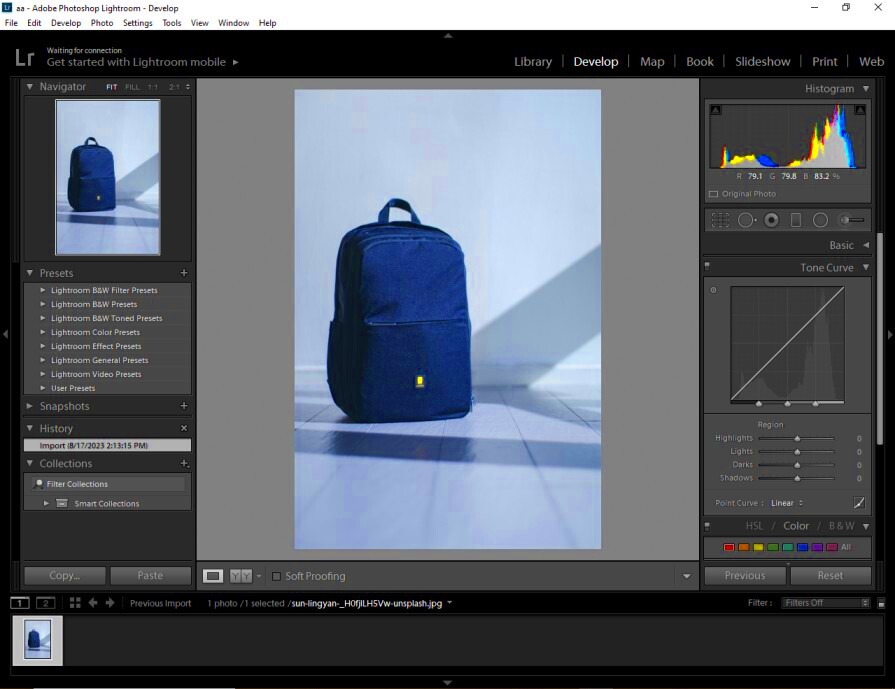
- Step 1: Select the Image - Open Lightroom and navigate to the Library or Develop module. Choose the image you want to resize.
- Step 2: Click on Export - Once your image is selected, click on the "Export" button located at the bottom left of the screen.
- Step 3: Set File Settings - In the Export window, you’ll first need to choose your file format (JPEG, TIFF, PNG, etc.) and quality settings. For web use, JPEG is often preferred due to its smaller file size.
- Step 4: Resize the Image - Under the "Image Sizing" section, tick the "Resize to Fit" box. Here, you can specify either the dimensions or the resolution you want for your image.
- Step 5: Adjust the Resolution - You can set the resolution (measured in pixels per inch, PPI) according to your needs. For print, a resolution of 300 PPI is ideal, while for web images, 72 PPI works well.
- Step 6: Save Your Image - Once all the settings are adjusted, click "Export" to save your resized image.
By following these steps, you can easily resize your images in Lightroom, ensuring they fit your specific requirements for both online and print use.
Also Read This: Here Is Your Step-by-step Handbook on How to Download Facebook Video Thumbnail
Adjusting Image Resolution in Lightroom

Image resolution refers to the number of pixels in an image, and adjusting it is an important step in resizing. The resolution can directly impact how sharp or clear an
- Step 1: After selecting your image, open the Export window.
- Step 2: Under the "Image Sizing" section, you’ll find an option to set the resolution (in PPI - pixels per inch).
- Step 3: For high-quality prints, set the resolution to 300 PPI. For web images, a resolution of 72 PPI is often sufficient, helping to reduce file size without compromising visible quality.
- Step 4: You can also adjust the image size by setting the width and height, but keep in mind that the resolution will affect how sharp the image appears when resized.
- Step 5: Check the "Don’t Enlarge" box to prevent Lightroom from increasing the image size above its original resolution, which can lead to pixelation.
Adjusting resolution is crucial for ensuring your images look their best for their intended use, whether it’s for a high-quality print or optimized for online viewing.
Also Read This: Checking Your Adobe Stock Credit Balance
How to Maintain Image Quality While Resizing
One of the biggest concerns when resizing an image is maintaining its quality. If resized improperly, an image can become pixelated or lose detail. Fortunately, Lightroom offers a few ways to ensure that your resized image retains as much quality as possible. Here are a few tips:
- Use the Correct Resolution: As mentioned earlier, setting the right resolution for your intended output is crucial. For print, 300 PPI is the standard, while 72 PPI works for web images.
- Resize Gradually: If you need to increase the size of an image, do it in small increments rather than a large jump. This can prevent significant loss of detail and sharpness.
- Avoid Excessive Compression: When resizing for the web, make sure you don't apply too much compression, as it can lead to blurry or pixelated images. Lightroom allows you to adjust compression settings to maintain a balance between file size and image quality.
- Sharpen After Resizing: Sometimes, resizing an image can soften the details. Lightroom has built-in sharpening tools under the "Export" window that can help restore some of the sharpness lost during resizing.
- Check Your Image on Different Devices: After resizing, view the image on multiple devices (computer, phone, tablet) to make sure it looks crisp and clear on all of them.
By following these steps, you can ensure that your images retain their visual appeal, even after being resized for different purposes.
Also Read This: how to get the money out of adobe stock
Common Mistakes to Avoid When Resizing in Lightroom
Resizing images in Lightroom is a simple task, but there are a few common mistakes that can negatively impact the quality and performance of your images. Avoiding these errors can help ensure your images look great no matter where you use them. Here are some of the most frequent mistakes to watch out for:
- Not Checking the Resolution: One of the most common mistakes is forgetting to set the right resolution for the image. For print, 300 PPI is ideal, but for web, 72 PPI is typically sufficient. Using the wrong resolution can lead to pixelated or blurry images.
- Resizing Without Maintaining Aspect Ratio: If you resize an image without locking the aspect ratio, it may get stretched or distorted. Always ensure that the aspect ratio is preserved to keep the image proportionate and natural.
- Over-Compressing Images: When resizing images, it’s tempting to use high compression to reduce file size. However, over-compressing can result in a loss of quality, making the image look blurry or pixelated. Find the right balance between quality and size.
- Not Previewing the Resized Image: After resizing, always preview your image to see how it looks at the new size. Sometimes, resizing can soften the details or cause issues that aren't obvious until viewed at full size.
- Resizing an Image That’s Already Low-Resolution: Resizing a low-resolution image to a larger size won’t magically improve its quality. It may only highlight the pixelation and blur. Always try to start with the highest quality image possible.
Avoiding these mistakes will help you get the best results from your image resizing in Lightroom, ensuring your final images maintain clarity and quality.
Also Read This: How to Unblur Patreon Images for Better Quality
FAQ about Resizing Images in Lightroom
Resizing images in Lightroom can sometimes be confusing, especially if you’re new to photo editing. Here are some frequently asked questions to help clarify the process:
- How can I resize an image for web use?
To resize for the web, go to the "Export" window, select the image format (JPEG is recommended), set the resolution to 72 PPI, and adjust the dimensions according to your needs. This will help optimize the file size for faster loading. - Can resizing affect image quality?
Yes, resizing can affect quality, especially if you increase the image size too much. It’s important to use the correct resolution and avoid excessive compression to preserve image quality. - What resolution should I use for printing?
For printing, a resolution of 300 PPI (pixels per inch) is ideal. This ensures the image prints with the sharpness and detail you expect. - How do I avoid pixelation when resizing?
To avoid pixelation, always start with a high-quality image and avoid enlarging it too much. Use Lightroom’s sharpening tools to enhance details if necessary after resizing. - Can I resize an image without losing quality?
While resizing can sometimes reduce quality, using the right settings (like proper resolution and minimal compression) can help you maintain as much quality as possible. Always resize with caution and check the results afterward.
If you follow these tips, resizing images in Lightroom will become a smoother and more predictable process, leaving you with high-quality results.
Conclusion on Resizing Images in Lightroom
Resizing images in Lightroom is a powerful tool that allows you to adapt your photos for different uses, whether it’s for web display, printing, or sharing on social media. By understanding the key steps and avoiding common mistakes, you can resize your images without losing quality. Remember to set the right resolution, maintain aspect ratio, and preview your images after resizing. With these simple steps, Lightroom can help you achieve professional-looking results with minimal effort.
Whether you're a beginner or an experienced photographer, mastering the art of resizing in Lightroom will streamline your workflow and ensure your images always look their best, no matter the platform.


