One efficient technique of creating stunning visuals without high-priced wide-format printers is printing big sized photos on several sheets. If you are interested in producing posters, oversized photo displays or printing other intricate designs, then multi-page printing is essential for achieving such at home. This article will illustrate how to print large-sized pictures on multiple pages while maintaining clarity and quality.
Preparing Your Image for Multi-Page Printing

Having a clean, professional-looking print largely depends on proper preparation. In the end, final quality can be greatly affected if image has right resolution and size. Here are some of the things you should take into account:
- Image Resolution: Ensure your image has a resolution of at least 300 DPI (dots per inch) for a sharp, clear print.
- File Format: Use high-quality image formats like PNG or TIFF, as these preserve details better than JPEGs.
- Aspect Ratio: Adjust your image's aspect ratio to match your printing layout, avoiding excessive stretching or cropping.
When your picture is complete, check it on Zoom in full-screen mode then confirm there are no pixels or blurriness. A little preparation time could mean everything depending on whether clarity matters most or detail does for your printed work.
Also Read This: Understanding Earnings Per Download on Adobe Stock
Choosing the Right Software and Tools

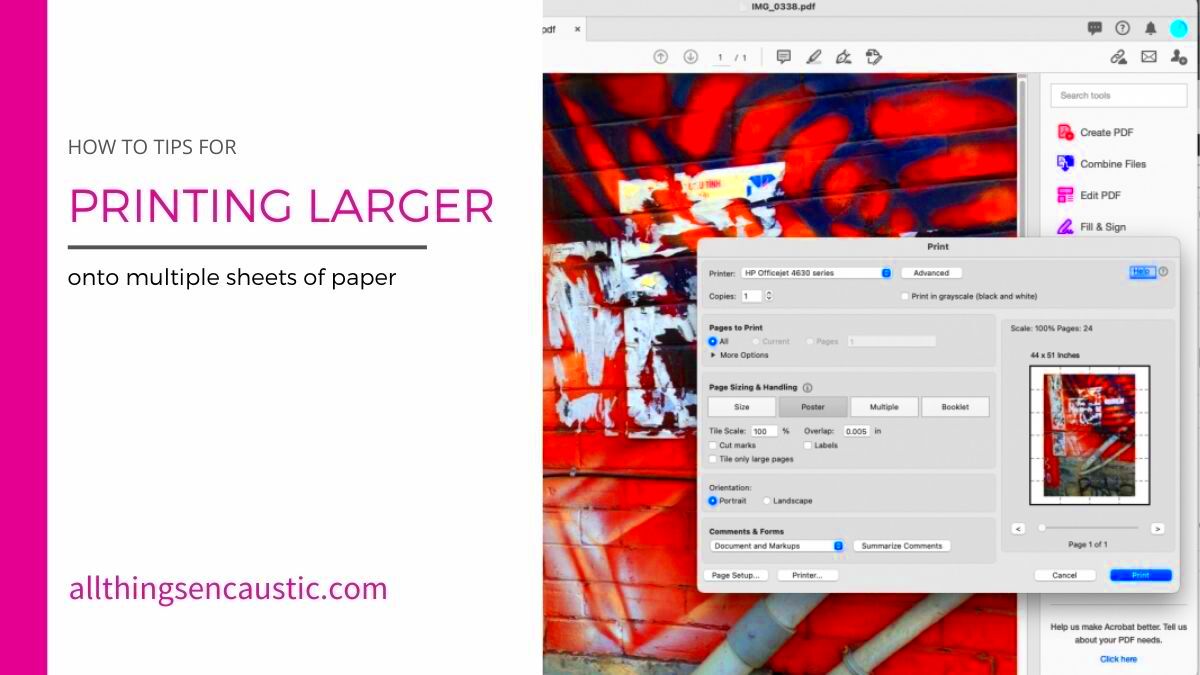
For large images that should be printed over multiple pages, you require software capable of both resizing and tiling - dividing the image into several fragments. Below are a few famous alternatives that can be looked at:
| Software | Features |
|---|---|
| Adobe Acrobat | Ideal for PDF files; supports custom page tiling and scaling |
| Microsoft Paint | Basic and free; suitable for simple, smaller projects |
| PosterRazor | Open-source tool specifically for poster and large image printing |
All these tools are unique in their own way thus if you are working on something complicated or have experience with editing software you should go for a particular one that will be best suited for it. The right tool makes it easier for you to position an image in such a way that it may be printed multiple pages at once.
Also Read This: how to submit vector art to adobe stock
Resizing Images Without Losing Quality
Resizing is often needed when printing large images; however, it can sometimes lead to a loss in quality making pictures blurry or pixelated. But do not worry, for there exist mechanisms that enable one to resize photos without compromising on their sharpness and clarity. Thus, here is how best you can go about it.
Following are a few tips that can help you resize your images without losing their quality:
- Use Vector Graphics: If possible, use vector images (like SVG files). These can be resized infinitely without losing quality.
- Maintain Aspect Ratio: Always keep the aspect ratio constant to avoid stretching or squishing the image. Most software allows you to lock this aspect ratio.
- Professional Software: Use high-quality editing tools like Adobe Photoshop or GIMP. These programs offer advanced resizing algorithms that preserve quality.
- Upscaling Techniques: If you must enlarge a raster image, consider using algorithms like bicubic smoother for upscaling, which can help maintain detail.
With these following rules you will know how to effectively change image sizes thus making them look good on all pages printed out.
Also Read This: Does Dailymotion Remove Copyrighted Music from Videos
Setting Up Print Options for Perfect Results
Once your image is ready and properly resized, the next thing to do is to set the print options. This can greatly affect how it will eventually turn out. Here’s what you need to consider:
Check on these essential print settings:
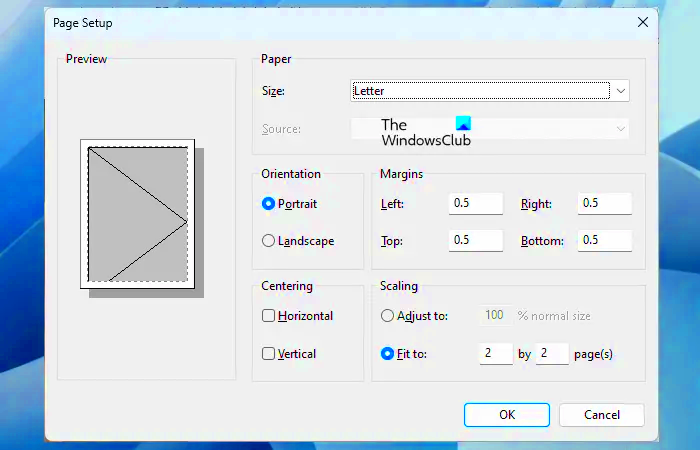
- Paper Size: Select the correct paper size that matches your printer settings. If you’re printing on multiple sheets, use the dimensions of each individual page.
- Print Quality: Choose a high-quality print setting to ensure details come out sharp. This is usually found in the print dialog box.
- Borderless Printing: If you want your image to reach the edges of the paper, enable borderless printing if your printer supports it.
- Color Management: Adjust the color settings to match your monitor and printer. This ensures the colors in your print match what you see on your screen.
By investing your time into proper print option setup, you can avoid future problems while ensuring that your images appear well.
Also Read This: How to Increase Image Ratings in BSG
Arranging and Aligning Printed Pages
Having printed your giant picture on a number of sheets, it is now time to put them in order and alignment. This stage is essential in order to achieve a seamless appearance. Here’s how to ease the process:
This is a simple procedure that can be used in the arrangement of prints:
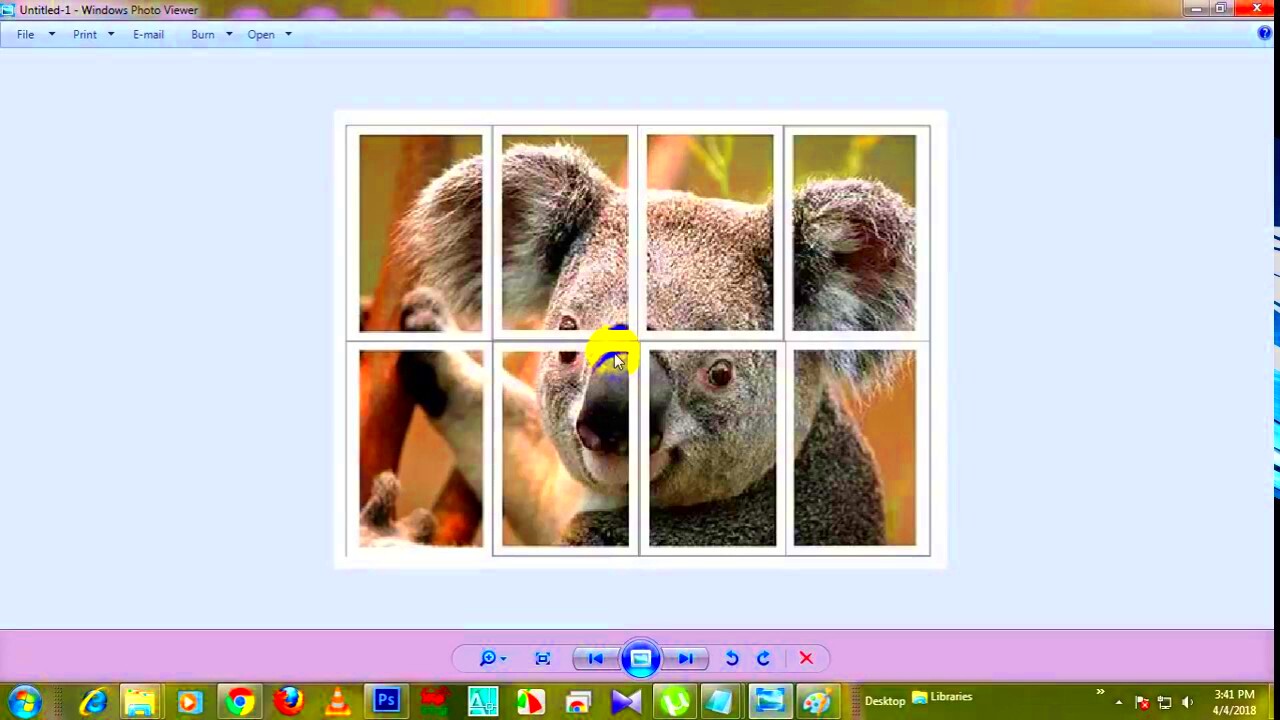
- Lay Out the Pages: Start by laying out all the printed pages on a flat surface. Arrange them in the order they will be assembled.
- Check Alignment: Look for edges that need to be aligned. Adjust them so that there are no gaps or overlaps.
- Tape or Glue: Use double-sided tape or glue to adhere the pages together. This helps keep everything in place.
- Trim Edges: If necessary, use a paper cutter to trim any white borders to create a cleaner look.
If you follow these steps carefully, it will help make your large image look amazing thus making it an eye-catching feature in any area.
Also Read This: 10 Hidden Likee Features You Probably Didn’t Know About
Enhancing the Look with Different Paper Types
The quality of your printed images can be severely altered through the paper you use. The colors, textures and other things would look better on an appropriate type of paper. This article will explore several popular types of paper that can enhance the look of your prints.
These are several paper types that you might want to think about when it comes to large image prints:
| Paper Type | Description | Best For |
|---|---|---|
| Glossy Paper | This paper has a shiny finish that enhances color vibrancy. | Photos and colorful images |
| Matte Paper | Matte paper has a non-reflective surface, offering a more subtle look. | Art prints and professional presentations |
| Canvas Paper | This textured paper mimics the look of canvas paintings. | Art reproductions and decorative prints |
| Photo Paper | Specialized paper designed specifically for printing high-quality photographs. | High-resolution images and portraits |
Various sorts of papers can be tried to get a specific appearance you desire. There is no harm in trying out several choices for yourself and find the one which looks perfect for your picture!
Also Read This: how to trace an image online
FAQs on Printing Large Images Across Multiple Pages
When it comes to printing big photos for the first time, you are often faced with many questions without answers. To avoid any possible confusion, here are common FAQs you may consider.
- What size can I print? The maximum size depends on your printer and paper size. Most home printers can handle up to 11x17 inches, while larger models can accommodate bigger sheets.
- Can I print in black and white? Yes, you can print in black and white, but ensure your image is properly adjusted for contrast and clarity.
- What if my image looks blurry after printing? Check the resolution before printing. Aim for at least 300 DPI for best results. If it’s still blurry, it might be a resizing issue.
- How do I store my prints? Store your prints in a cool, dry place, away from direct sunlight. Using a portfolio or frame can also help protect them.
The most frequently asked questions are discussed here but if you have additional inquiries, please do not hesitate to ask or conduct further investigations!
Final Thoughts on Large Image Printing
Printing large pictures on several sheets can be a fulfilling activity. With appropriate scraps materials, tools, and preparation, it is possible to produce mind-blowing images that are captivating at first sight. Take your time by resizing and setting print options as well as selecting the right type of paper.
Some of the things that you should consider:
- Plan Ahead: Take your time in planning the layout and selecting your materials.
- Test Print: Do a small test print to check quality before going for the full print.
- Stay Organized: Keep your printed pages organized to make assembling easier.
Having these instructions, you can fearlessly handle your big image printing task. Relish on the creative procedure and the appealing outputs!

 admin
admin


